
Quickstart
Set up the ALPON X4 edge computer with step-by-step installation and configuration. Get your device ready for industrial deployment.
Bring an ALPON X4 online in 5 steps
Register the device in Sixfab Connect, connect power, plug in a network, verify the LEDs, then open a browser-based remote terminal from ALPON Cloud. Five steps, one device, no local toolchain. Built on Raspberry Pi.
Five steps, about 5 minutes.
Register the device in Sixfab Connect using its QR code or
serial number, connect power via the included 27 W USB-C PD
adapter (or the 9–30 V DC screw terminal, or PoE+ on PoE-enabled
variants), plug in Ethernet for first-time provisioning, watch the front-panel
LEDs settle, then open a browser-based remote terminal from ALPON
Cloud. First boot completes in about 60 seconds; the device is
reachable as soon as it shows Online.
Before you start
Have these on hand before powering on. Everything except a Sixfab Connect
account ships in the box: the device, four external antennas
(2× LTE, 1× GNSS, 1× Wi-Fi) labeled L,
L, G, and W, and the 27 W
USB-C PD adapter with four interchangeable plug heads
(US / EU / UK / AU). The antennas screw onto the matching connectors on
the back panel and must be attached before applying power.
L, L, G, and W for the matching antennas. Screw-terminal block for DC input ships in the box.
L for LTE Main and LTE Diversity, one G for GNSS/GPS, one W for Wi-Fi/Bluetooth. Hand-tighten only — no tools required. Attach all four before applying power.
The procedure
Five steps. The first registers the device to your account; the next three bring it up on power and the network; the fifth opens the remote terminal so you can run commands and deploy workloads. Each step's commands are self-contained, so copy them in order.
Register the device in Sixfab Connect
Registering links the device's serial number to your account so ALPON Cloud can reach it the moment it comes online. There are two paths to the same result — scanning the QR code is faster, but manual registration works just as well if you only have the device in front of you.

- Find the QR code on the device's bottom label.
- Scan it with your phone camera.
- Sixfab Connect opens; log in.
- The device auto-registers to your account.
- Open Sixfab Connect.
- Go to Assets, click Register Asset.
- Enter the serial number from the bottom label.
- Confirm to register.
Registering before applying power is fully supported. The device finishes the handshake automatically once it reaches the network in Step 3.
Connect power
Screw the two LTE antennas onto the L connectors,
the GNSS antenna onto the G connector, and the Wi-Fi
antenna onto the W connector on the back panel.
Hand-tighten only — no tools required. Connecting or disconnecting
antennas on a powered LTE radio can damage the cellular module,
so always work with the device unpowered through this step.
The ALPON X4 accepts three power inputs. The included 27 W USB-C PD adapter is the fastest path for first boot. Slide the correct regional plug head onto the adapter body before use; the screw terminal (9–30 V DC) and PoE+ inputs remain available for industrial wiring and single-cable installs.
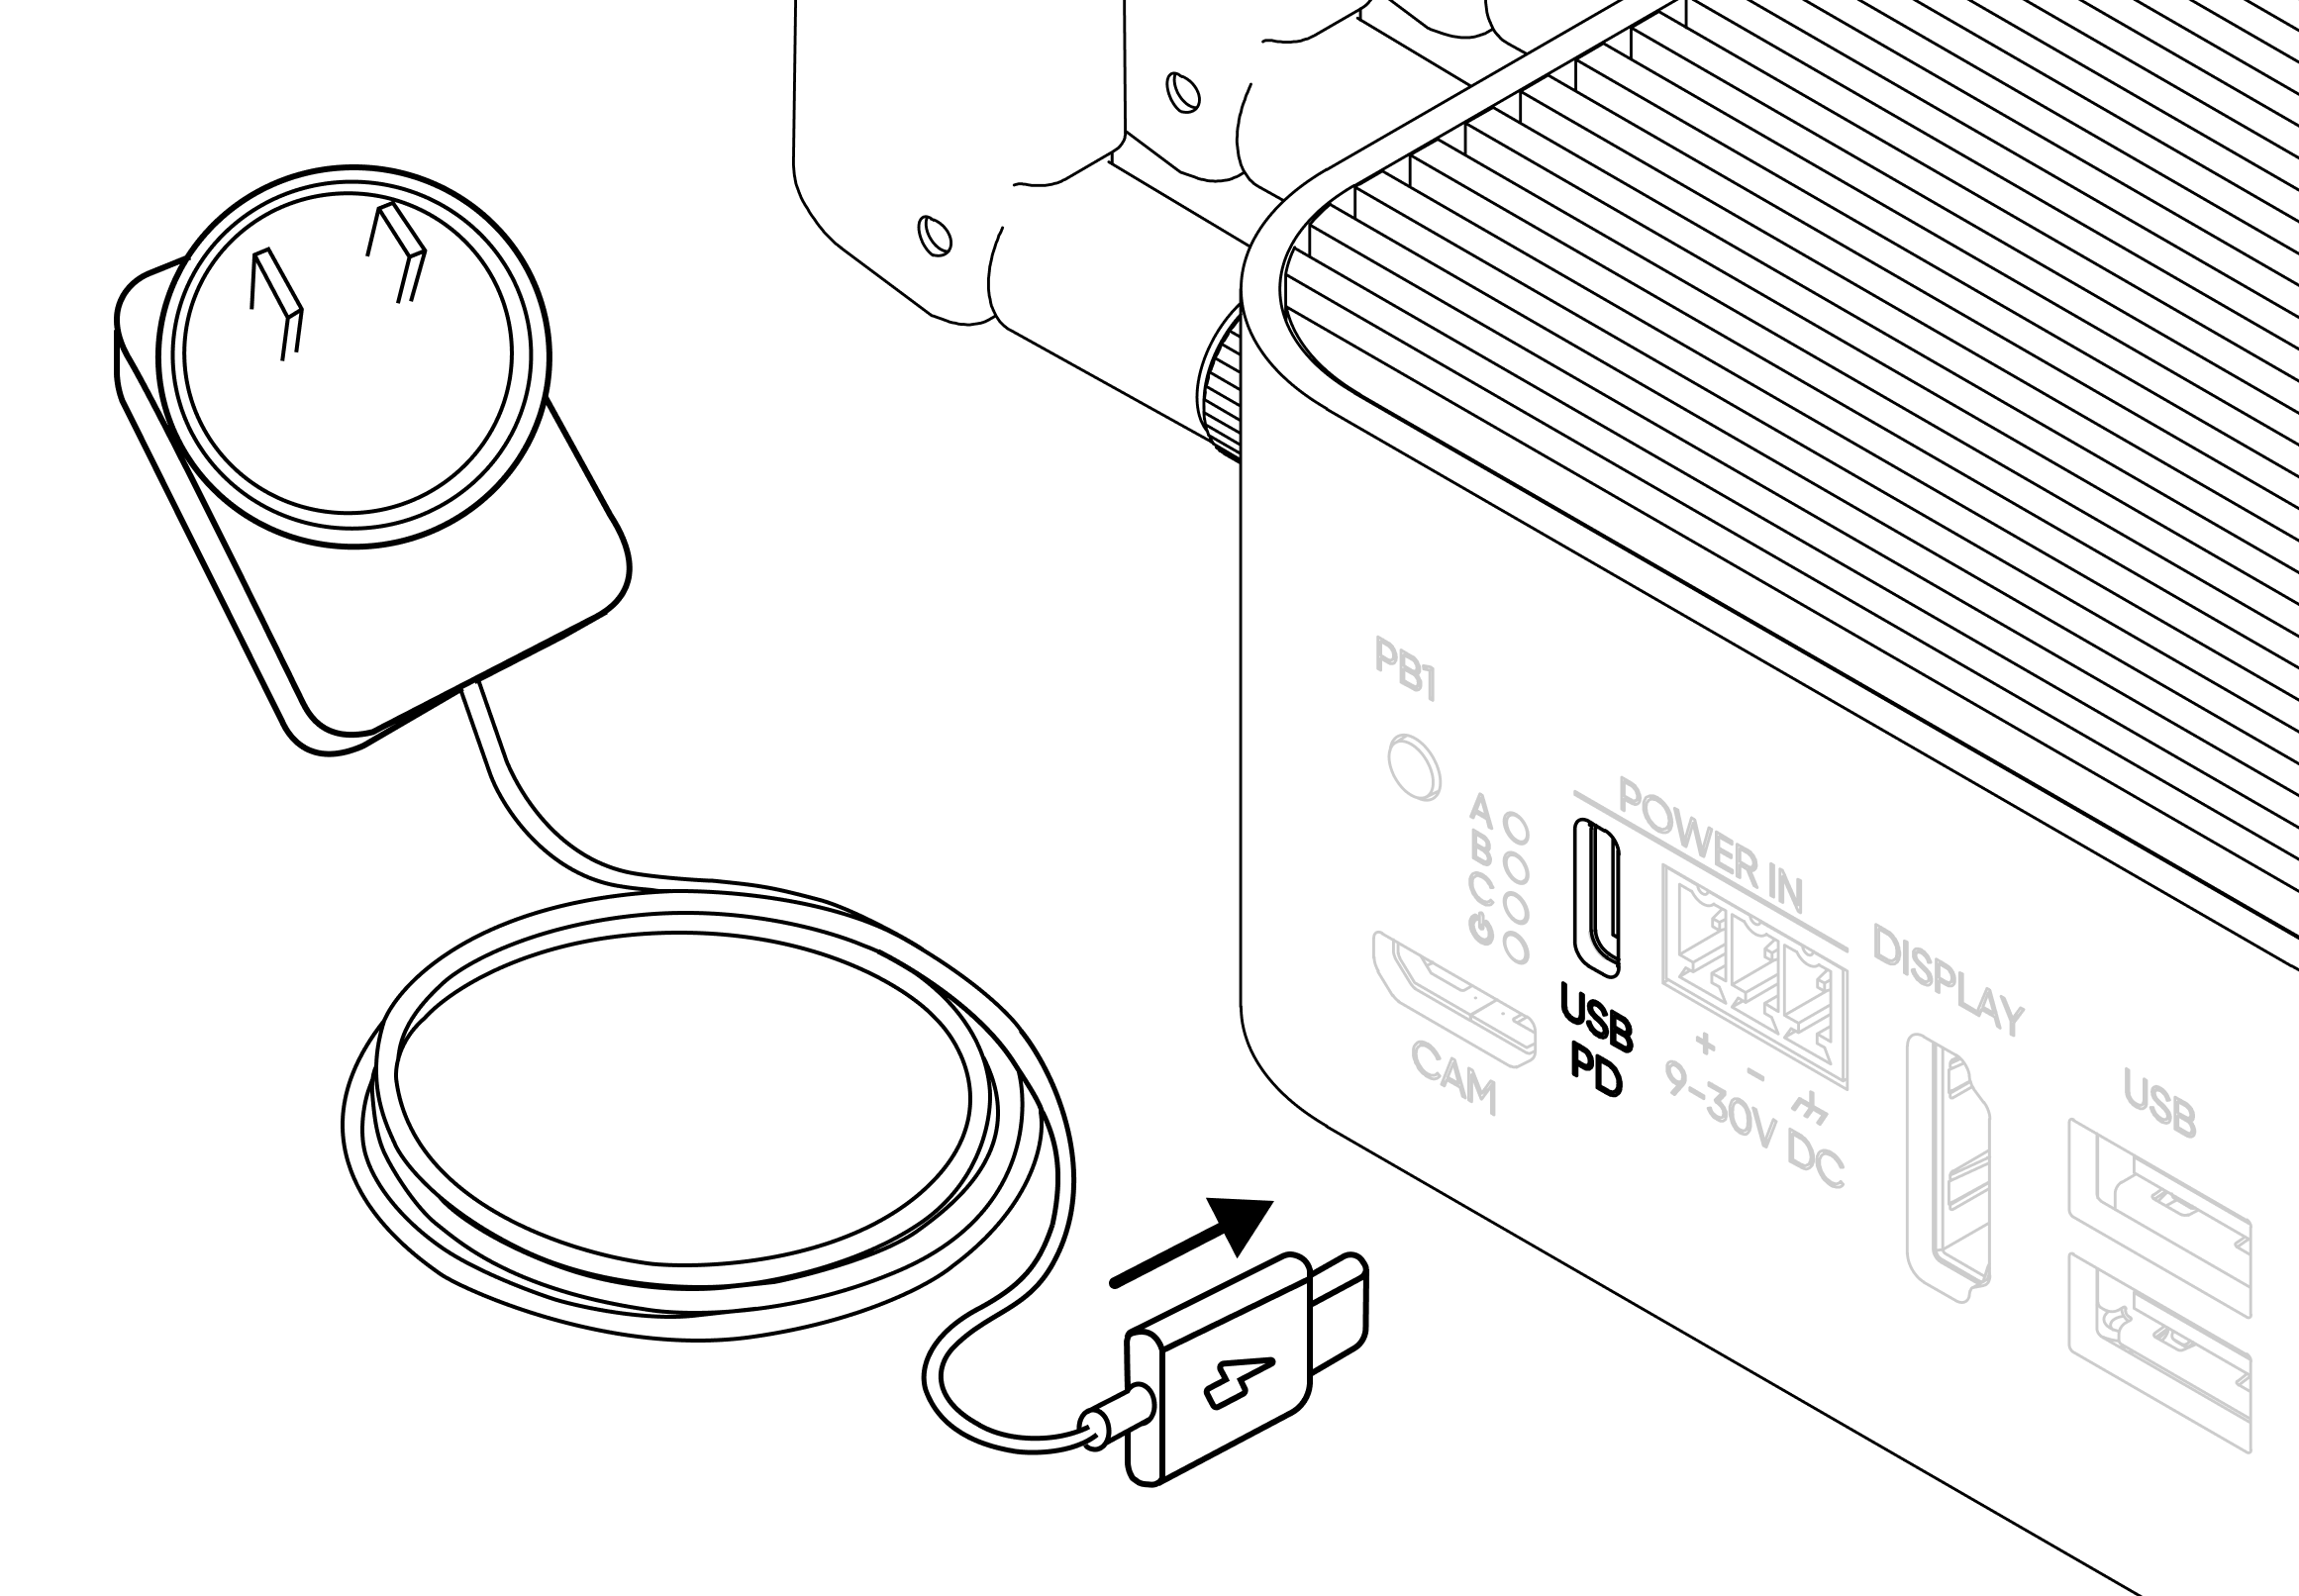
USB-C PD
Included 27 W adapter, 15 V DC × 1.8 A
Screw terminal
9–30 V DC for industrial wiring
PoE+ (variant)
IEEE 802.3at on the 1 Gbps port
- Slide the regional plug head onto the USB-C PD adapter until it clicks.
- Connect the adapter cable to the device's USB-C port.
- Plug the adapter into mains power.
- The Power LED turns solid white within ~3 seconds.
Standard USB-C phone chargers may not negotiate the required voltage and can trigger under-voltage warnings. If the Power LED does not turn on, confirm you are using the included 27 W USB-C PD adapter, or wire a 9–30 V DC supply into the screw terminal. Use only one power input at a time.
Connect to a network
The ALPON X4 offers two RJ45 Ethernet ports — a 1 Gbps WAN port and a 100 Mbps port for downstream LAN devices — plus built-in cellular (eSIM, eUICC). For first boot, plug an Ethernet cable into the 1 Gbps port. The integrated eSIM activates in parallel and the ALPON Cloud network manager performs automatic failover between any available network paths.
- Connect an Ethernet cable from your router or switch to the 1 Gbps port.
- The device requests an IP via DHCP. No further configuration is required.
- If Ethernet is unavailable, the eSIM negotiates an LTE Cat 4 connection automatically.
The third RJ45-shaped connector on the device is the GPIO Add-on port. It carries GPIO signals (I²C, UART, SPI, 5 V, GND) — not Ethernet, not PoE. Plugging an Ethernet cable into this port causes permanent hardware damage.
You should have attached the four included antennas in Step 2 before applying power. For deployments with weak signal, an optional outdoor IP67 combination antenna is available as an upgrade; see Connectivity & Antenna Specifications.
Verify the device is online
First boot completes in about 60 seconds. Watch the front-panel LEDs to confirm power, network, and cloud reachability before opening the remote terminal. The full LED legend below covers the four states you'll see during provisioning; full provisioning over LTE alone can take up to 3 minutes.
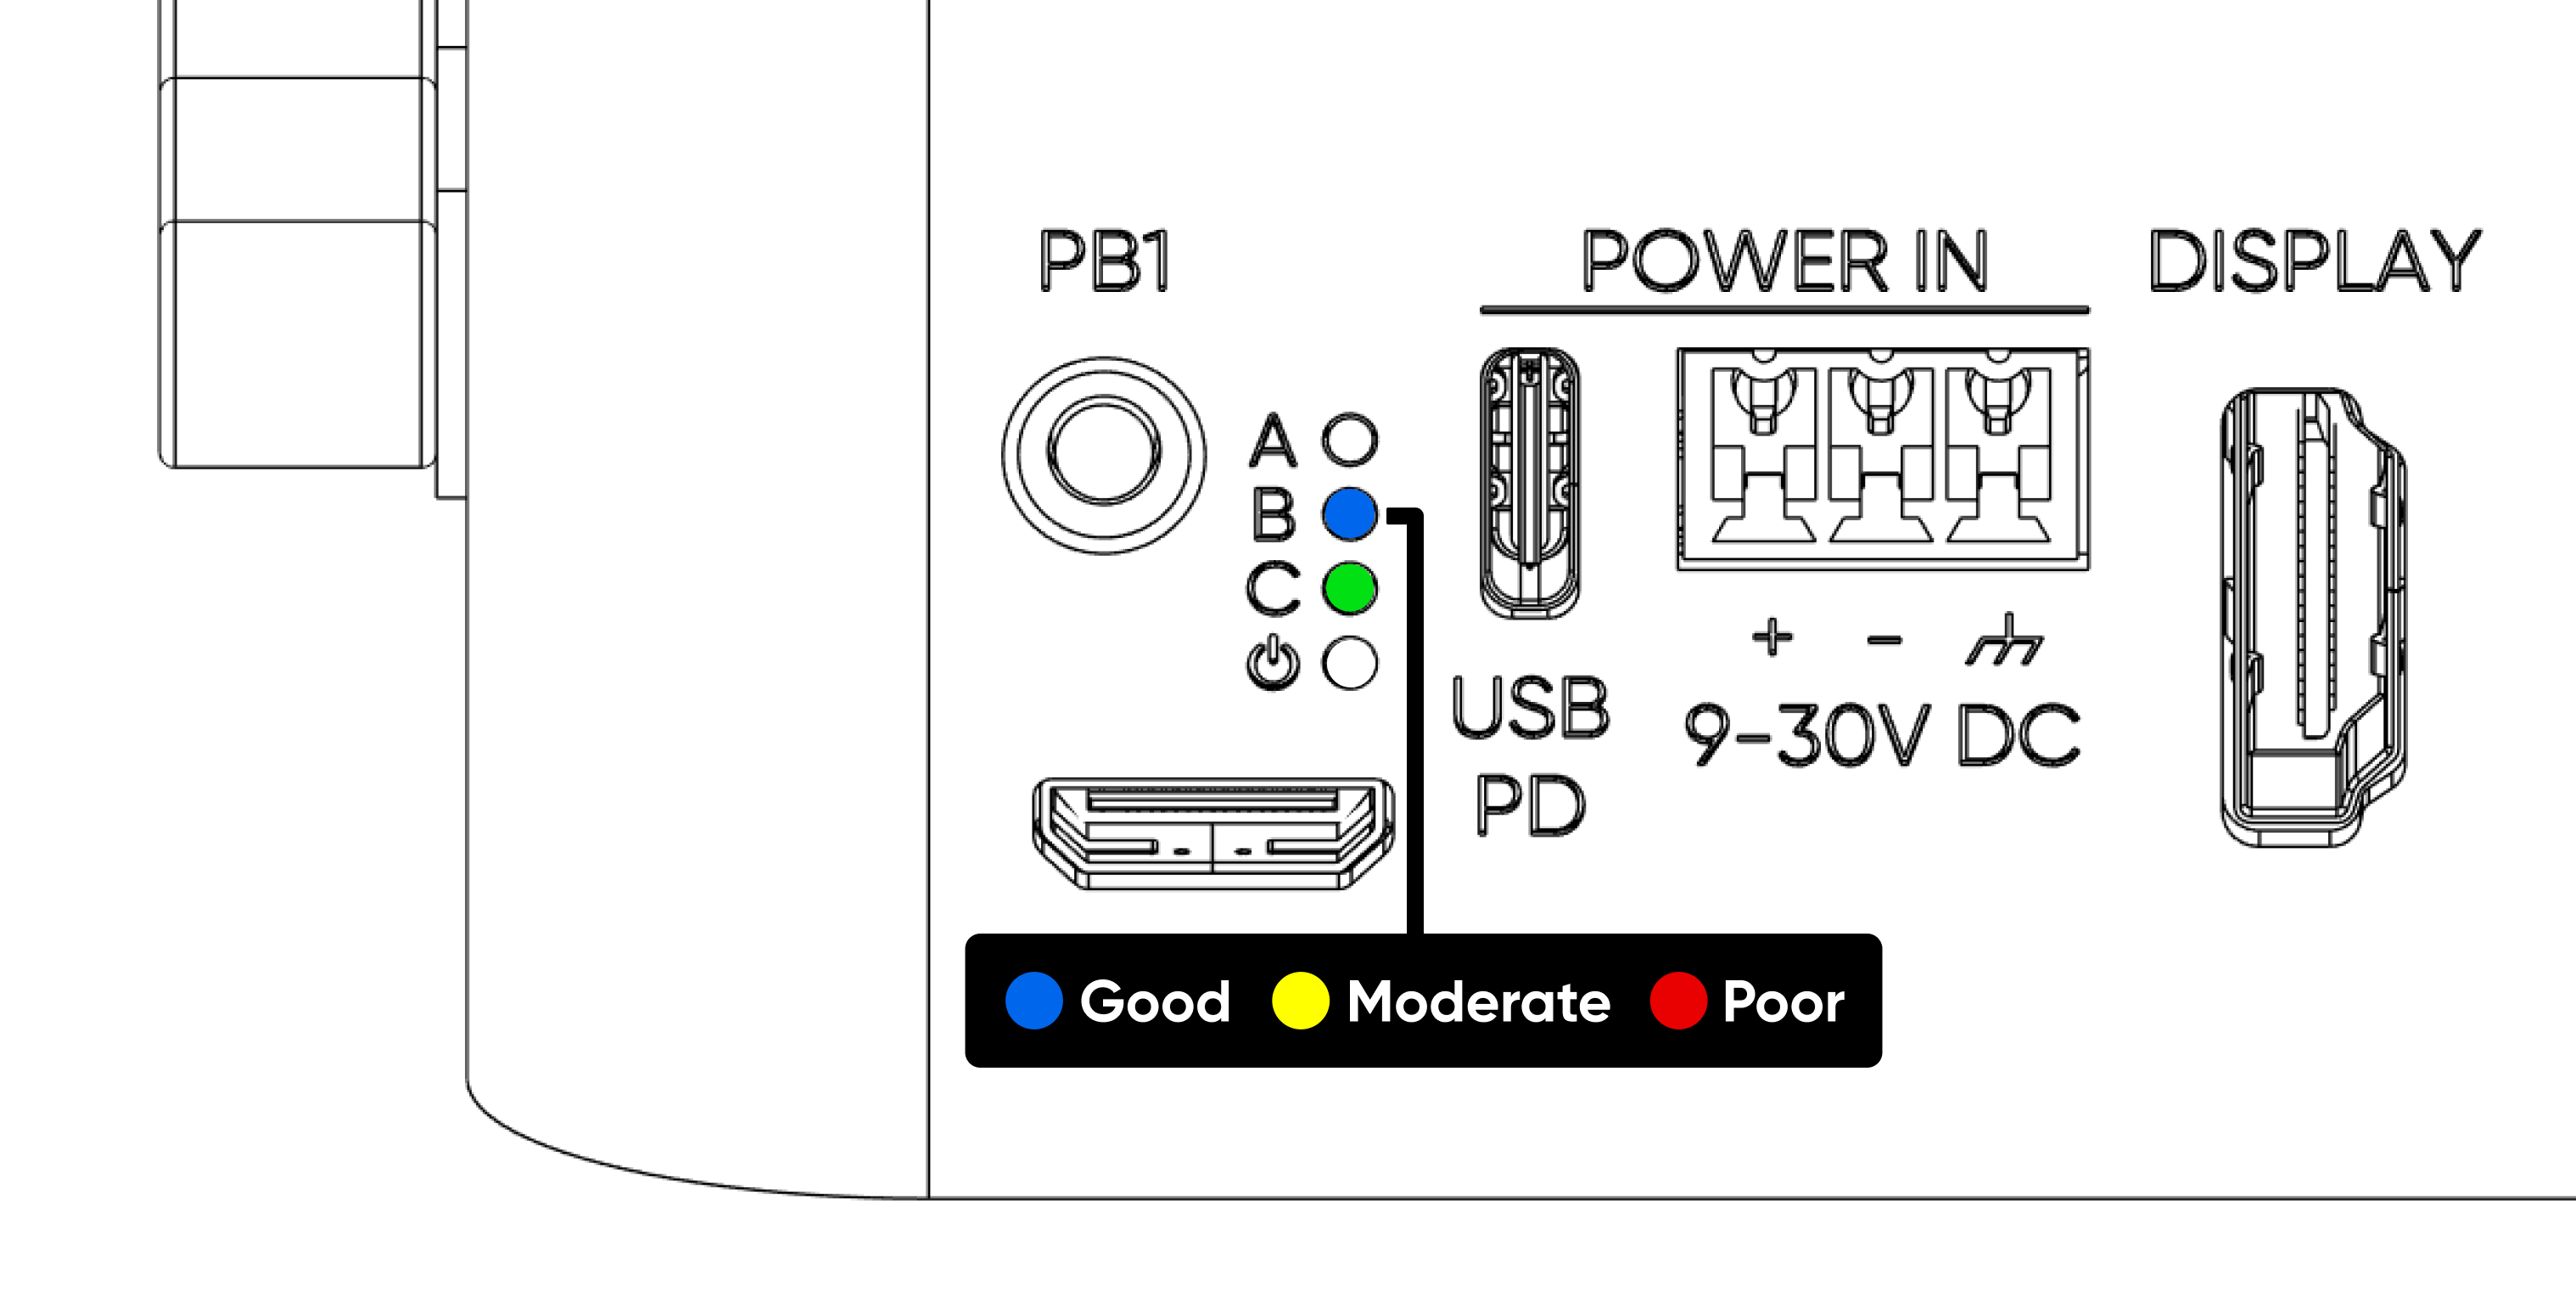
The Status LED is solid green and the device shows
Online in your Sixfab Connect dashboard.
Connect an Ethernet cable to the 1 Gbps port. The ALPON X4 fails over to any available network path automatically and uses Ethernet as the uplink until cellular returns.
Access the device
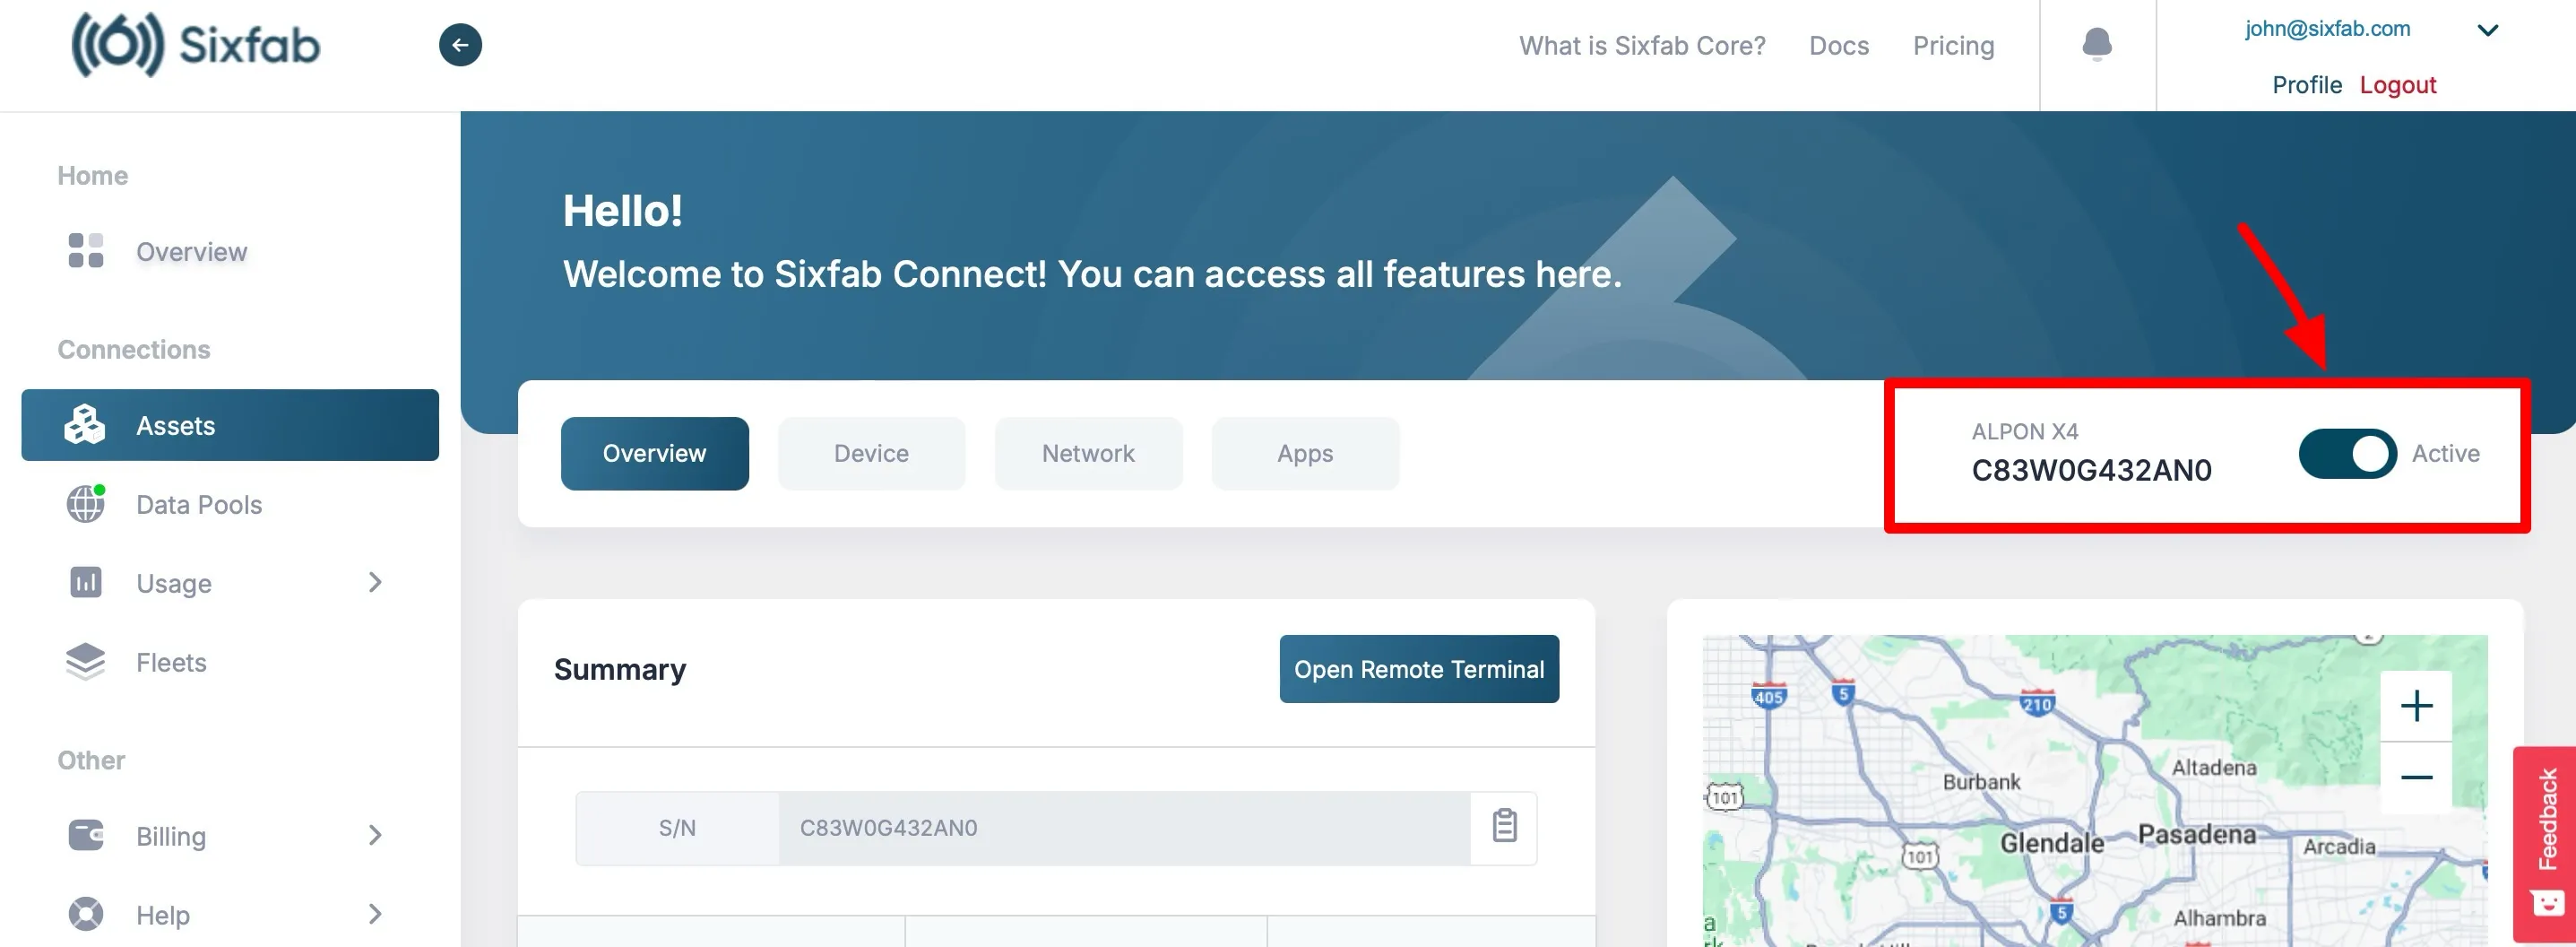
Open Sixfab Connect and pick the device from your asset list. From here you can run commands, monitor health, and deploy container workloads — no local SSH client needed.
Online and the browser-based remote terminal open.
From the dashboard you can:
- Activate the device with the Active / Inactive toggle in the top right of the asset detail page.
- Open a browser-based remote terminal — no local SSH client needed.
- Monitor device health: CPU, memory, temperature, network, container state.
- Deploy ARM64 container workloads from Docker Hub or Sixfab Container Registry to the device or to your fleet.
- Schedule OTA updates for firmware and applications.
- Manage eSIM profiles and configure network failover.
For local SSH or HDMI console access, the default user is alpon
with password sixfab. Change it on first login with
passwd. See ALPON X4 OS
for hardening guidance.
First-boot troubleshooting
Most setup issues resolve in under a minute. Open the question that matches what you see; for anything else, head to the full Troubleshooting guide.
The Power LED does not turn on
Confirm the adapter is the included 27 W USB-C PD unit. Standard USB-C phone chargers may not negotiate the required voltage. As a fallback, wire a 9–30 V DC supply into the screw terminal using the included terminal block.
The Status LED stays red or never turns green
The device cannot reach ALPON Cloud. Verify the LTE antennas are hand-tight, move the device to a location with better cellular coverage, or plug an Ethernet cable into the 1 Gbps port. First-time provisioning over LTE can take up to 3 minutes.
The QR code does not scan
Use the Manual registration path in Step 1. Type the serial number from the bottom label into Sixfab Connect Assets → Register Asset.
The device shows Offline in Sixfab Connect after a few minutes
Confirm the Cellular LED is not red. If LTE is weak, plug an Ethernet cable into the 1 Gbps port. The ALPON X4 fails over to any available network path automatically. The device only reports Offline when no network path is available.
Ethernet is plugged in but the device still reports no network
The ALPON X4 has two RJ45 Ethernet ports. Use the 1 Gbps port for WAN uplink, not the 100 Mbps port (intended for downstream LAN devices). Confirm the connector clicks into place. Do not plug Ethernet into the GPIO Add-on port: it is an RJ45-shaped connector but carries GPIO signals (I²C, UART, SPI, 5 V, GND), not Ethernet, and a cable plugged into it causes permanent hardware damage.
I cannot find the activation code or serial number
Both are printed on the bottom label of the device, next to the QR code. If the label is missing or unreadable, contact Sixfab support with your order number.
Where to next
The device is up, the LEDs are green, and the dashboard shows it
Online. Pick the next step based on what you want to build:
push container workloads to the device, harden the operating system, or
manage a fleet at scale.
Updated 2 months ago