
HTTP Request to Web Server
The Pico LTE provides all the components you will need for establishing an HTTP connection to a web server. You don't need any additional hardware equipments for this example. In the tutorial, we choose webhook.site as the web server to test our requests.
Before starting this Pico LTE tutorial, the Pico LTE SDK installation and configuration steps must be completed. Below are the system requirements for this tutorial. If you haven't followed the SDK installation steps, please refer to the page below before proceeding with the tutorial. The details of these steps will not be covered in this tutorial.
System Requirements
| Hardware Requirements | Software Requirements |
|---|---|
| • Sixfab Pico LTE • Micro USB cable |
• Thonny IDE |
If you have completed all the requirements, you are ready to send a request to the Web Server via HTTP. Let's get started!
Preparing Coding Environment
- Download the Pico LTE SDK repository to your local machine. If you have already downloaded it, skip this step.
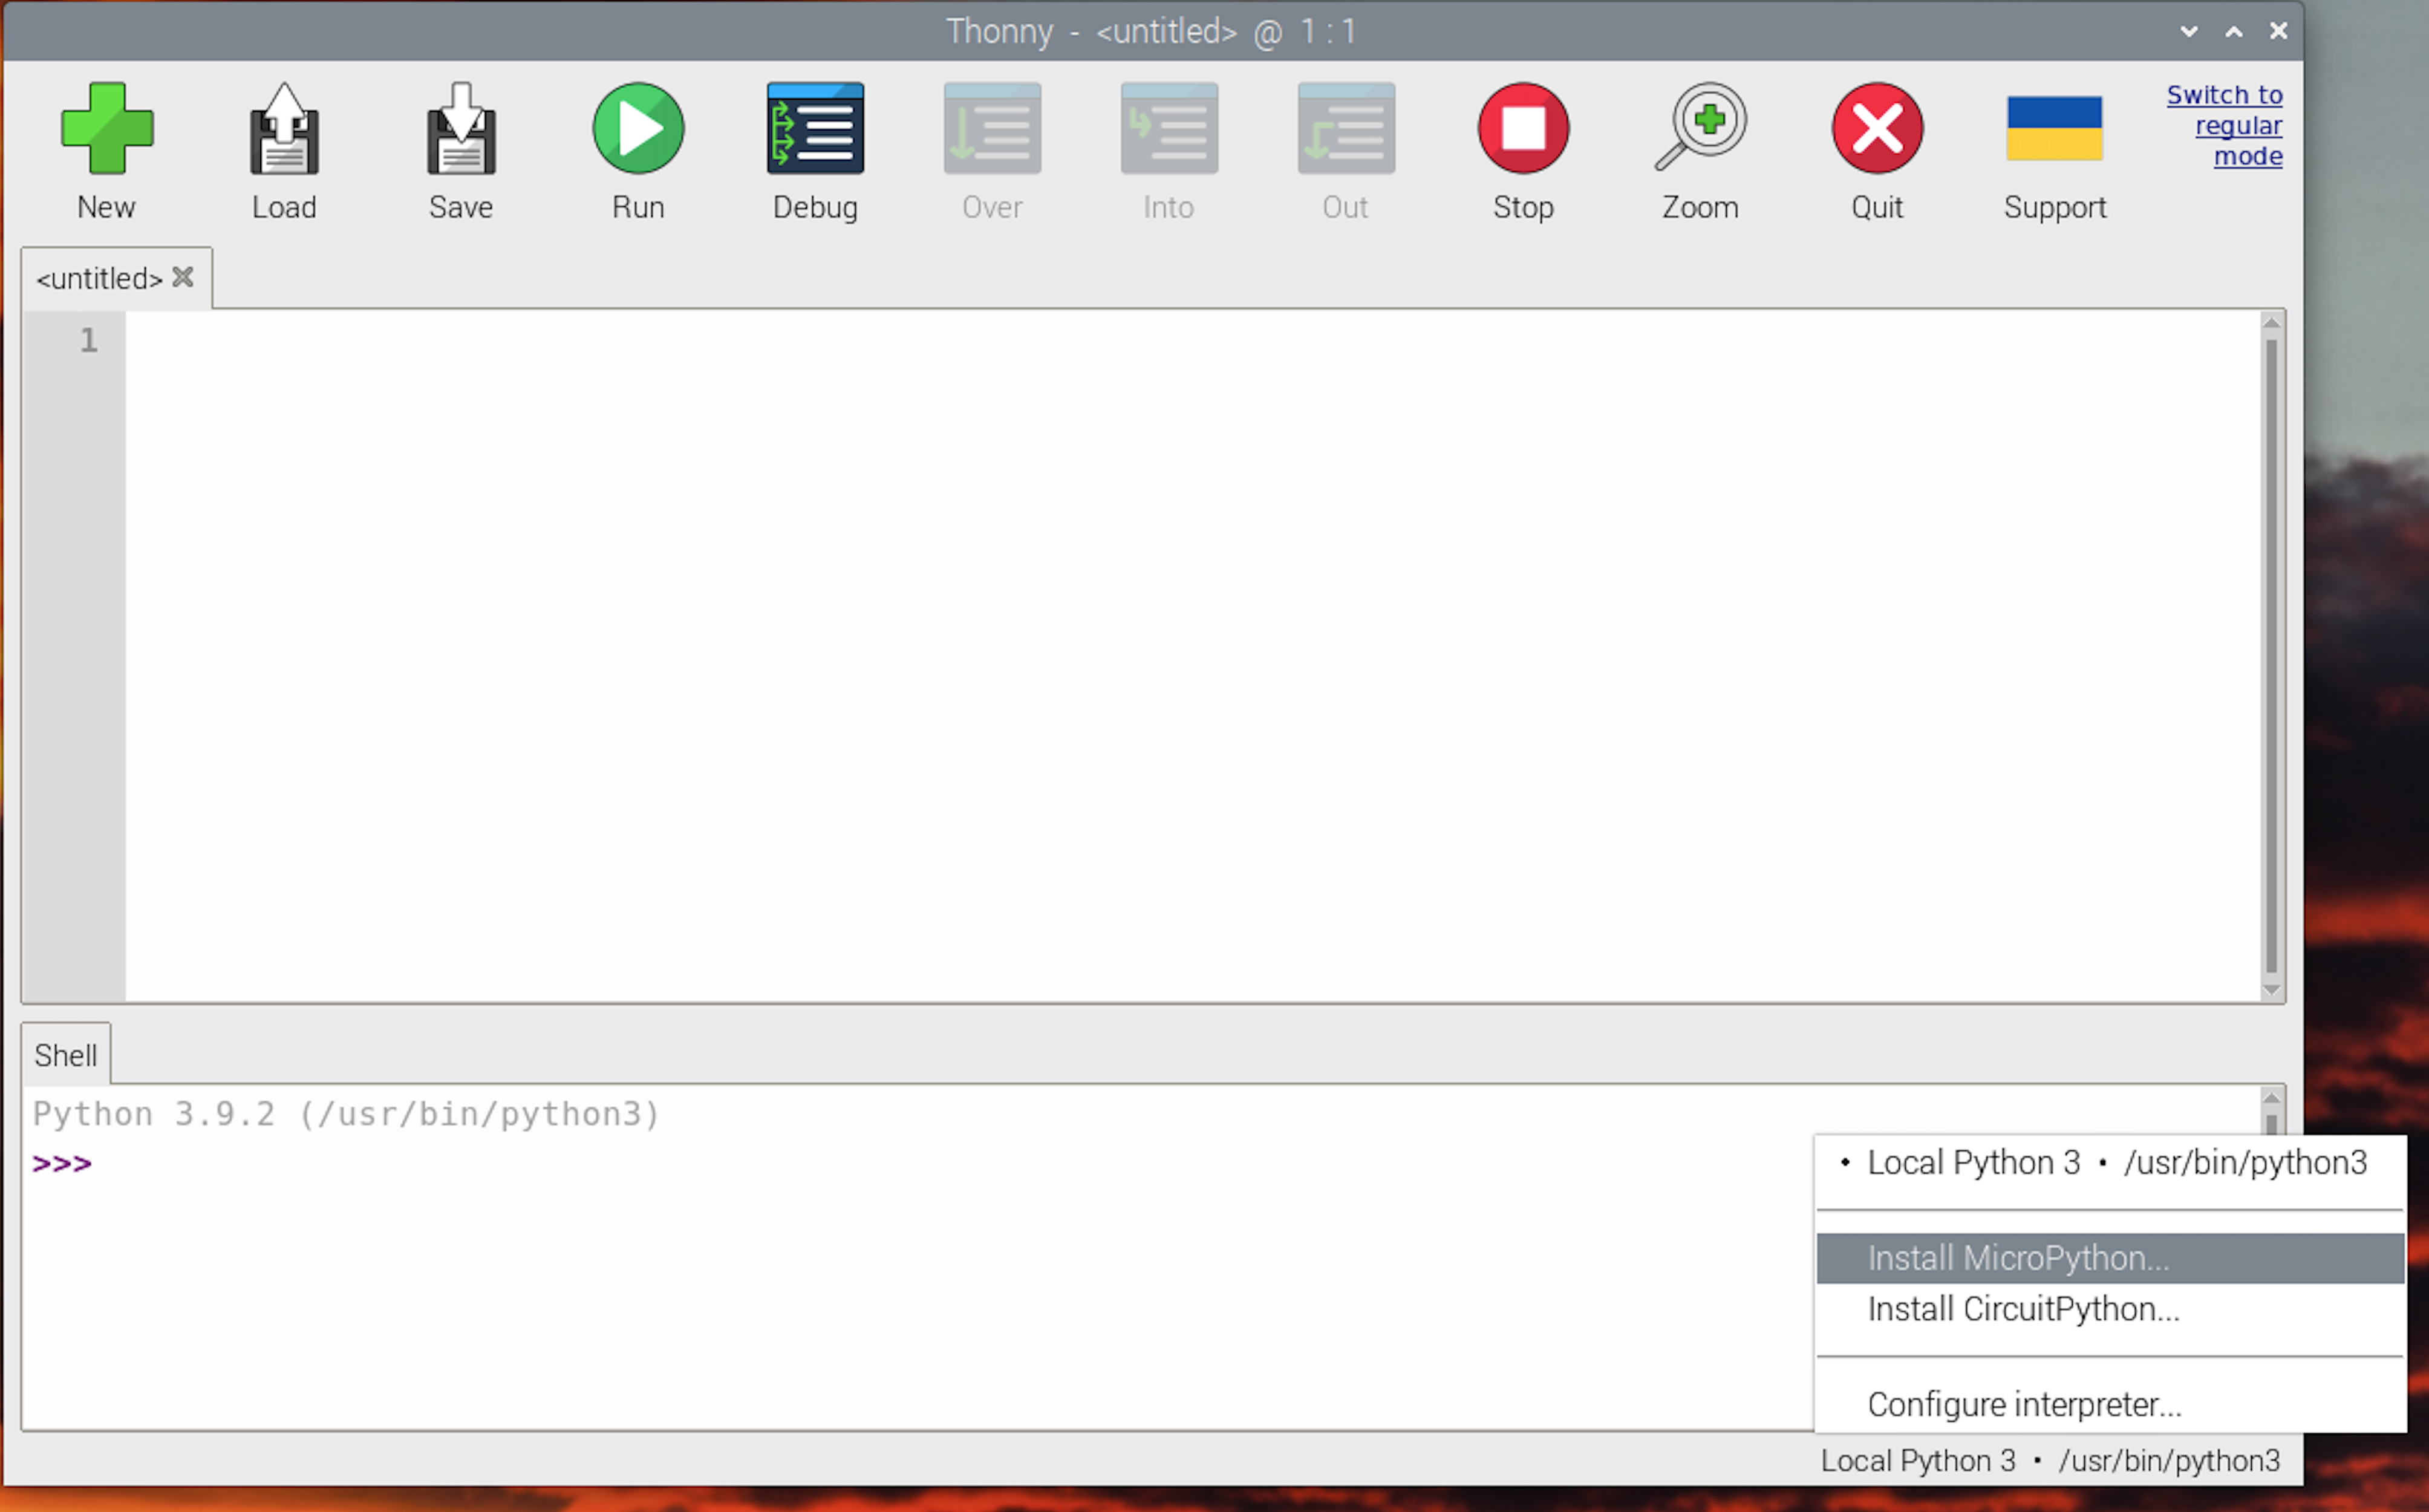
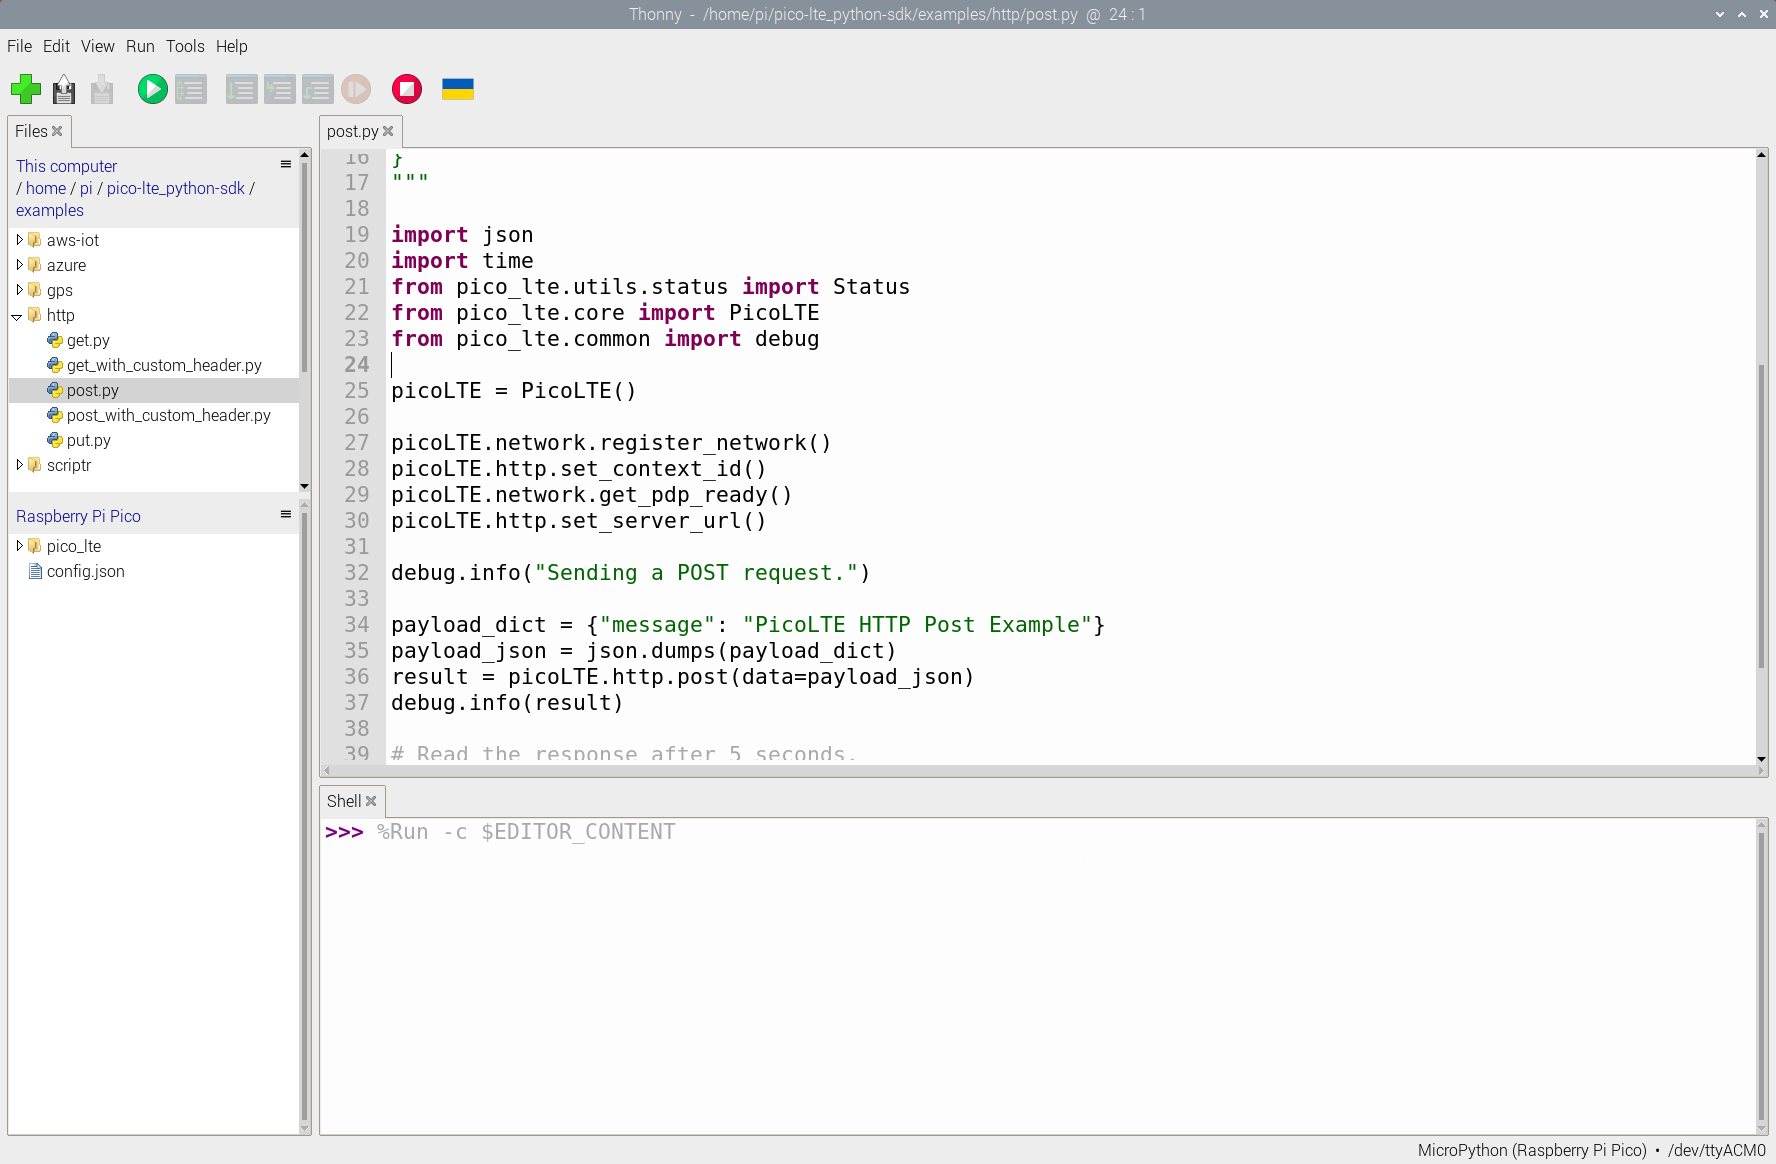
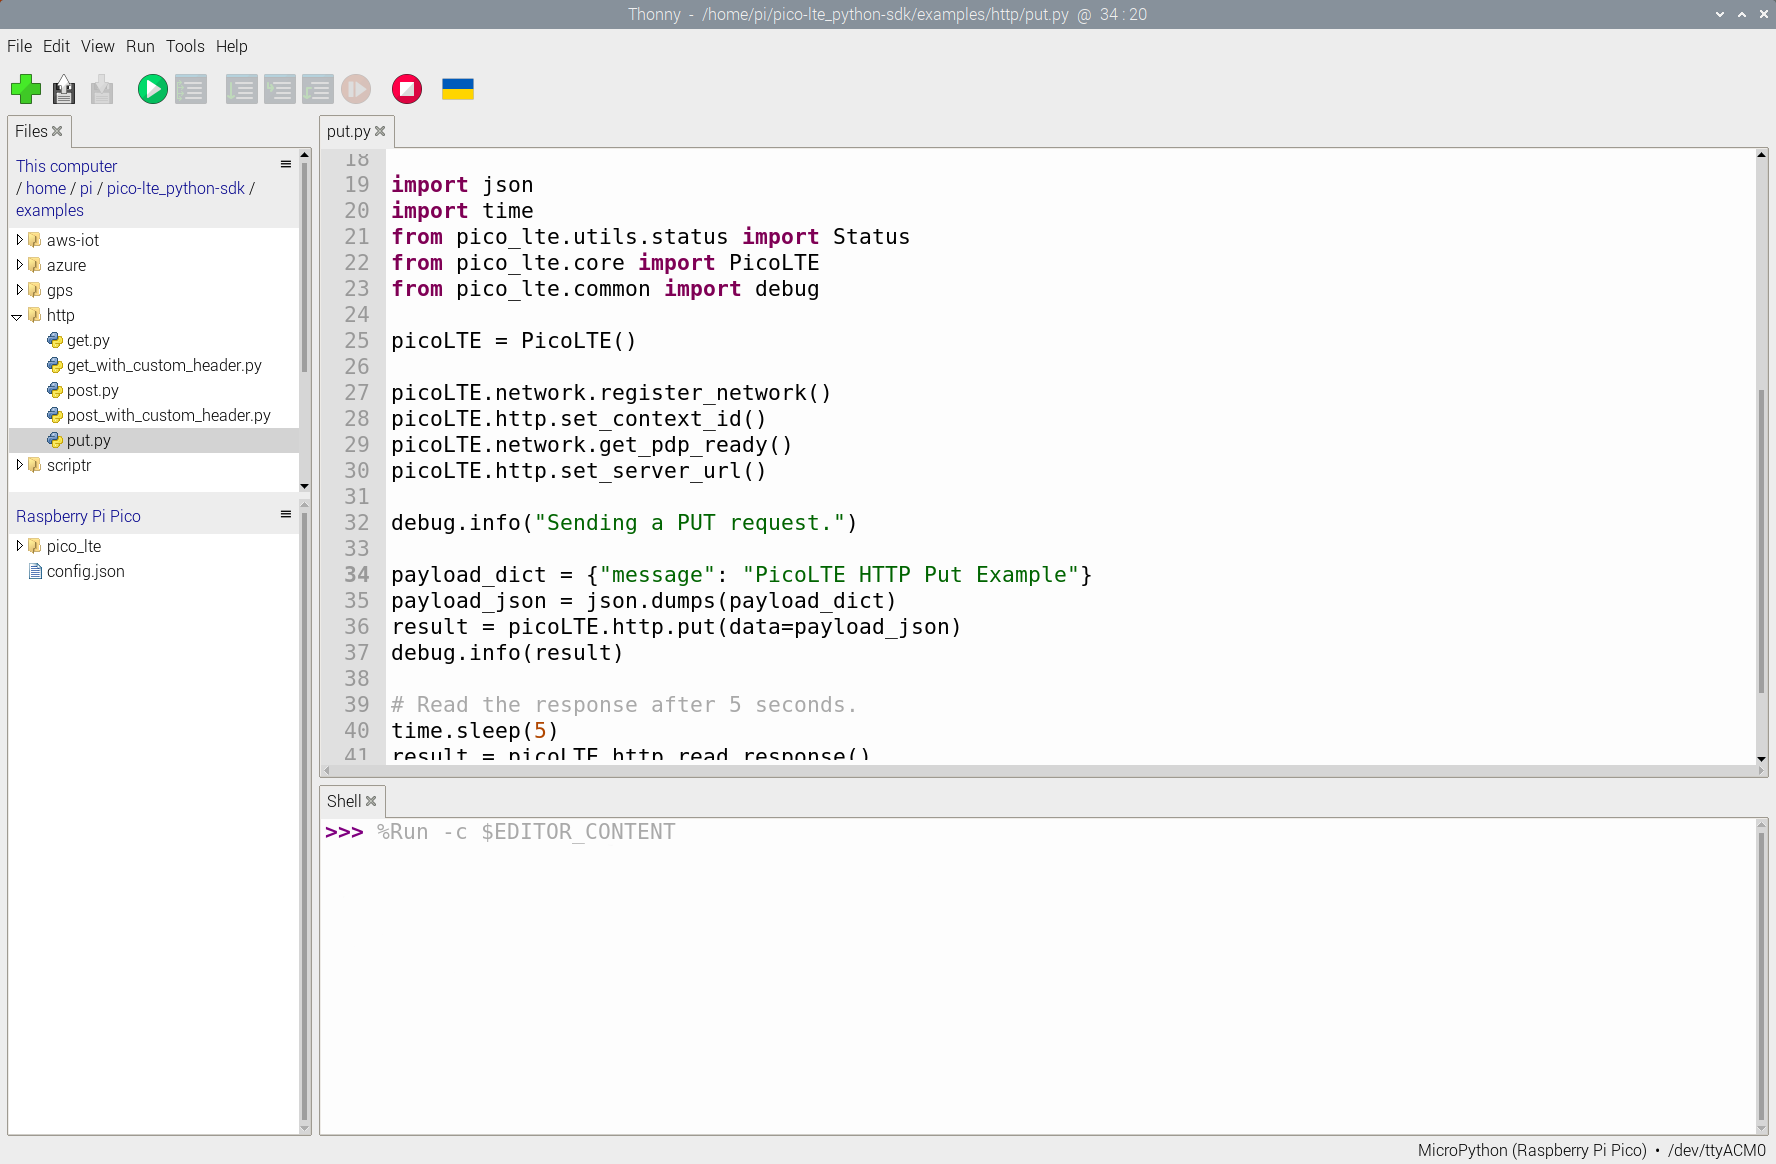
- Open script "examples → http → get.py or post.py or put.py" from the repository via Thonny IDE.
- If you haven't, create a config.json file in the root directory of Pico LTE device.
Pico LTE GET Request to a Web Server using HTTP
Preparing the Webhook.site
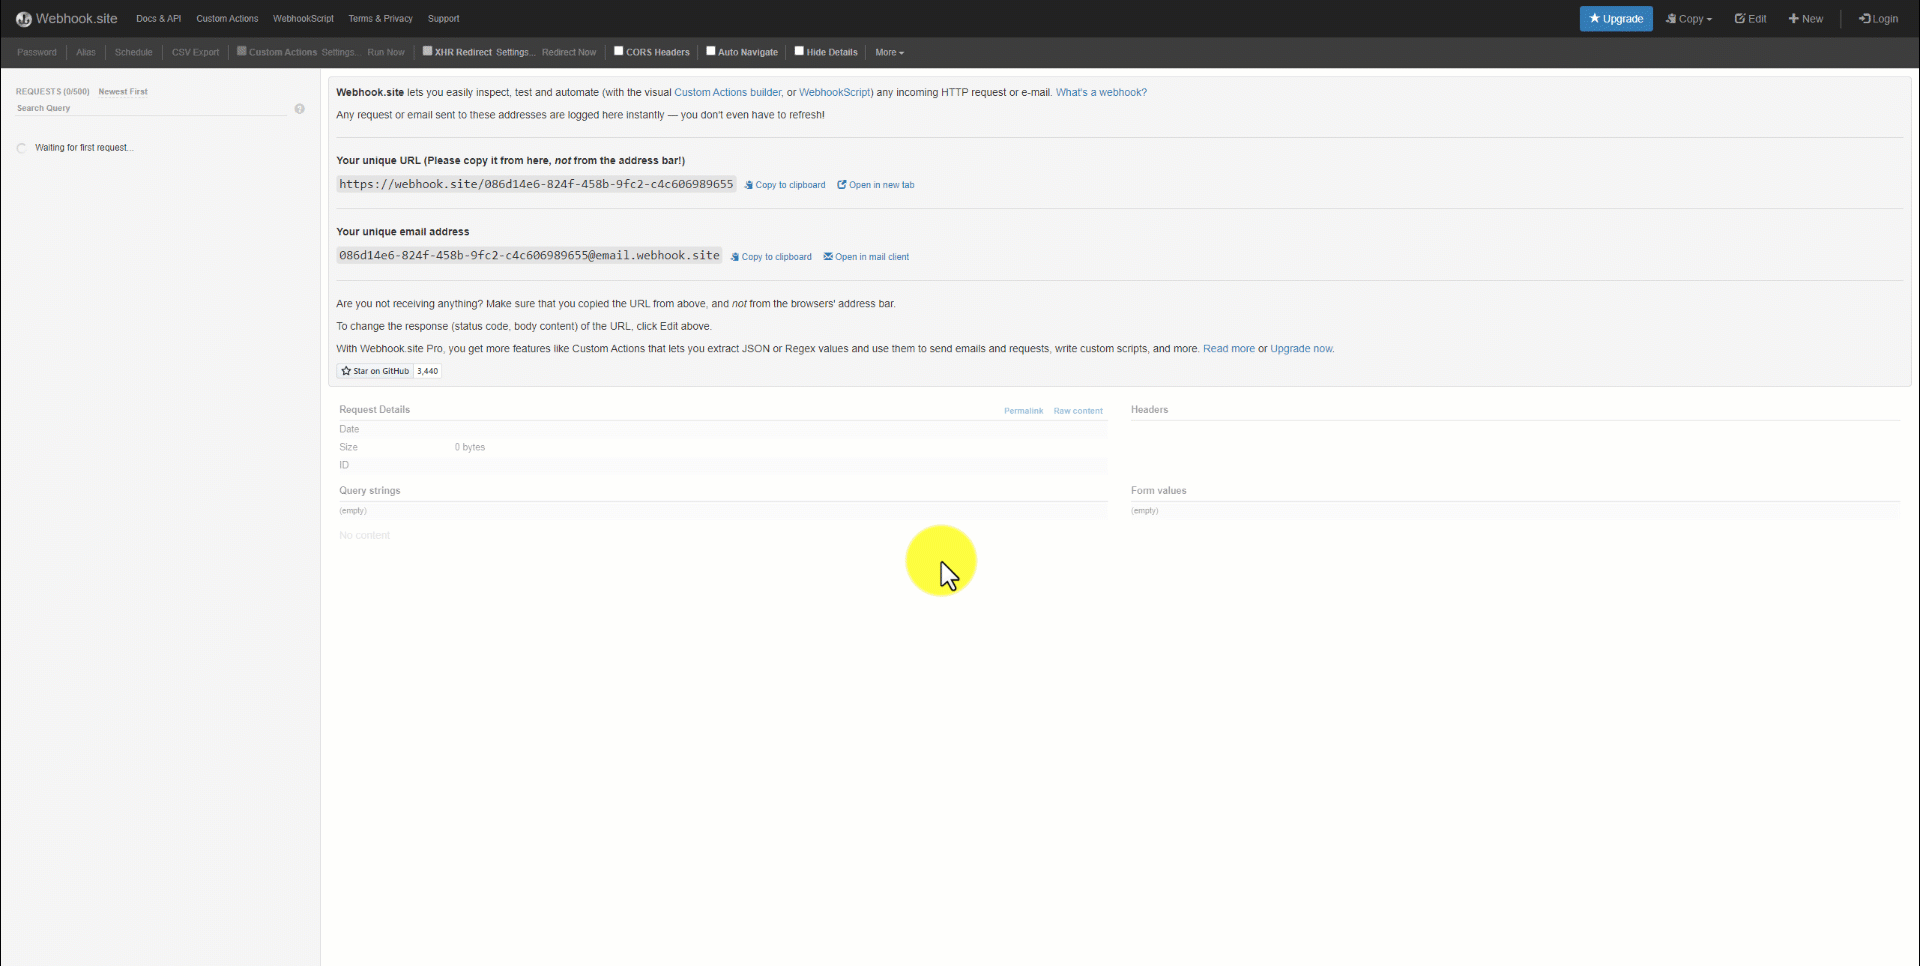
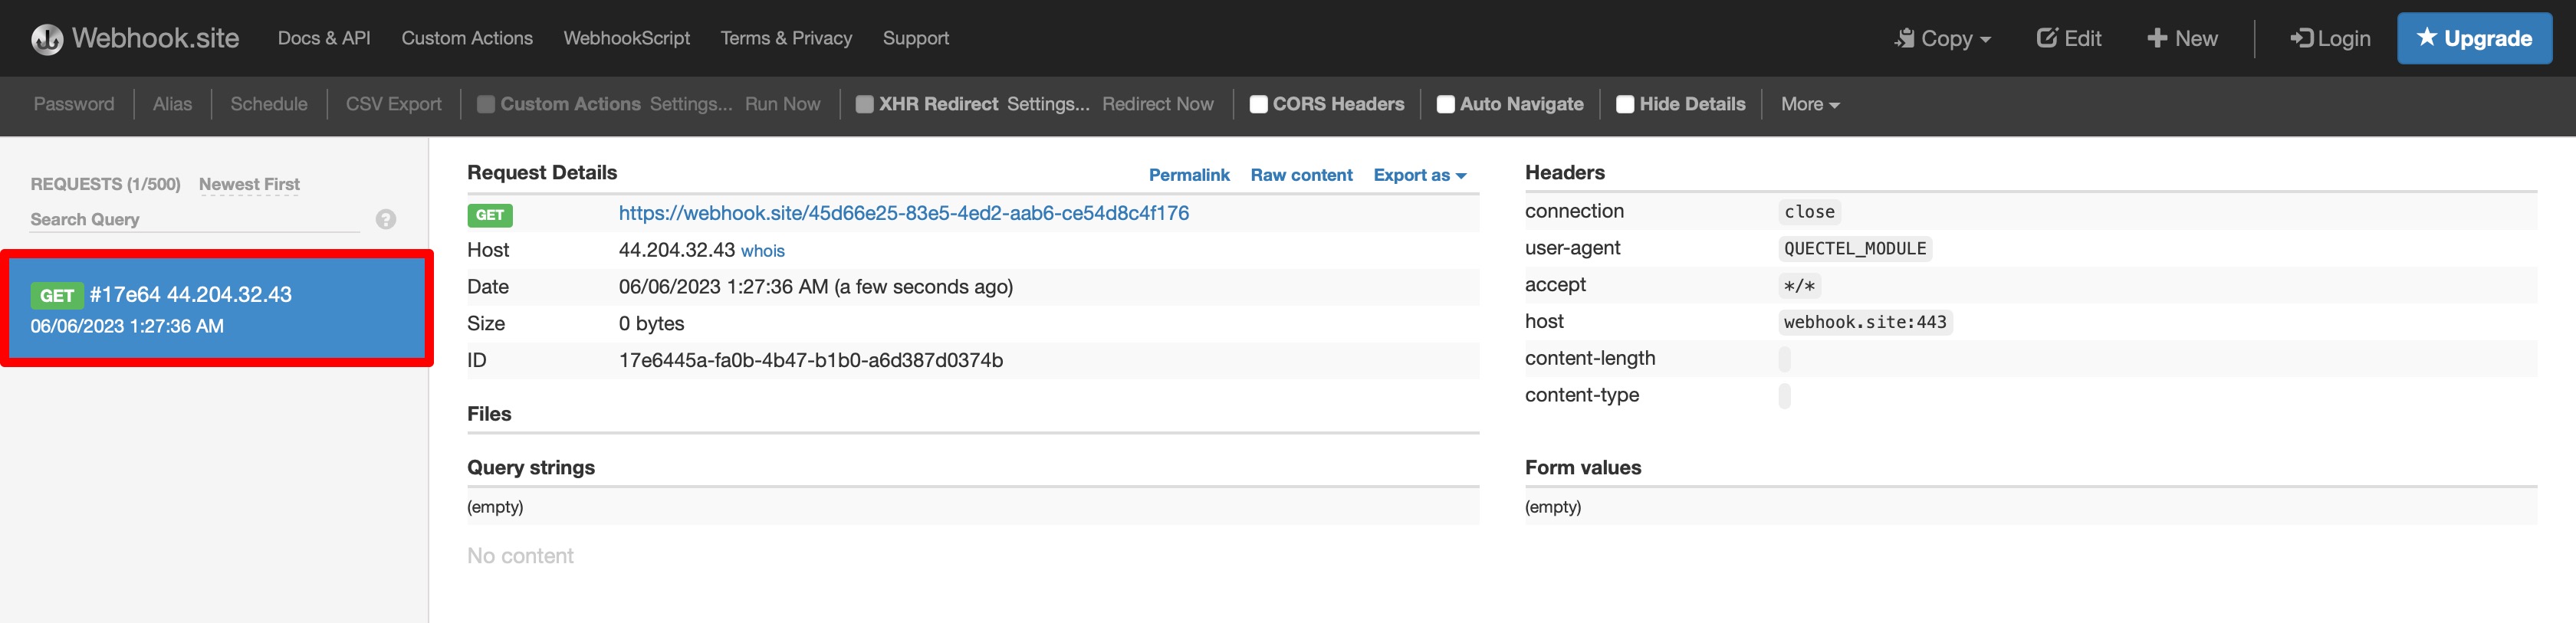
Firstly, open the https://webhook.site link in your browser on the host machine. A unique URL will be displayed for you. Refer to the figure below to locate your unique address easily. Keep in mind that all requests sent to your unique address will be visible on the sidebar.
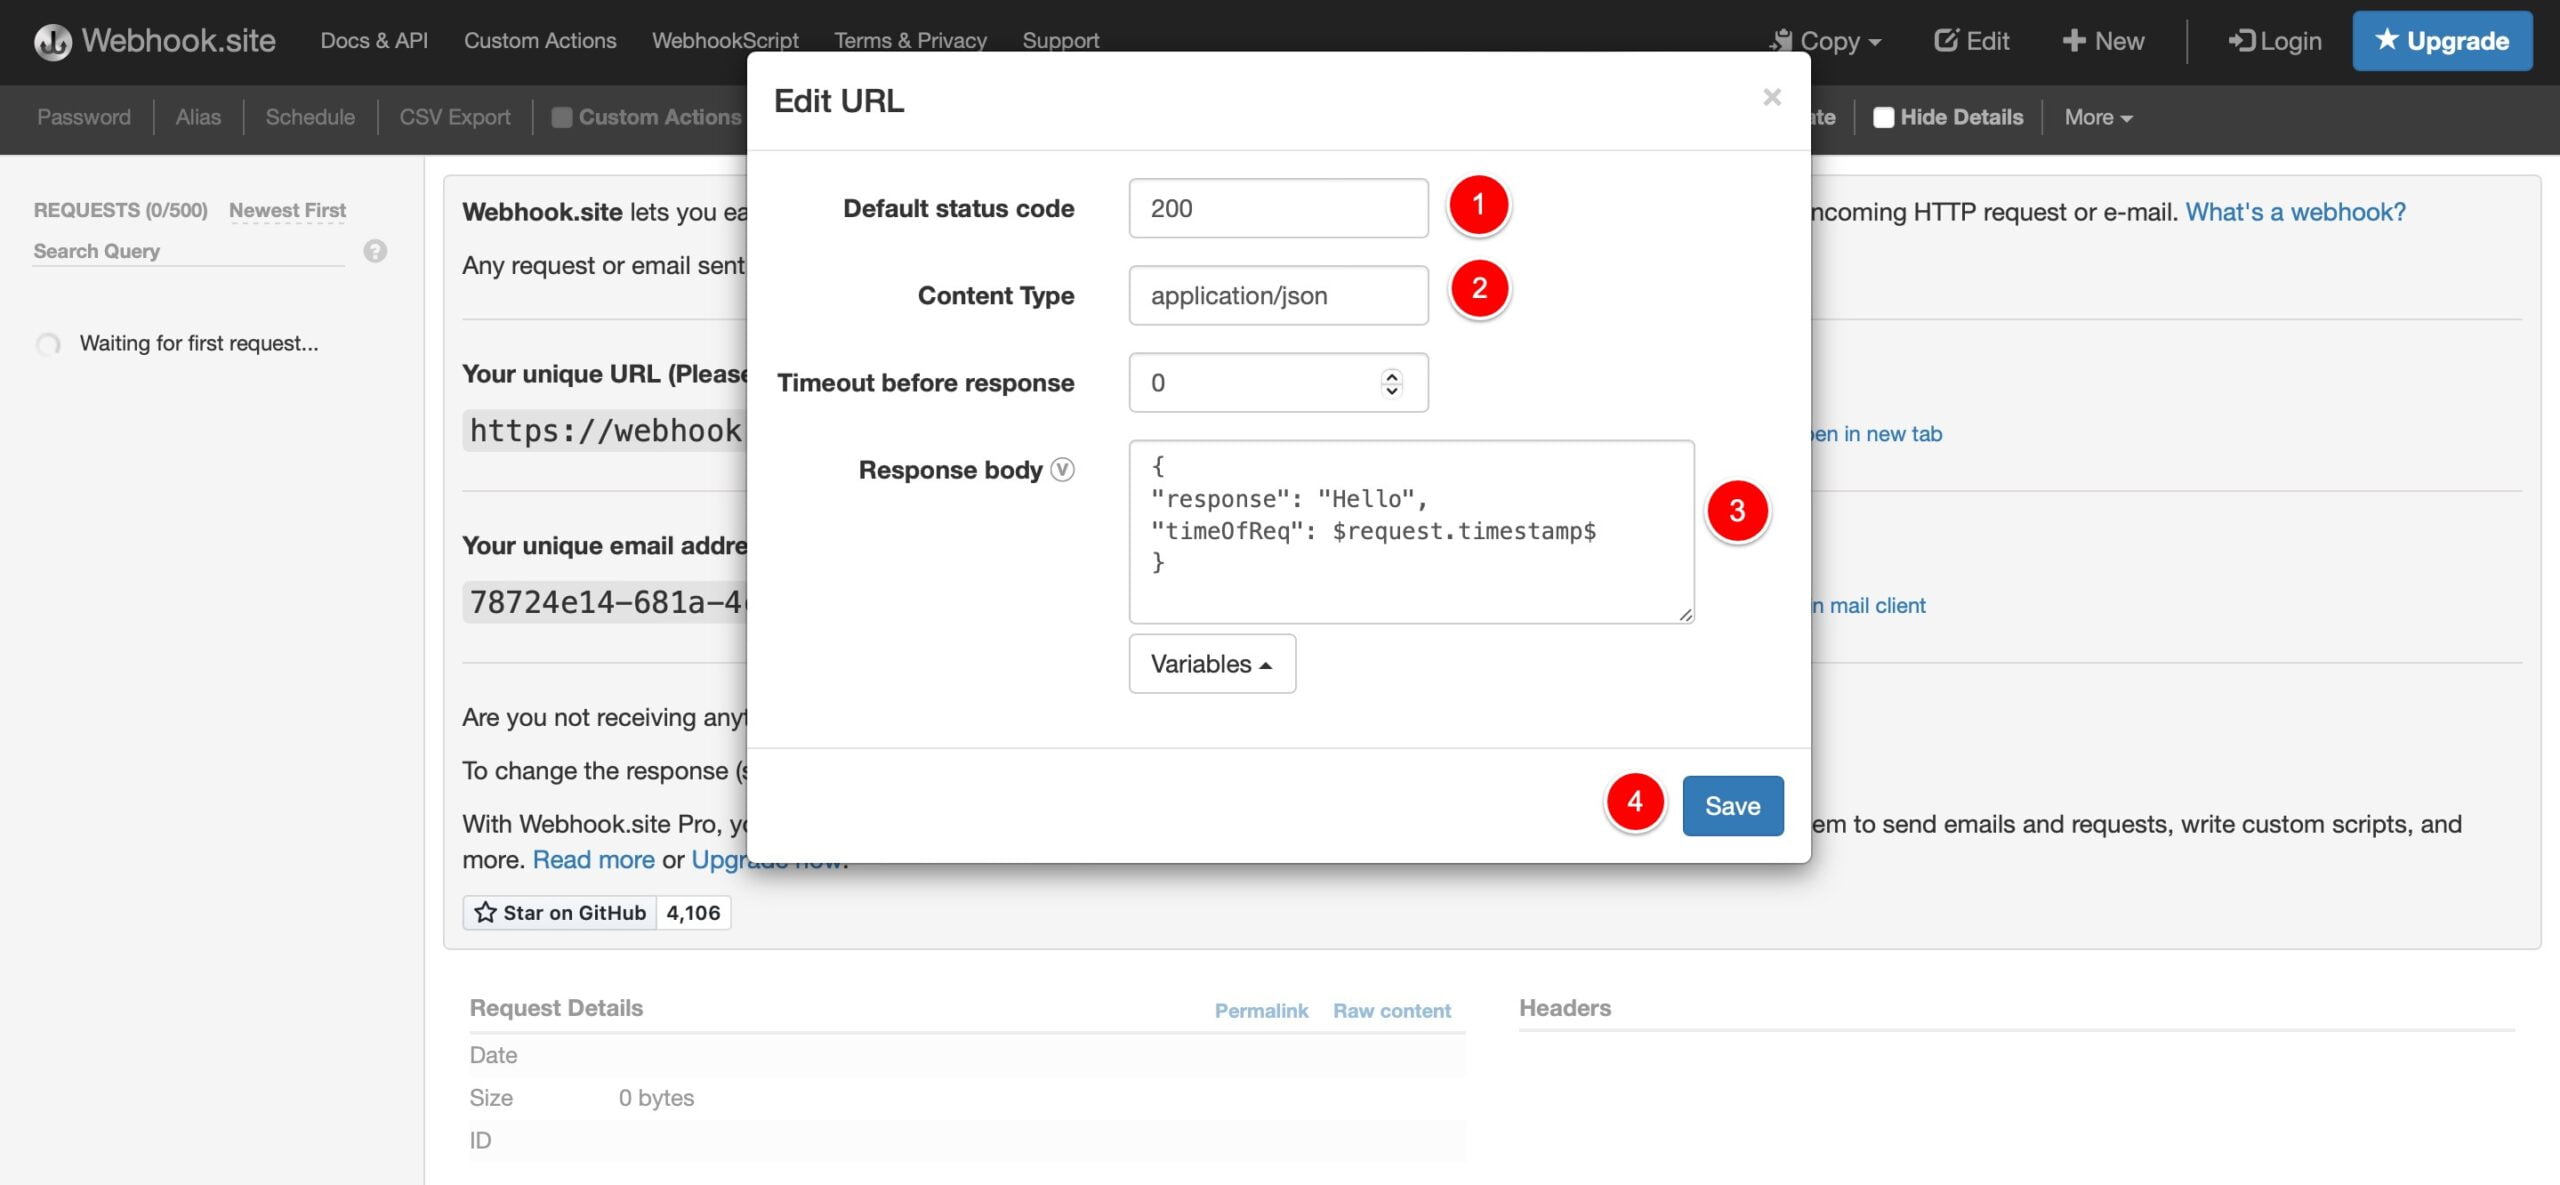
Since our example also reads the response of the request, we may need to create a special one to understand if Pico LTE gets it correctly. Please click Edit button on the right side of the menu, and there has to be new pop-up panel about editing the response.
Status Code: The status code is a number determined by the standards, and it expresses the successful reception of a message with the number 200.
Content Type: The content type is utilized to specify the desired message format. It can be set to "text/plain" for returning plain text or "application/json" for returning a JSON file.
Response Body: The response body refers to the desired response to be returned.
In our example, we aimed to return a success message and include the request time to the server. Once you have prepared your custom response, click the save button.
{
    "response": "Hello",
    "timeOfReq": $request.timestamp$
}
Test the Code Example
Copy the following code block into the config.json file and enter your HTTP Server information.
{
  "https":{
        "server": "YOUR_HTTP_SERVER",
        "username": "YOUR_HTTP_USERNAME",
        "password": "YOUR_HTTP_PASSWORD"
   },
}
Since Webhook.site does not need use any user name and password settings, we will only provide the host address. 'Username' and 'Password' values can be deleted. For example:
{
  "https":{
        "server": "https://webhook.site/000-****-****-****-*********",
        "username": "",
        "password": ""
   },
}
Add picoLTE.http.set_auth() line below picoLTE.network.get_pdp_ready() if you are using basic HTTP authentication with a username and password specified in the config.json file.
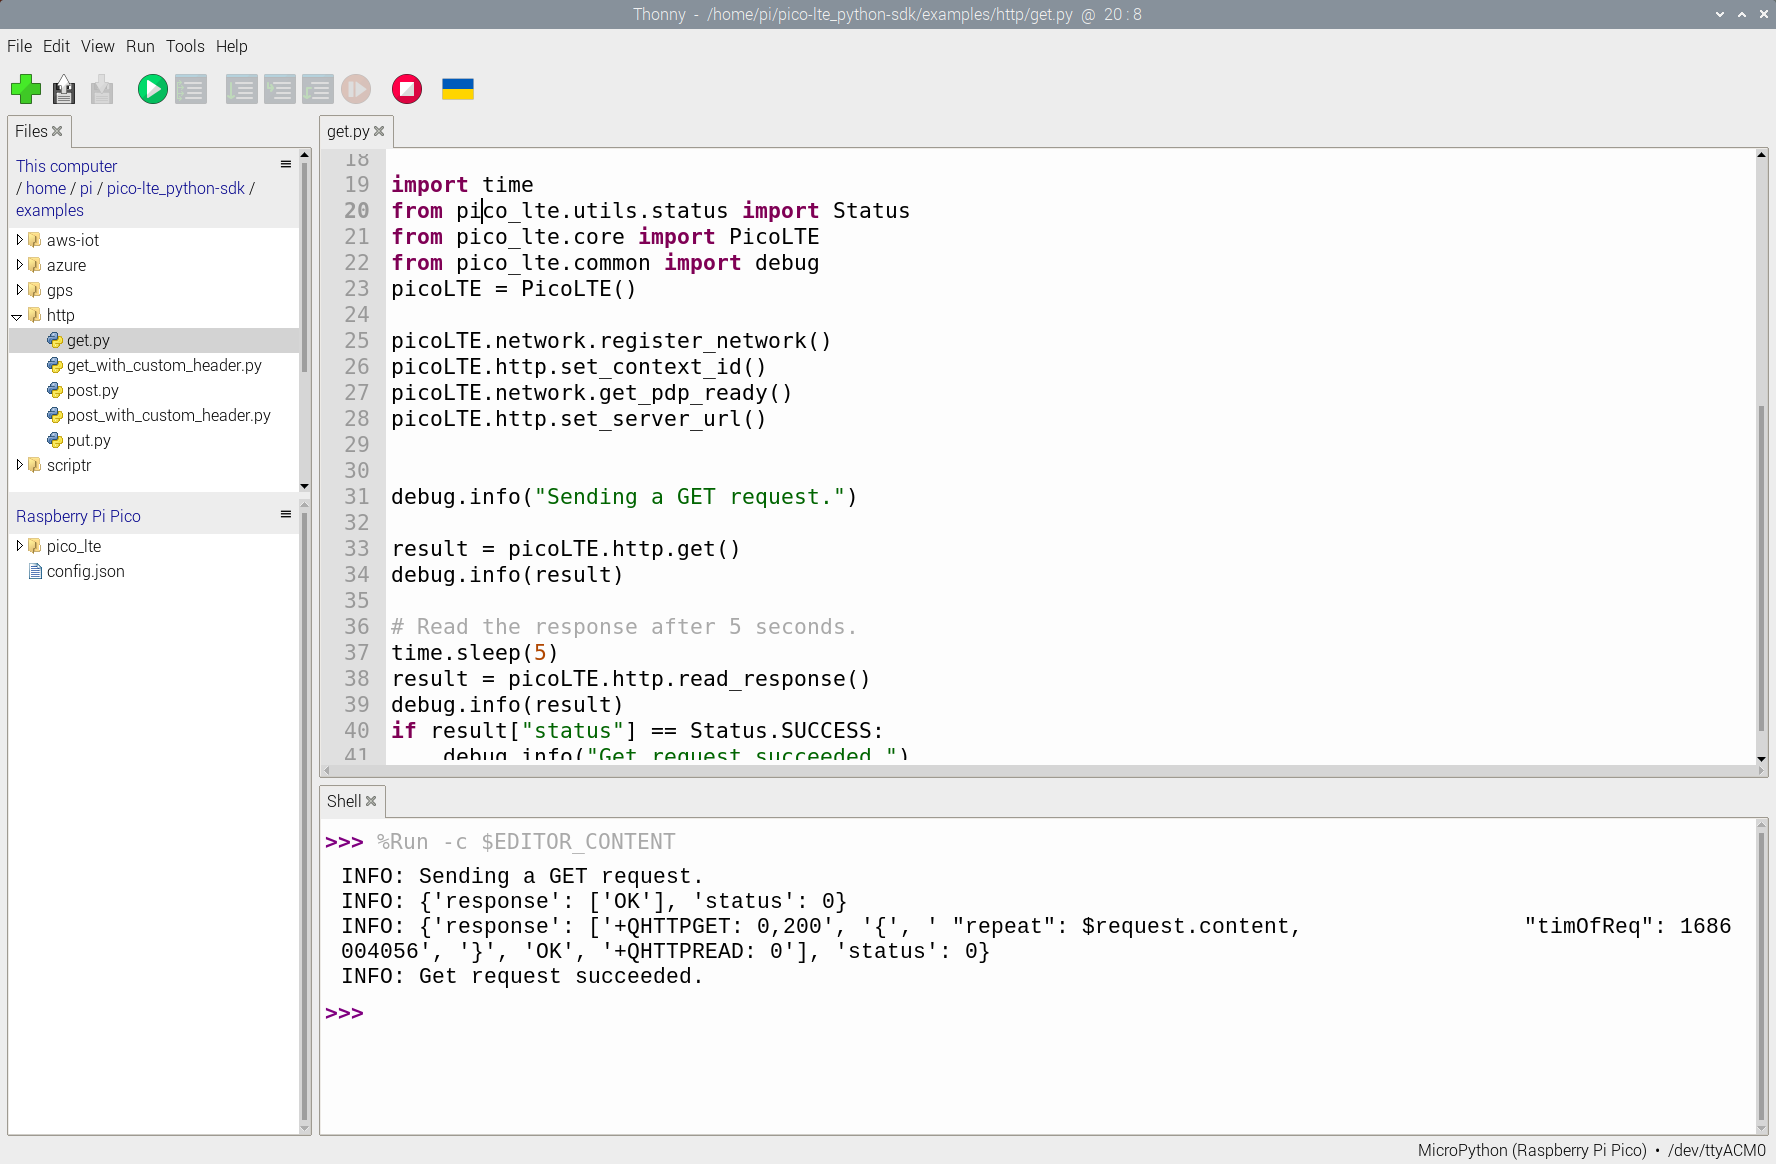
Run the "get.py" script that you opened in Thonny IDE. When you run the script, you should see a log similar to the log below, and you should see the new GET request in your Webhook.site dashboard.
Troubleshooting
I'm getting +CME ERROR: 703 error when reading the response.
Please increase the sleeping time before asking the Pico LTE to read response. It should be solved.
Pico LTE POST Request to a Web Server using HTTP
Preparing the Webhook.site
Firstly, open the https://webhook.site link in your browser on the host machine. A unique URL will be displayed for you. Refer to the figure below to locate your unique address easily. Keep in mind that all requests sent to your unique address will be visible on the sidebar.
Since our example also reads the response of the request, we may need to create a special one to understand if Pico LTE gets it correctly. Please click Edit button on the right side of the menu, and there has to be new pop-up panel about editing the response.
Status Code: The status code is a number determined by the standards, and it expresses the successful reception of a message with the number 200.
Content Type: The content type is utilized to specify the desired message format. It can be set to "text/plain" for returning plain text or "application/json" for returning a JSON file.
Response Body: The response body refers to the desired response to be returned.
In our example, we aimed to return a success message and include the request time to the server. Once you have prepared your custom response, click the save button.
{
    "response": "Hello",
    "timeOfReq": $request.timestamp$
}
Test the Code Example
Copy the following code block into the config.json file and enter your HTTP Server information.
{
  "https":{
        "server": "YOUR_HTTP_SERVER",
        "username": "YOUR_HTTP_USERNAME",
        "password": "YOUR_HTTP_PASSWORD"
   },
}
Since Webhook.site does not need use any user name and password settings, we will only provide the host address. 'Username' and 'Password' values can be deleted. For example:
{
  "https":{
        "server": "https://webhook.site/000-****-****-****-*********",
        "username": "",
        "password": ""
   },
}
Add picoLTE.http.set_auth() line below picoLTE.network.get_pdp_ready() if you are using basic HTTP authentication with a username and password specified in the config.json file.
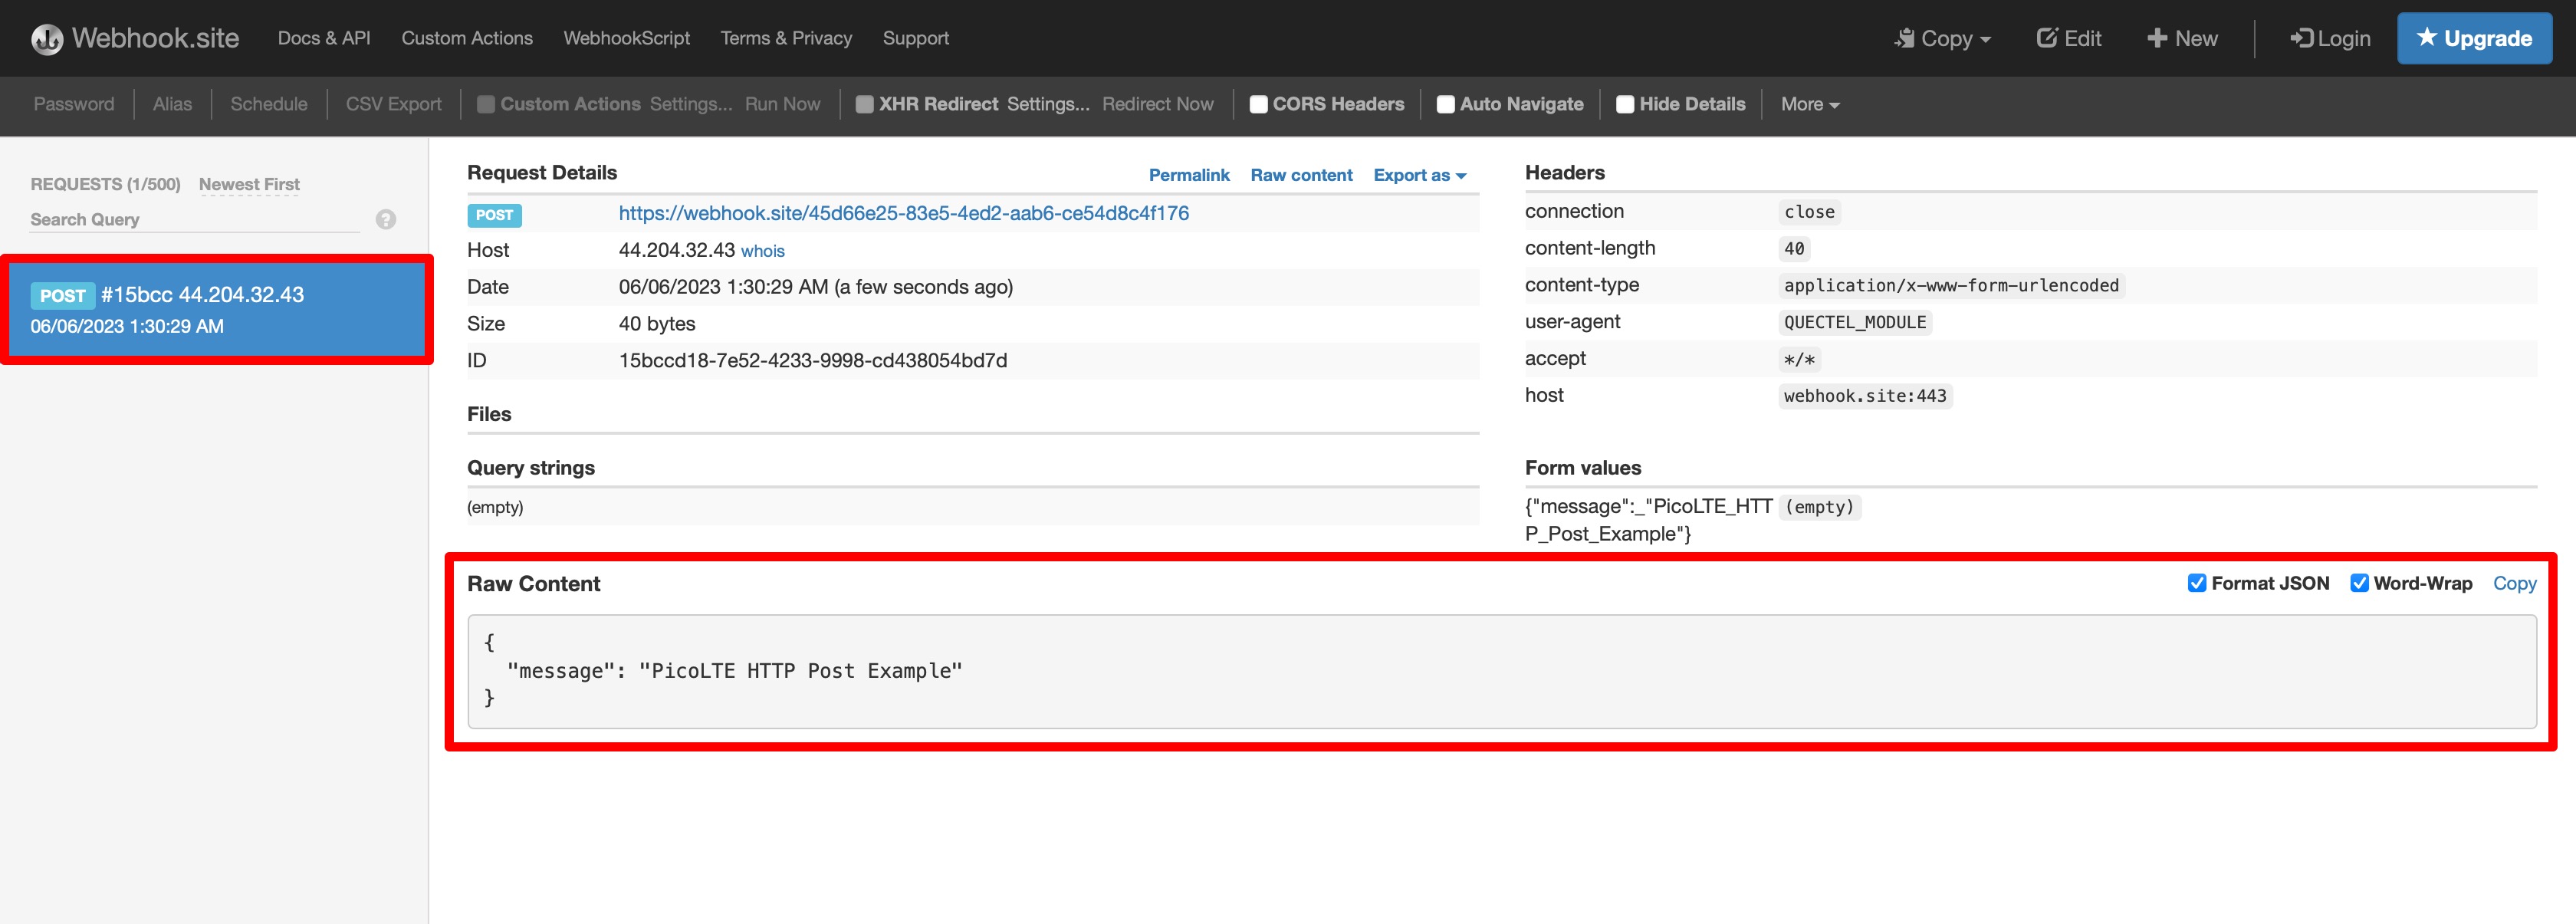
Run the "post.py" script that you opened in Thonny IDE. When you run the script, you should see a log similar to the log below, and you should see the new POST request in your Webhook.site dashboard.
Troubleshooting
I'm getting +CME ERROR: 703 error when reading the response.
Please increase the sleeping time before asking the Pico LTE to read response. It should be solved.
I'm getting +CME ERROR: 712 error while sending a POST request.
This error described as wrong or empty URL setting for the host. Please check your config.json file and put the proper URL which includes "https://" and its query.
Pico LTE PUT Request to a Web Server using HTTP
Preparing the Webhook.site
Firstly, open the https://webhook.site link in your browser on the host machine. A unique URL will be displayed for you. Refer to the figure below to locate your unique address easily. Keep in mind that all requests sent to your unique address will be visible on the sidebar.
Since our example also reads the response of the request, we may need to create a special one to understand if Pico LTE gets it correctly. Please click Edit button on the right side of the menu, and there has to be new pop-up panel about editing the response.
Status Code: The status code is a number determined by the standards, and it expresses the successful reception of a message with the number 200.
Content Type: The content type is utilized to specify the desired message format. It can be set to "text/plain" for returning plain text or "application/json" for returning a JSON file.
Response Body: The response body refers to the desired response to be returned.
In our example, we aimed to return a success message and include the request time to the server. Once you have prepared your custom response, click the save button.
{
    "response": "Hello",
    "timeOfReq": $request.timestamp$
}
Test the Code Example
Copy the following code block into the config.json file and enter your HTTP Server information.
{
  "https":{
        "server": "YOUR_HTTP_SERVER",
        "username": "YOUR_HTTP_USERNAME",
        "password": "YOUR_HTTP_PASSWORD"
   },
}
Since Webhook.site does not need use any user name and password settings, we will only provide the host address. 'Username' and 'Password' values can be deleted. For example:
{
  "https":{
        "server": "https://webhook.site/000-****-****-****-*********",
        "username": "",
        "password": ""
   },
}
Add picoLTE.http.set_auth() line below picoLTE.network.get_pdp_ready() if you are using basic HTTP authentication with a username and password specified in the config.json file.
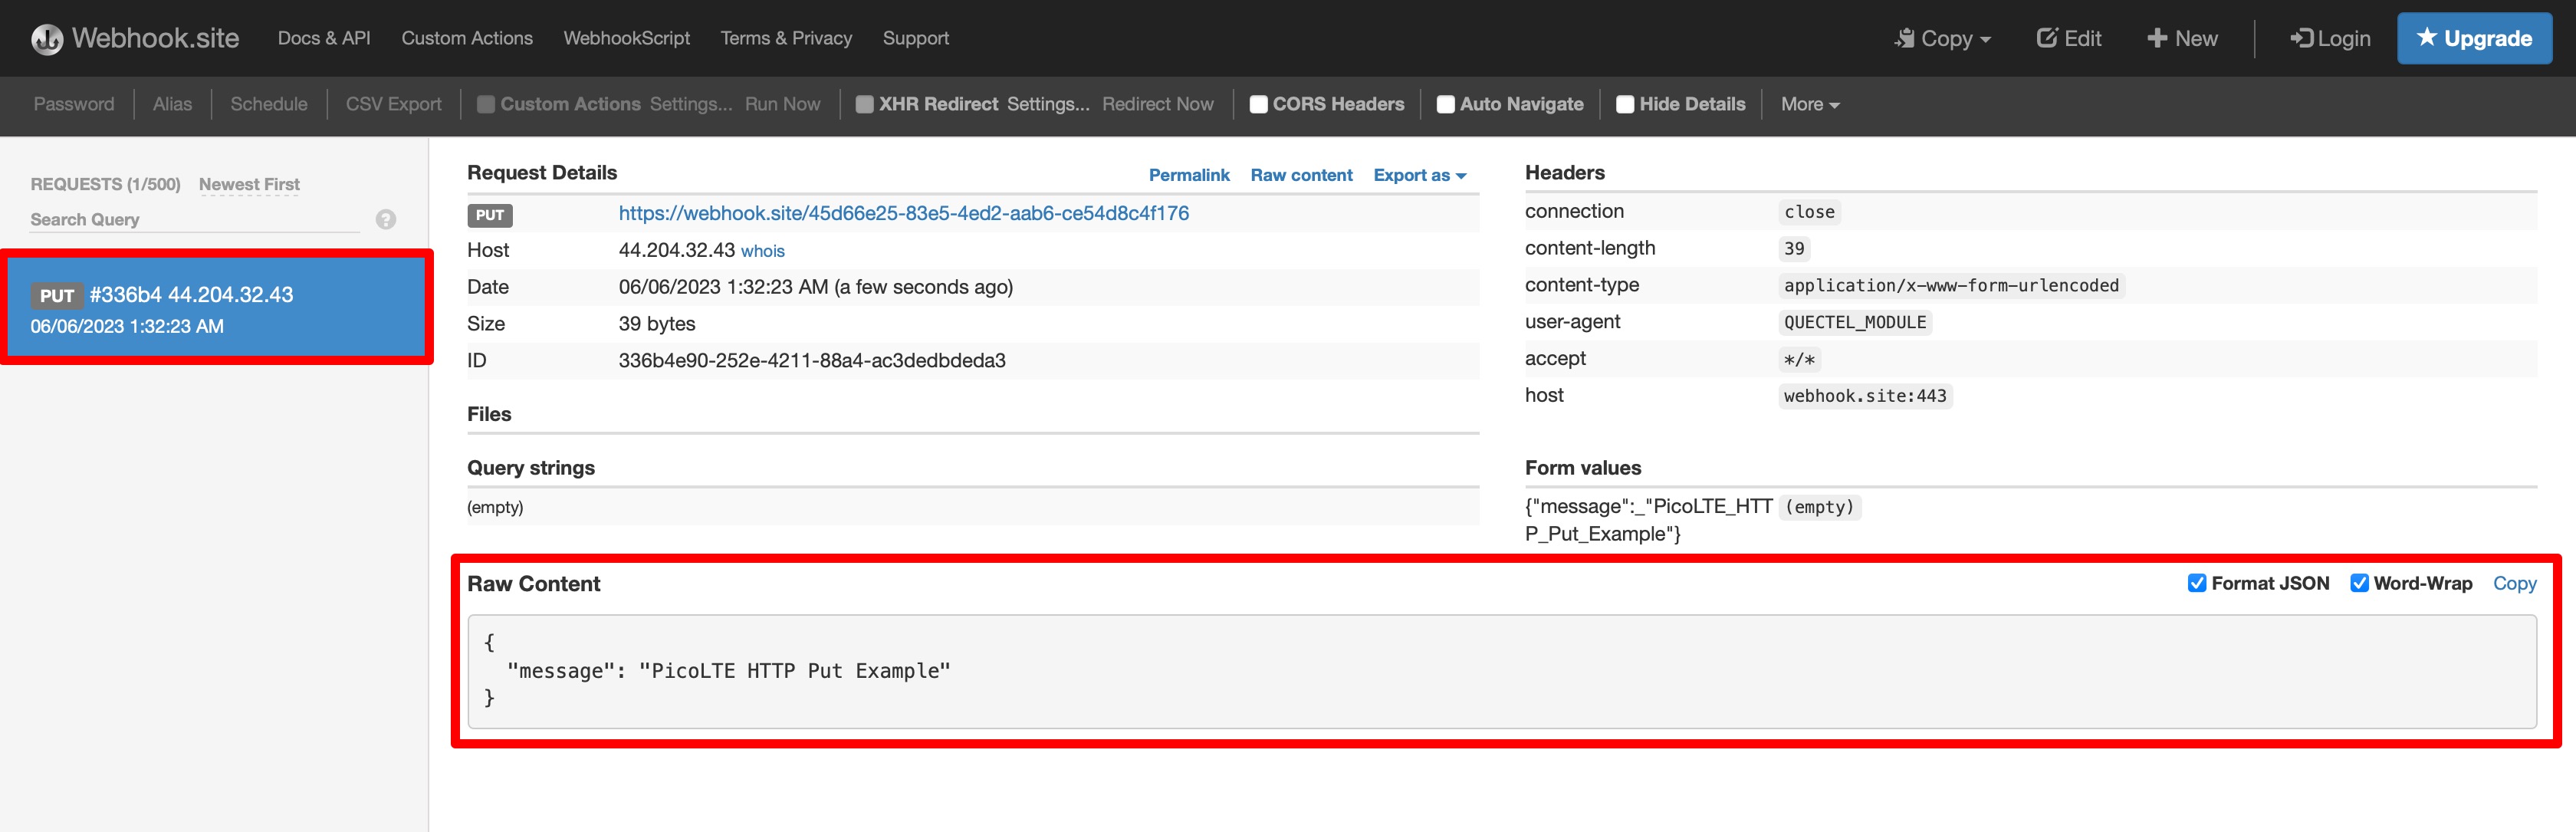
Run the "put.py" script that you opened in Thonny IDE. When you run the script, you should see a log similar to the log below, and you should see the new PUT request in your Webhook.site dashboard.
Troubleshooting
I'm getting +CME ERROR: 703 error when reading the response.
Please increase the sleeping time before asking the Pico LTE to read response. It should be solved.
I'm getting +CME ERROR: 712 error while sending a PUT request.
This error described as wrong or empty URL setting for the host. Please check your config.json file and put the proper URL which includes "https://" and its query.
Updated 8 months ago