
AWS IoT Connection
The Pico LTE provides all the components you will need for establishing an HTTPS / MQTT connection to the Amazon Web Services' IoT Core.
Before starting this Pico LTE tutorial, the Pico LTE SDK installation and configuration steps must be completed. Below are the system requirements for this tutorial. If you haven't followed the SDK installation steps, please refer to the page below before proceeding with the tutorial. The details of these steps will not be covered in this tutorial.
System Requirements
| Hardware Requirements | Software Requirements |
|---|---|
| • Sixfab Pico LTE • Micro USB cable |
• Thonny IDE |
If you have completed all the requirements, you are ready to use Amazon Web Services' HTTPS / MQTT broker. Let's get started!
Preparing Coding Environment
- Download the Pico LTE SDK repository to your local machine. If you have already downloaded it, skip this step.
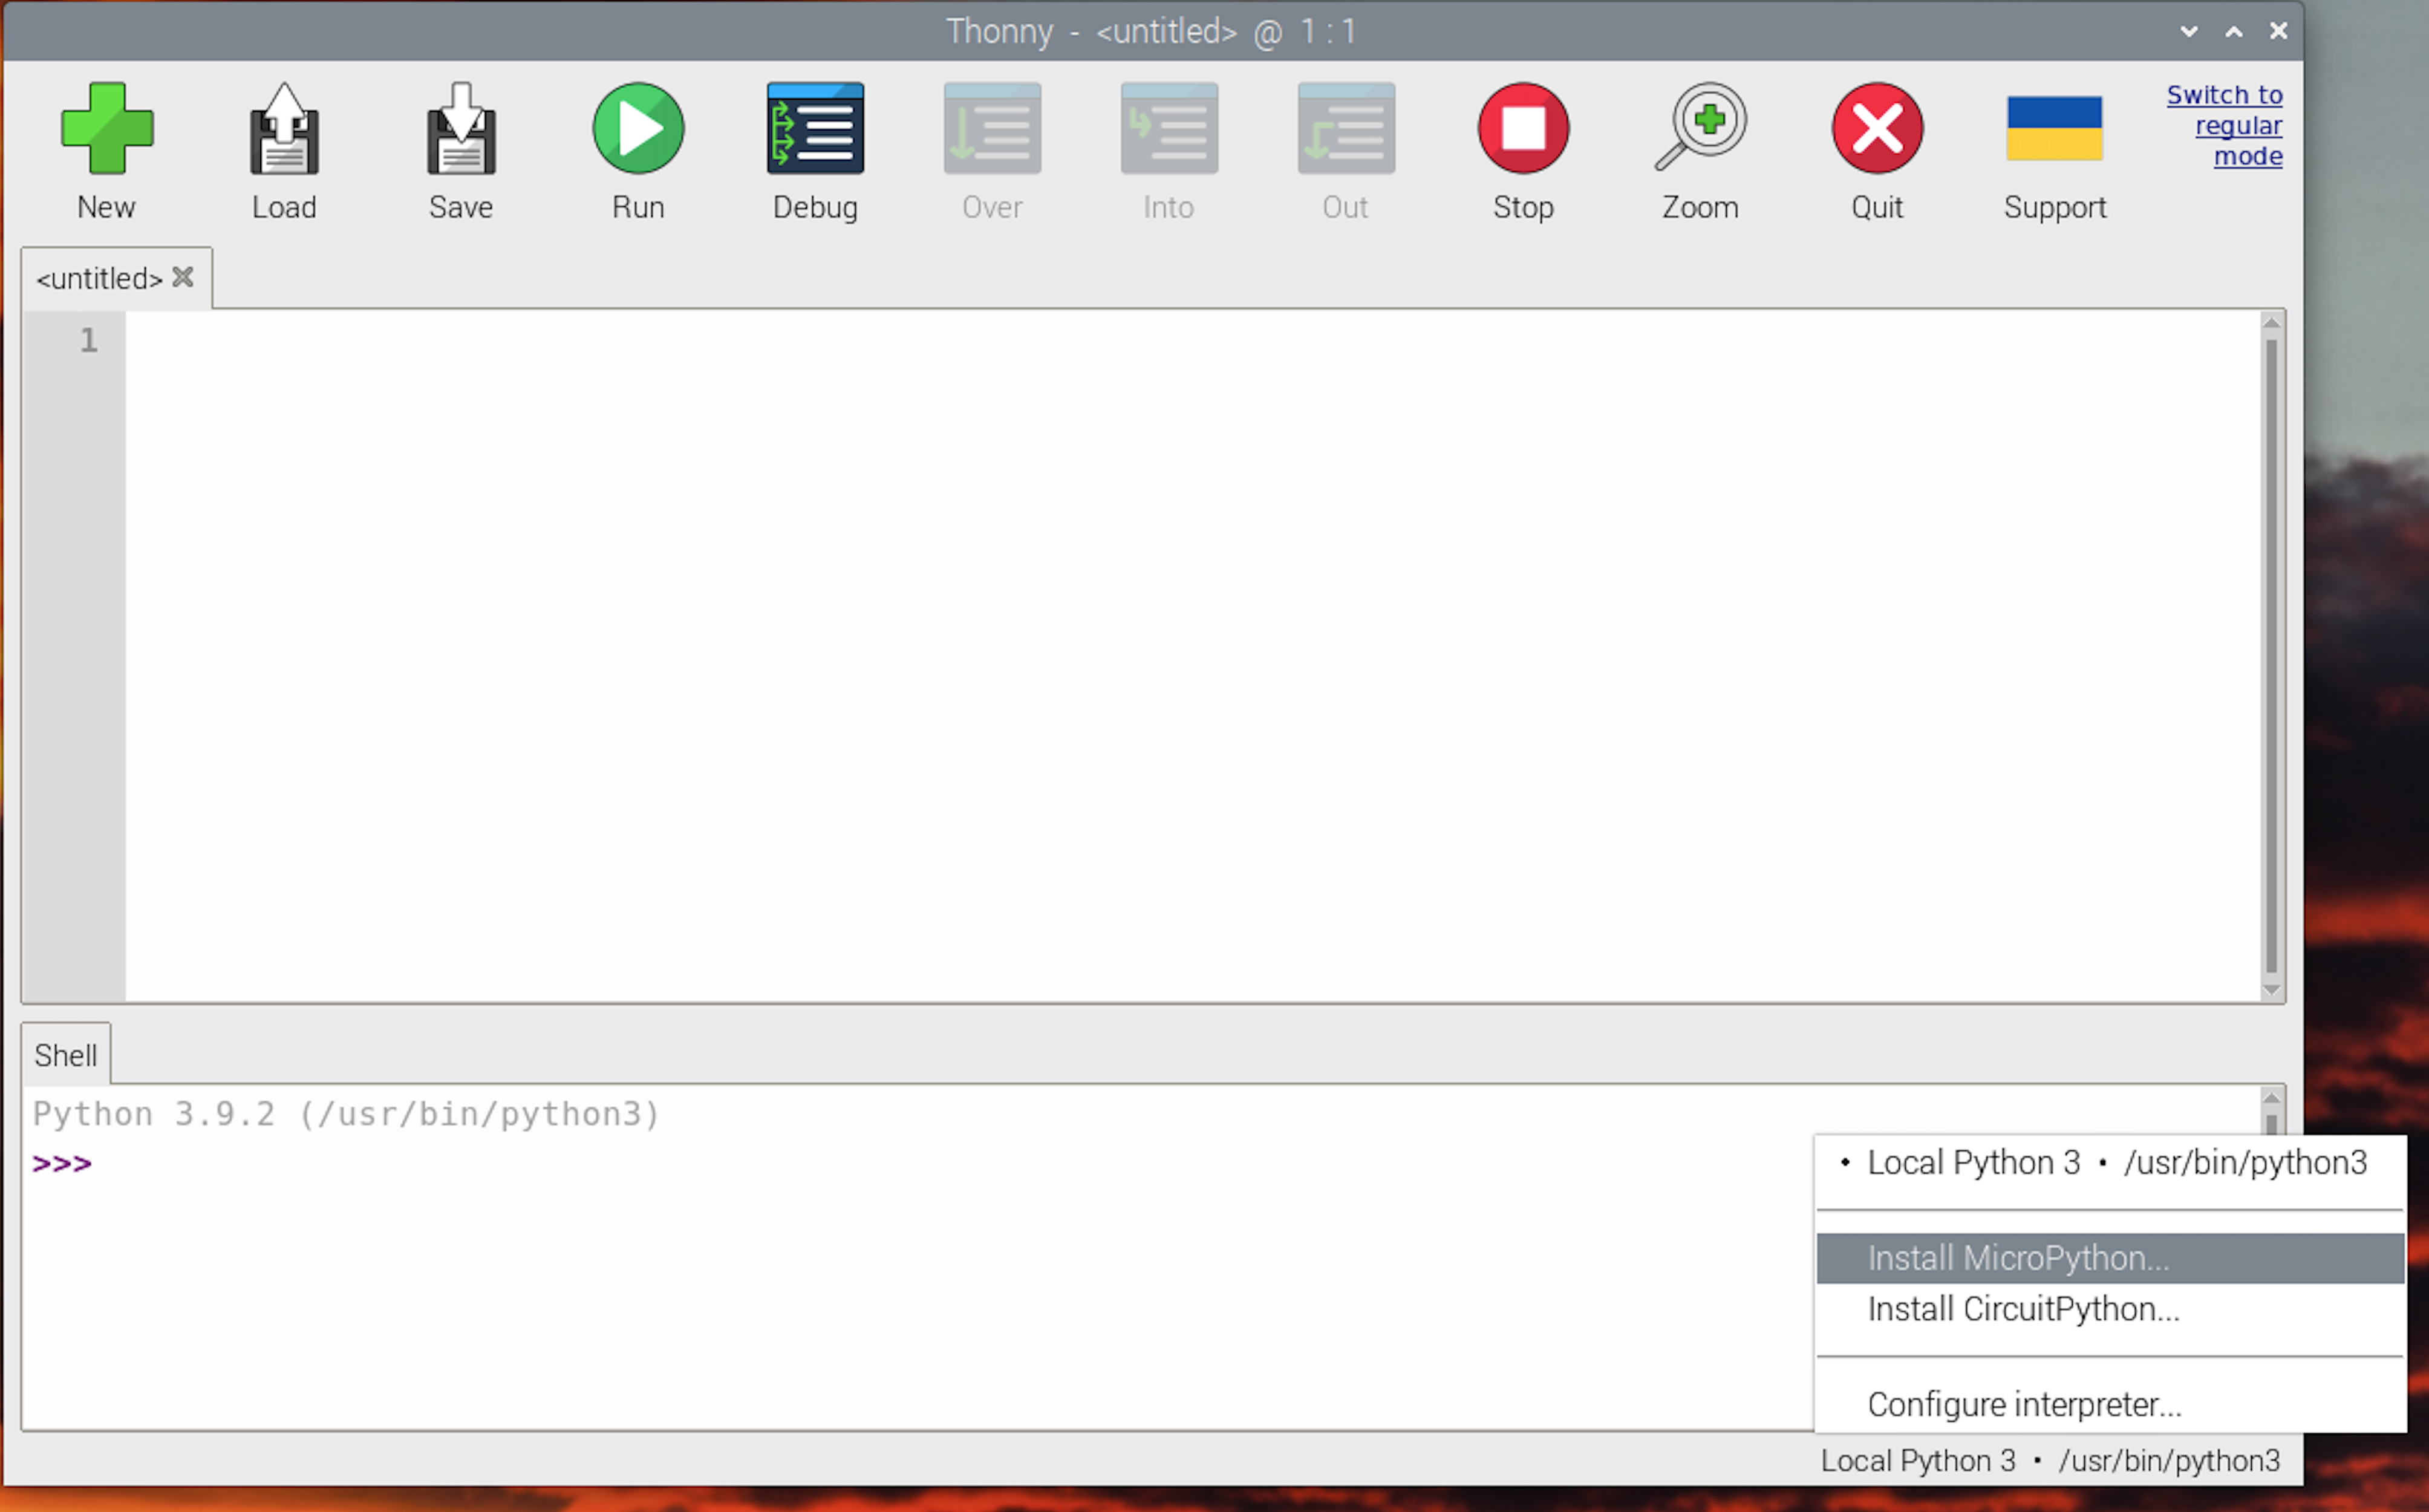
- Open script "examples → aws-iot → http_post.py or mqtt_publish.py" from the repository via Thonny IDE.
- If you haven't, create a config.json file in the root directory of Pico LTE device.
Register and Activate AWS IoT Service
1. Sign in to the AWS Management Console. If you don't have an account, "How do I create and activate a new AWS account?" follow the article.
2. Type "IoT Core" in the search bar and select the IoT Core service.
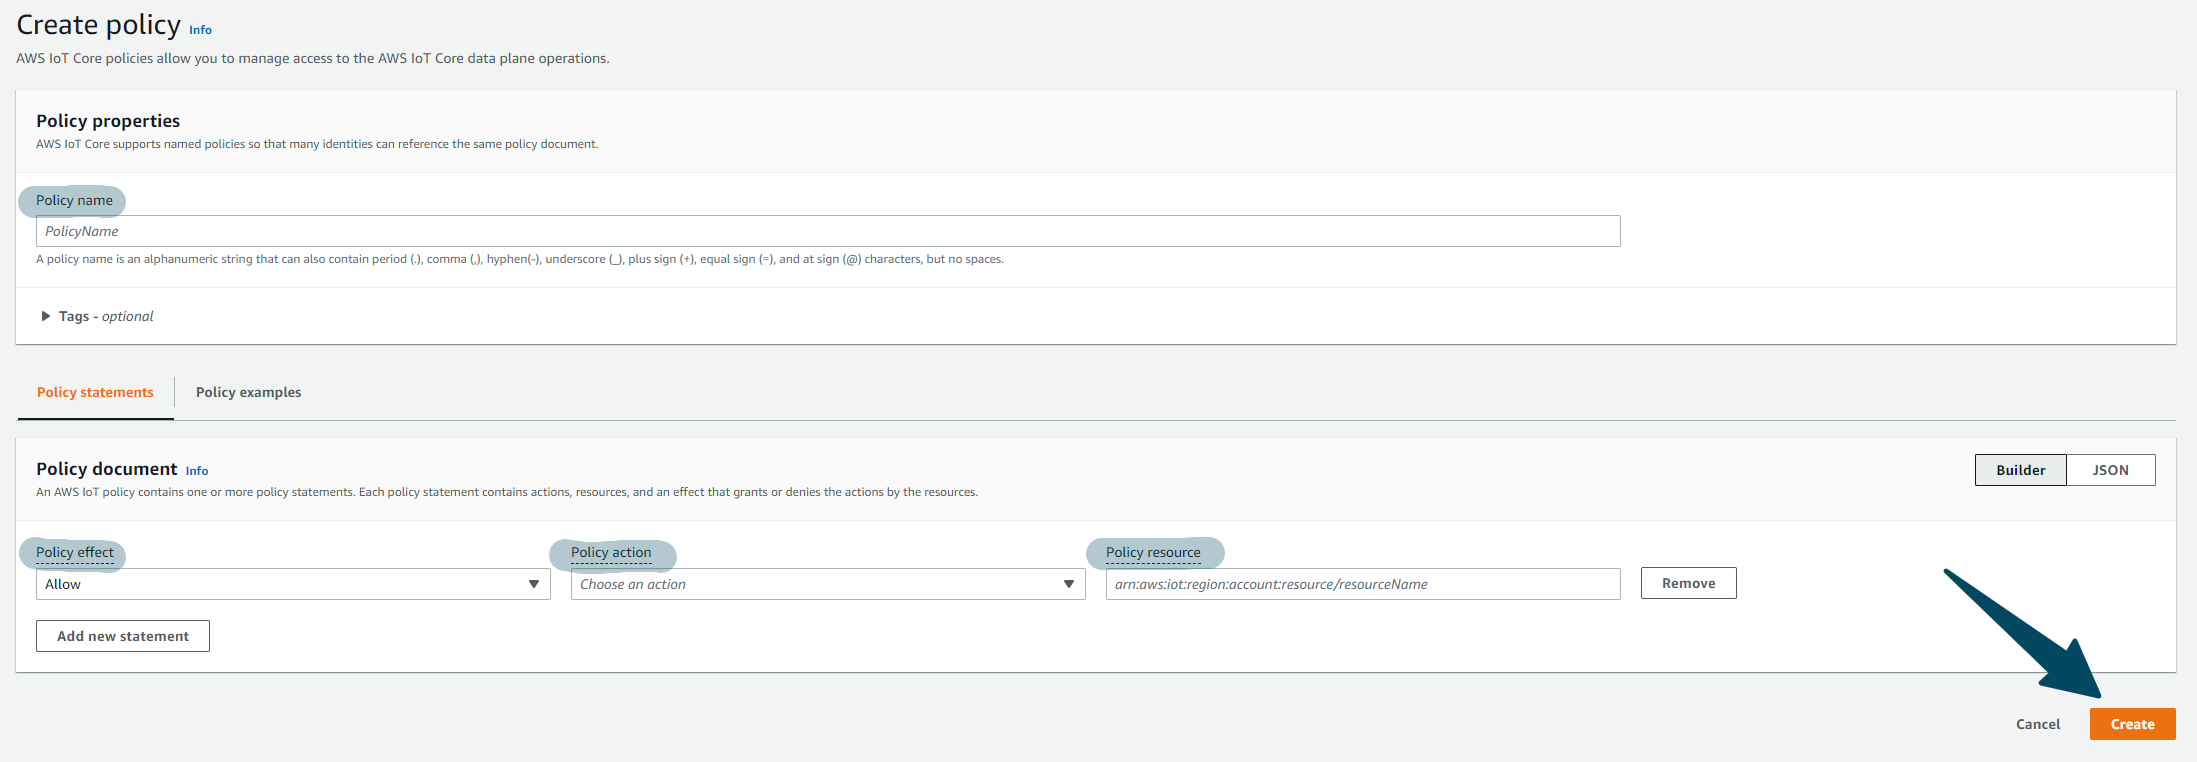
3. Click on "Policies → Security" dropdown menu under the "Manage" section in the sidebar. Then, click on the "Create policy" button.

4. Enter the name of the policy. Set the policy effect as Allow, its Policy action and Policy resource as * (which means _all_), and click "Create" button.
5. Click on the "All Devices → Things" option from the side menu. Create a new device using Create things button. Select "Create single thing" for the number of things to be created and click "Next" button.
6. Enter the name of the thing and set the device shadow to "Unnamed shadow (classic)", then click the "Next" button.
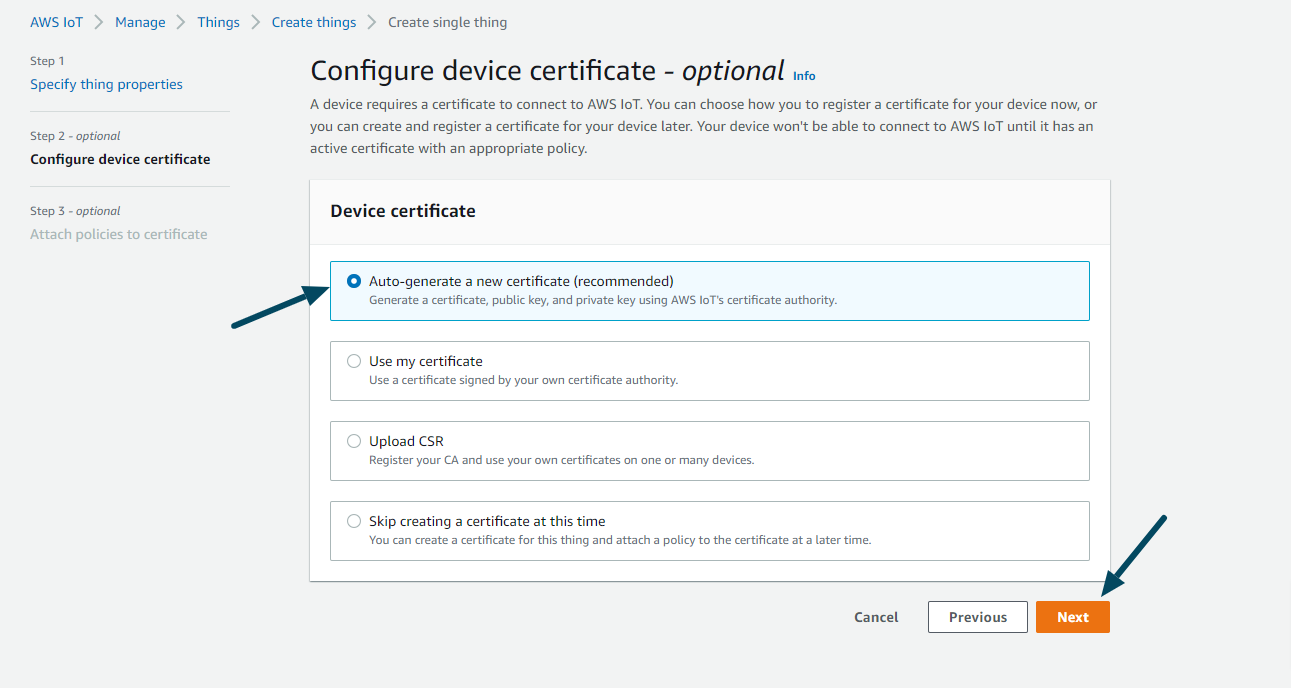
7. Select Auto-generate a new certificate (recommended) for the device certificate, and click "Next" button.
8. Select the policy you created and Click "Create thing" button.
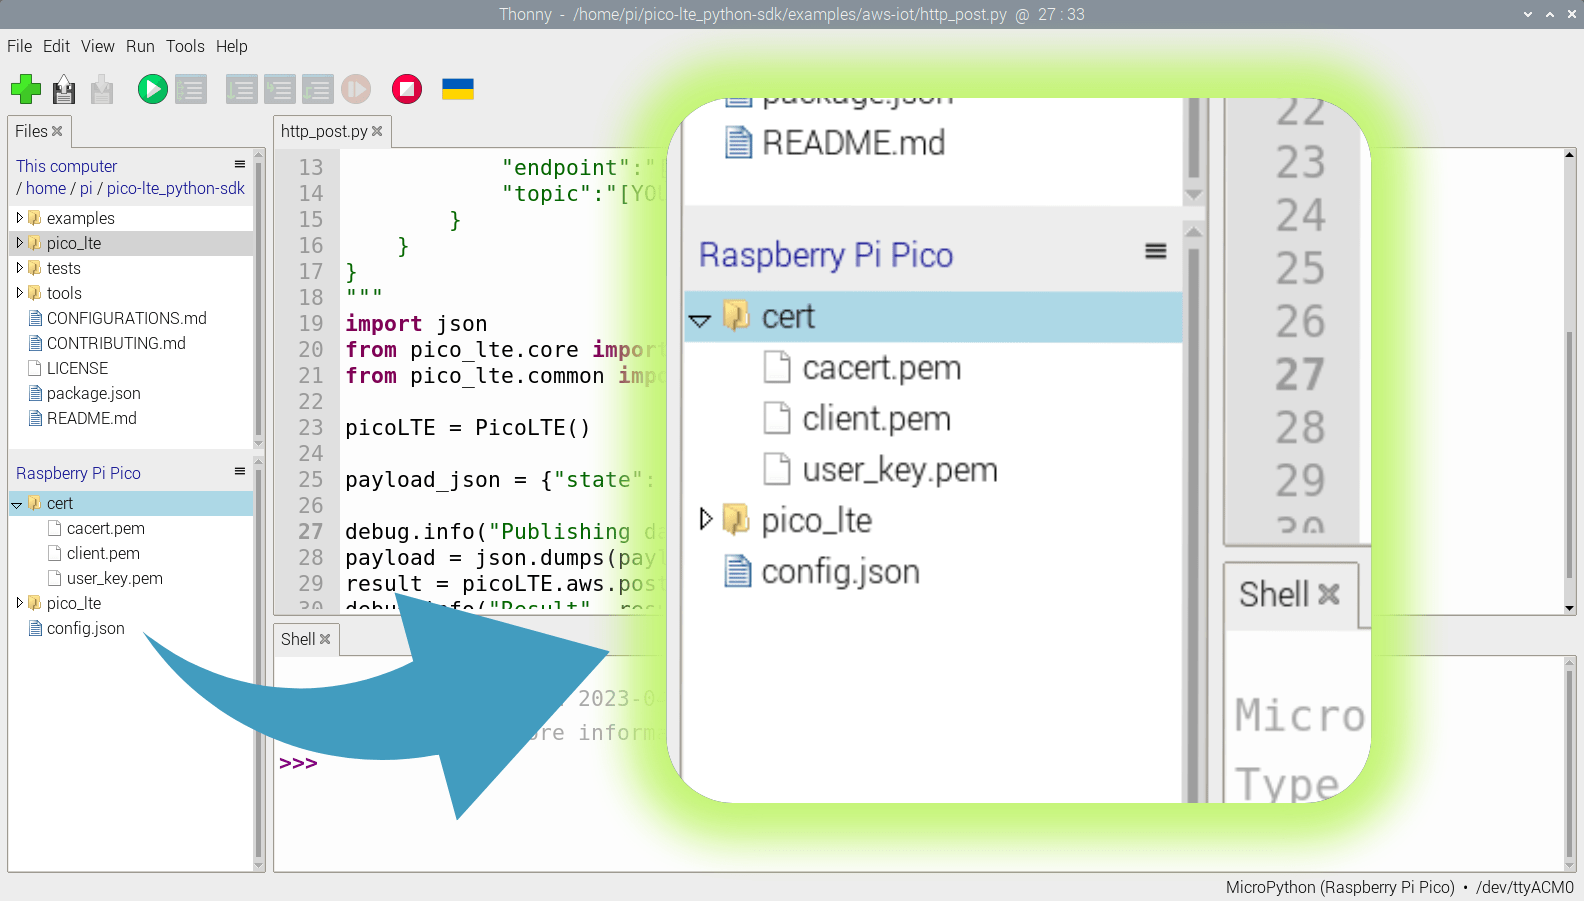
9. Save the following certificates with the specified names:
- Device certificate: client.pem
- Private key file: user_key.pem
- Root certificate: cacert.pem
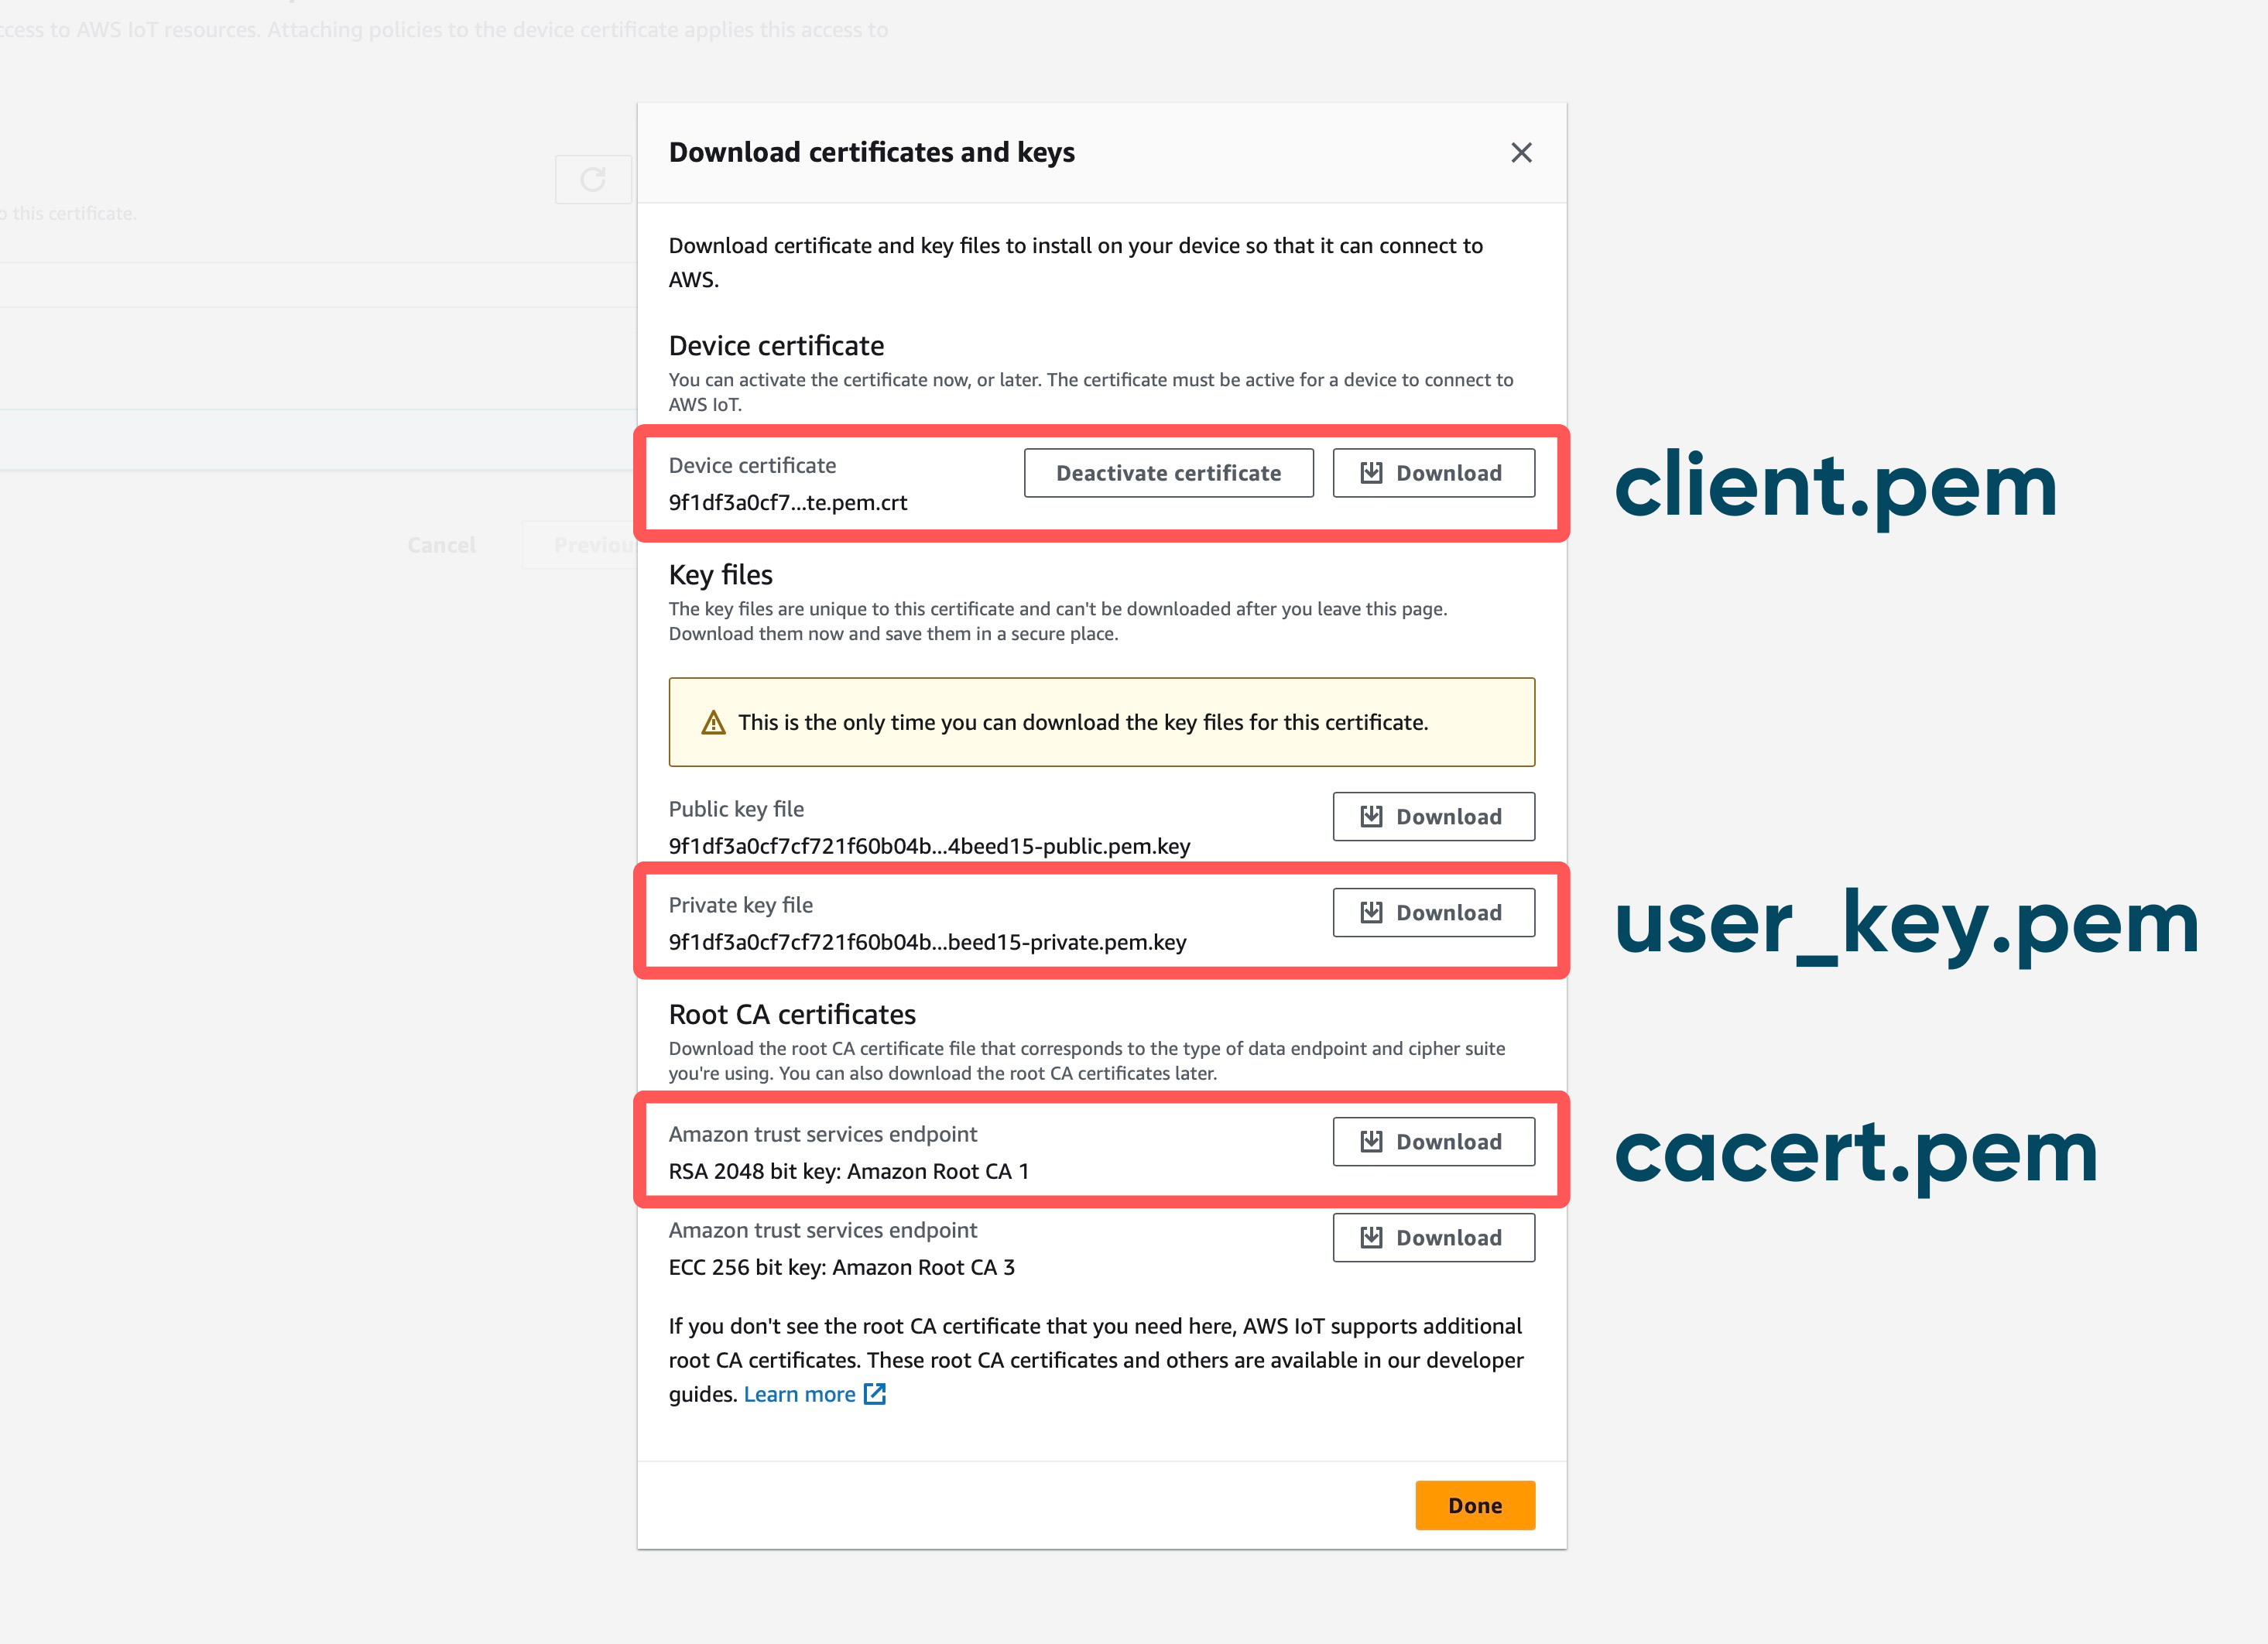
Create a folder named "cert" and move these 3 files into it. Then upload this folder to your root directory of Pico LTE device.
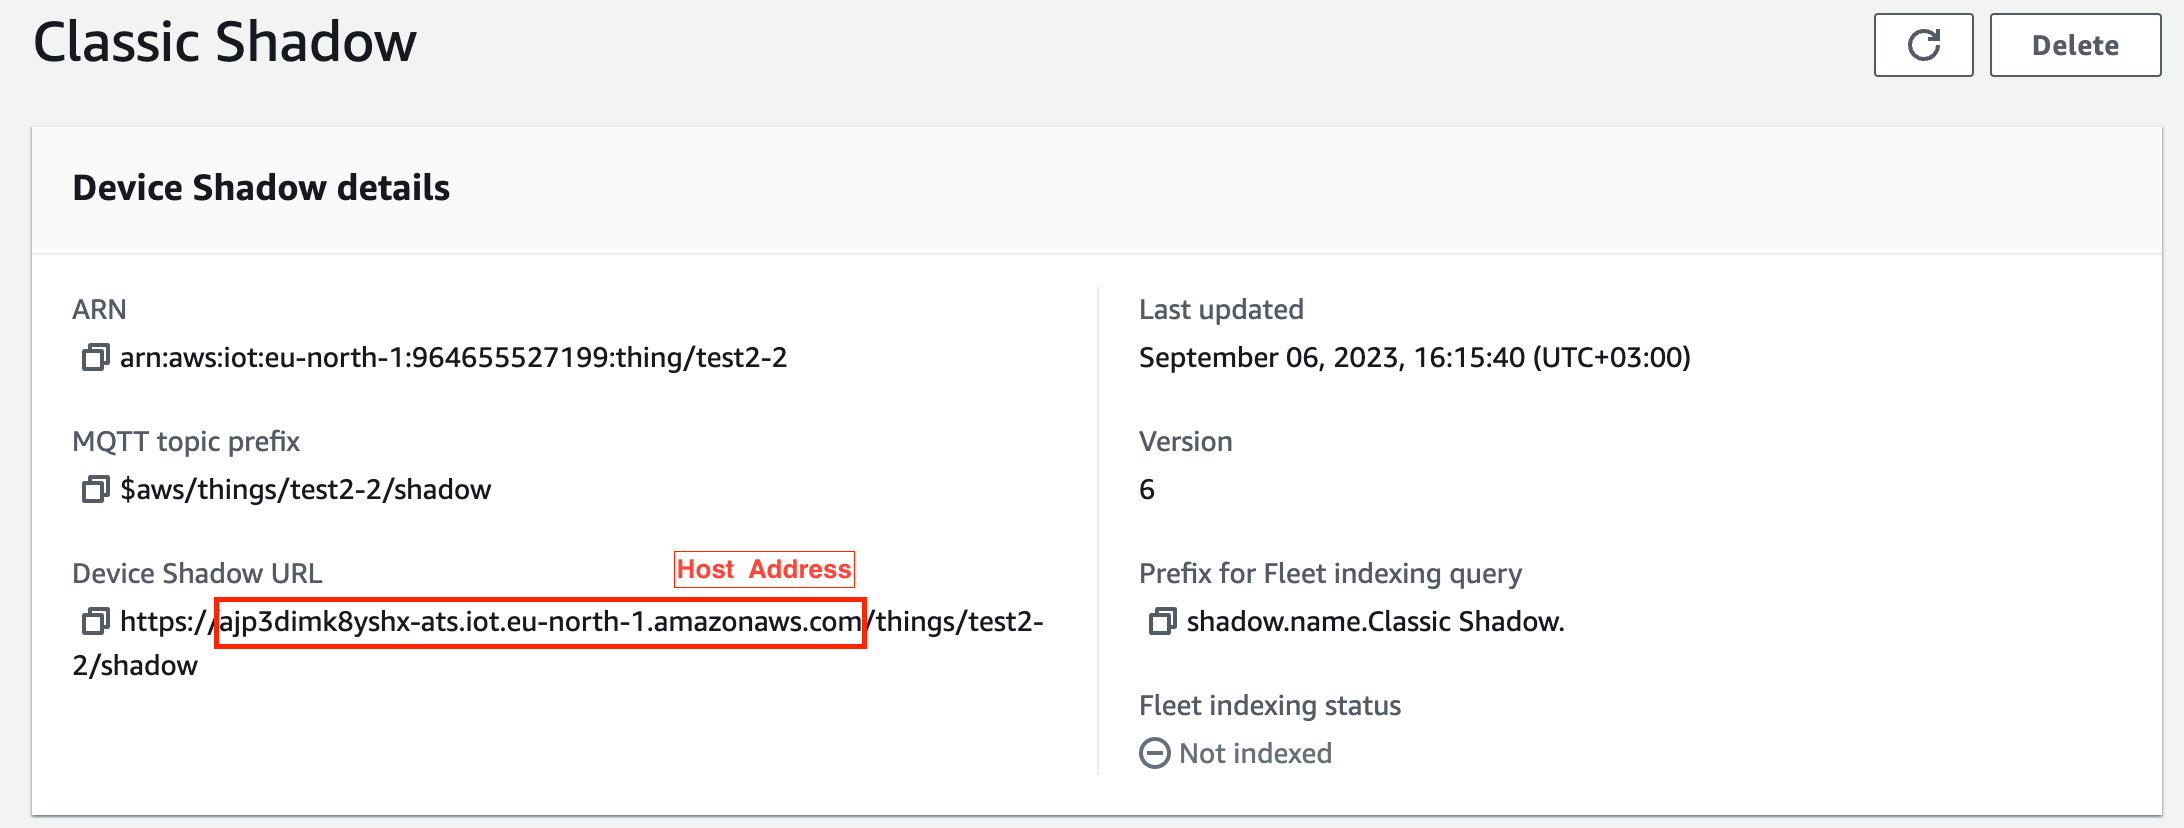
10. Now, it's time to find your host address and the topic for publishing messages over a HTTP POST request.
To do that, please go to the "All devices → Things" page again, and select the thing that you've created in Step 6. Then select the "Device Shadows" tab, and click on the "Classic Shadow".
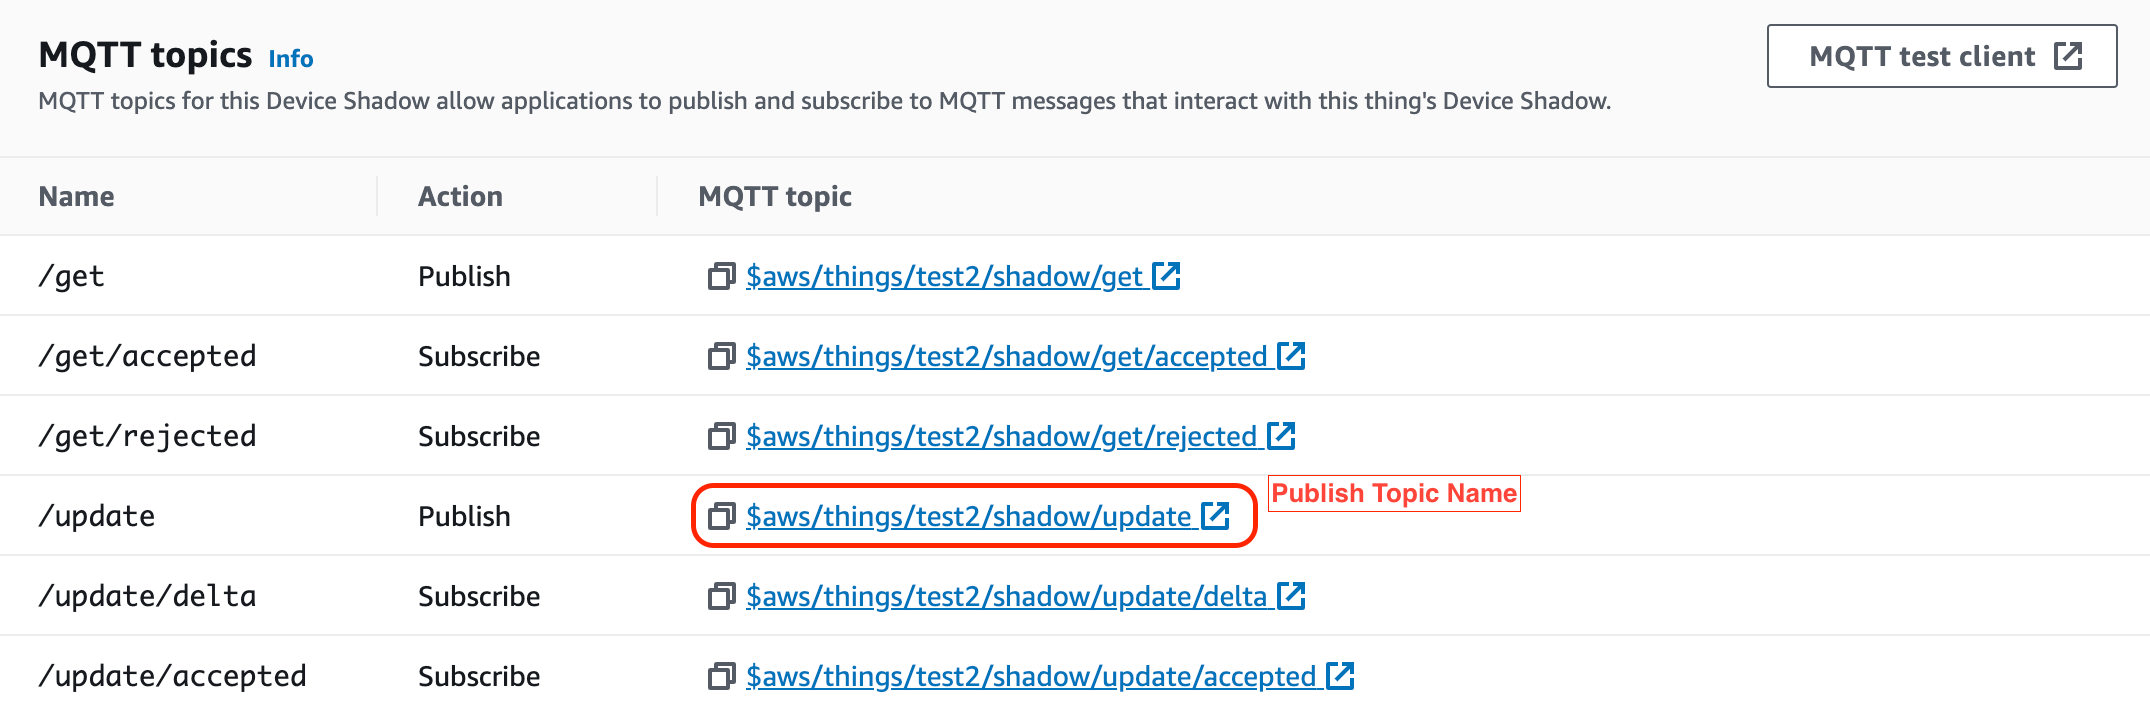
11. Follow the MQTT Topics, and get your host address and publishing topic name as shown in the figure below. We're going to put these informations into our config.json file to send a HTTP POST request.
Test the Code Example
Copy the following code block into the config.json file and enter your AWS Host Address and AWS Publish Topic.
{
      "aws": {
          "https": {
              "endpoint": "YOUR_AWS_HOST_ADDRESS",
              "topic": "YOUR_AWS_PUBLISH_TOPIC"
          }
      }
  }
Then save this on your Pico LTE device. Since AWS does not need to use any username and password settings, you must provide your device's credential keys as we explained in Step 9.
If you want to change the message you will send, you can open the Python file containing our code and update the PAYLOAD_JSON variable as you wish. After finishing all the steps explained above, you can run the example code with pressing the run button on the Thonny IDE.
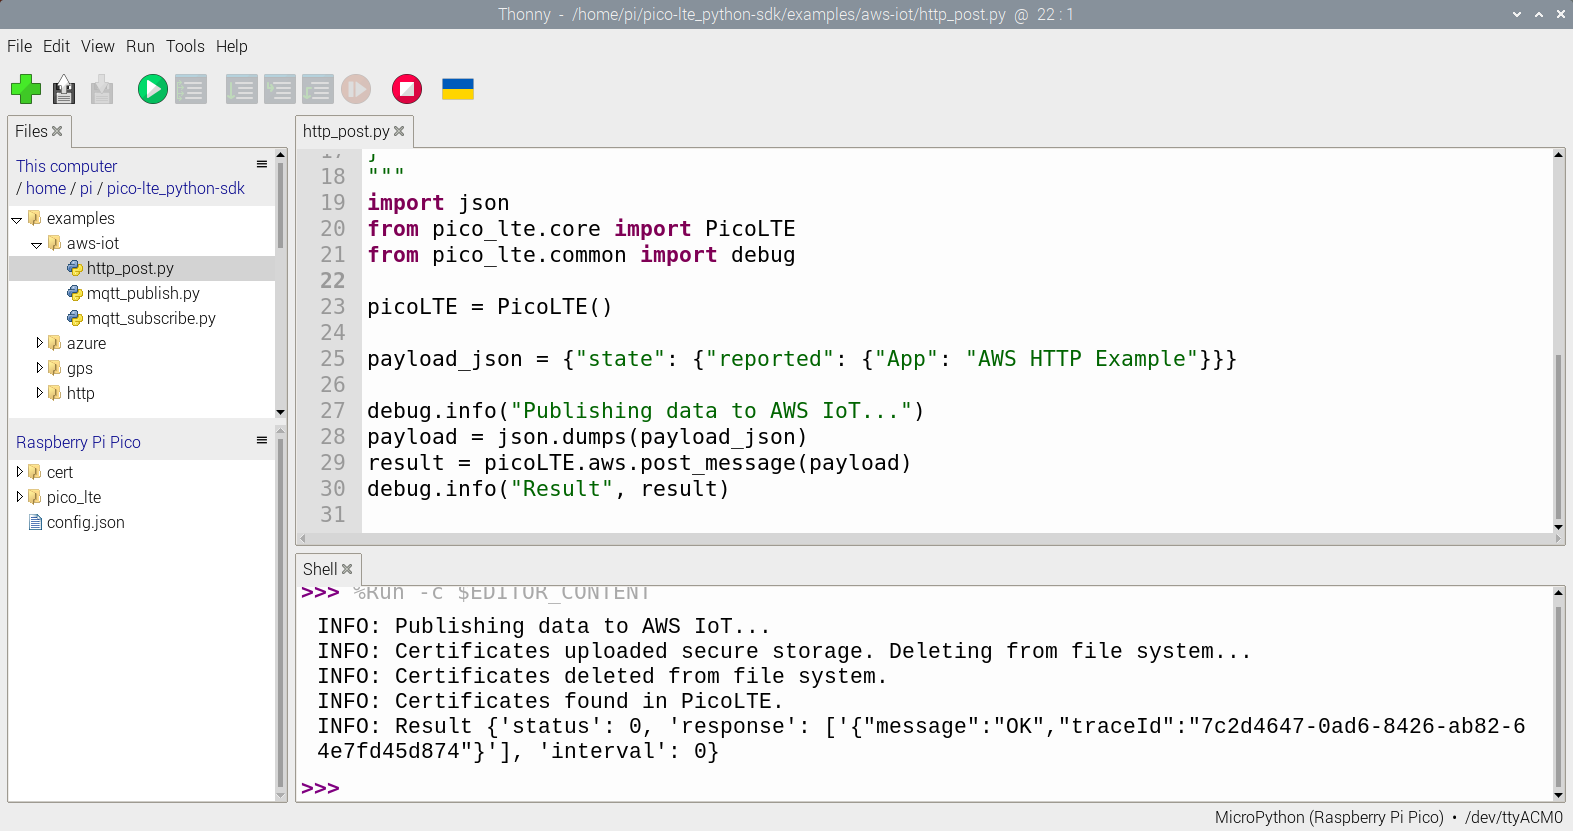
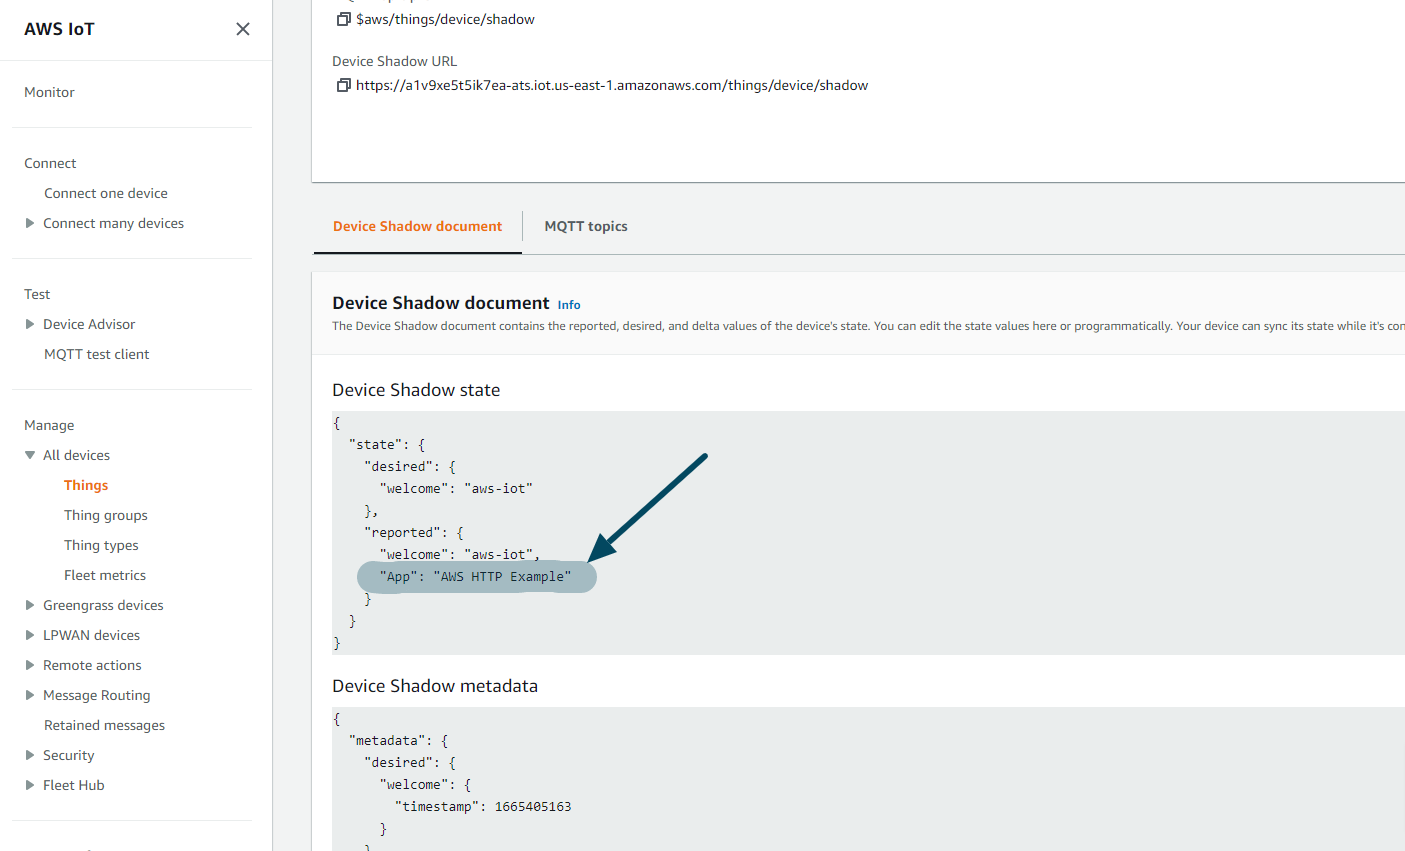
If you have successfully completed all the steps, when you run the program, you should see a log similar to the log below, and you should see the addition of "App": "AWS HTTP Example" in the JSON named Device Shadow state on the page we opened with Step 11 in Amazon Web Services IoT Core.
❗️ Warning
The JSON library is important to us because the AWS IoT Core platform accepts sent messages as JSON.
Troubleshooting
I'm getting "INFO: {'interval': 0, 'status': 1}" in logs, and I cannot see my message in device shadow document
It means that your endpoint address in the config.json file is corrupted or wrong. Please go to the Step 11, and provide the correct HTTP endpoint address information. Check if your file is same as the test configuration file provided above.
Pico LTE sends the message, however, the device shadow document is not changing
If the status value is "1" in the information log you receive, it means that Pico LTE is performing its task correctly. If there is no update in your Device Shadow Document in AWS, first check your topic address in your config.json file. Check that the address of this topic belongs to the publish channel named /update.
It gives me an "Certificates couldn't find in modem!" error
This error can have multiple causes. The most common of these is to upload the certificate files into your Pico LTE without changing the names of the certificate files correctly (as described in Step 9). Another reason is that the installed certificate files are not installed in the cert/ folder in the file system of your Pico LTE. Please check both these conditions and try again.
Register and Activate AWS IoT Service
1. Sign in to the AWS Management Console. If you don't have an account, "How do I create and activate a new AWS account?" follow the article.
2. Type "IoT Core" in the search bar and select the IoT Core service.
3. Click on "Policies → Security" dropdown menu under the "Manage" section in the sidebar. Then, click on the "Create policy" button.
4. Enter the name of the policy. Set the policy effect as Allow, its action and resource as * (which means _all_), and click "Create" button.
5. Click on the "All Devices → Things" option from the side menu. Create a new device using Create things button. Select "Create single thing" for the number of things to be created and click "Next" button.
6. Enter the name of the thing and set the device shadow to "Unnamed shadow (classic)", then click the "Next" button.
7. Select Auto-generate a new certificate (recommended) for the device certificate, and click "Next" button.
8. Select the policy you created and Click "Create thing" button.
9. Save the following certificates with the specified names:
- Device certificate: client.pem
- Private key file: user_key.pem
- Root certificate: cacert.pem
Create a folder named "cert" and move these 3 files into it. Then upload this folder to your root directory of Pico LTE device.
10. Now, its time to find your host address and the topic for publishing messages over MQTT. To do that, please go to the "All devices → Things" page again, and select the thing that you've created in Step 6. Then select the "Device Shadows" tab, and click on the "Classic Shadow".
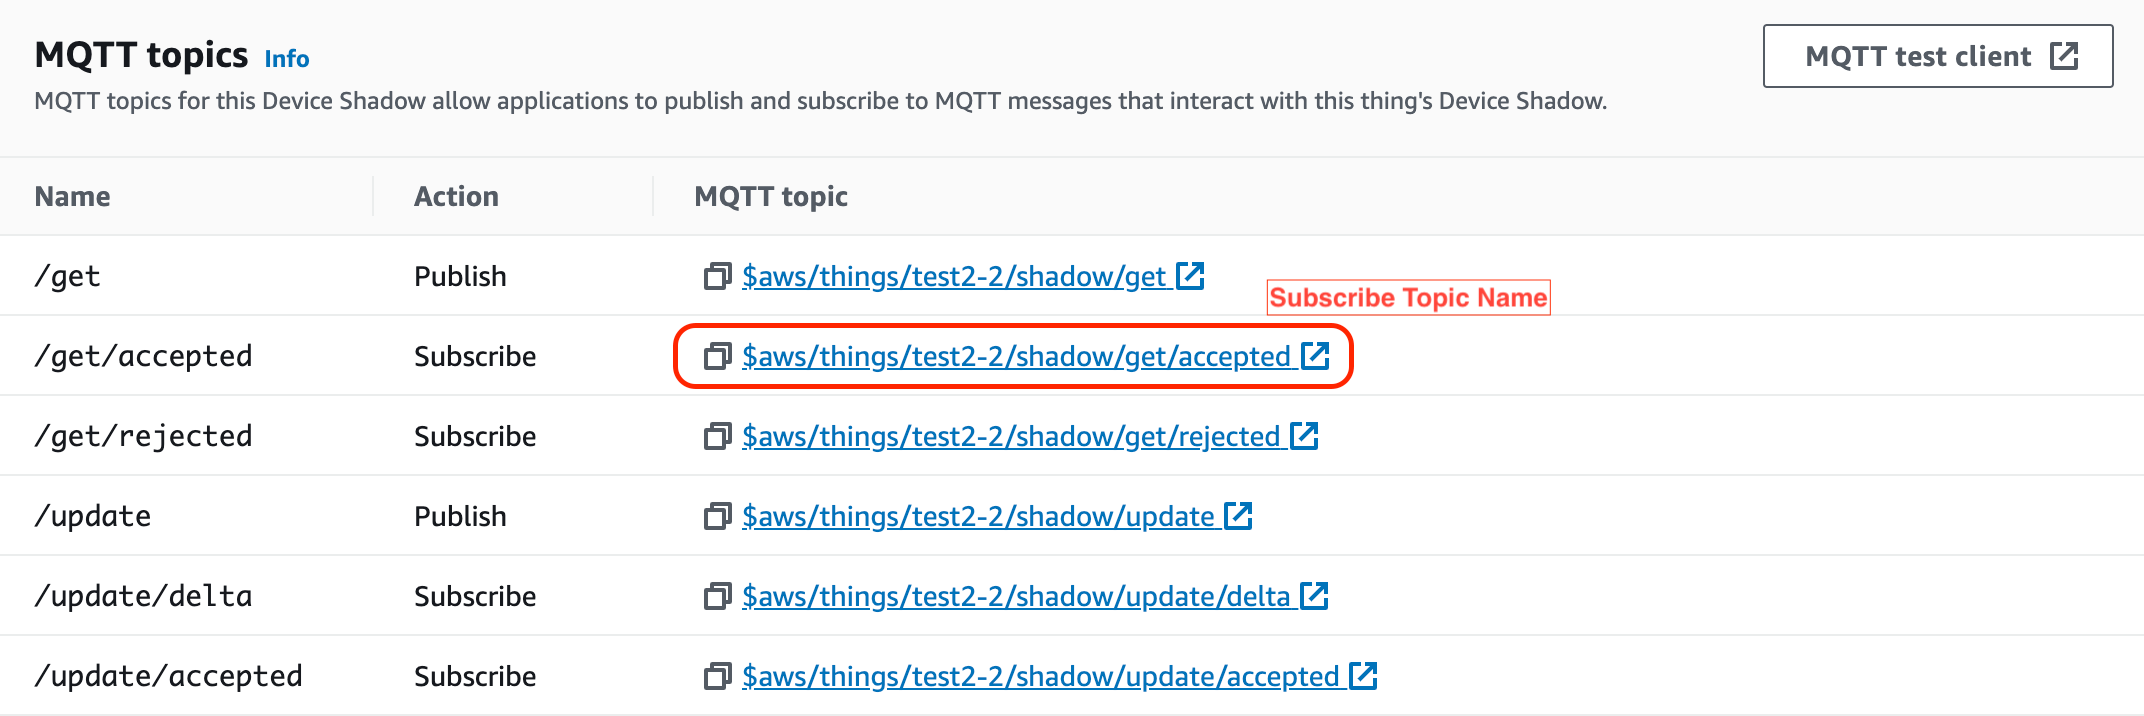
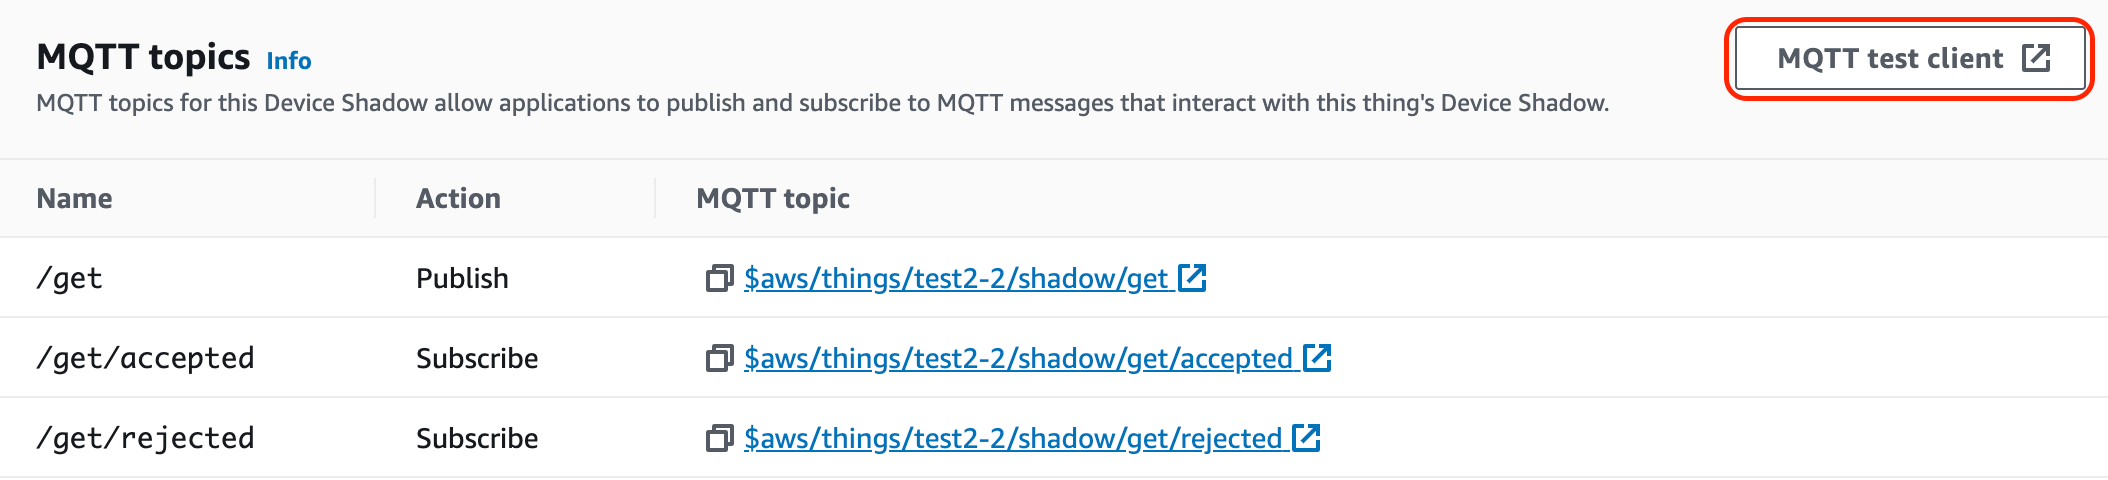
11. Follow the MQTT Topics, and get your host address and subscribe / publish topic nameas shown in the figure below. We're going to put these informations into our config.json file to connect into the MQTT broker.
Publishing Data to AWS using MQTT
Copy the following code block into the config.json file and enter your AWS Host Address and AWS Publish Topic.
{
    "aws": {
        "mqtts": {
                "host": "YOUR_AWS_HOST_ADDRESS",
                "port": 8883,
                "pub_topic": "YOUR_AWS_PUBLISH_TOPIC"
            }
    }
}
Then save this on your Pico LTE device. Since AWS does not need to use any username and password settings, you must provide your device's credential keys as we explained in Step 9.
If you want to change the message you will send, you can open the Python file containing our code and update the PAYLOAD_JSON variable as you wish. After finishing all the steps explained above, you can run the example code with pressing the run button on the Thonny IDE.
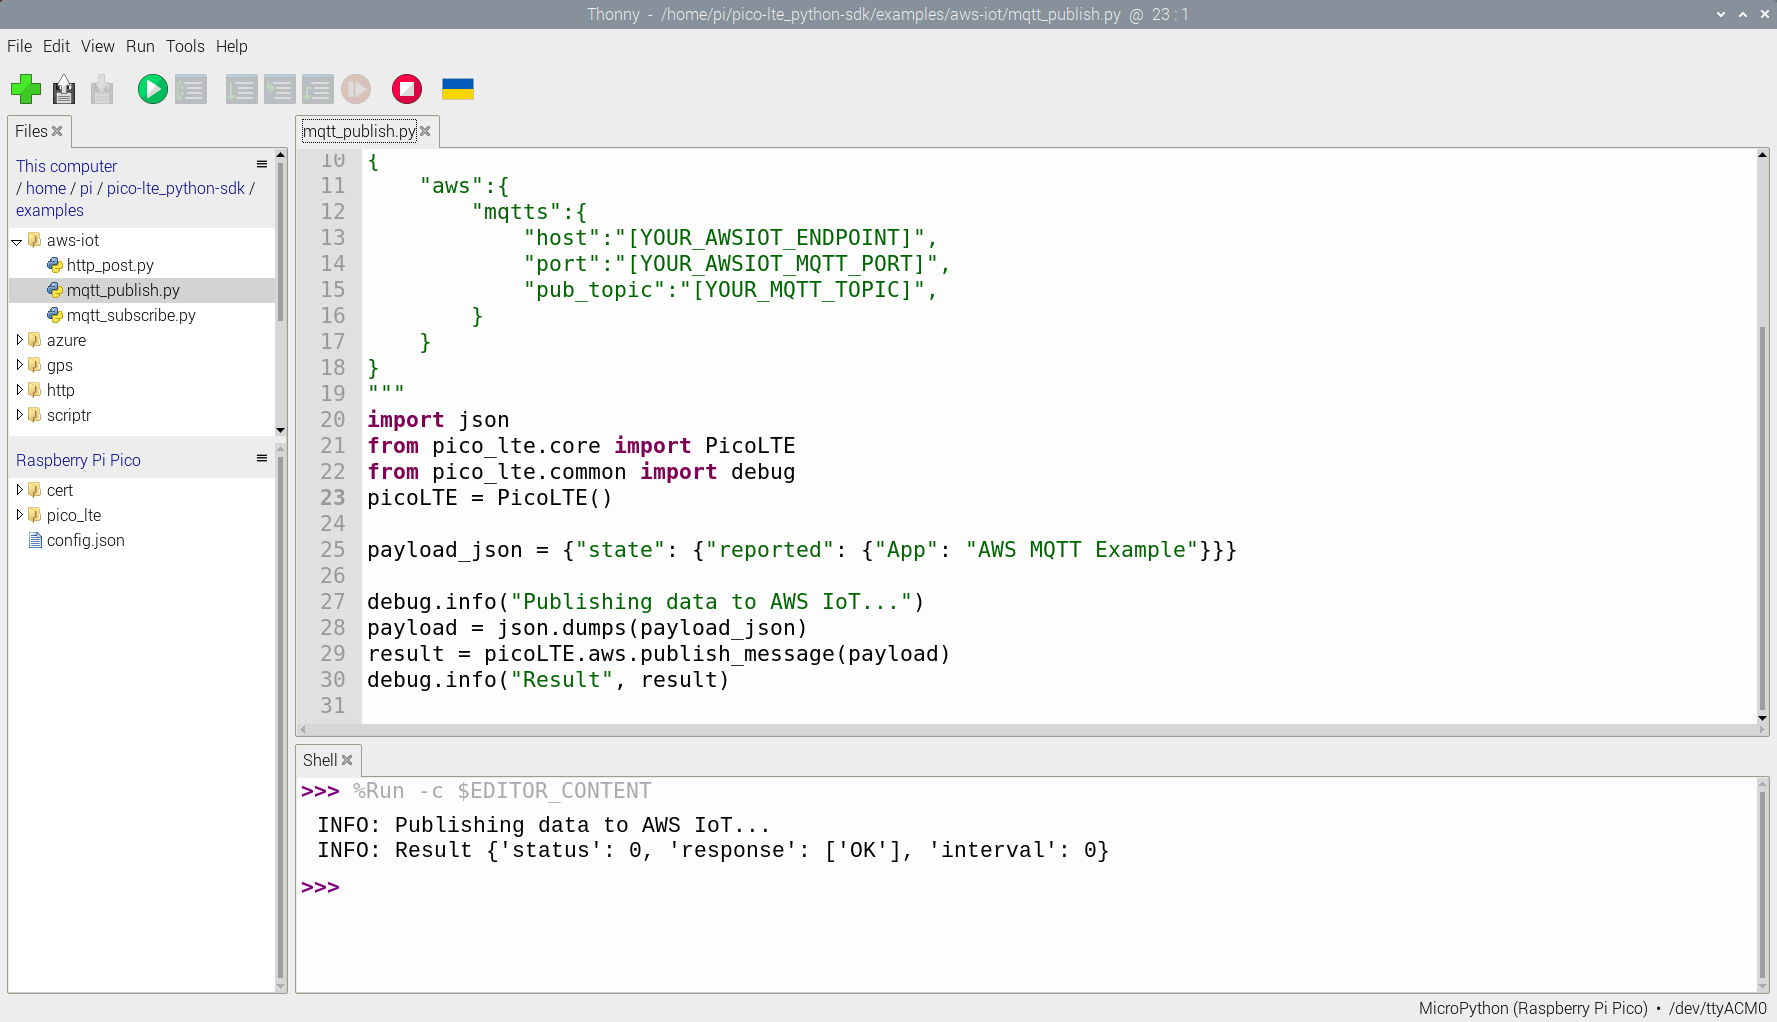
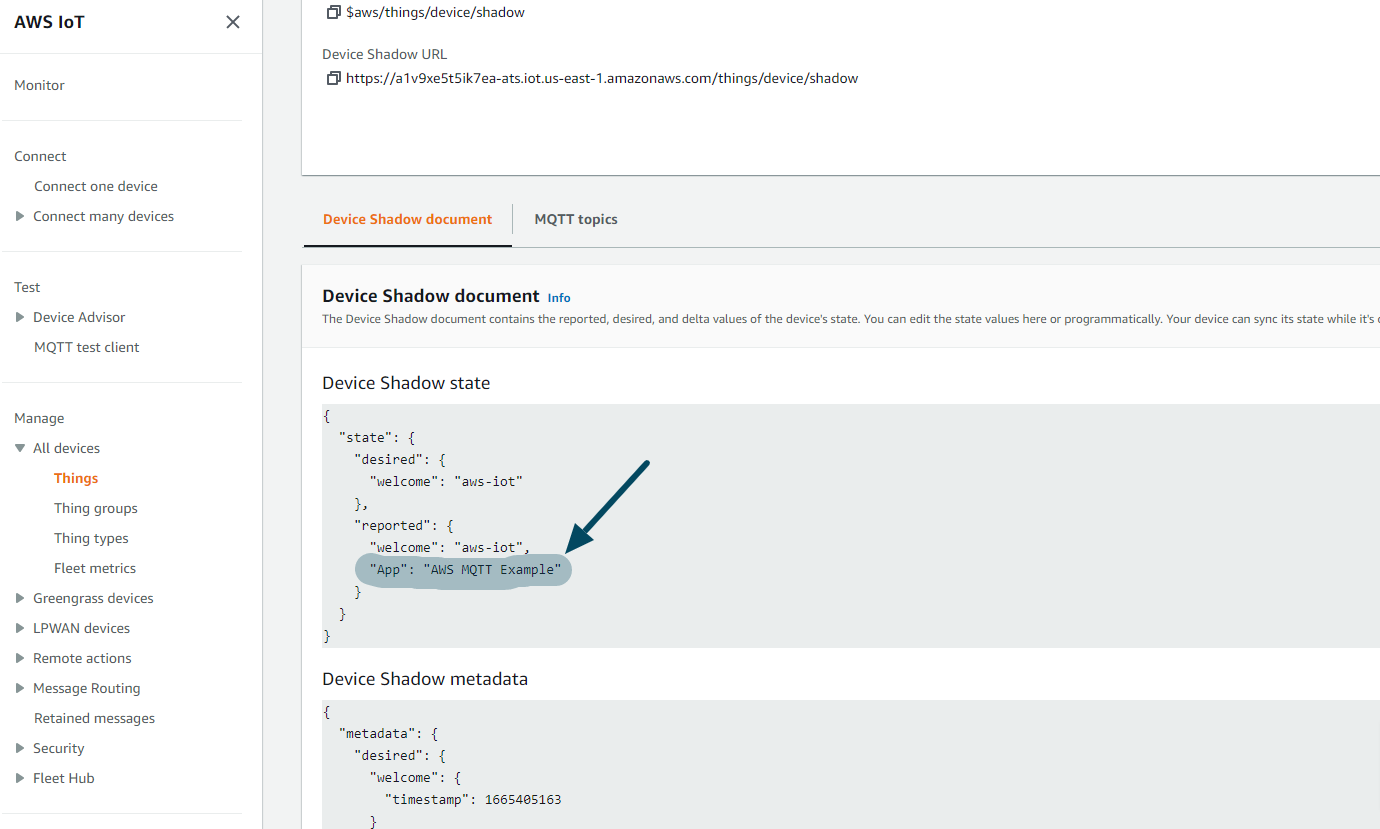
If you have successfully completed all the steps, when you run the program, you should see a log similar to the log below, and you should see the addition of "App": "AWS MQTT Example" in the JSON named Device Shadow state on the page we opened with Step 11 in Amazon Web Services IoT Core.
Subscribing (Cloud-to-Device) AWS using MQTT
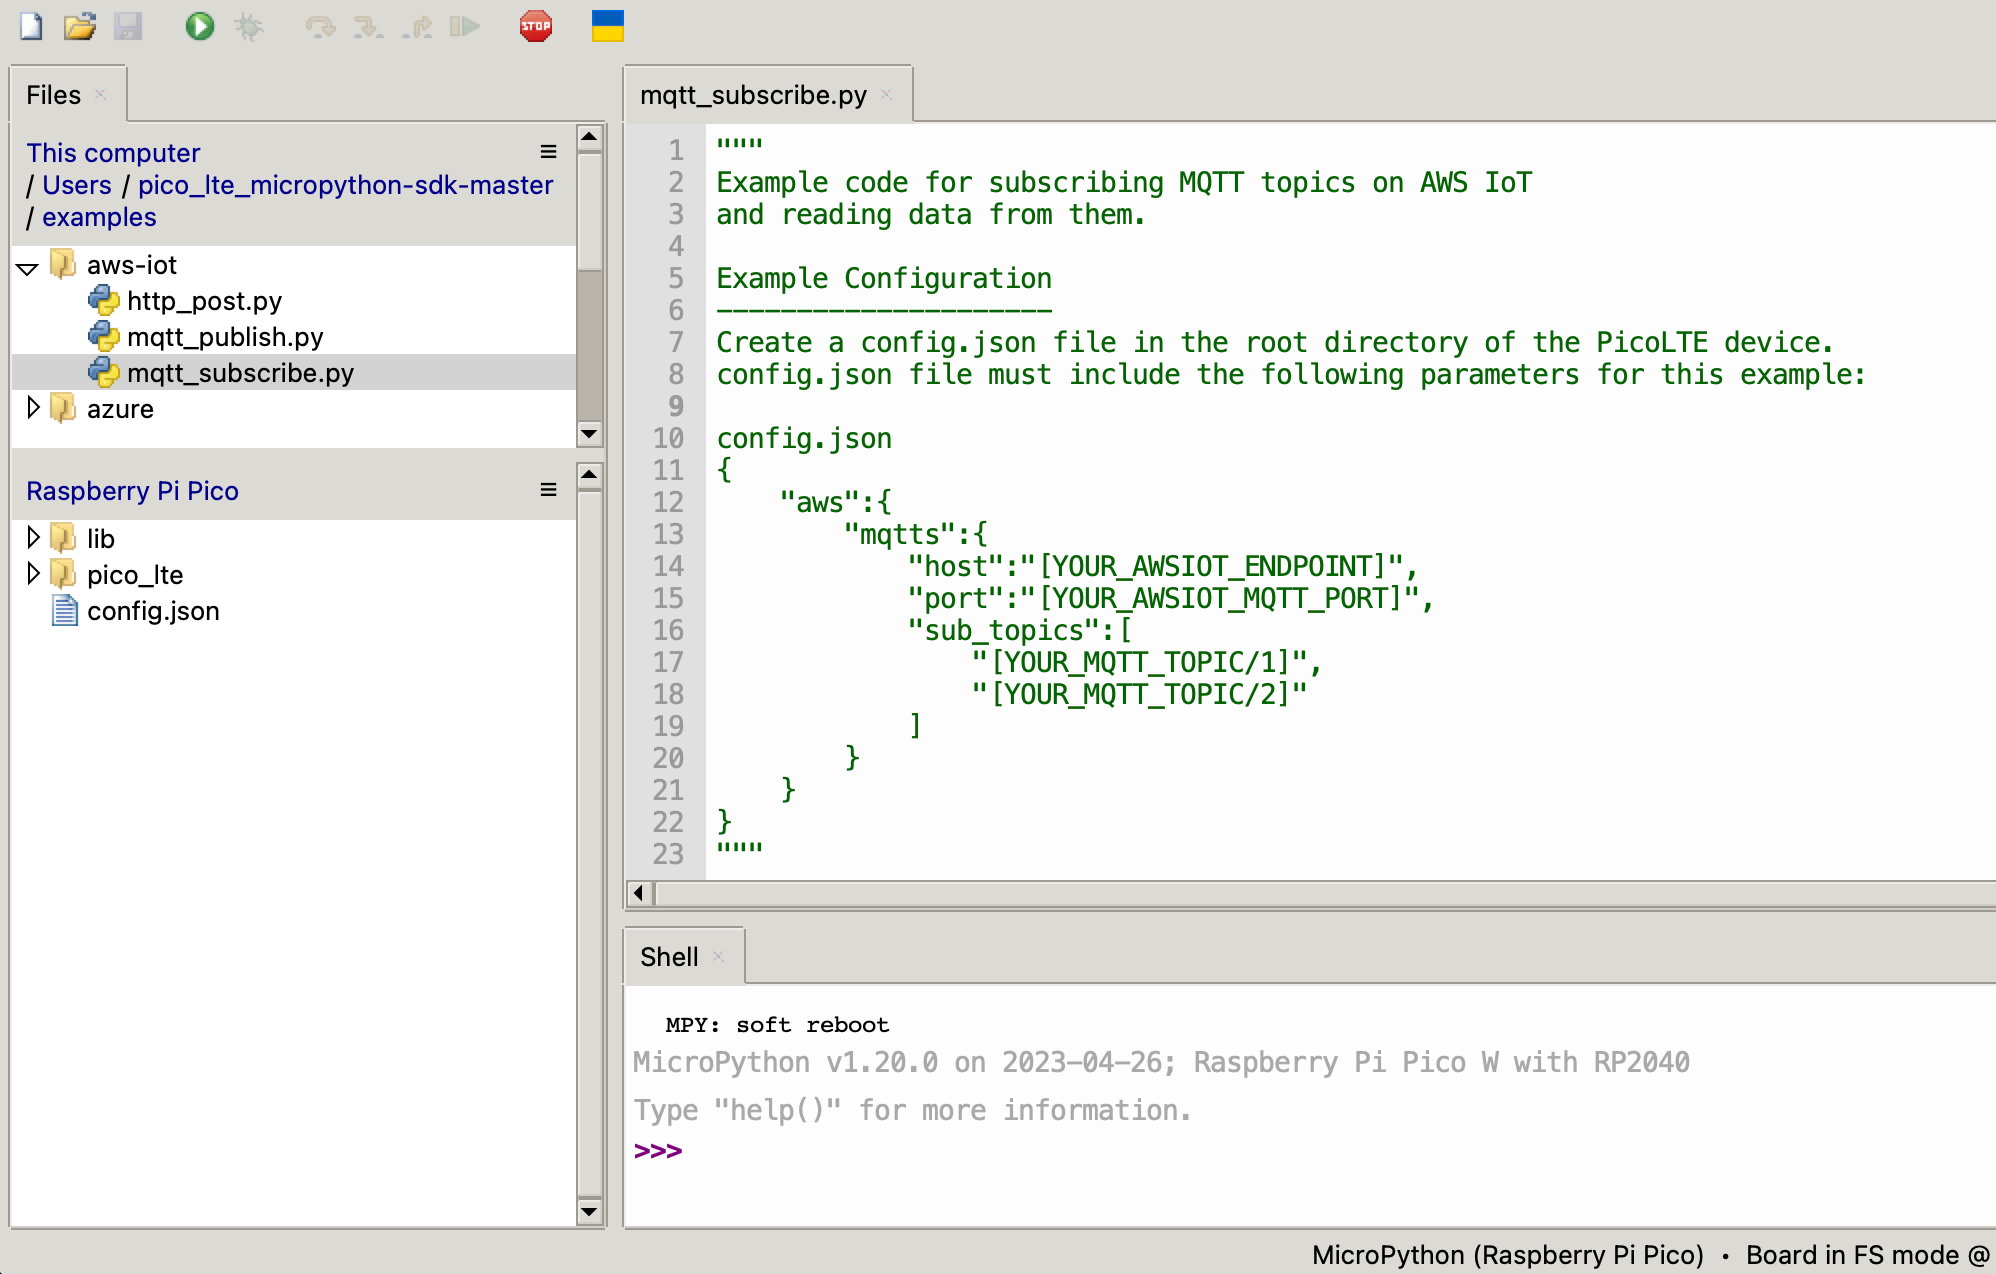
Copy the following code block into the config.json file and enter your AWS Host Address and AWS Subscribe Topic.
{
    "aws": {
        "mqtts": {
            "host": "YOUR_AWS_HOST_ADDRESS",
            "port": 8883,
            "sub_topics":[
                    ["YOUR_MQTT_TOPIC/1", QoS],
                    ["YOUR_MQTT_TOPIC/2", QoS]
                    ]
            }
    }
}
An example subscribe topic parameter:
"sub_topics": [ ["$aws/things/test2-2/shadow/get/accepted", 0] ]Then save this on your Pico LTE device. Since AWS does not need to use any username and password settings, you must provide your device's credential keys as we explained in Step 9.
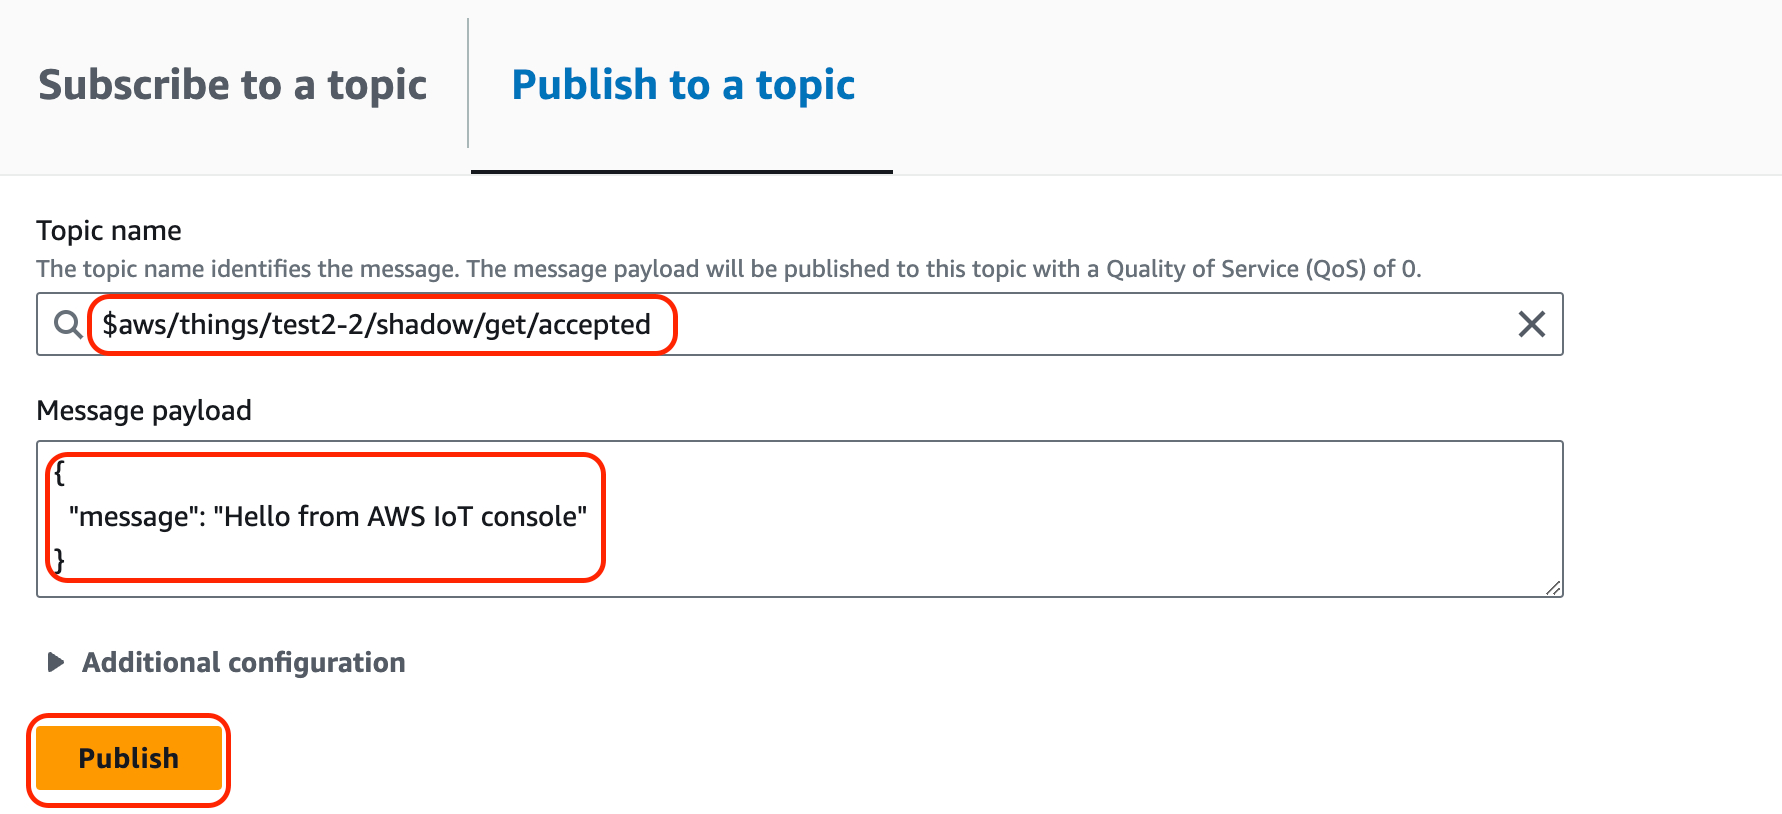
Press “MQTT test client” from same page in step 11.
Press “Publish to a topic”.
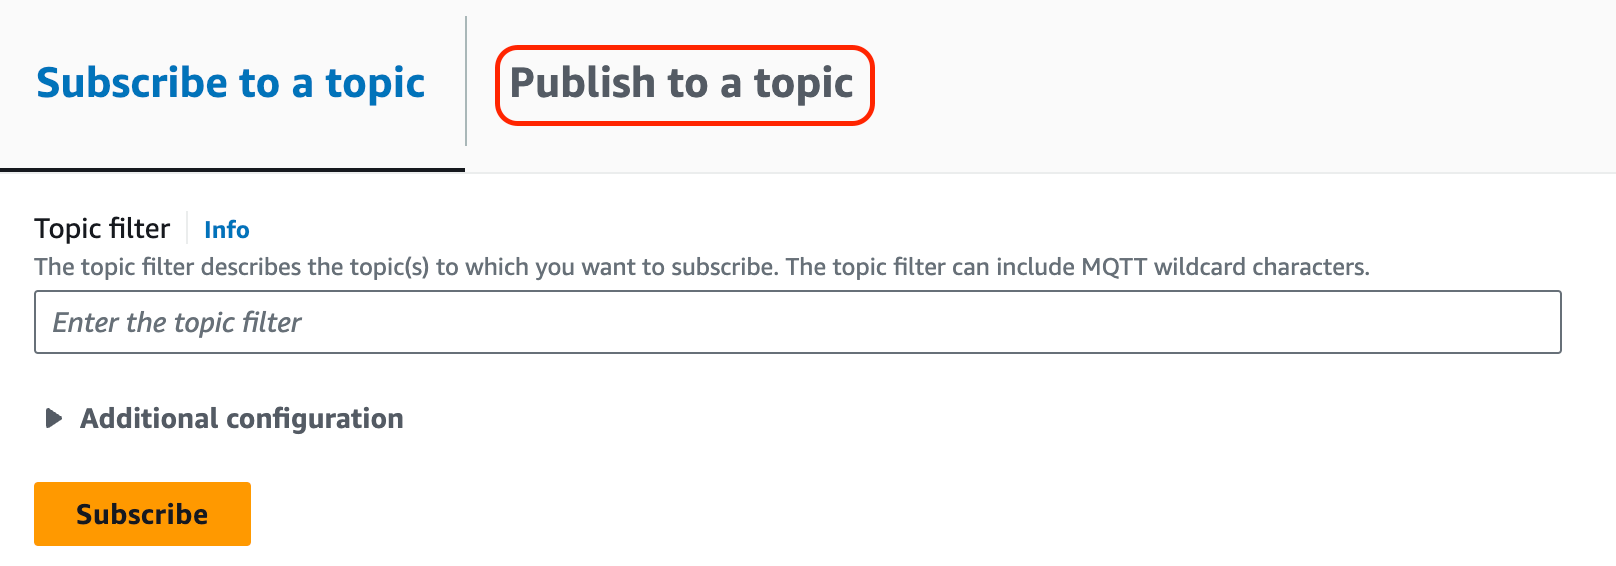
Go to Thonny IDE and run “mqtt_subscribe.py” file.
Turn back to “MQTT test client” page. Fill the topic name and a message payload. Then, click to “Publish”.
If you have successfully completed all the steps, when you run the program, you should see a log similar to the log below.

❗️ Warning
The JSON library is important to us because the AWS IoT Core platform accepts sent messages as JSON.
Troubleshooting
I cannot connect to the broker and logs give me MQTT: None 8883 None information
It means that your config.json file doesn't have host and publish topic fields. Please copy the example config.json file given in the Test section, and replace the relevant fields without corrupting the file.
I can send a JSON message, but AWS IoT Core Device Shadow state doesn't show me the message I sent
If you can see a log such as INFO: {'interval': 0, 'status': 0}, it means that your message has been sent into the host you provided. Please check your Policy settings as shown in Step 5, and configure it as "Allow all". Additionally, please check your PAYLOAD_JSON if it follows the AWS IoT Core's message format rules.
It gives me an Certificates couldn't find in modem! error
This error can have multiple causes. The most common of these is to upload the certificate files into your Pico LTE without changing the names of the certificate files correctly (as described in Step 9.). Another reason is that the installed certificate files are not installed in the cert/ folder in the file system of your Pico LTE. Please check both these conditions and try again.
I'm getting a INFO: {'interval': 0, 'status': 1}. statement and message is not delivered
The fact that status is 1 in the information logs you receive indicates that your operation returned an error. Additionally, if you think that you have not received any additional information about the error at all, the reason for the error is that your certificate files do not allow you to login to the MQTT broker. To fix this, re-install the correct certificates in the cert/ folder with the correct filenames. If this solution did not work, repeat all the steps in the Register and Activate AWS IoT Service section and upload your new certificate files to your Pico LTE device.
Updated 9 months ago