
InitialState Integration
Learn how to integrate ALPON X4 with InitialState to stream and visualize IoT data in real time using a containerized data ingestor.
InitialState is a real-time IoT visualization platform that lets you stream data into customizable dashboards. With ALPON X4, it can be deployed in a fully containerized environment via ALPON Cloud, enabling you to send and monitor device data continuously.
This guide walks through creating a simple InitialState data ingestion container and deploying it on ALPON X4 using ALPON Cloud.
For more details on InitialState, visit the InitialState documentation.
Prerequisites
Before getting started, ensure the following:
- ALPON X4 Device: Powered on, connected to ALPON Cloud, and operational.
- ALPON Cloud Account: Access to ALPON Cloud for container management.
- Docker Installed: On your development machine for building the container image.
- InitialState Account: An InitialState account with to create data buckets and view your dashboards.
Step 1: Create an InitialState Bucket
Before deploying the container, you need to set up a data bucket in InitialState to receive your data.
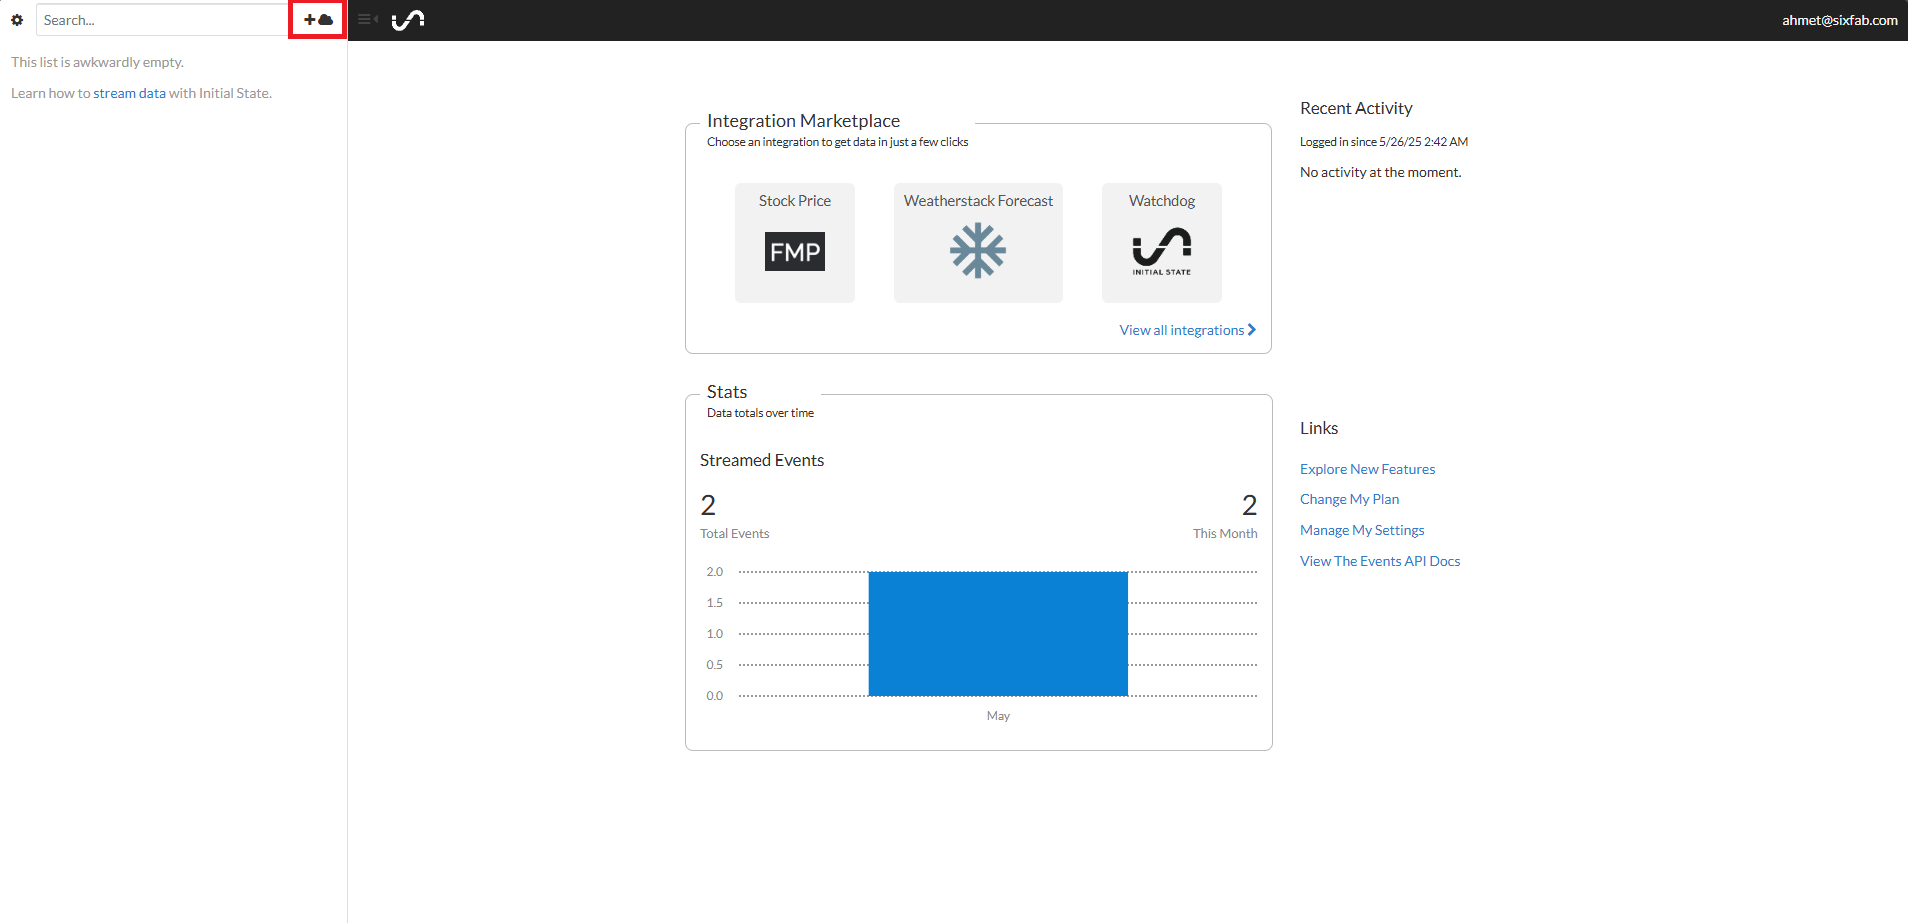
- Log in to your InitialState account.
- From the dashboard, click the plus (+) icon in the top left to create a new data stream bucket.
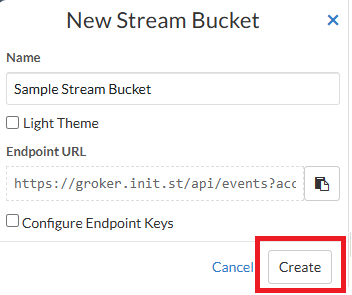
- In the New Stream Bucket dialog, enter a name (e.g. Sample Stream Bucket) and click Create.
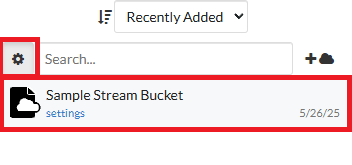
- Your new bucket will appear in the left panel. Click the gear icon next to it to access settings.
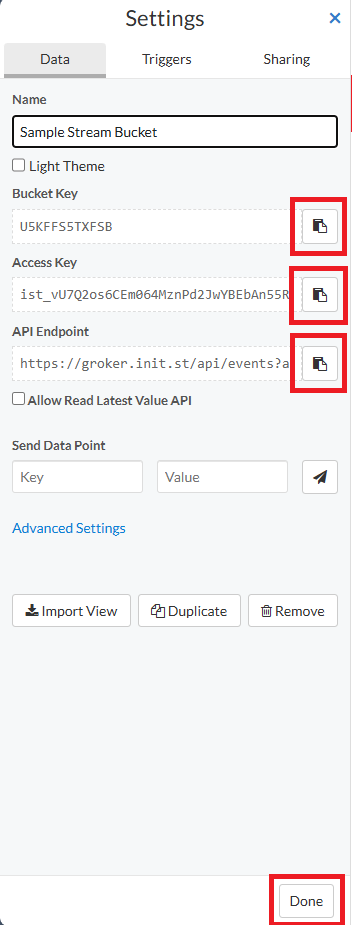
- In the Data tab of the settings window, copy the Bucket Key and Access Key. These will be required later as environment variables.
Step 2: Build the Container
You will now create a container that sends simulated IoT data to your InitialState bucket.
Create the Dockerfile
FROM python:3.11-slim

WORKDIR /app

COPY main.py .

RUN pip install --no-cache-dir requests

CMD ["python", "main.py"]
Create main.py (Data Ingestion Logic)
import os
import requests
import time
import random
from datetime import datetime

url_base = "https://groker.init.st/api/events"

# Get environment variables
access_key = os.getenv('ACCESS_KEY')
bucket_key = os.getenv('BUCKET_KEY')
data_prefix = os.getenv('DATA_PREFIX')

if not access_key or not bucket_key or not data_prefix:
    raise ValueError("ACCESS_KEY, BUCKET_KEY, and DATA_PREFIX environment variables must be set.")

data_types = ['temp', 'humidity', 'pressure', 'motion', 'light']

print("Starting data transmission to InitialState...")

try:
    while True:
        # Select a random data type and generate a random ID for variety
        data_type = random.choice(data_types)
        random_id = random.randint(1, 100)
        value = random.randint(10, 500) # Random value for the data point

        # Construct the data stream name using the prefix, type, and ID
        data_name = f"{data_prefix}_{data_type}_{random_id}"

        # Manually create the query string for the GET request
        full_url = (
            f"{url_base}?accessKey={access_key}"
            f"&bucketKey={bucket_key}"
            f"&{data_name}={value}"
        )

        response = requests.get(full_url)
        print(f"Attempting to send: {full_url}")
        print(f"[{datetime.now().strftime('%H:%M:%S')}] Sent: {data_name}={value} | Status: {response.status_code} {response.reason}")

        time.sleep(5) # Wait for 5 seconds before sending the next data point

except KeyboardInterrupt:
    print("\nData transmission stopped by user.")
except Exception as e:
    print(f"An error occurred: {e}")
Build the Image
- Open a terminal on your development machine and navigate to the folder containing your Dockerfile and main.py.
- Build the Docker image for the data ingestor. It's recommended to build for linux/arm64 if deploying on ALPON X4.
cd <your-folder-containing-Dockerfile-and-main.py>

docker buildx build --platform linux/arm64 --load -t initialstate-ingestor .
Step 3: Push the Image to ALPON Cloud
- Log in to the Sixfab Connect platform, navigate to the Sixfab Registry page
- Click on + Add Container and follow the prompts to push container to Sixfab registry.\
Manage and Deploy ApplicationsVisit the Manage & Deploy Applications page for all the necessary details on pushing your container image to the Sixfab Registry.
Step 4: Deploy the Container
-
Go to the Application section of your asset on Sixfab Connect.
-
Click the + Deploy button to configure and deploy the container.
-
In the Deploy Container window, use the following settings:
-
Container Name:
initialstate -
Image: Select the
initialstate-ingestorimage and tag pushed to the Sixfab Registry. -
Environment: Click "+ Add More" in the environment section and add the following values:
Key Value ACCESS_KEY YOUR_INITIALSTATE_ACCESS_KEY BUCKET_KEY YOUR_INITIALSTATE_BUCKET_KEY DATA_PREFIX alpon_device (or your desired prefix)
-
Click the "+ Deploy" button.
-
Step 5: Verify Data in InitialState
- Open your InitialState dashboard.
- Select the bucket you created (e.g. Sample Stream Bucket).
- You should see live tiles updating with values such as
alpon_device_temp_42,alpon_device_humidity_7, etc. generated by your ALPON X4.
Your ALPON X4 is now integrated with InitialState!
With this setup, you can monitor IoT data streams in real time, build interactive dashboards, and analyze incoming device data.