
Quickstart
Get your AI HAT+ running in minutes. This fast installation guide covers PCIe detection, driver setup, and DXNN quick setup, providing the fastest path to validating your hardware and running your first edge AI inference test.
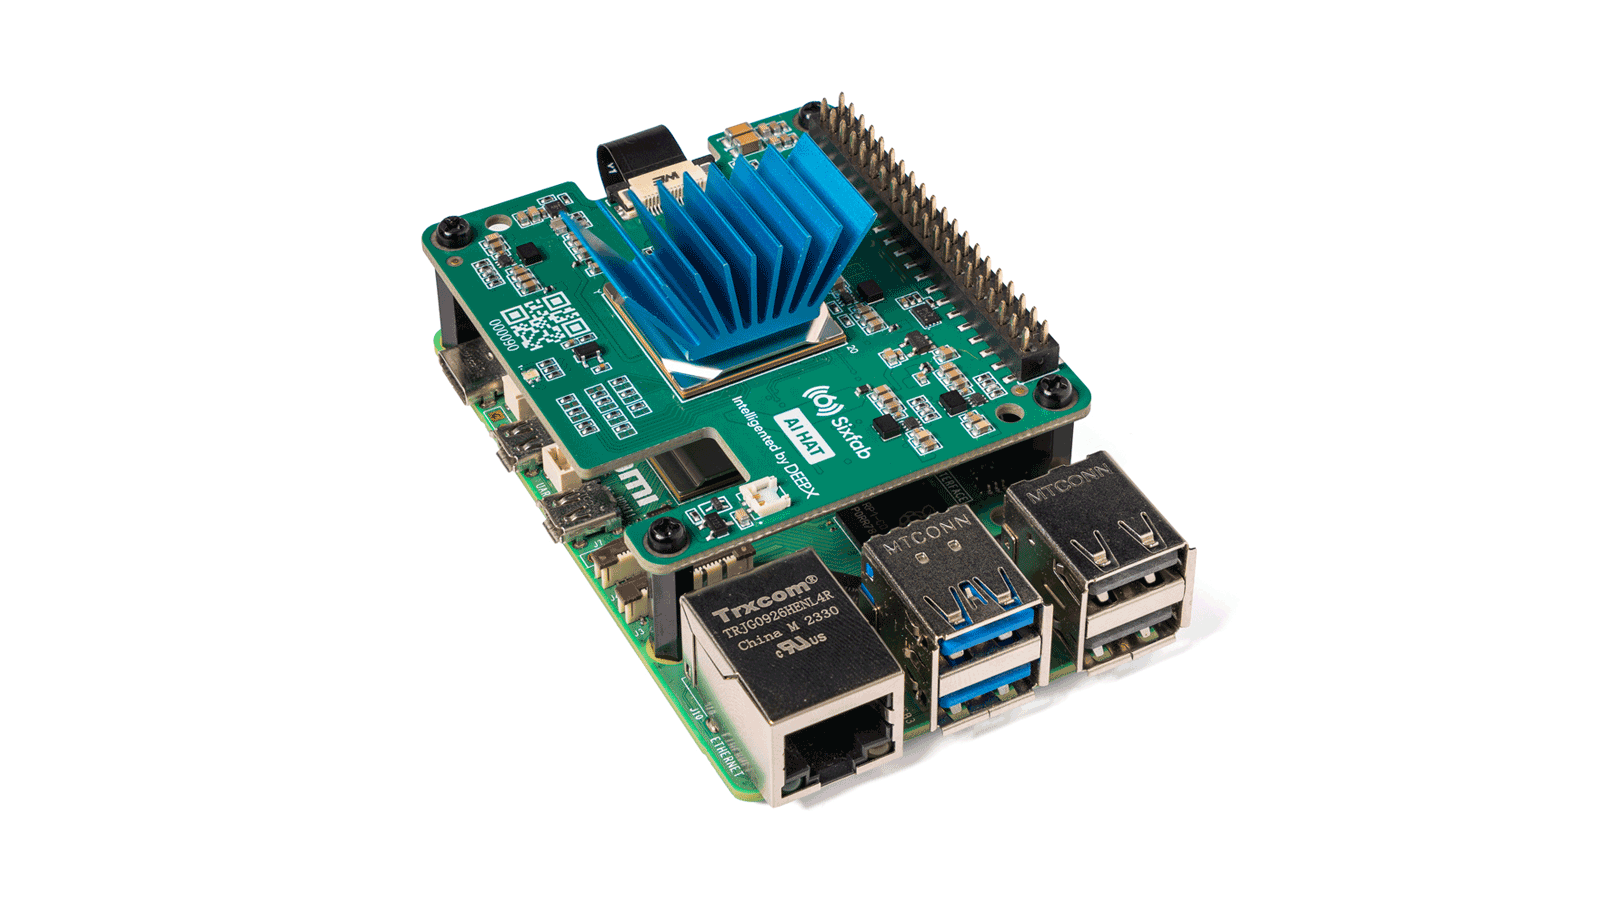
From unboxing to first inference on the Sixfab AI HAT+
Mount the AI HAT+, install the DEEPX runtime with sudo apt install sixfab-dx,
verify the driver, runtime, and on-NPU firmware, then run live object detection on the
DEEPX DX-M1M NPU. Intelligented by DEEPX. Built on Raspberry Pi.
Five steps, about 20 minutes.
Check the prerequisites and supported host platform, power off your
Raspberry Pi 5, mount the Sixfab AI HAT+ with the 16-pin FFC cable,
install the DEEPX runtime with sudo apt install sixfab-dx (5–10 minutes
depending on your connection), verify the driver, runtime, and on-NPU firmware versions
with dxrt-cli -s, then run run_hello_world to launch a live
YOLOv8 detection demo on the NPU.
Before you start
This Quickstart is one of three paths through the AI HAT+ documentation. Pick the one that matches what you want to build. You can always come back here when you need the runtime up and running.
The procedure
Ten steps. Step 1 confirms what you need on hand and which host platform is supported. Steps 2 through 5 assemble the AI HAT+ onto the Raspberry Pi 5 in the order the Sixfab assembly guide specifies: the four spacers, the stacking header, the PCIe cable and the board, then the top screws. The 16-pin PCIe cable ships pre-attached to the AI HAT+, so you only connect its free end to the Pi 5. Step 6 attaches the passive heatsink to the NPU (recommended), Step 7 powers the board and installs the DEEPX runtime, and Step 8 enables PCIe Gen 3 for best throughput (recommended). Steps 9 and 10 verify the stack and run your first inference. Each step's commands are self-contained, so work through them in order.
Check the prerequisites and supported host platform
You already have the Sixfab AI HAT+ kit on hand, and it ships ready to assemble. Before you start, confirm the host platform you'll mount it on and the few items the kit does not include are in front of you.
What you'll need
What's in the box
Open the kit and confirm all six items are present before you start. The AI HAT+ board itself, every fastener, the PCIe cable, and the passive cooler ship in the same box, so nothing else is needed from Sixfab.
The AI HAT+ is not hot-pluggable. Disconnect the USB-C power supply completely before mounting or removing the board. Mounting under power can damage the PCIe FFC connector, the NPU, or the Pi 5.
Install the four M2.5 × 16 mm spacers
The 16-pin PCIe cable ships pre-attached to the AI HAT+ at the factory, so assembly starts on the Raspberry Pi 5 side. The kit's contents and a "Not in the box" reminder are in Step 1. Tighten every fastener finger-tight only.
Place the four M2.5 × 16 mm female-female spacers over the Pi 5's four mounting holes and fasten them from the underside of the Pi 5 with four of the M2.5 × 5 mm plastic screws.
Tighten the M2.5 spacers and screws by hand only, never with a power driver. Each screw threads into the spacer, so over-torquing strips the threads inside the spacer, and a spacer with stripped threads has to be replaced.
Fit the 2×20 stacking header on the Pi 5 GPIO
Press the included 16 mm stacking header (2×20 female) straight down onto the Pi 5's 40-pin GPIO header until it is fully seated on the Pi 5. The header passes the 3.3 V and 5 V rails and the I²C ID lines up to the AI HAT+.
The header is intentionally not tall enough for its plastic body to reach the AI HAT+, and that gap is by design: it lets air move between the two boards instead of sealing the space off. When you mount the board in the next step, the AI HAT+ rests on the four spacers, not on the header. The header only carries the electrical connection. So press it firmly all the way down onto the Pi 5 and leave the clearance above it as it is.
Connect the PCIe cable to the Pi 5 and seat the AI HAT+
The 16-pin FFC cable is already locked into the AI HAT+ at the factory; its free end is labeled Raspberry Pi 5. Hold the AI HAT+ upright above the Pi 5 so the cable reaches the Pi 5's PCIe connector, and connect that end before you lower the board.
1. Seat the cable in the Pi 5. Lift the latch on the Pi 5's PCIe connector, slide the free Raspberry Pi 5 end of the cable in with its label oriented as printed on the cable, seat it fully, and close the latch.
2. Lower the AI HAT+ onto the stack. Align the AI HAT+'s 40-pin female header with the stacking header on the Pi 5, then press the board straight down, firmly and evenly, until the headers are fully mated and the board rests on the four spacers. Let the FFC cable fold neatly into the gap between the two boards as the board comes down.
Only the Raspberry Pi 5 end is connected here; the HAT end stays in the AI HAT+ as shipped. Match the printed Raspberry Pi 5 label to the cable's orientation, insert the cable fully, then close the latch. A reversed or partially seated cable produces no PCIe link, and the NPU will not enumerate.
Secure the AI HAT+ with four M2.5 × 5 mm screws
Fasten the AI HAT+ to the four spacers with the remaining four M2.5 × 5 mm plastic screws, driven from the top of the board. Eight screws now hold the stack: four securing the spacers to the Pi 5 from below, and four securing the AI HAT+ to the spacers from above. The hardware stack is complete. Finger-tight only.
Attach the passive heatsink to the NPU
RecommendedThe AI HAT+ kit includes a passive heatsink, pre-paired with a thermal pad, for the DEEPX NPU. Fitting it keeps the NPU cooler under sustained inference, so it is recommended for most workloads.
Peel the protective film off the thermal pad on the underside of the heatsink, then place the heatsink on the NPU exactly as shown below. Press down gently and evenly on the top of the heatsink so the thermal pad makes full contact across both surfaces.
Connect power and install the driver and DEEPX runtime
Connect the official USB-C power supply to the Raspberry Pi 5 and
boot it, then open a terminal. A single APT command installs the kernel driver, the DEEPX
runtime, and the CLI tools (dxrt-cli, dxtop,
run_model).
When power is first applied, the LED on the AI HAT+ glows white for a moment while the Pi 5 boots, then turns off. That brief flash followed by the LED going dark is normal; the board does not have a dedicated always-on power LED at this stage. For the full LED state reference, see LED indicators in the Specifications.
# 1. Refresh the package index
sudo apt update

# 2. Install the Sixfab APT repository
sudo apt install apt-repo-sixfab

# 3. Refresh again, then install the DEEPX runtime
sudo apt update && sudo apt install sixfab-dx
When the installer prompts Do you want to continue? [Y/n], type
Y and press Enter. The driver compiles against your running
kernel, so the first install can take 5–10 minutes depending on connection speed.
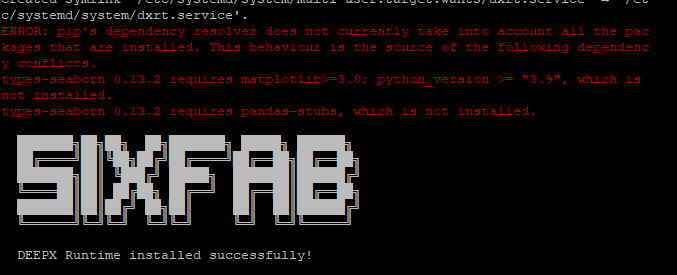
As shown in the image below, encountering Python version issues is not a critical
problem. Version incompatibilities with Python libraries on the system can be resolved by
using pip to downgrade or upgrade them as needed. The
DEEPX Runtime installed successfully! line at the end confirms the install
completed.
Sanity check: the runtime is reachable and the NPU enumerates
# 1. Confirm the runtime CLI is on PATH
dxrt-cli --version

# 2. Confirm the NPU enumerates over PCIe
lspci | grep -i deepx
lspci doesn't list a DEEPX entry
Power off, reseat the 16-pin FFC cable at the Pi 5 end (latch fully closed),
and power back on. If the entry still doesn't appear, run
lsmod | grep -i dx to confirm the kernel module loaded, and
dmesg | grep -i dx for driver errors. See
Troubleshooting.
Enable PCIe Gen 3 for optimal performance
RecommendedThe Raspberry Pi 5 negotiates the PCIe link at Gen 2 by default. To get the best inference throughput from the DEEPX NPU, switch the link to Gen 3 with two lines in the boot configuration file.
Open the boot configuration file:
sudo nano /boot/firmware/config.txt
Add the following lines at the end of the file:
dtparam=pciex1
dtparam=pciex1_gen=3
Save and exit (Ctrl+X, then Y, then Enter), then reboot:
sudo reboot
After the reboot, the next step runs dxrt-cli -s, where the
PCIe line should report Gen3 X1. If it still shows Gen 2,
re-check the two dtparam lines in /boot/firmware/config.txt and
reboot again.
Verify driver, runtime, and on-NPU firmware
Before running inference, confirm that the kernel driver, the DEEPX runtime,
and the firmware on the DEEPX NPU module are at the versions you expect.
dxrt-cli -s prints a complete hardware and firmware status report
in one shot.
The DEEPX runtime, the kernel driver, and the on-NPU firmware all carry
independent version numbers. A drift between any two shows up later as silent
CPU fallback, version-mismatch errors when loading .dxnn files,
or unstable inference. Catching it here is much cheaper than catching it
after deployment.
# Full hardware and firmware status report
dxrt-cli -s
What each field in the report confirms
The runtime returns a version-mismatch error when loading a .dxnn
file if the on-NPU firmware is too old. See the FAQ entry
How do I receive SDK and driver updates?
and, if a standalone firmware update is required, the
dxrt-cli -u fw.bin flash command (covered alongside the runtime
install in Step 7) handles the update.
Run your first inference on the NPU
The sixfab-dx package ships with a pre-compiled YOLOv8 detection
demo wired up to run_hello_world. A single command launches it on the
NPU and opens a window with bounding boxes drawn in real time.
This demo opens a graphical window, so run it on the Pi 5 desktop (a connected monitor or a VNC session) rather than over a plain SSH session.
run_hello_world
A window opens showing the live feed with bounding boxes drawn around detected objects in real time.
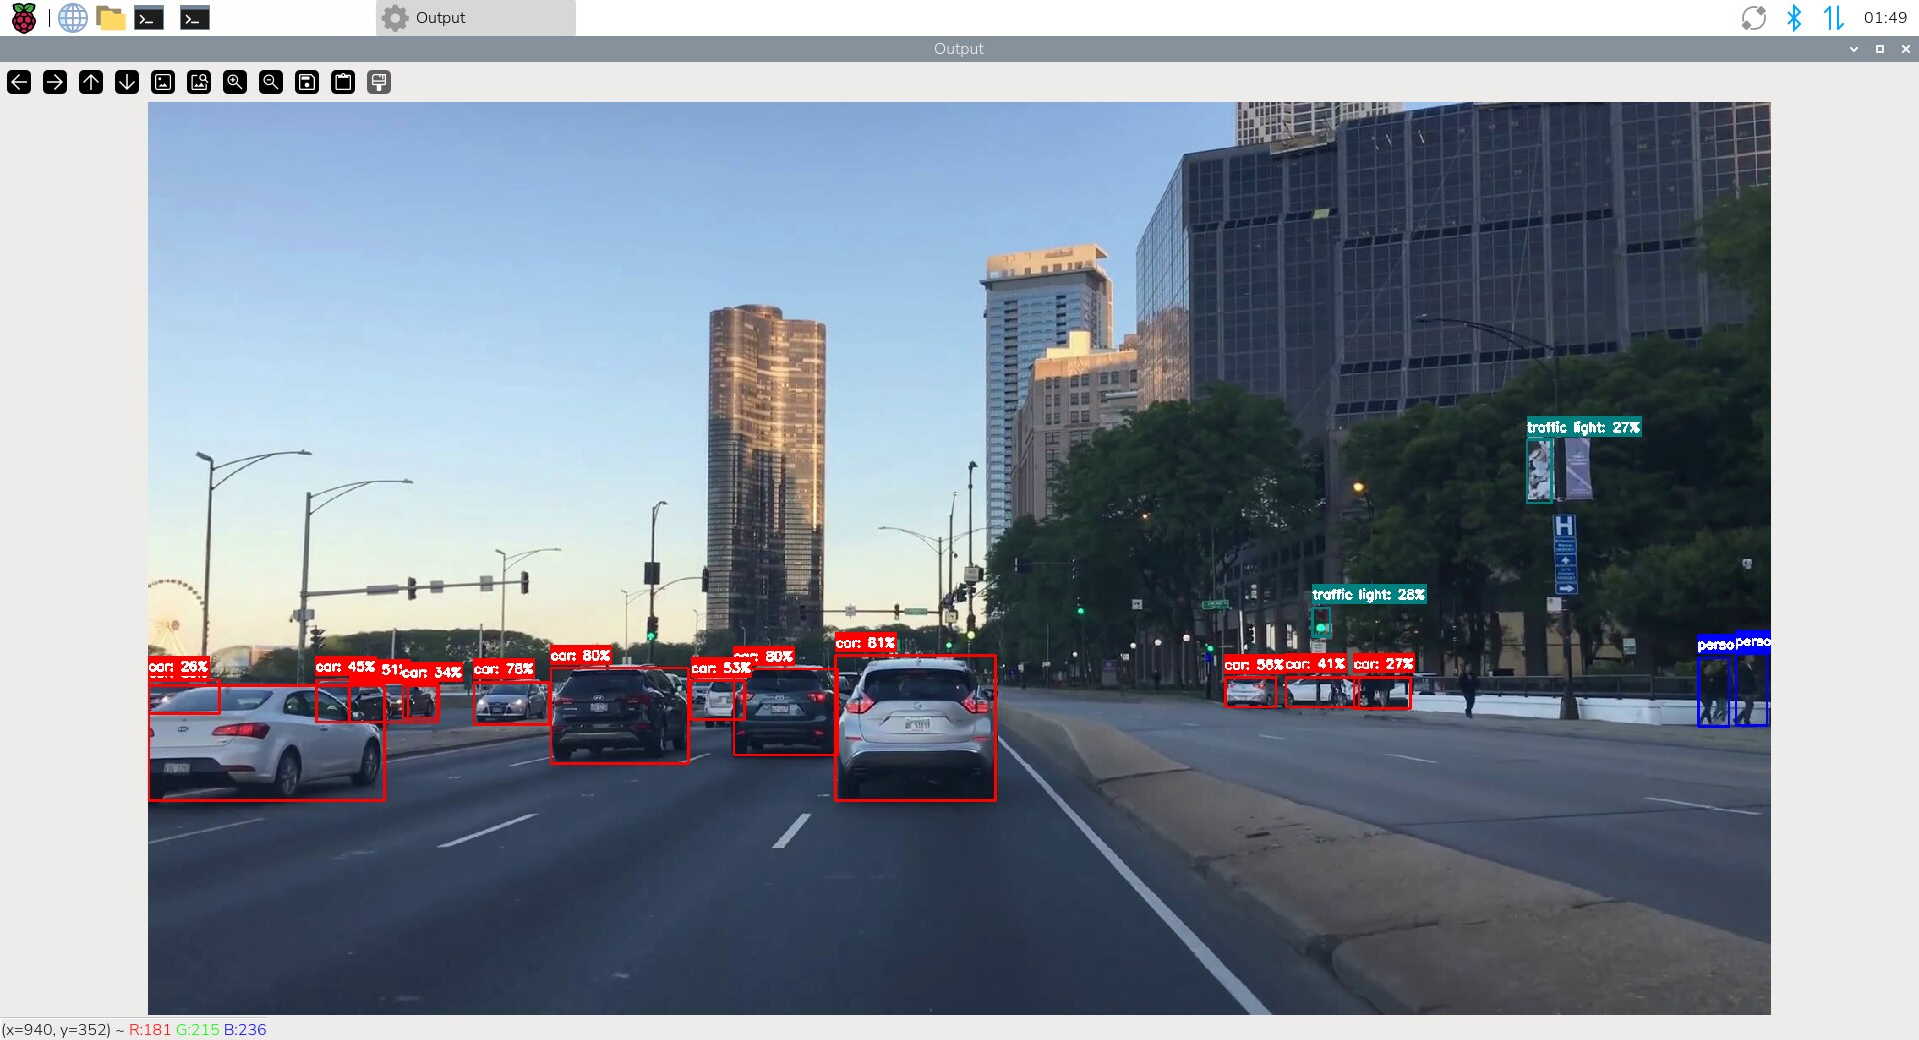
A live detection window with bounding boxes means YOLOv8 is executing on the DEEPX NPU, not on the Raspberry Pi CPU. That's the AI HAT+ doing its job.
Watch the NPU work in real time
Open a second terminal while the demo is running and launch dxtop.
It prints per-core utilisation, voltage, clock, and temperature, much like
htop for the NPU.
dxtop
Press q to quit.
Where to next
YOLOv8 is now running on the DEEPX NPU. The hardware and runtime stack are healthy, and the next chapter is AI Model Deployment: choose more pre-compiled models, bring your own trained model to the NPU, or instrument the deployment for production.
dxrt-cli and dxtop. Read NPU telemetry, surface
it to dashboards, and watch deployments in real time.
Monitor the NPU →
Updated 27 days ago