Setting Up MCC USB DAQ Devices
Learn to configure MCC USB DAQ devices with Uldaq for seamless data acquisition.
This guide provides step-by-step instructions on setting up and deploying the MCC USB Series Data Acquisition (DAQ) system using Uldaq on the ALPON X4 micro-edge computer. It explains how to prepare the environment, build and test the Docker container, and deploy the setup through the Sixfab Connect platform. By following these steps, you will enable reliable data acquisition and analysis capabilities for your ALPON X4.
Requirements
- MCC USB DAQ Device: Ensure the device is compatible with the Uldaq library.
Step 1: Preparing the for Uldaq
To use the DAQ with ALPON X4, you will create a Docker container that installs and configures Uldaq, an open-source library for MCC DAQ devices.
Below is a Dockerfile that installs Uldaq and its dependencies. It prepares a runtime environment for data acquisition on container:
FROM bitnami/minideb:latest
RUN apt-get update && apt-get install -y \
    tar \
    bzip2 \
    build-essential \
    wget \
    curl \
    libusb-1.0-0-dev \
    python3 \
    python3-pip \
    python-is-python3 \
    procps \
    git \
    && rm -rf /var/lib/apt/lists/*
WORKDIR /home
RUN mkdir uldaq
WORKDIR uldaq
RUN wget -N https://github.com/mccdaq/uldaq/releases/download/v1.2.1/libuldaq-1.2.1.tar.bz2 && \
    tar -xvjf libuldaq-1.2.1.tar.bz2 && \
    rm -rf libuldaq-1.2.1.tar.bz2
WORKDIR /home/uldaq/libuldaq-1.2.1
RUN ./configure && make && make install
RUN pip3 install --break-system-packages setuptools wheel uldaq
WORKDIR /home
CMD ["tail", "-f", "/dev/null"]
Step 2: Build and Test the Docker Image Locally
To ensure the container is fully compatible with your MCC USB DAQ device, a local test is essential. This allows any necessary adjustments to be made before deployment.
Before deploying the image to Sixfab Connect, ensure to build and test it on your personal computer. Make sure Docker is installed to successfully build and run the image.
Build the Docker Image
Run the following command to build the Docker image:
docker buildx build -t uldaq-container .Run the Container Locally
To test the container with your MCC USB DAQ device, use the following command:
docker run --privileged --device=/dev/bus/usb -it uldaq-container- The --privileged flag grants the container access to hardware resources.
- The --device=/dev/bus/usb option mounts the USB device interface inside the container.
Verify that the container can interact with the DAQ device by running a test script or Uldaq commands.
Step 3: Build and Push to Sixfab Registry
Once the test script or Uldaq commands confirm the container's functionality, the next step is to prepare it for deployment on the ALPON X4 by building it specifically for the ARM64 architecture on your personal computer.
To deploy the container on ALPON X4, the image must be built on your personal computer for the ARM64 architecture.
docker buildx build --platform=linux/arm64 -t uldaq-container .Push to Sixfab Registry:
- Log in to the Sixfab Connect platform, navigate to the Sixfab Registry page
- Click on + Add Container and follow the prompts to push container to Sixfab registry.\
Manage and Deploy ApplicationsVisit the Manage & Deploy Applications page for all the necessary details on pushing your container image to the Sixfab Registry.
Step 4: Deployment
Once the container image is uploaded to the Sixfab Connect registry, deploy it as follows:
-
Go to the Application section of your asset on Sixfab Connect.
-
Click the + Deploy button to configure and deploy the container.
-
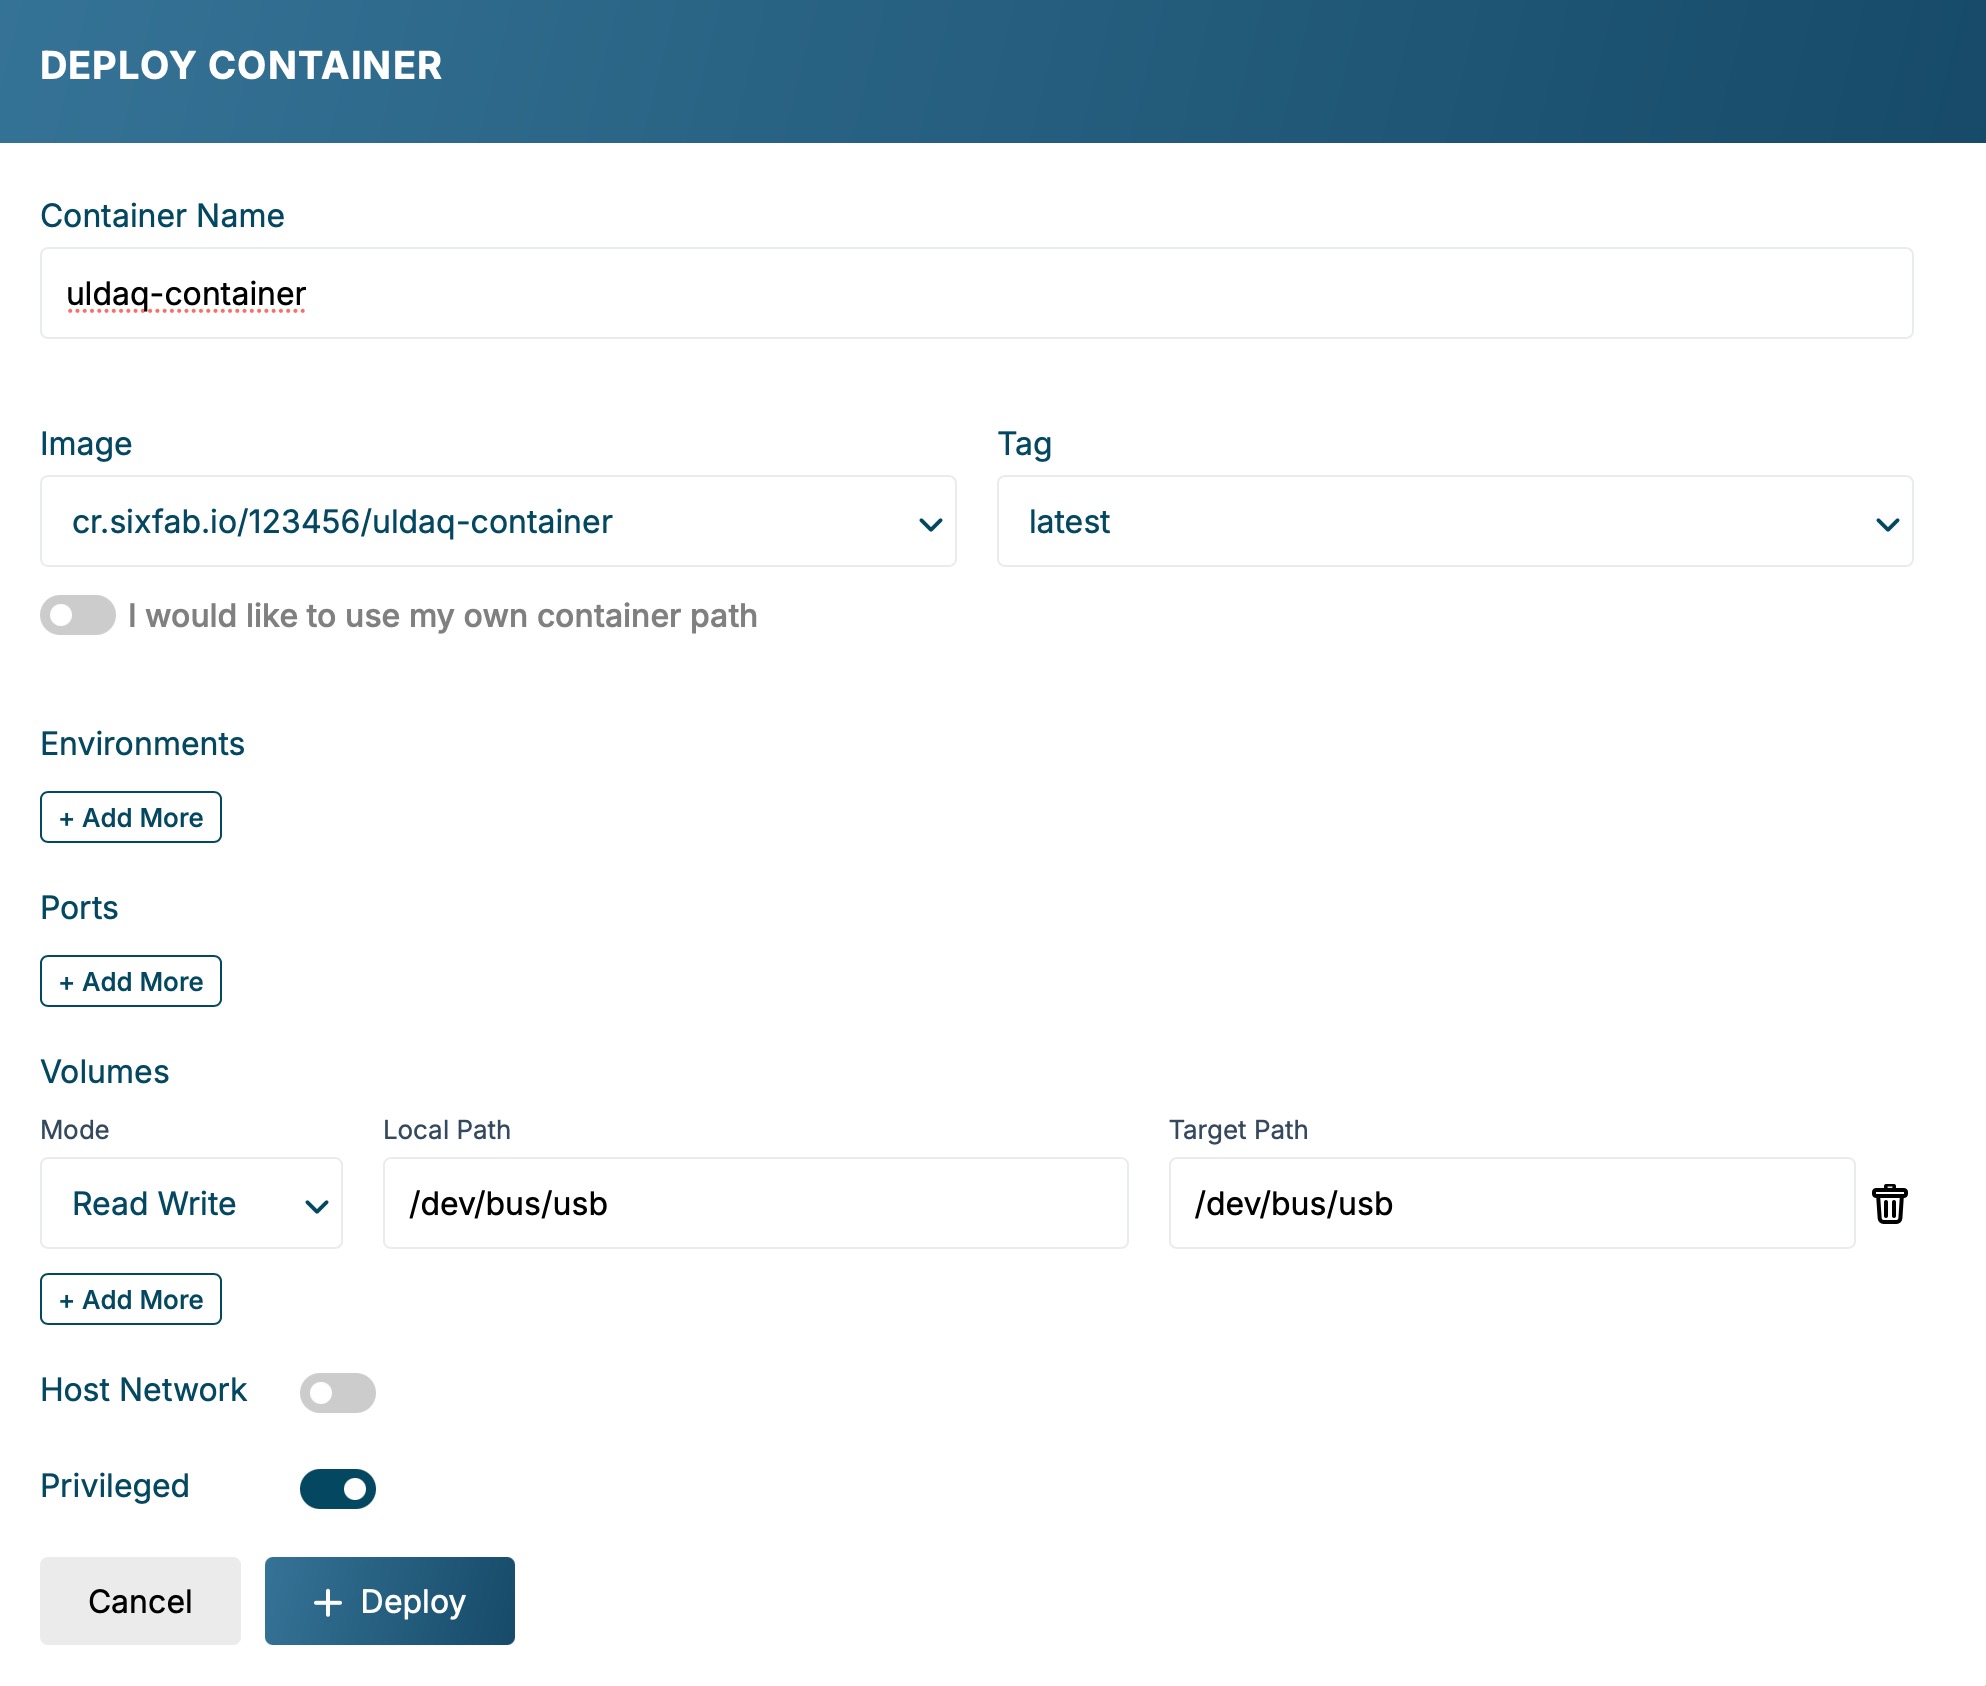
In the Deploy Container window, use the following settings:
-
Container Name: Enter the application name (e.g., "uldaq-container").
-
Image: Select the Uldaq container image and tag pushed to the Sixfab Registry.
-
Volumes: Click "+ Add More" in the Volumes section and configure the following volumes:
Read/Write Local Path Target Path Read/Write /dev/bus/usb /dev/bus/usb
-
Enable the Privileged option to grant the container elevated access.
-
Click the "+ Deploy" button to deploy.

-
Step 5: Verify and Use the Application
After deployment:
-
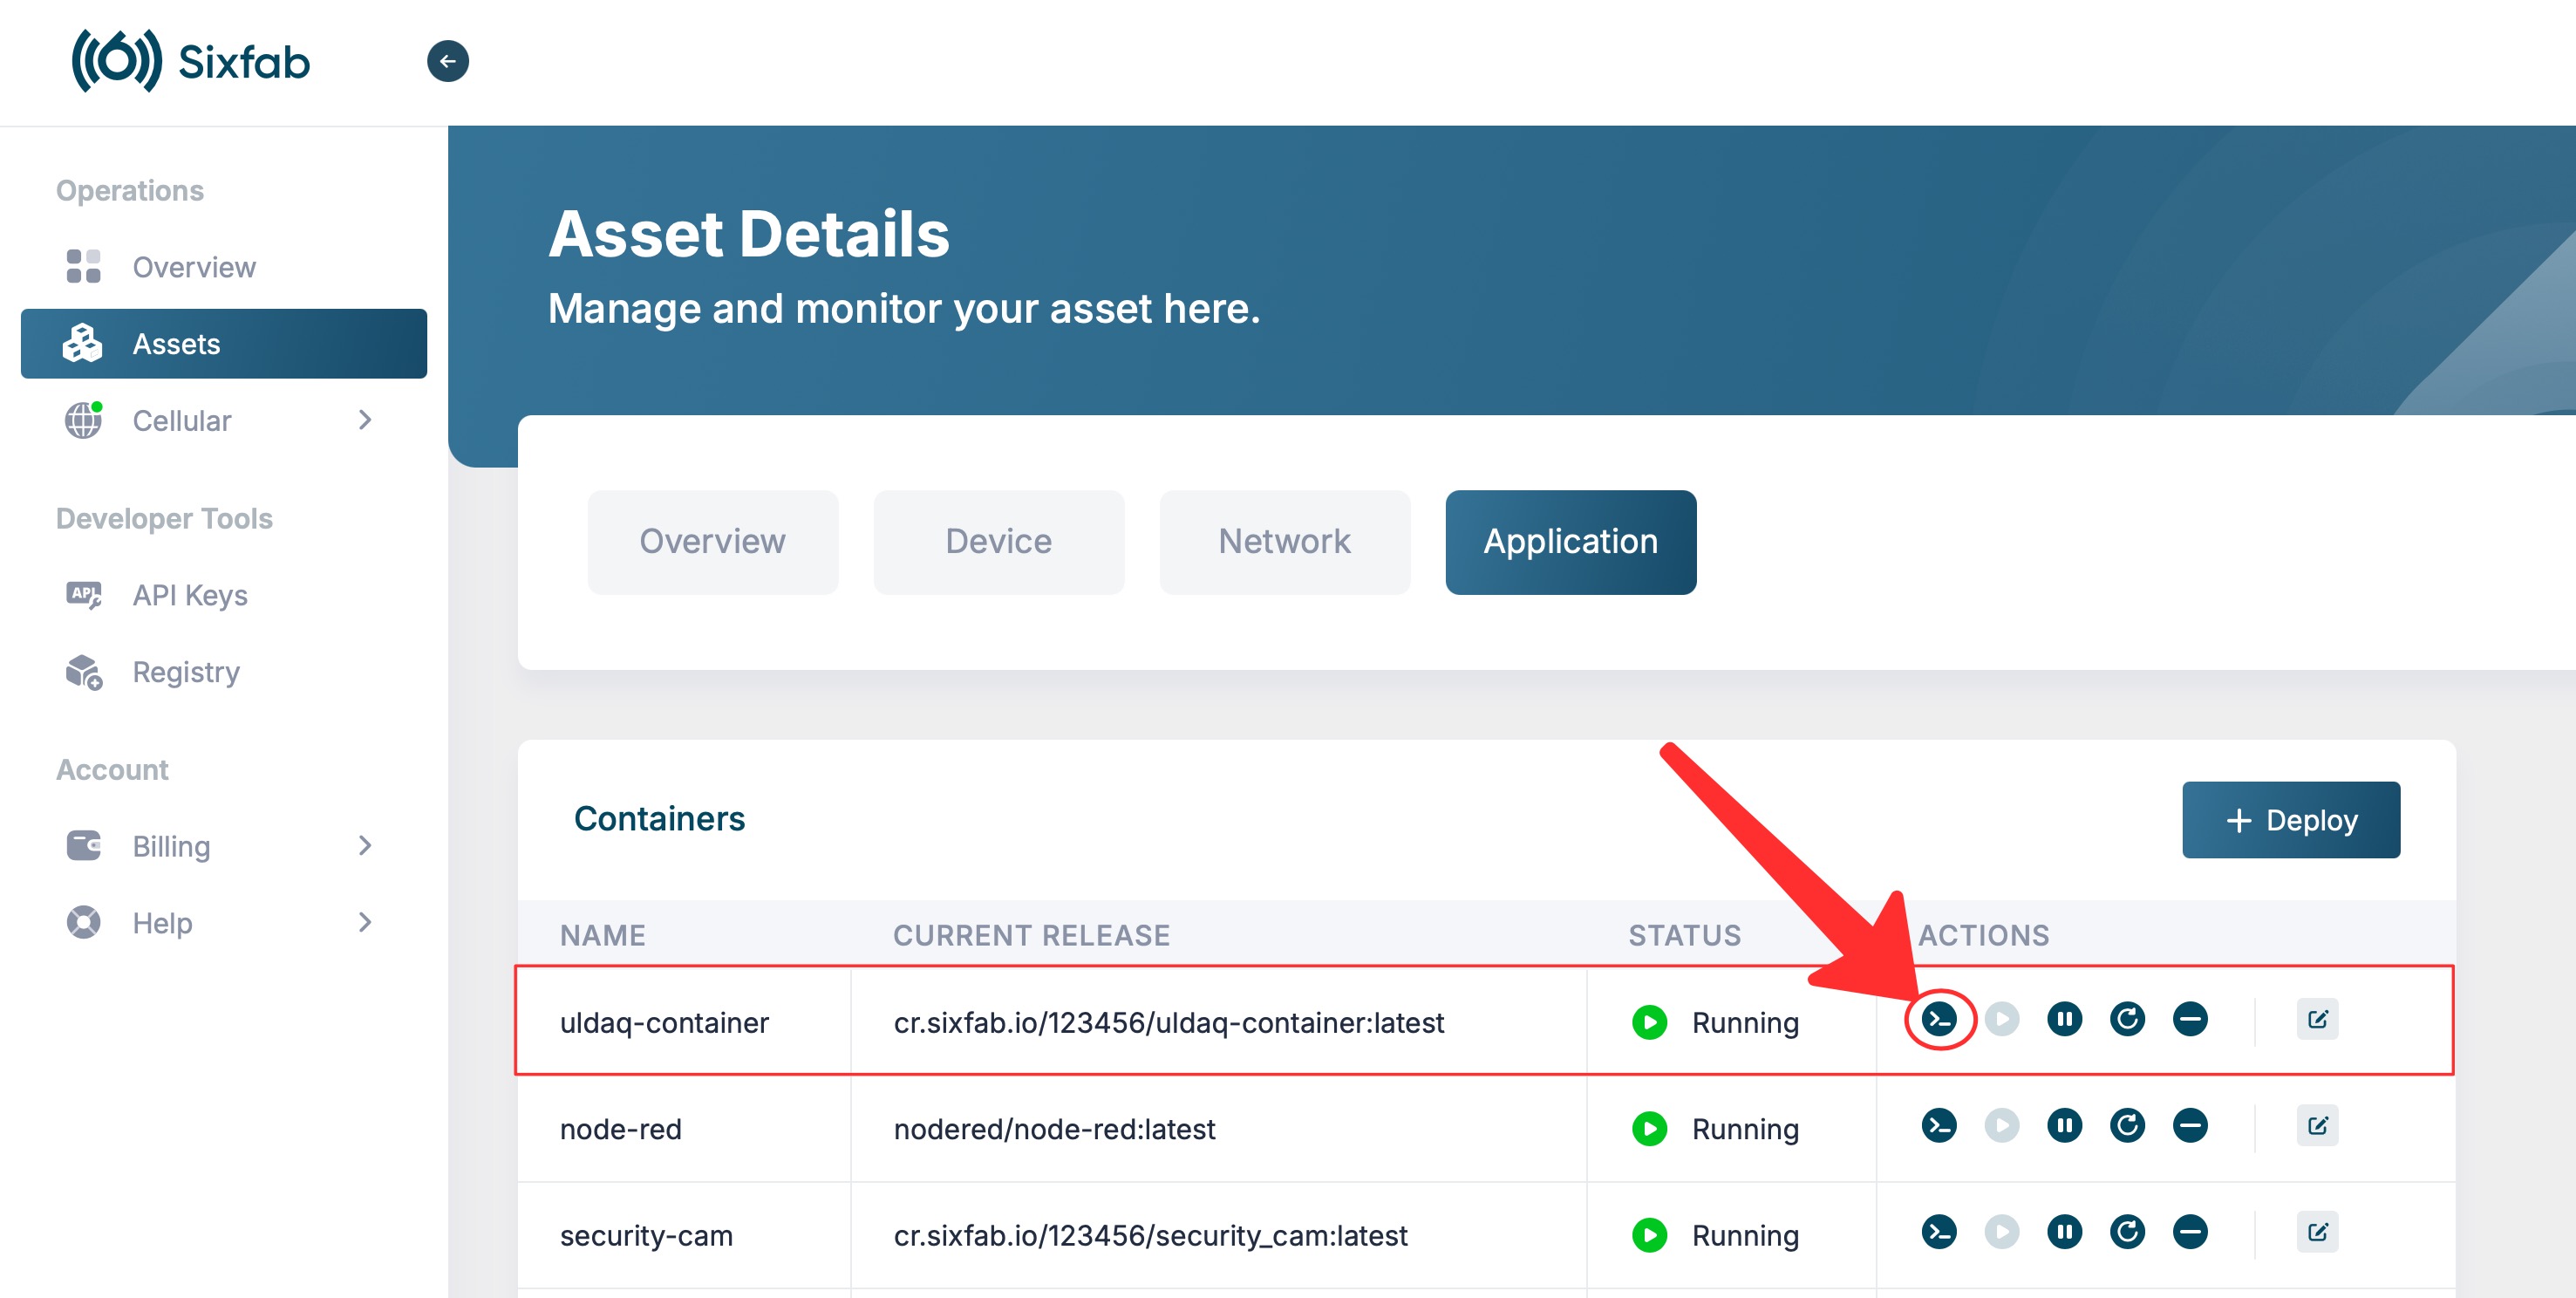
Go to the Application section of your asset on Sixfab Connect.
-
Locate the deployed container and click on the Shell Access button to open a terminal session.

-
Run Uldaq commands or scripts to interact with your MCC USB DAQ device.
By following this guide, you have successfully set up and deployed the MCC USB Series DAQ system on ALPON X4 using Uldaq and Docker. This setup enables reliable data acquisition and allows you to manage and monitor the system through Sixfab Connect. Regular updates and testing are recommended to ensure optimal performance.
Reference
Updated 3 months ago
