
Azure IoT Hub Connection
The Pico LTE device provides all the components needed to connect with Azure IoT Hub.
Before starting this Pico LTE tutorial, the Pico LTE SDK installation and configuration steps must be completed. Below are the system requirements for this tutorial. If you haven't followed the SDK installation steps, please refer to the page below before proceeding with the tutorial. The details of these steps will not be covered in this tutorial.
System Requirements
| Hardware Requirements | Software Requirements |
|---|---|
| • Sixfab Pico LTE • Micro USB cable |
• Thonny IDE |
If you have completed all the requirements, you are ready to use Azure IoT Hub with Pico LTE. Let's get started!
Preparing Coding Environment
- Download the Pico LTE SDK repository to your local machine. If you have already downloaded it, skip this step.
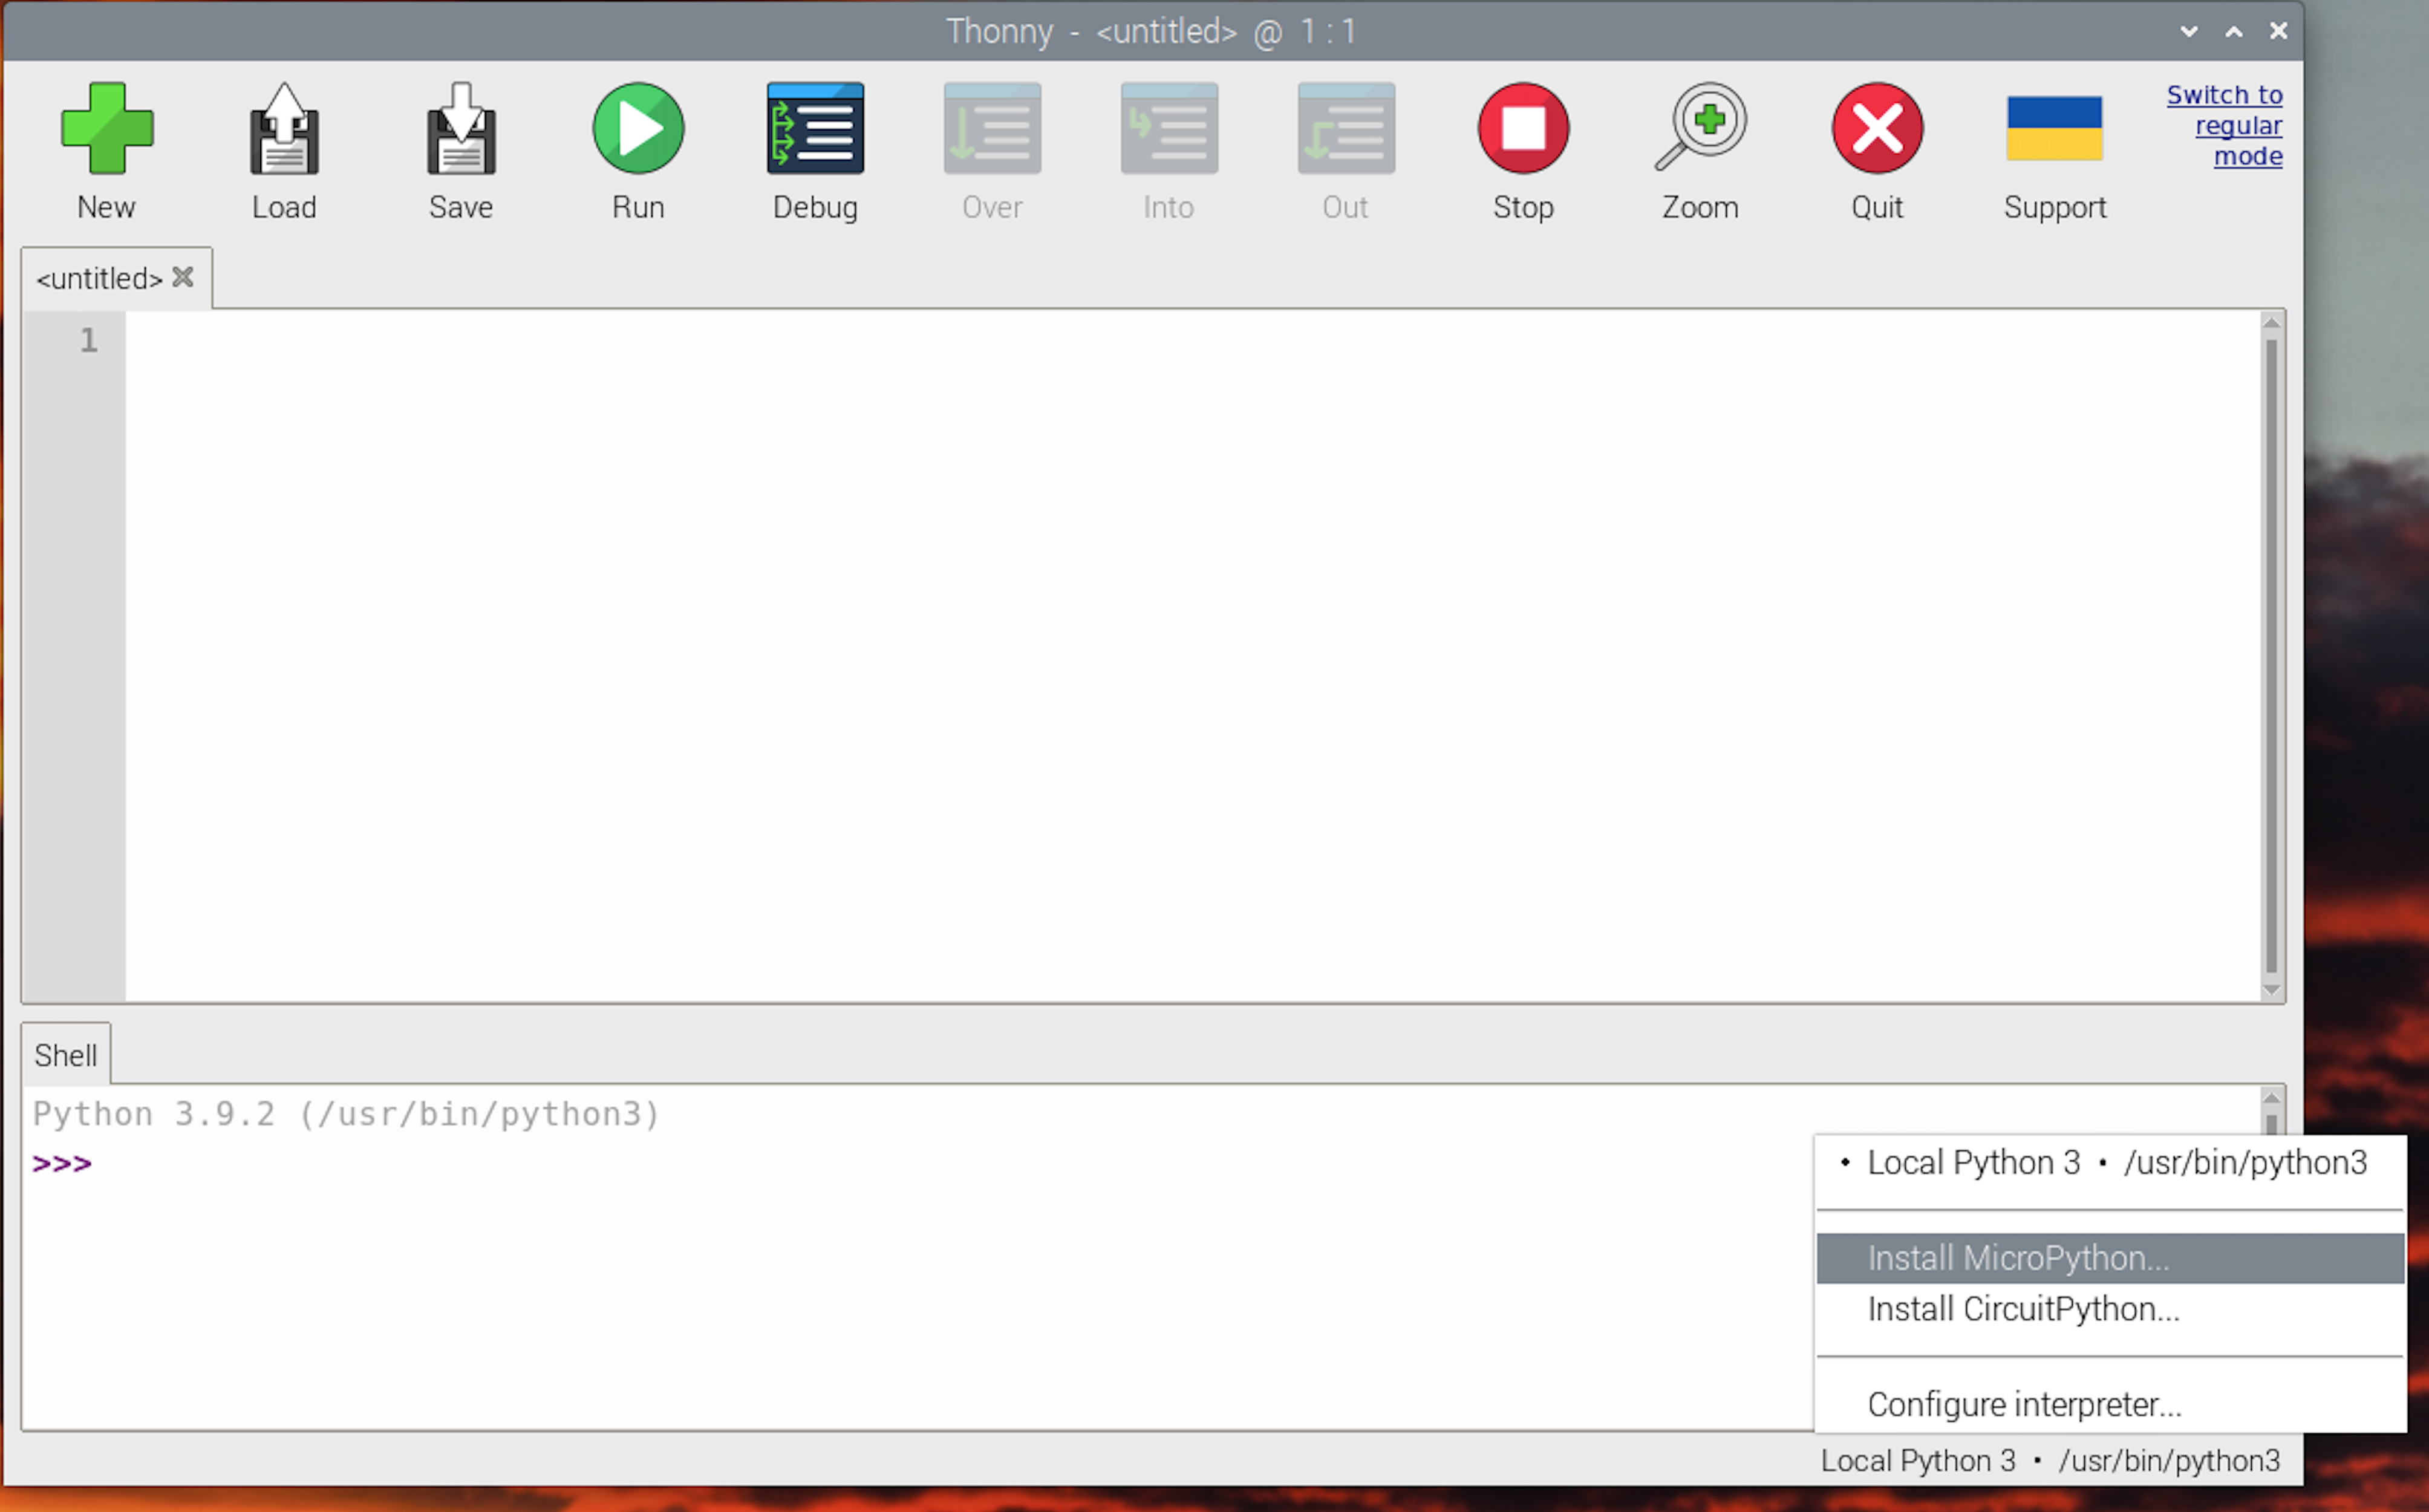
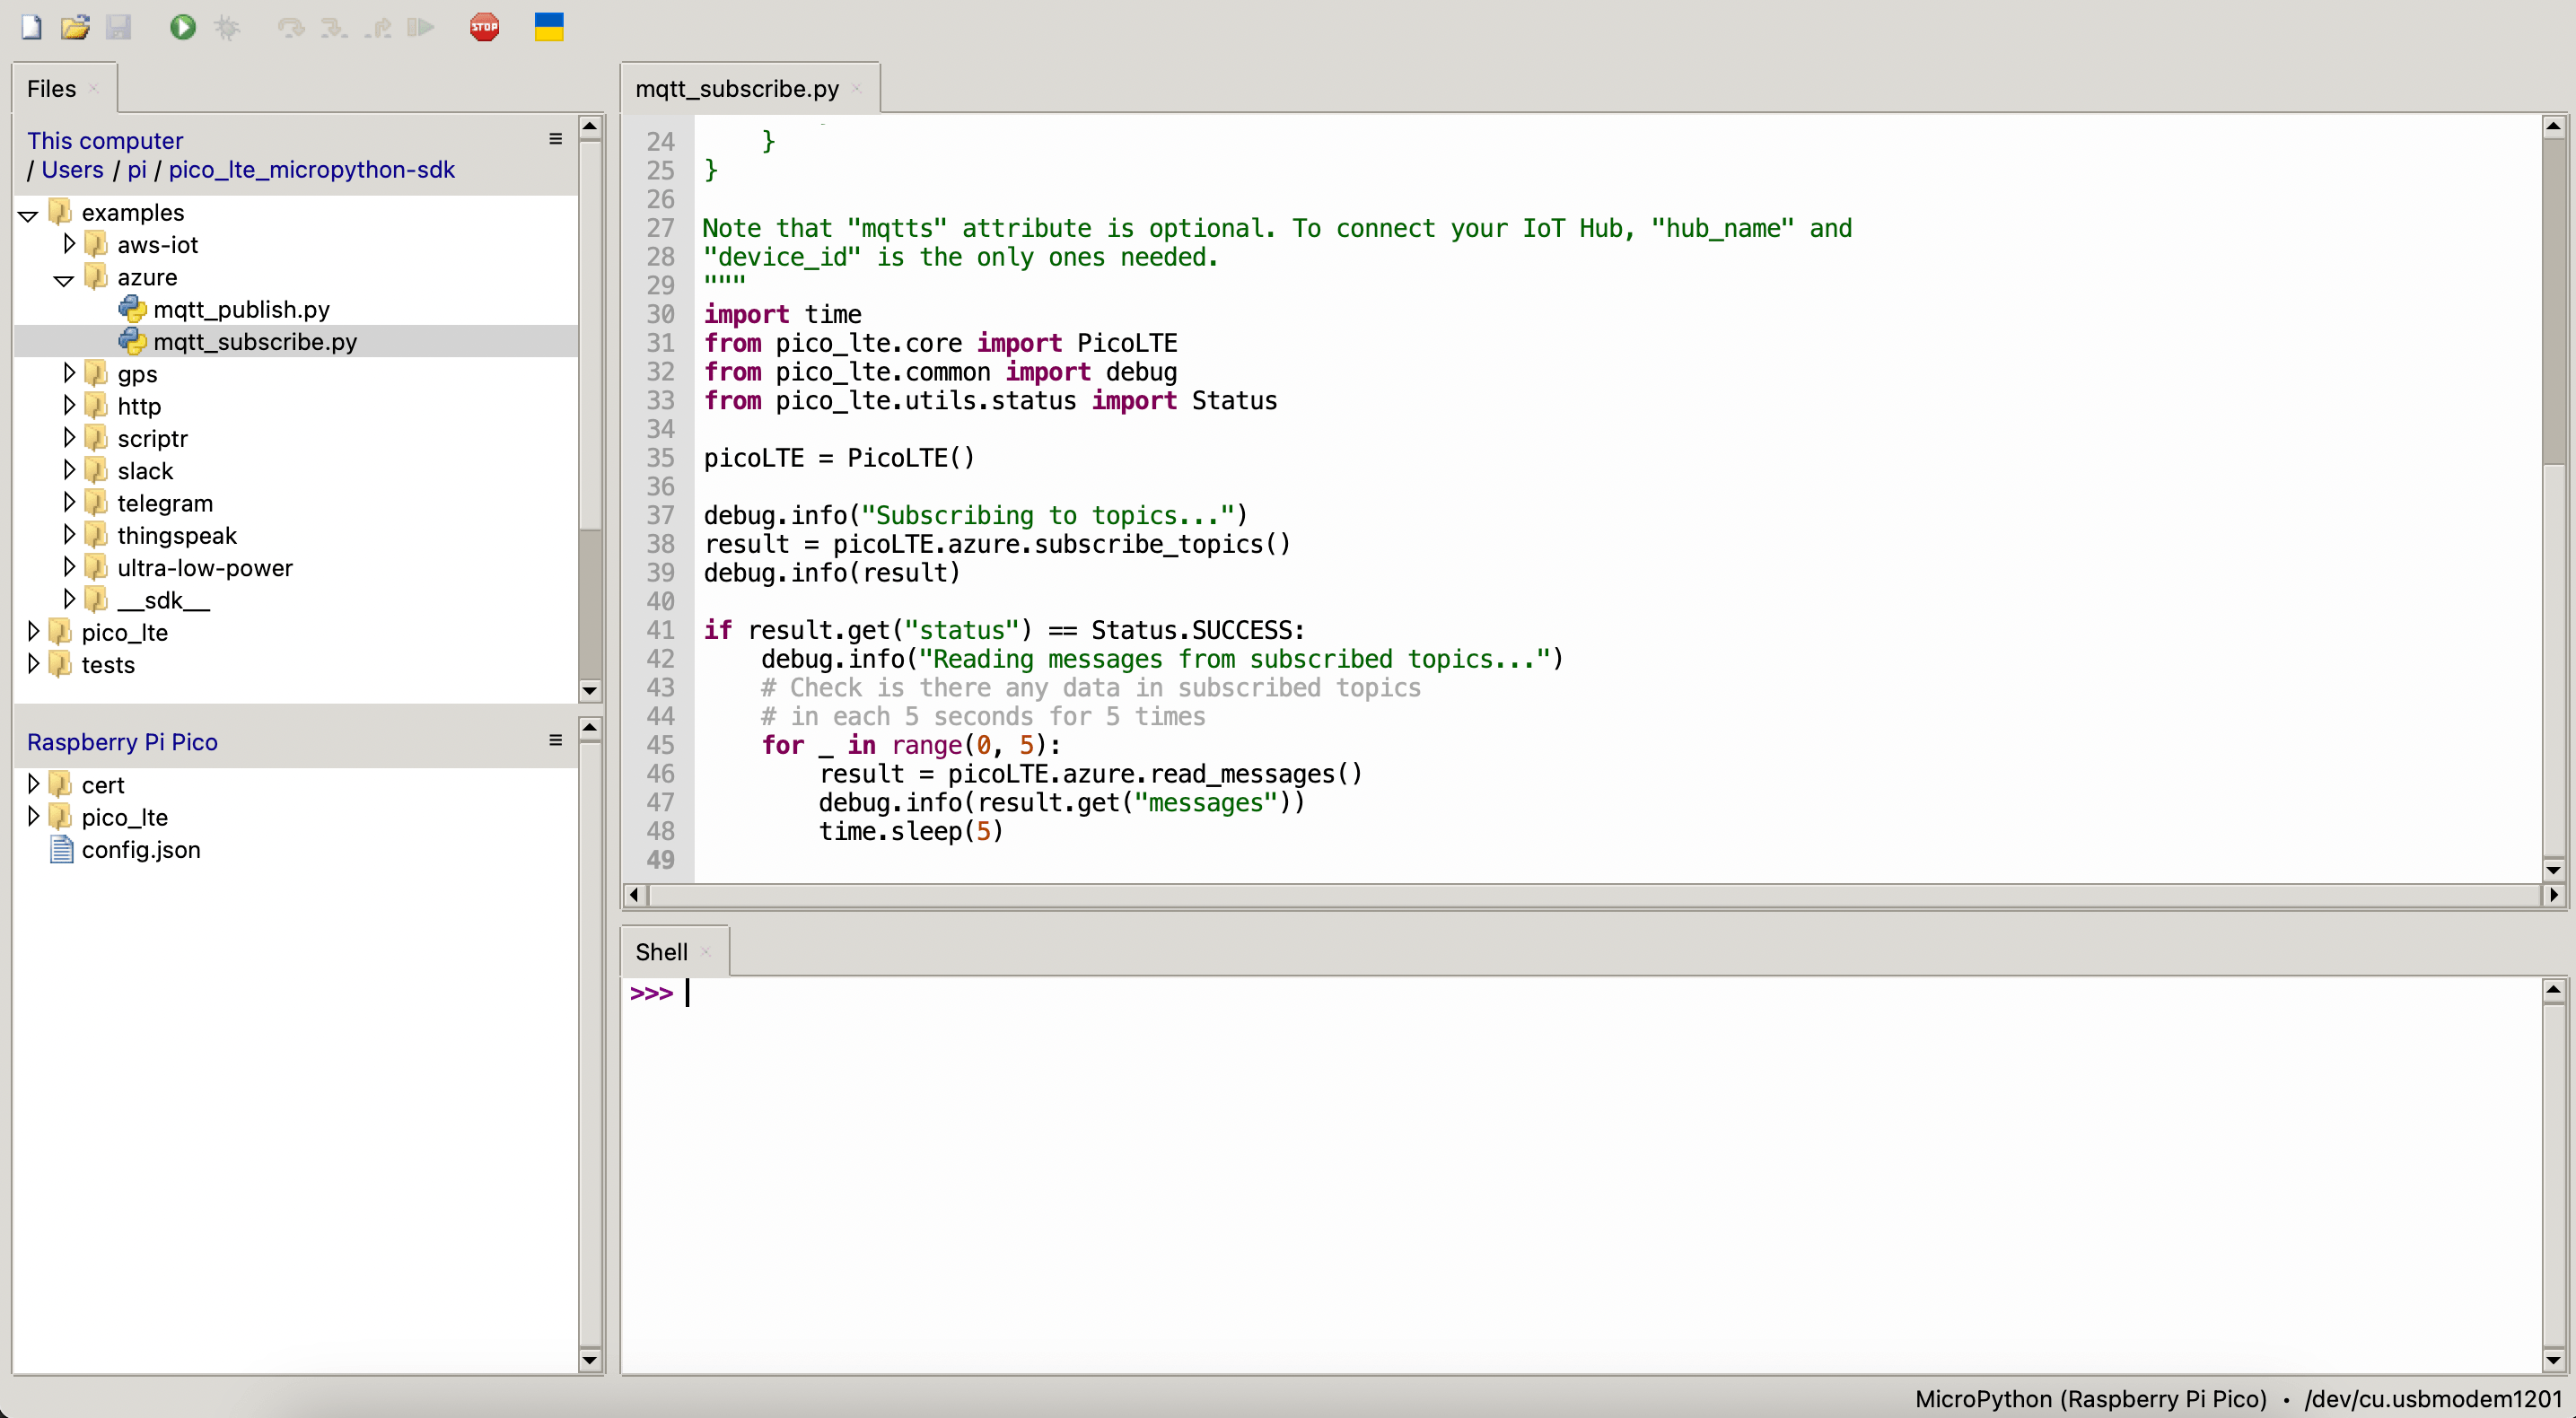
- Open script "examples → azure → mqtt_publish.py or mqtt_subscribe.py" from the repository via Thonny IDE.
- If you haven't, create a config.json file in the root directory of Pico LTE device.
Publishing Data to Azure IoT Hub using MQTT
Register and Activate Azure IoT Hub
1. Register or login to your Azure account.
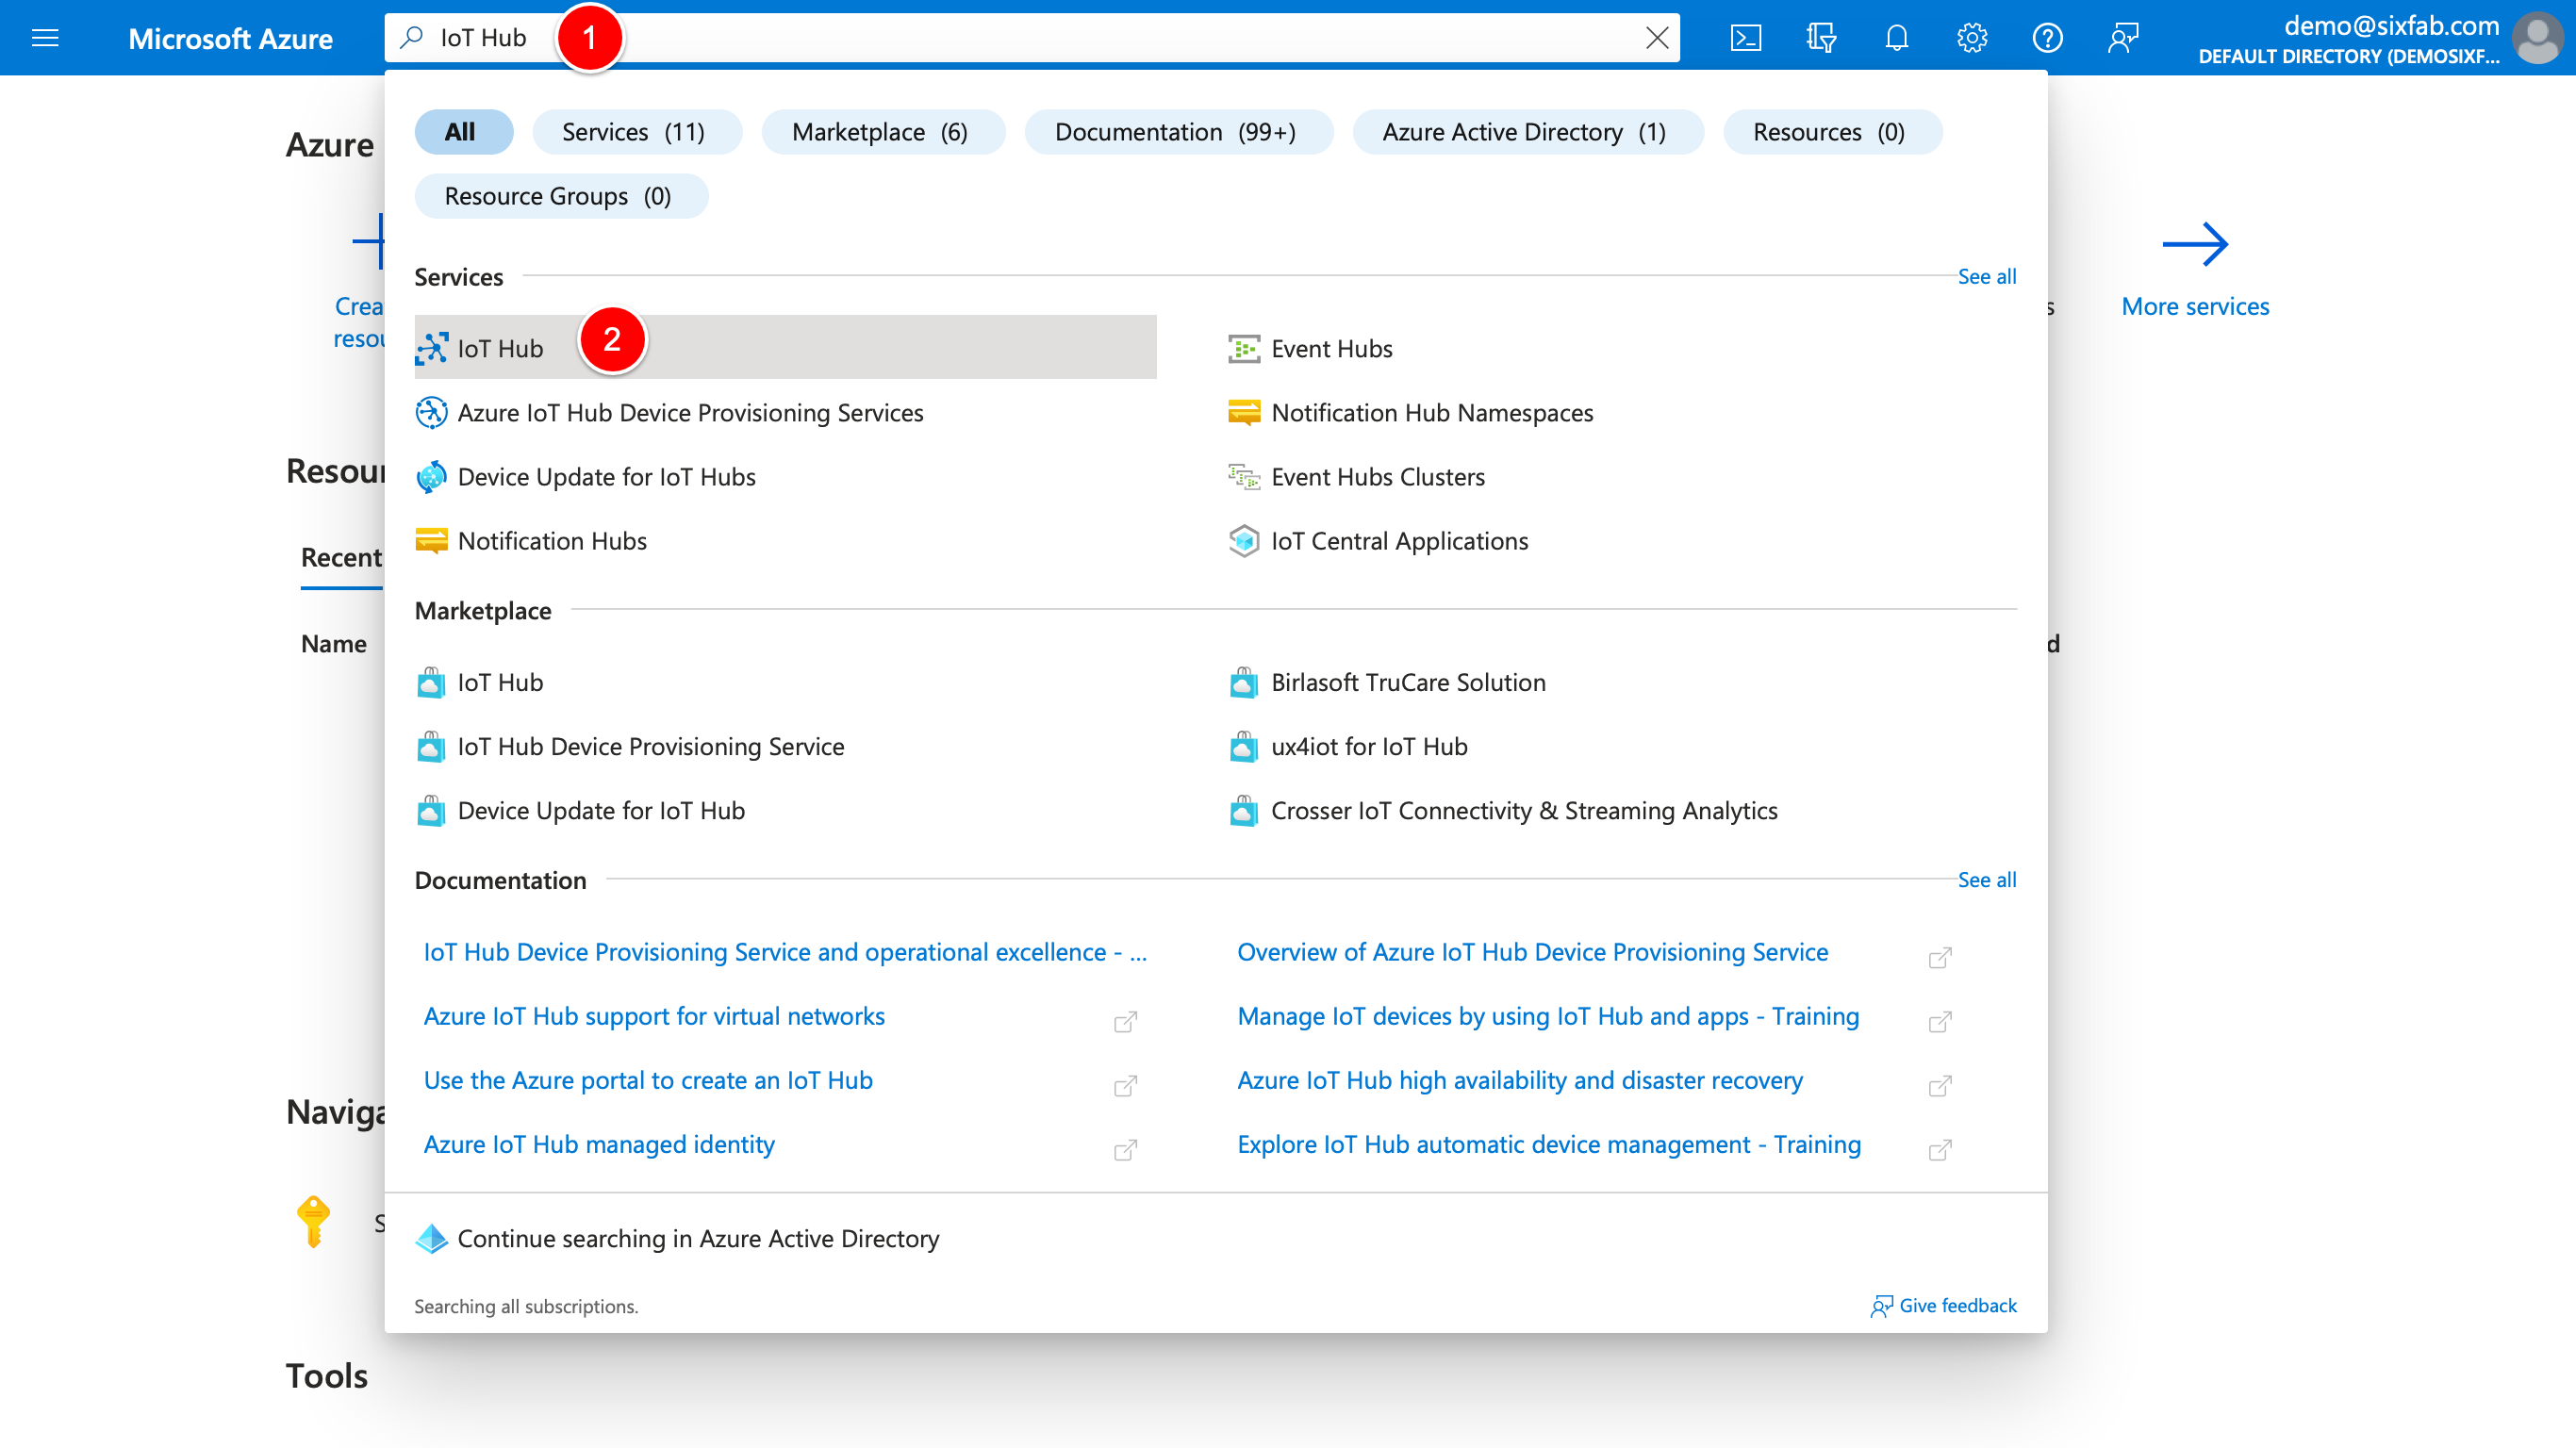
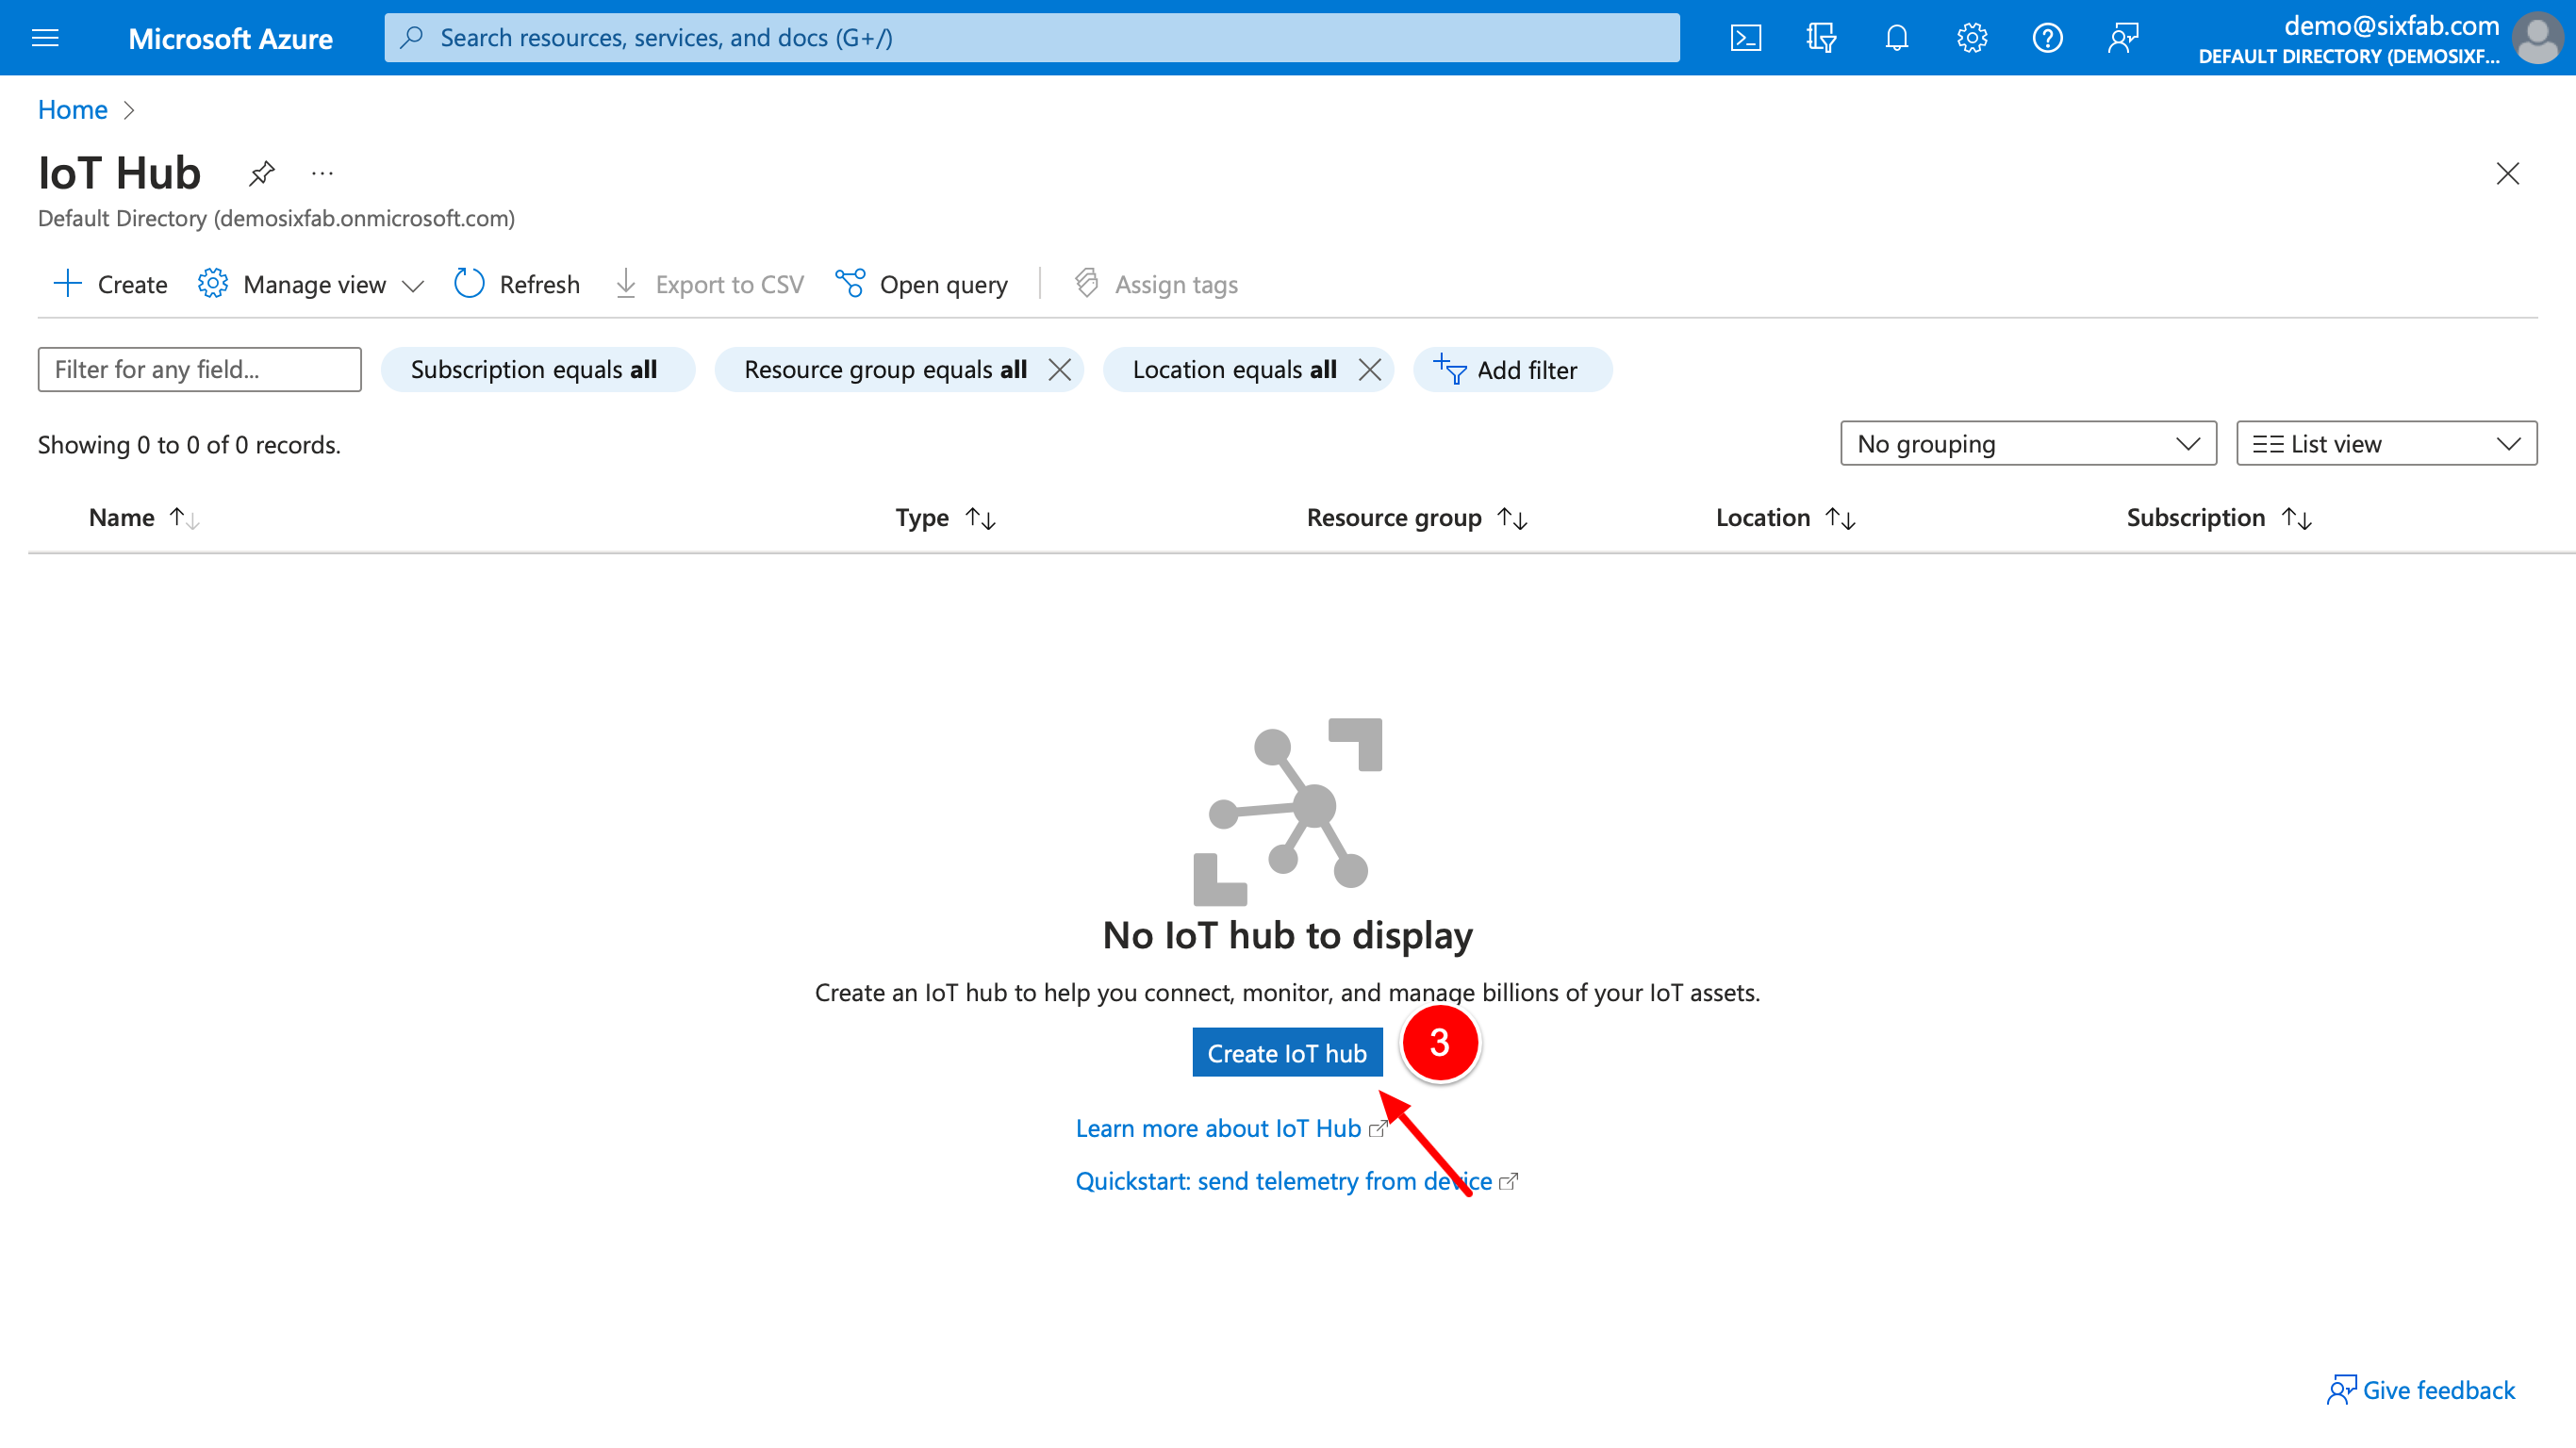
2. Type IoT Hub onto the search bar, and choose the service which has the same name with what we wrote. Click Create IoT Hub button.
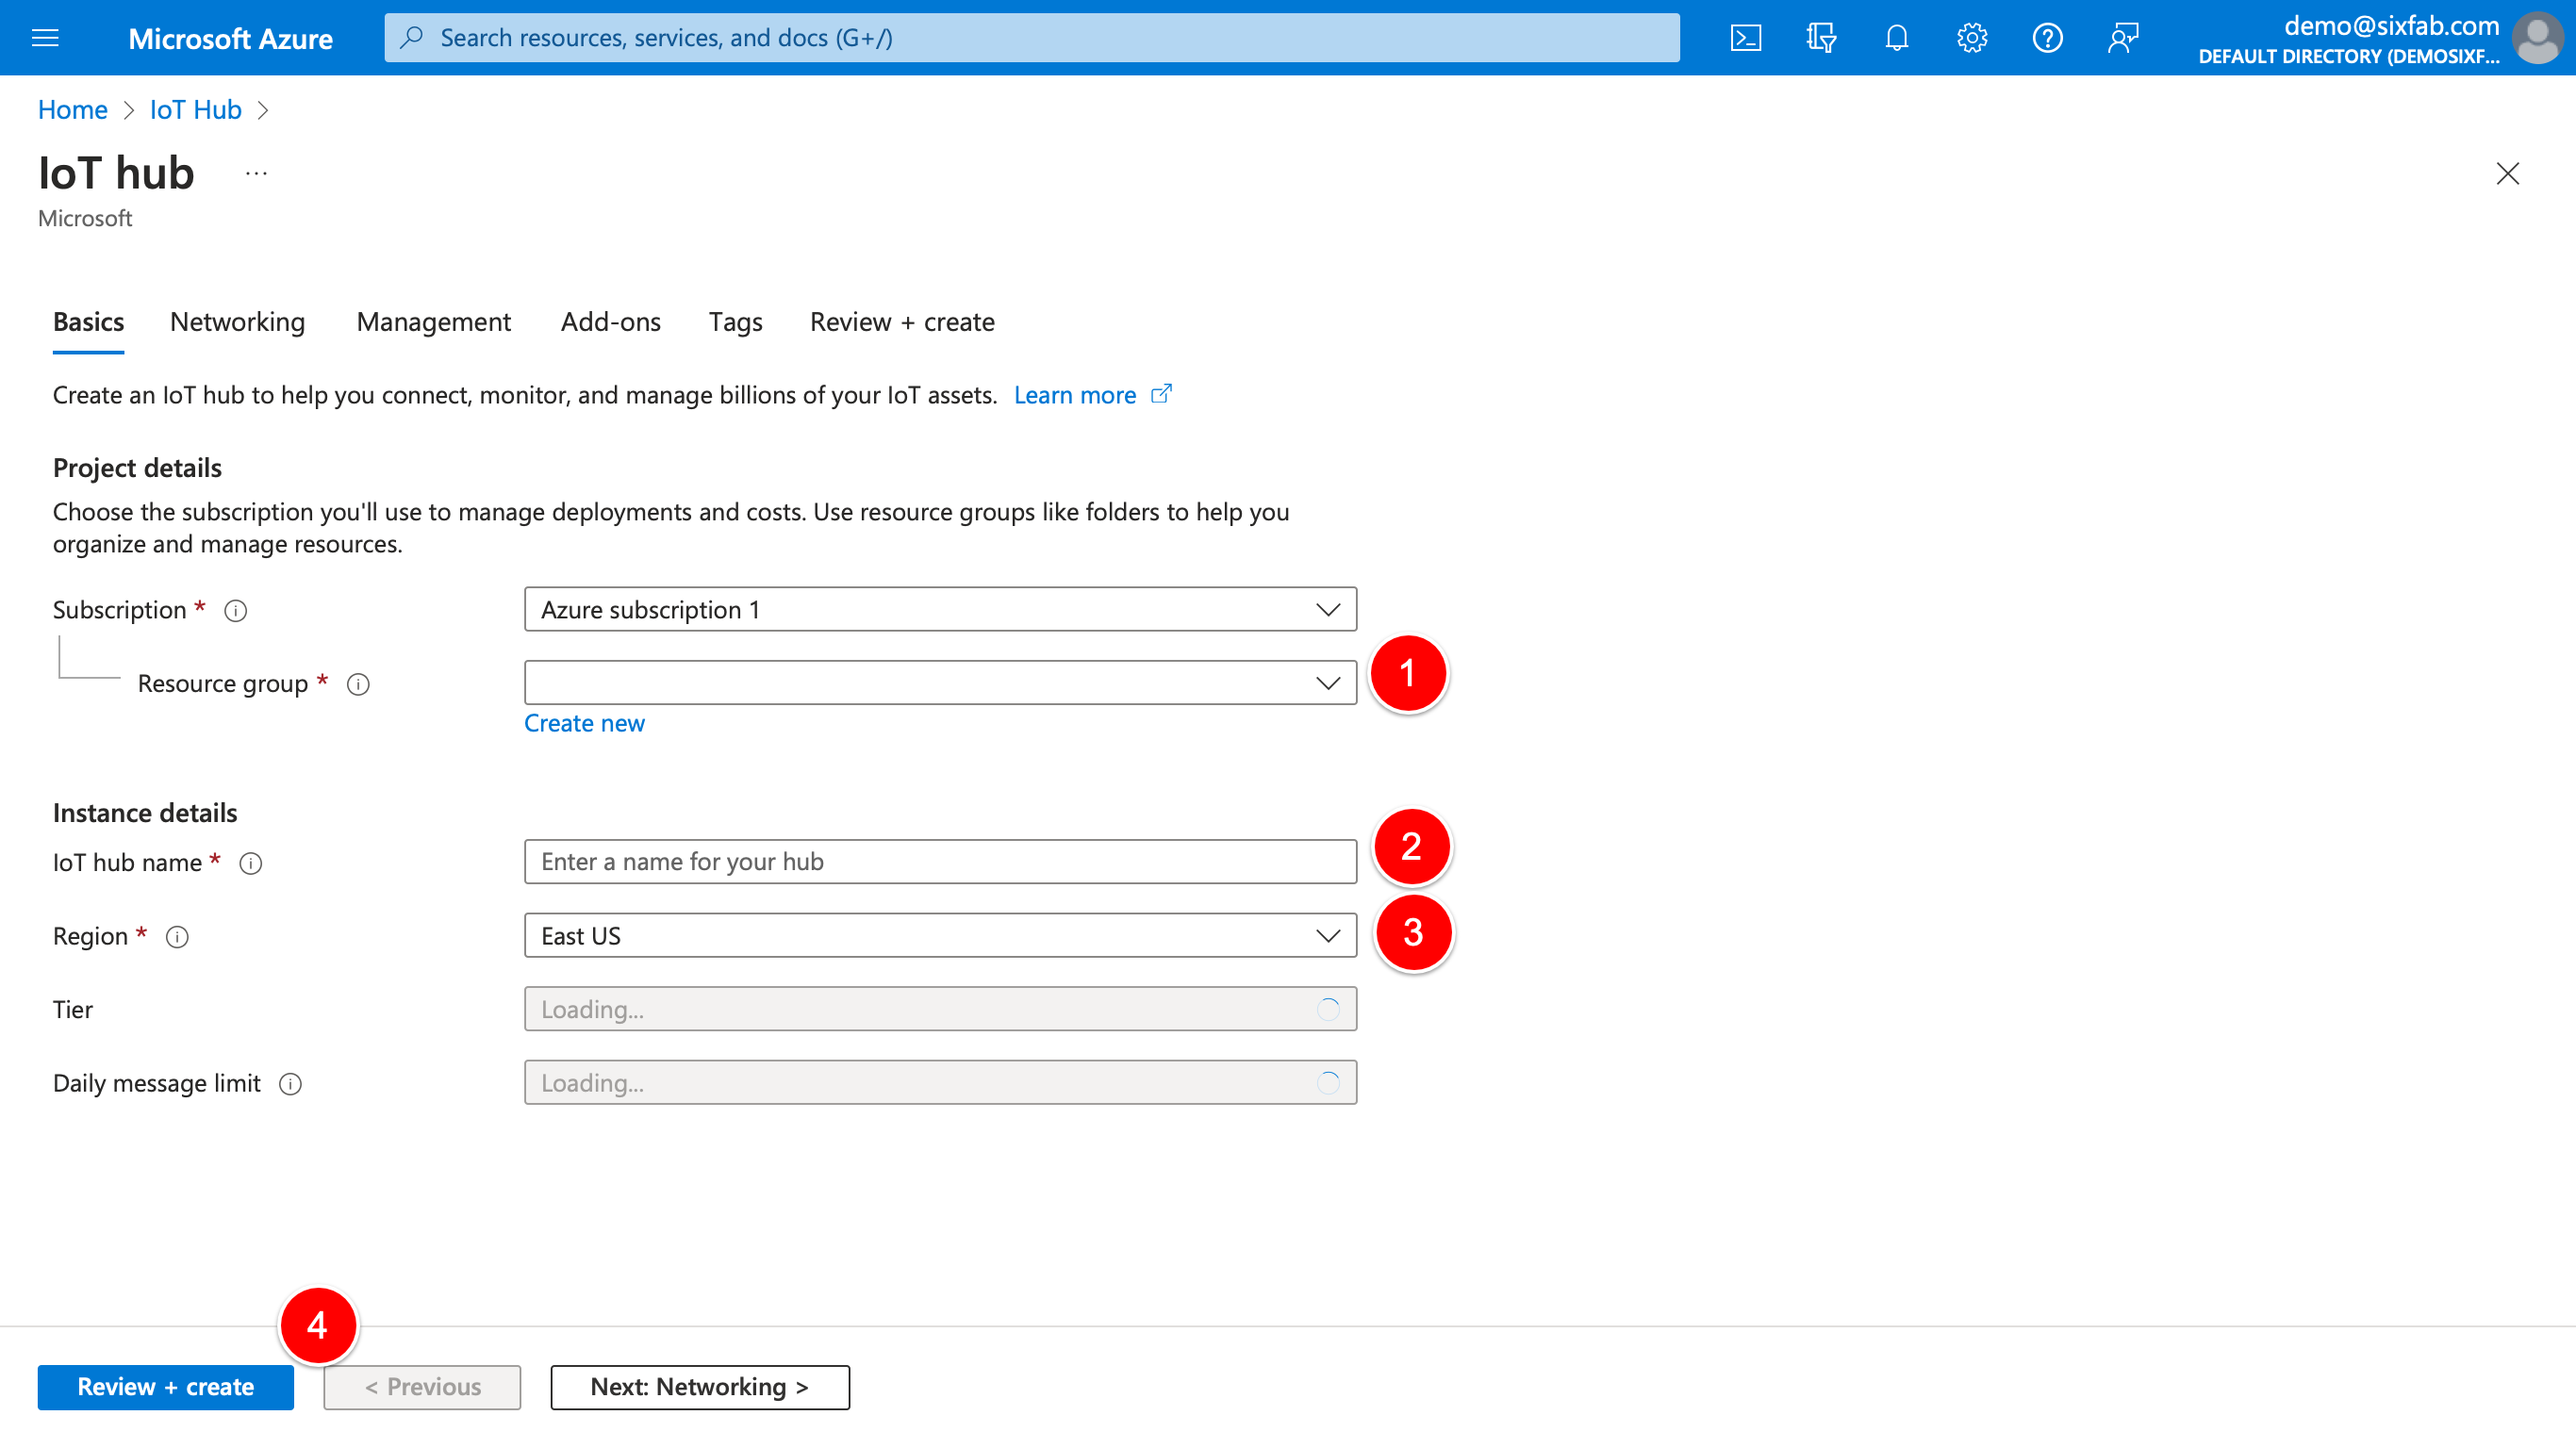
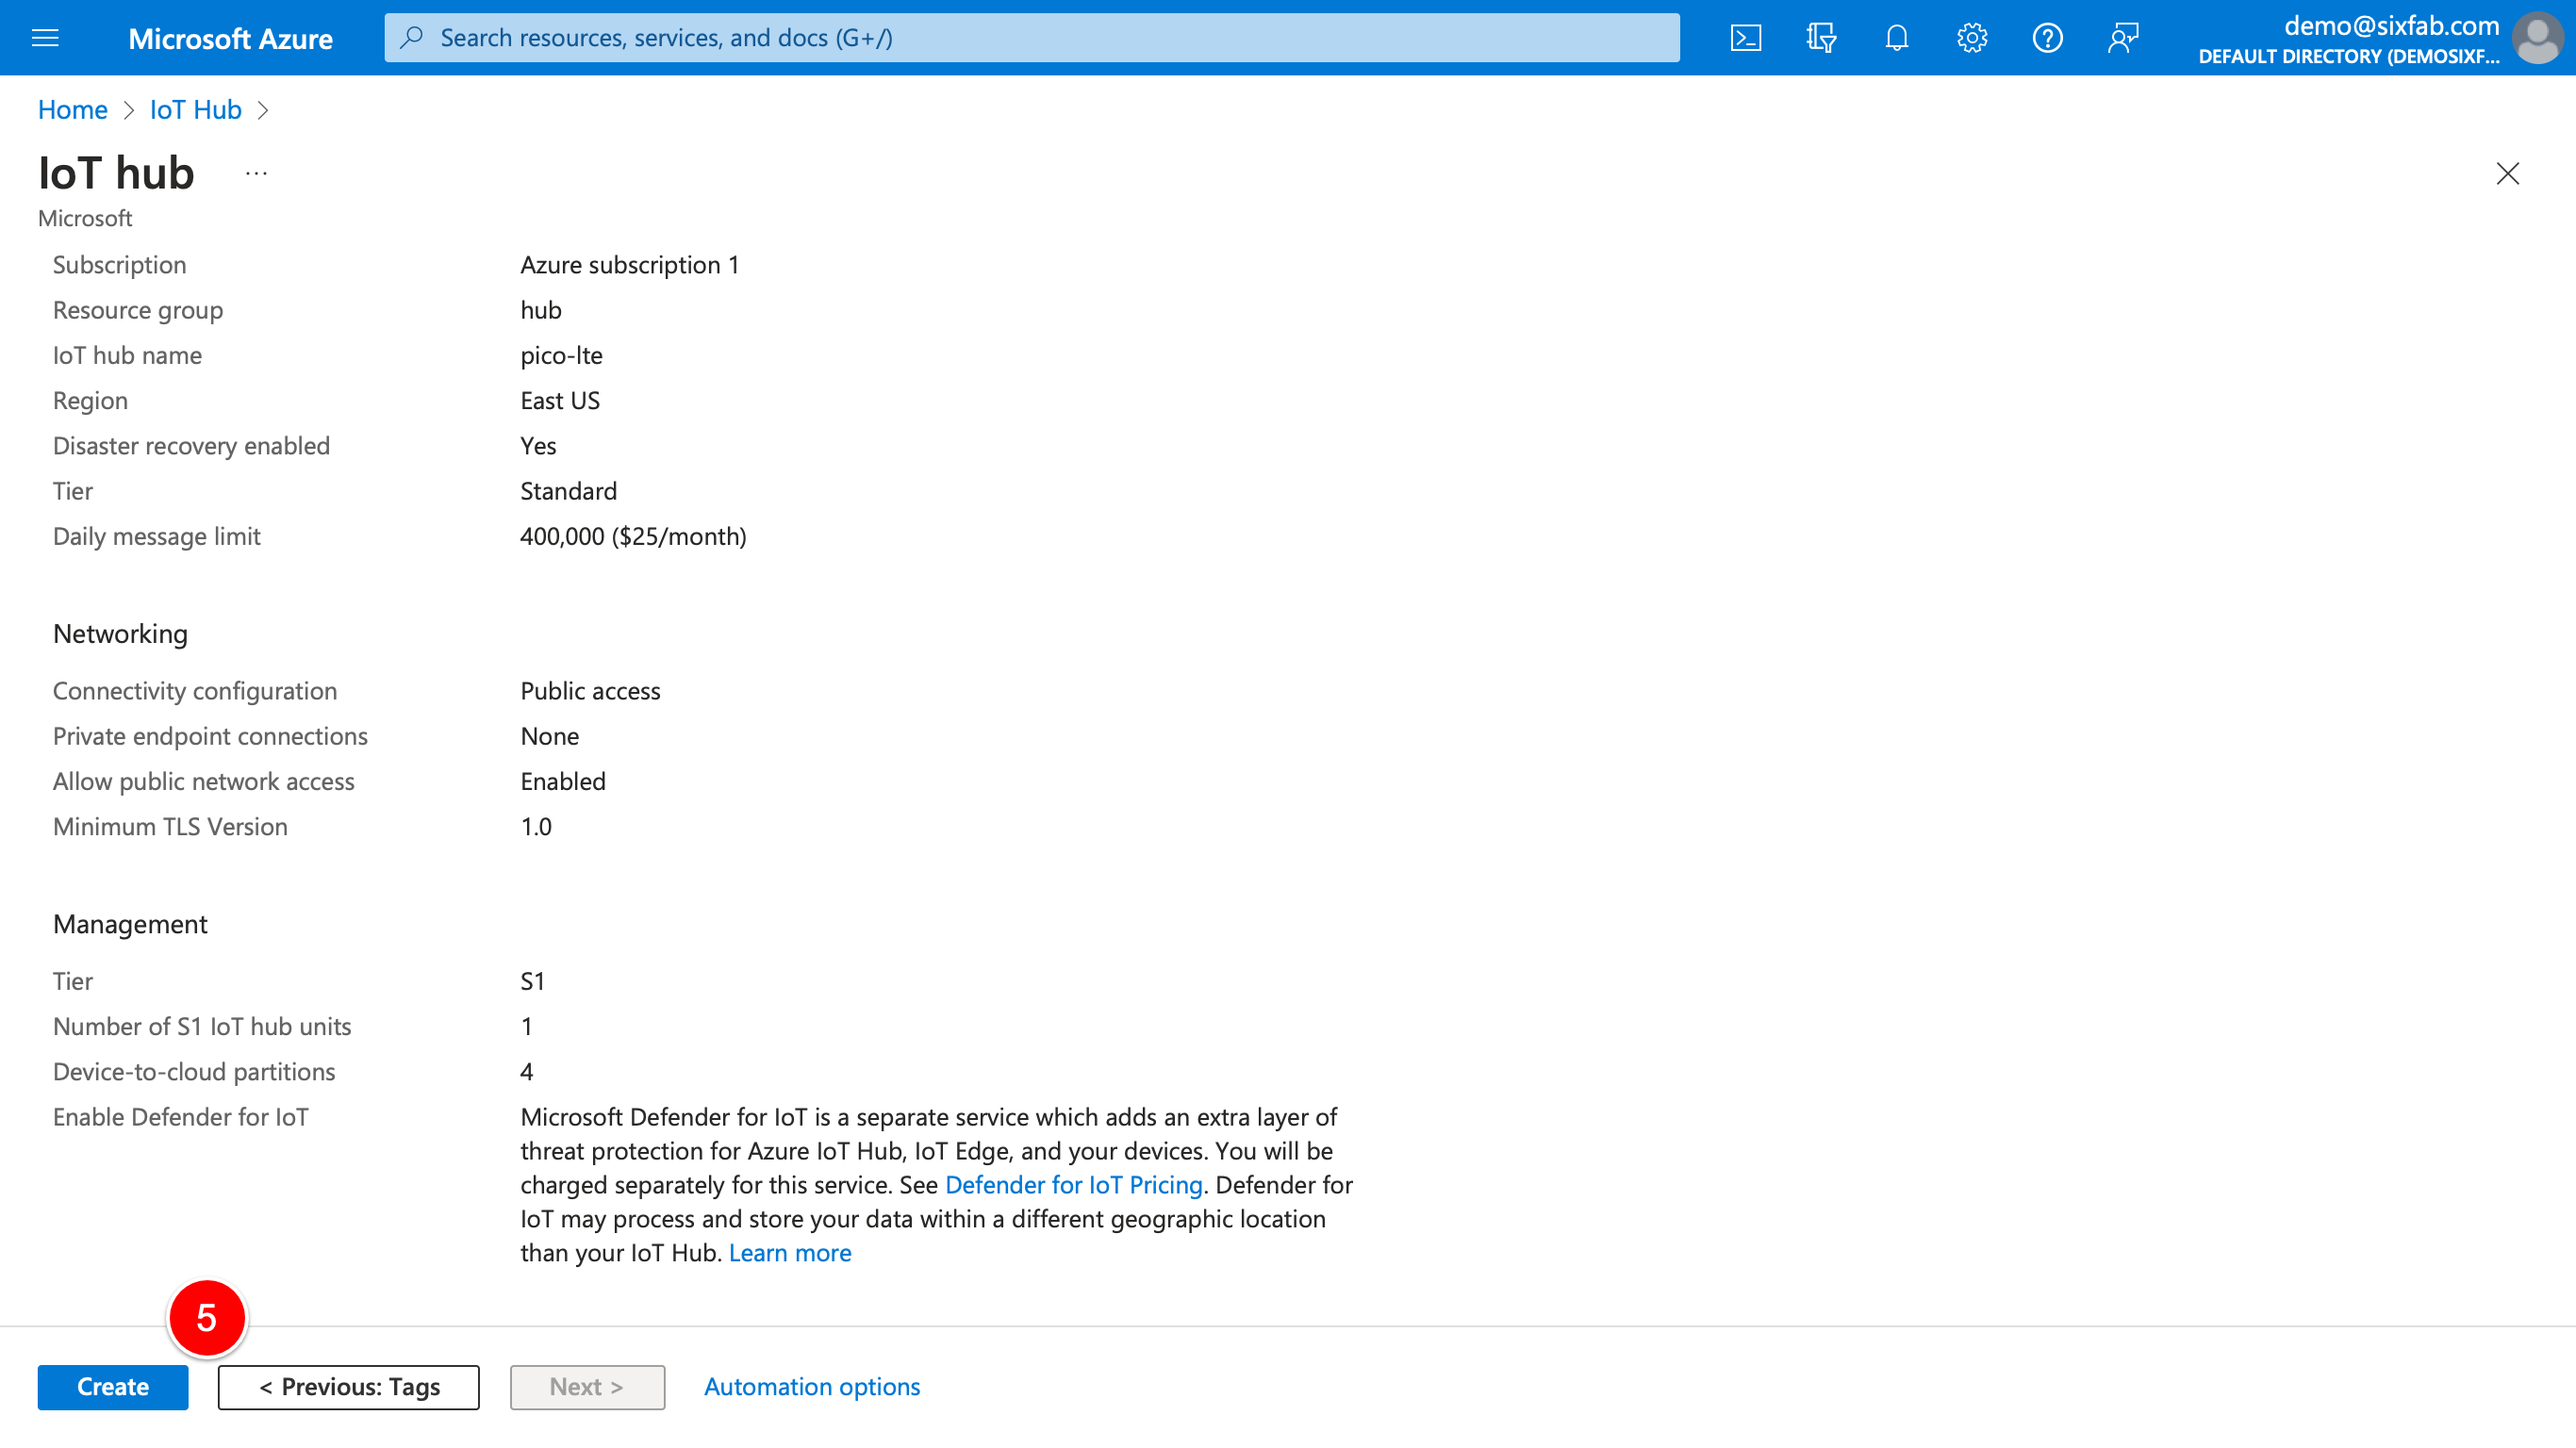
3. If the resource group is not created, click "Create new" to create it, then select a resource group to connect your Azure IoT Hub, and give a name to your hub. "IoT hub name" will be used in the config.json file. Therefore, note it somewhere. Please note that you may want to see other details such as Pricing in the Managment tab before pressing the Review + create button.
4. Review the information and if everything seems OK, press Create. Azure is going to deploy your service. Press Go to resource.
5. Creating Certificates
To create certificates, follow the links below step by step.- Set up the X.509 OpenSSL environment
- Create the root CA certificate
- Create the intermediate CA certificate
- Create the device certificates
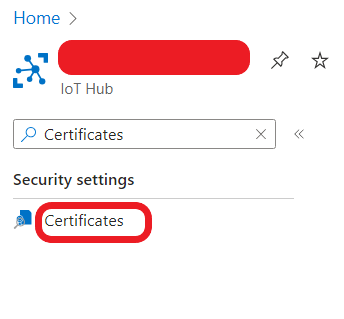
- Go to your IoT Hub. Type “Certificates” in the left menu and click “Certificates”.
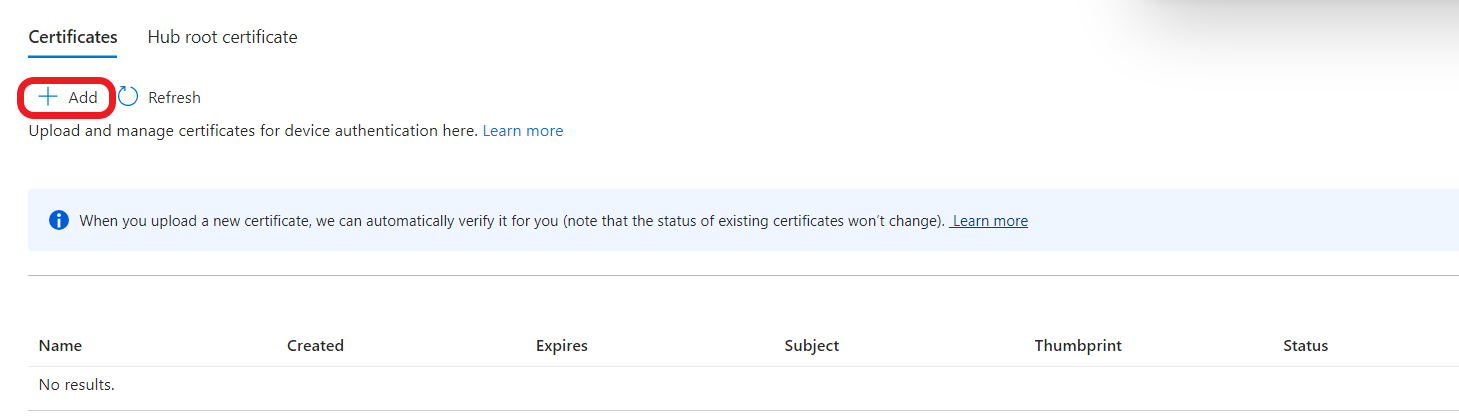
- Click “Add”.
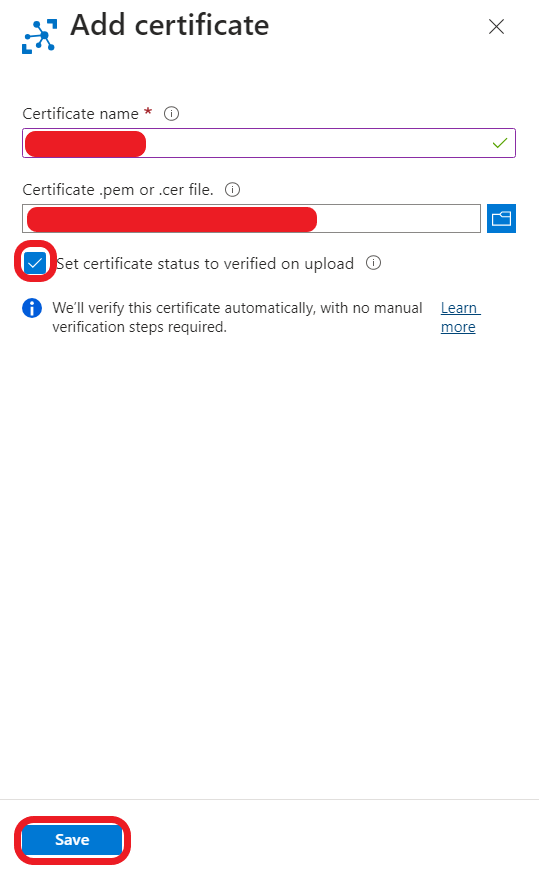
- In the side menu, you can add certificate. Input a certificate name. Then select certificate file in your certificate directory. The path is certificateDirectory/certs/azure-iot-test-only.intermediate.cert.pem. Lastly, press the button “Set certificate status to verified on upload” and click “Save”.
- Type “Devices” in the left menu and click “Devices”.
- Click “Add Device”.
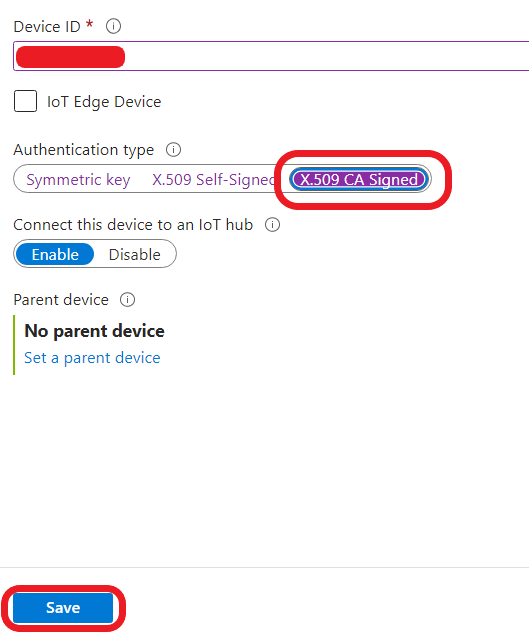
- Input the id (device name) of your device created before. It will be used in the next step and also in the config.json file. Select “X.509 CA Signed” in the “Authentication type” section and press “Save”.
In this part, you can replace 'device-01' with a name of your choice in all the commands. This device name will be used in the subsequent steps. Additionally, the 7th step is for registering a second device; you do not need to perform this step for a single device.


6. Download this certificate and save it to somewhere with cacert.pem file name. This certificate file is the root certificate for Azure IoT Hub services.
Upload the Certificates to Your Pico LTE
1. Create a folder named cert.
Note
Please note that it should be somewhere else then the directory created by certificateDirectory script in previous section's Step 5.
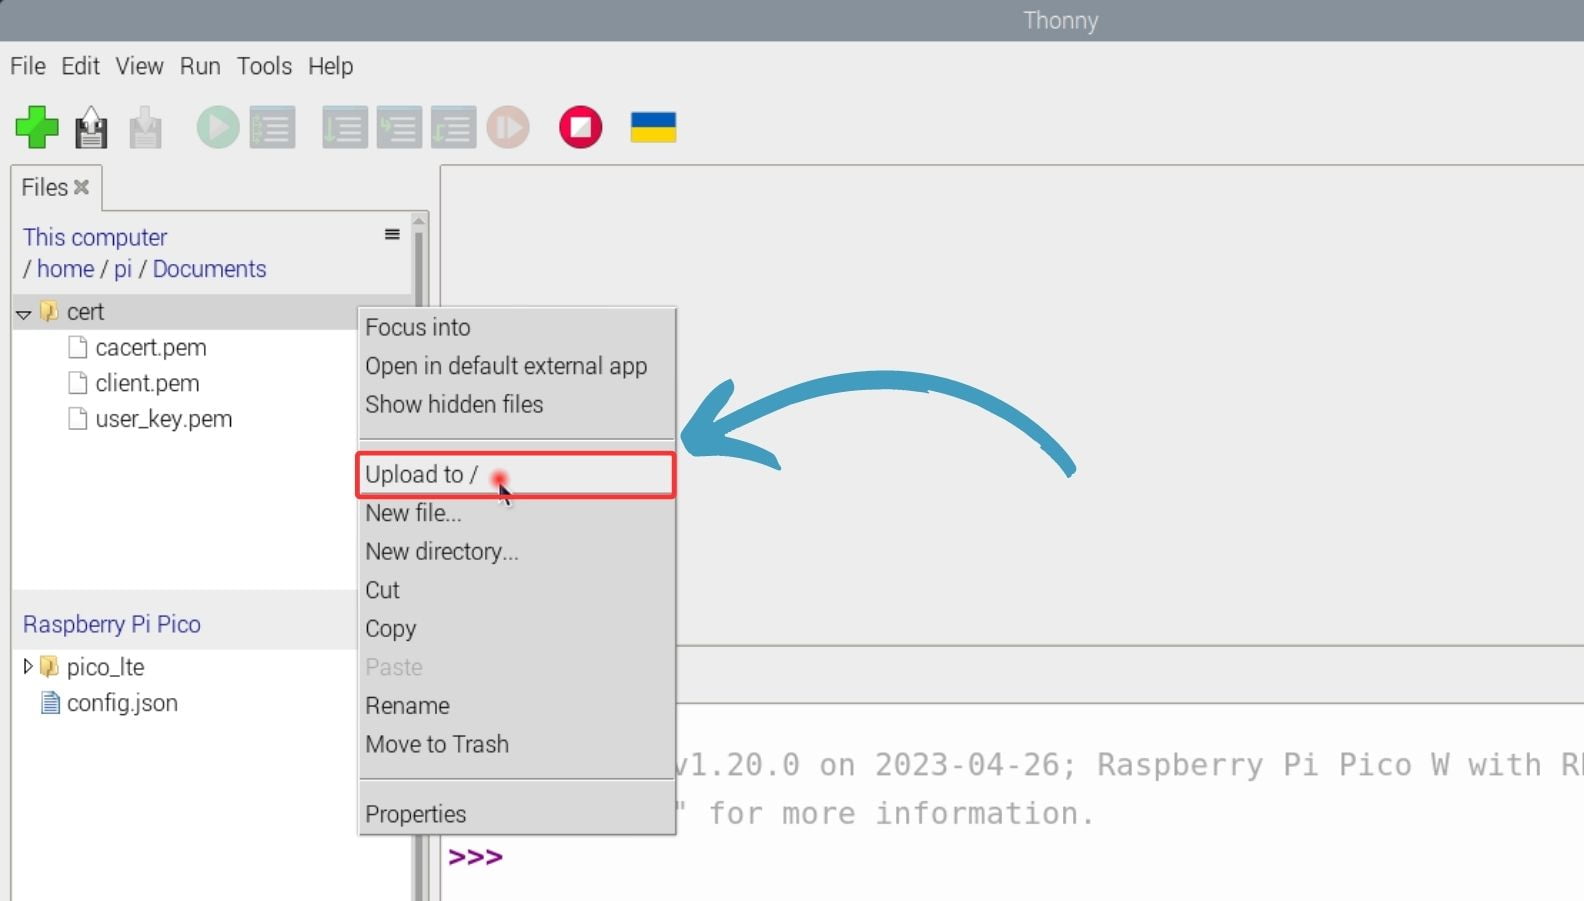
2. Rename the certificates you have with the names below, as indicated next to them, and copy them to the cert folder.
- "certificateDirectory/certs/[DEVICE_NAME].cert.pem" → client.pem
- "certificateDirectory/private/[DEVICE_NAME].key.pem" → user_key.pem
3. Copy the cacert.pem file that is created in previous section's Step 6 into the cert directory you've created.
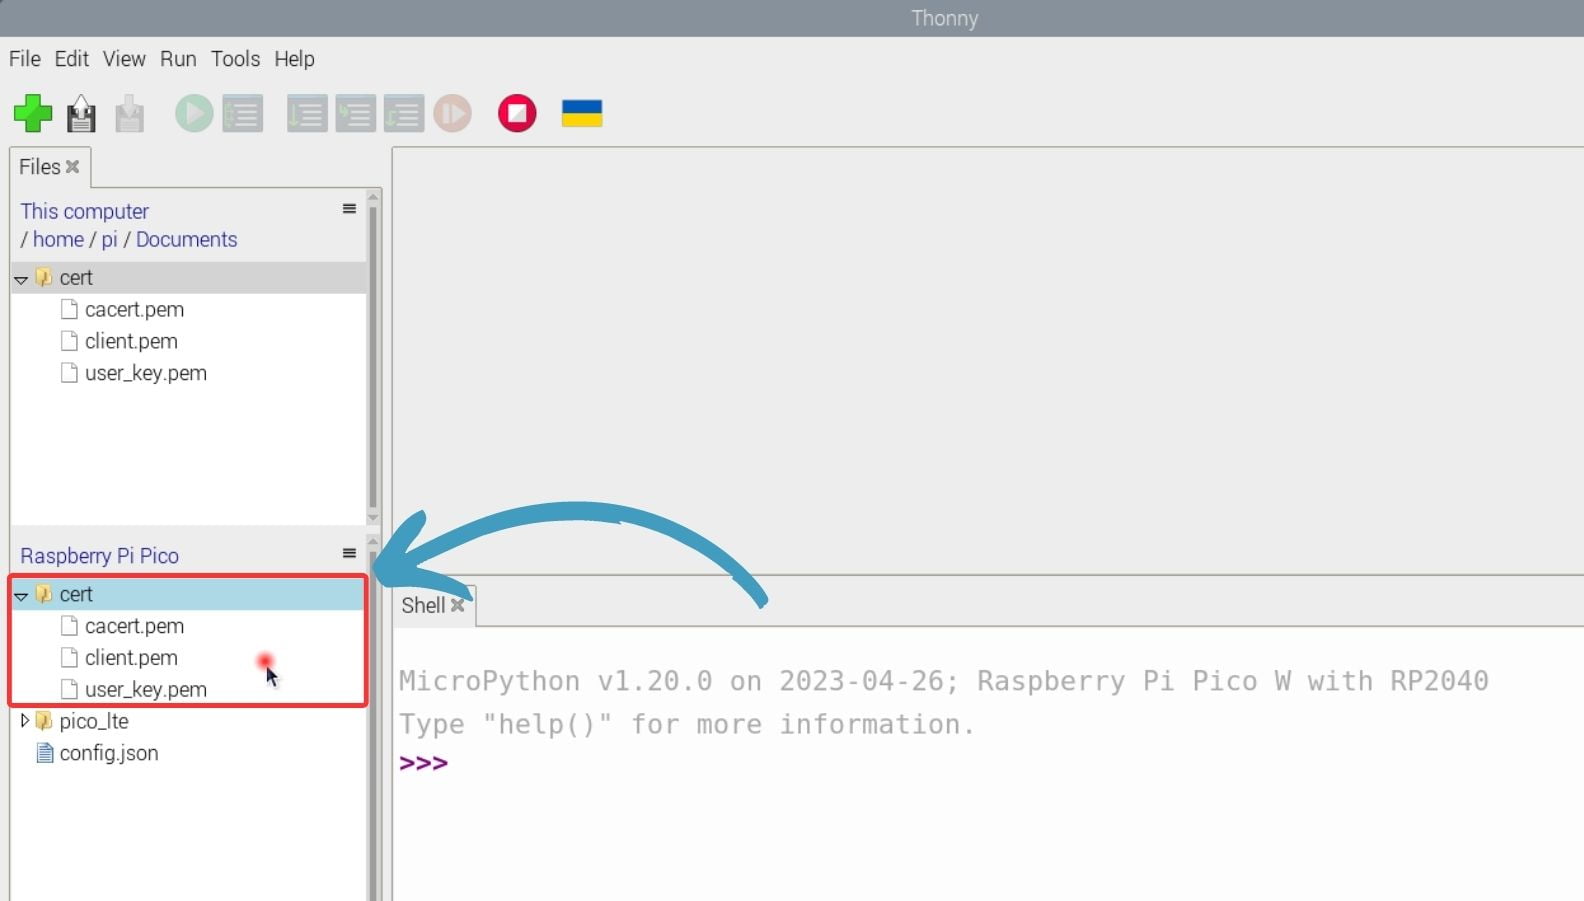
4. Upload this cert directory to your root directory of Pico LTE device.
Test the Code Example
Copy the following code block into the config.json file and enter your credentials.
{
    "azure":{
        "hub_name": "YOUR_AZURE_IOT_HUB_NAME",
        "device_id": "YOUR_DEVICE_ID",
    }
}
Run the "mqtt_publish.py" script that you opened in Thonny IDE.

The output you get in the code should look like this:
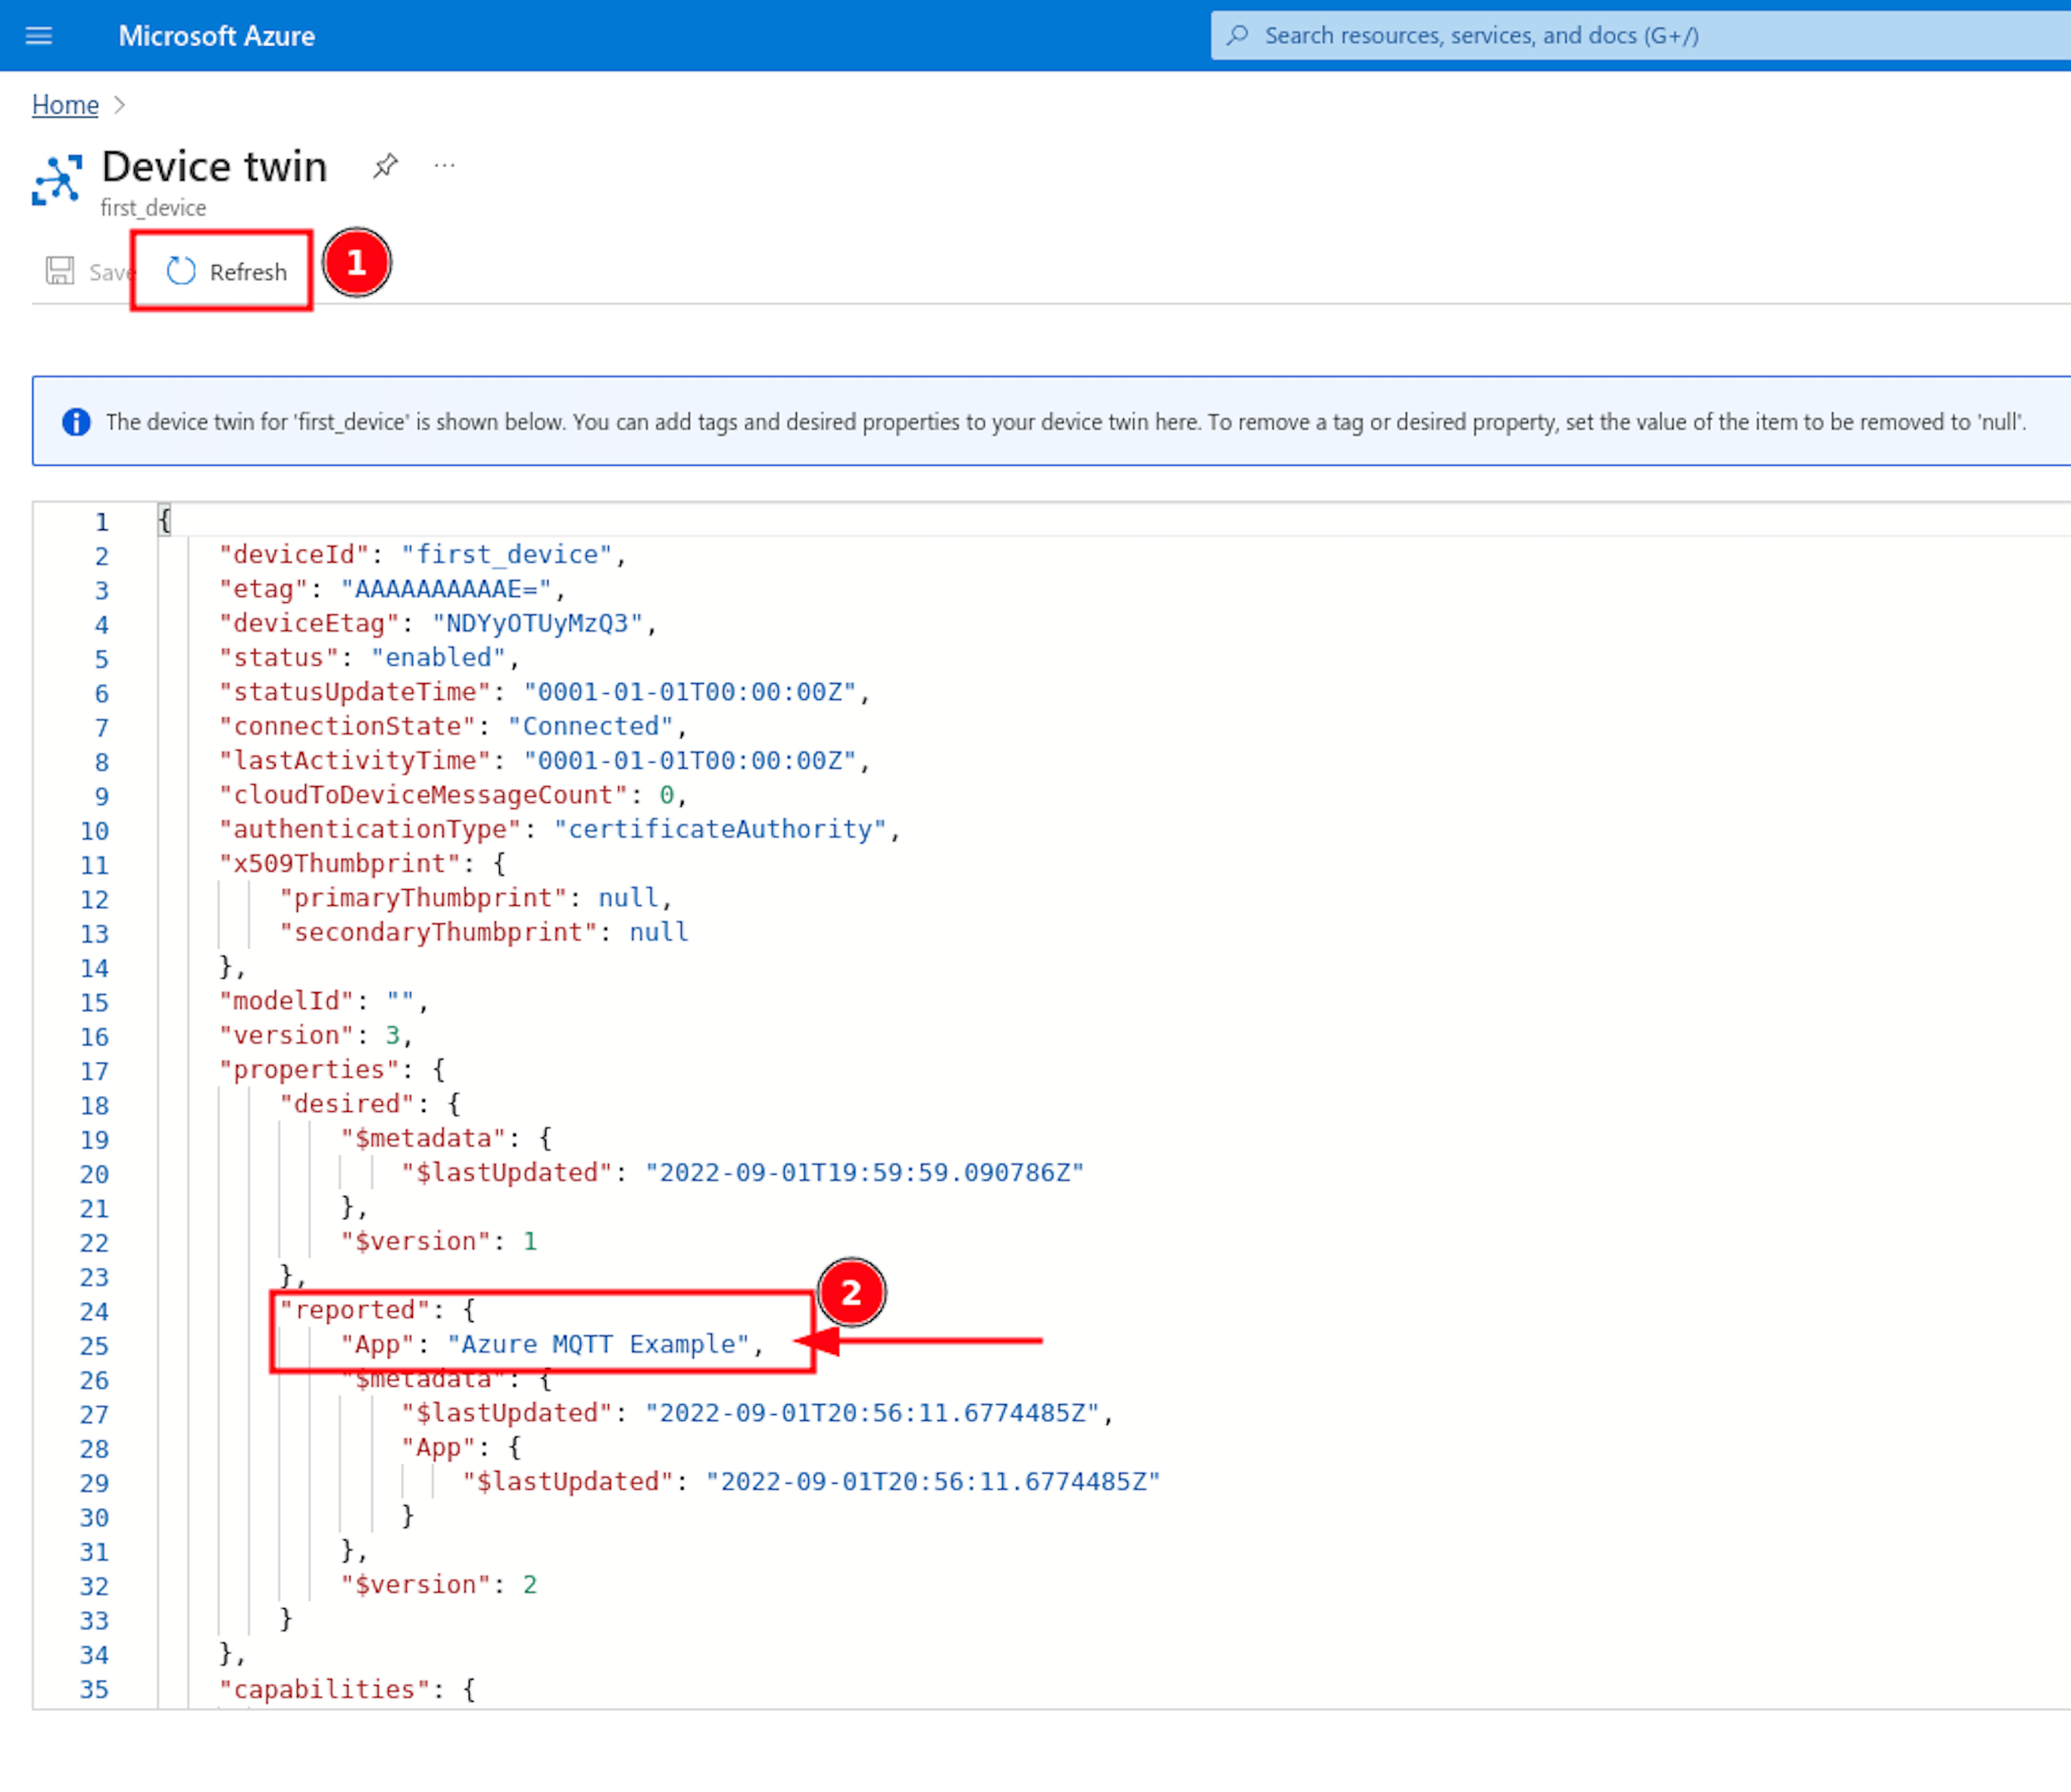
Now, go to your Internet browser and open the Azure IoT Hub dashboard. Select Devices from the sidebar, and choose the device we created for our Pico LTE. You may see a button called Device Twin, press it.
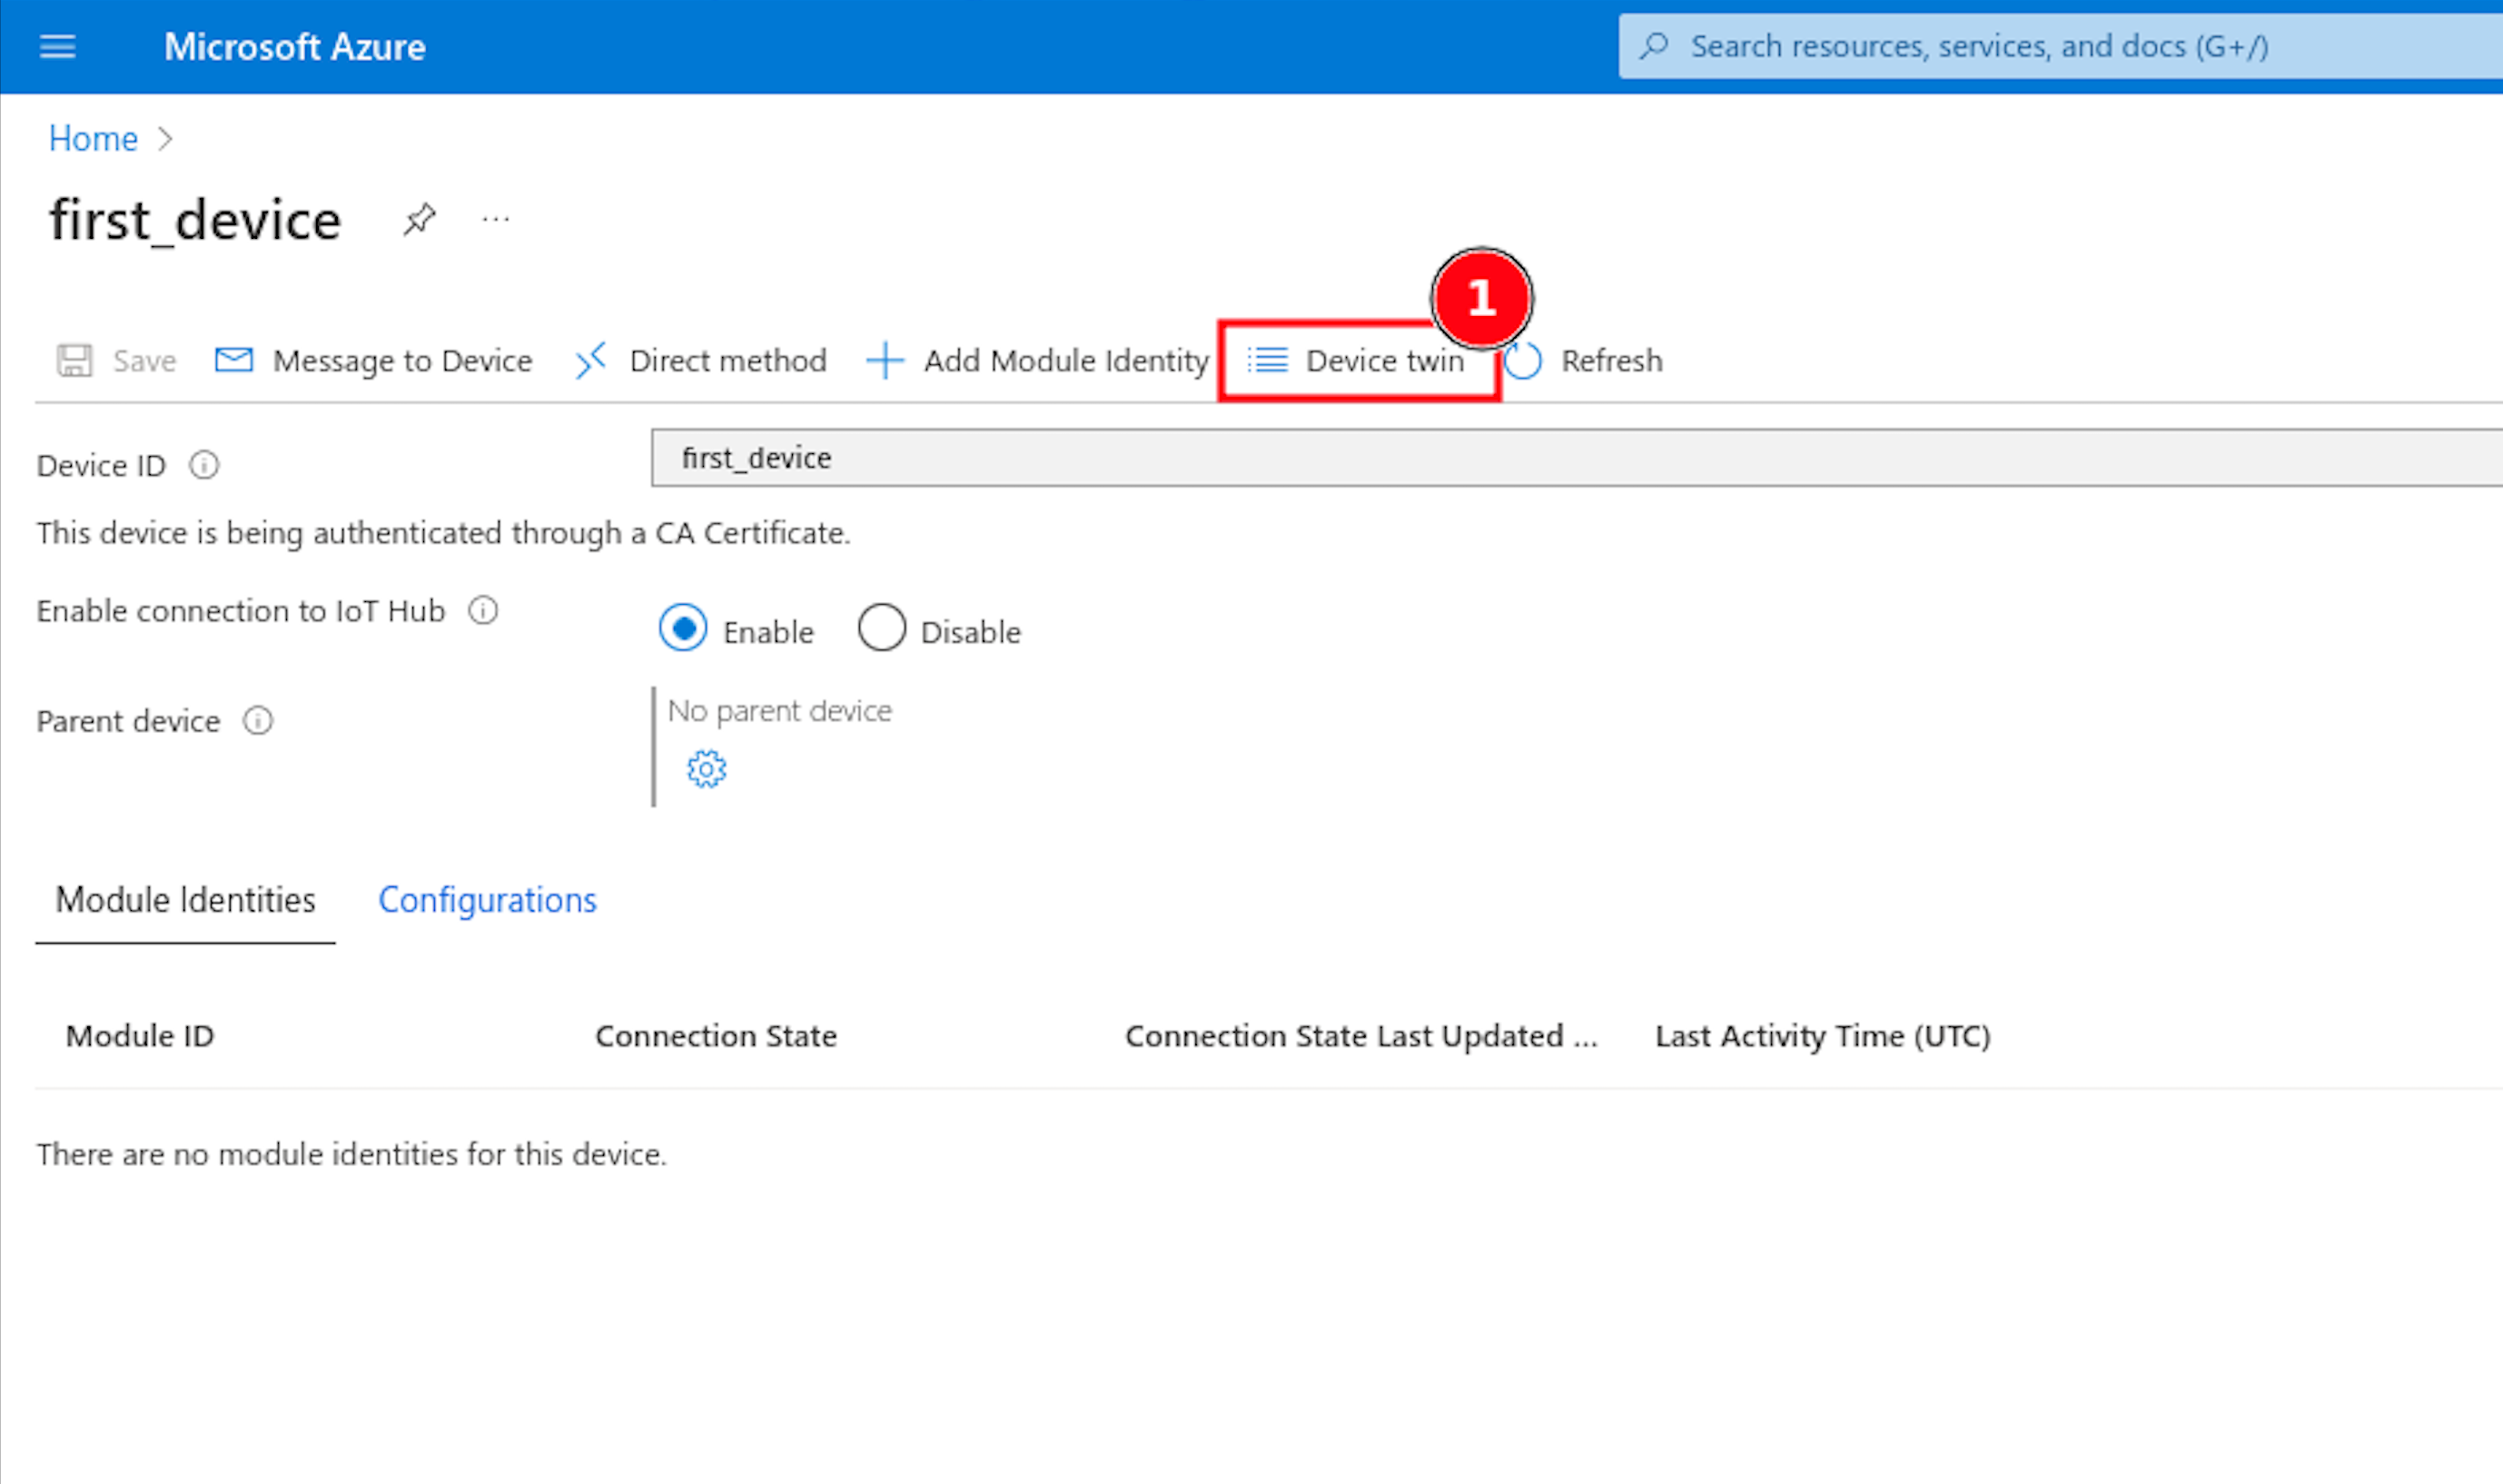
This panel is a JSON-looking descriptive document to see your configurations and data about your device. The data published from the device is always saved under the reported property. If you cannot see your message in this Device twin, click to Refresh button and check it again.
Subscribing (Cloud-to-Device) Azure IoT Hub using MQTT
Register and Activate Azure IoT Hub
1. Register or login to your Azure account. You may want to follow this tutorial on Microsoft Azure's documentation.
2. Type IoT Hub onto the search bar, and choose the service which has the same name with what we wrote. Click Create IoT Hub button.
3. If the resource group is not created, click "Create new" to create it, then select a resource group to connect your Azure IoT Hub, and give a name to your hub. "IoT hub name" will be used in the config.json file. Therefore, note it somewhere. Please note that you may want to see other details such as Pricing in the Managment tab before pressing the Review + create button.
4. Review the information and if everything seems OK, press Create. Azure is going to deploy your service. Press Go to resource.
5. Creating Certificates
- Set up the X.509 OpenSSL environment
- Create the root CA certificate
- Create the intermediate CA certificate
- Create the device certificates
- Go to your IoT Hub. Type “Certificates” in the left menu and click “Certificates”.
- Click “Add”.
- In the side menu, you can add certificate. Input a certificate name. Then select certificate file in your certificate directory. The path is certificateDirectory/certs/azure-iot-test-only.intermediate.cert.pem. Lastly, press the button “Set certificate status to verified on upload” and click “Save”.
- Type “Devices” in the left menu and click “Devices”.
- Click “Add Device”.
- Input the id (device name) of your device created before. Select “X.509 CA Signed” in the “Authentication type” section and press “Save”.
In this guide, you can replace 'device-01' with a name of your choice in all the commands. This device name will be used in the subsequent steps. Additionally, the 7th step is for registering a second device; you do not need to perform this step for a single device.
6. Download this certificate and save it to somewhere with cacert.pem file name. This certificate file is the root certificate for Azure IoT Hub services.
Upload the Certificates to Your Pico LTE
1. Create a folder named cert.
Note
Please note that it should be somewhere else then the directory created by certificateDirectory script in previous section's Step 5.
2. Rename the certificates you have with the names below, as indicated next to them, and copy them to the cert folder.
- "certificateDirectory/certs/[DEVICE_NAME].cert.pem" → client.pem
- "certificateDirectory/private/[DEVICE_NAME].key.pem" → user_key.pem
3. Copy the cacert.pem file that is created in previous section's Step 6 into the cert directory you've created.
4. Upload this cert directory to your root directory of Pico LTE device.
Test the Code Example
Copy the following code block into the config.json file and enter your credentials.
{
    "azure":{
        "hub_name": "YOUR_AZURE_IOT_HUB_NAME",
        "device_id": "YOUR_DEVICE_ID",
        "mqtts": {
            "sub_topics": [
            ["[SUB_TOPIC/1]", [QOS]],
            ["[SUB_TOPIC/2]", [QOS]],
            ],
        }
    }
}
Note
The key "mqtts":{"sub_topics"} should be in this format: "sub_topics": [ [ "devices/[DEVICE_ID] /messages/devicebound/#” , 1] ]
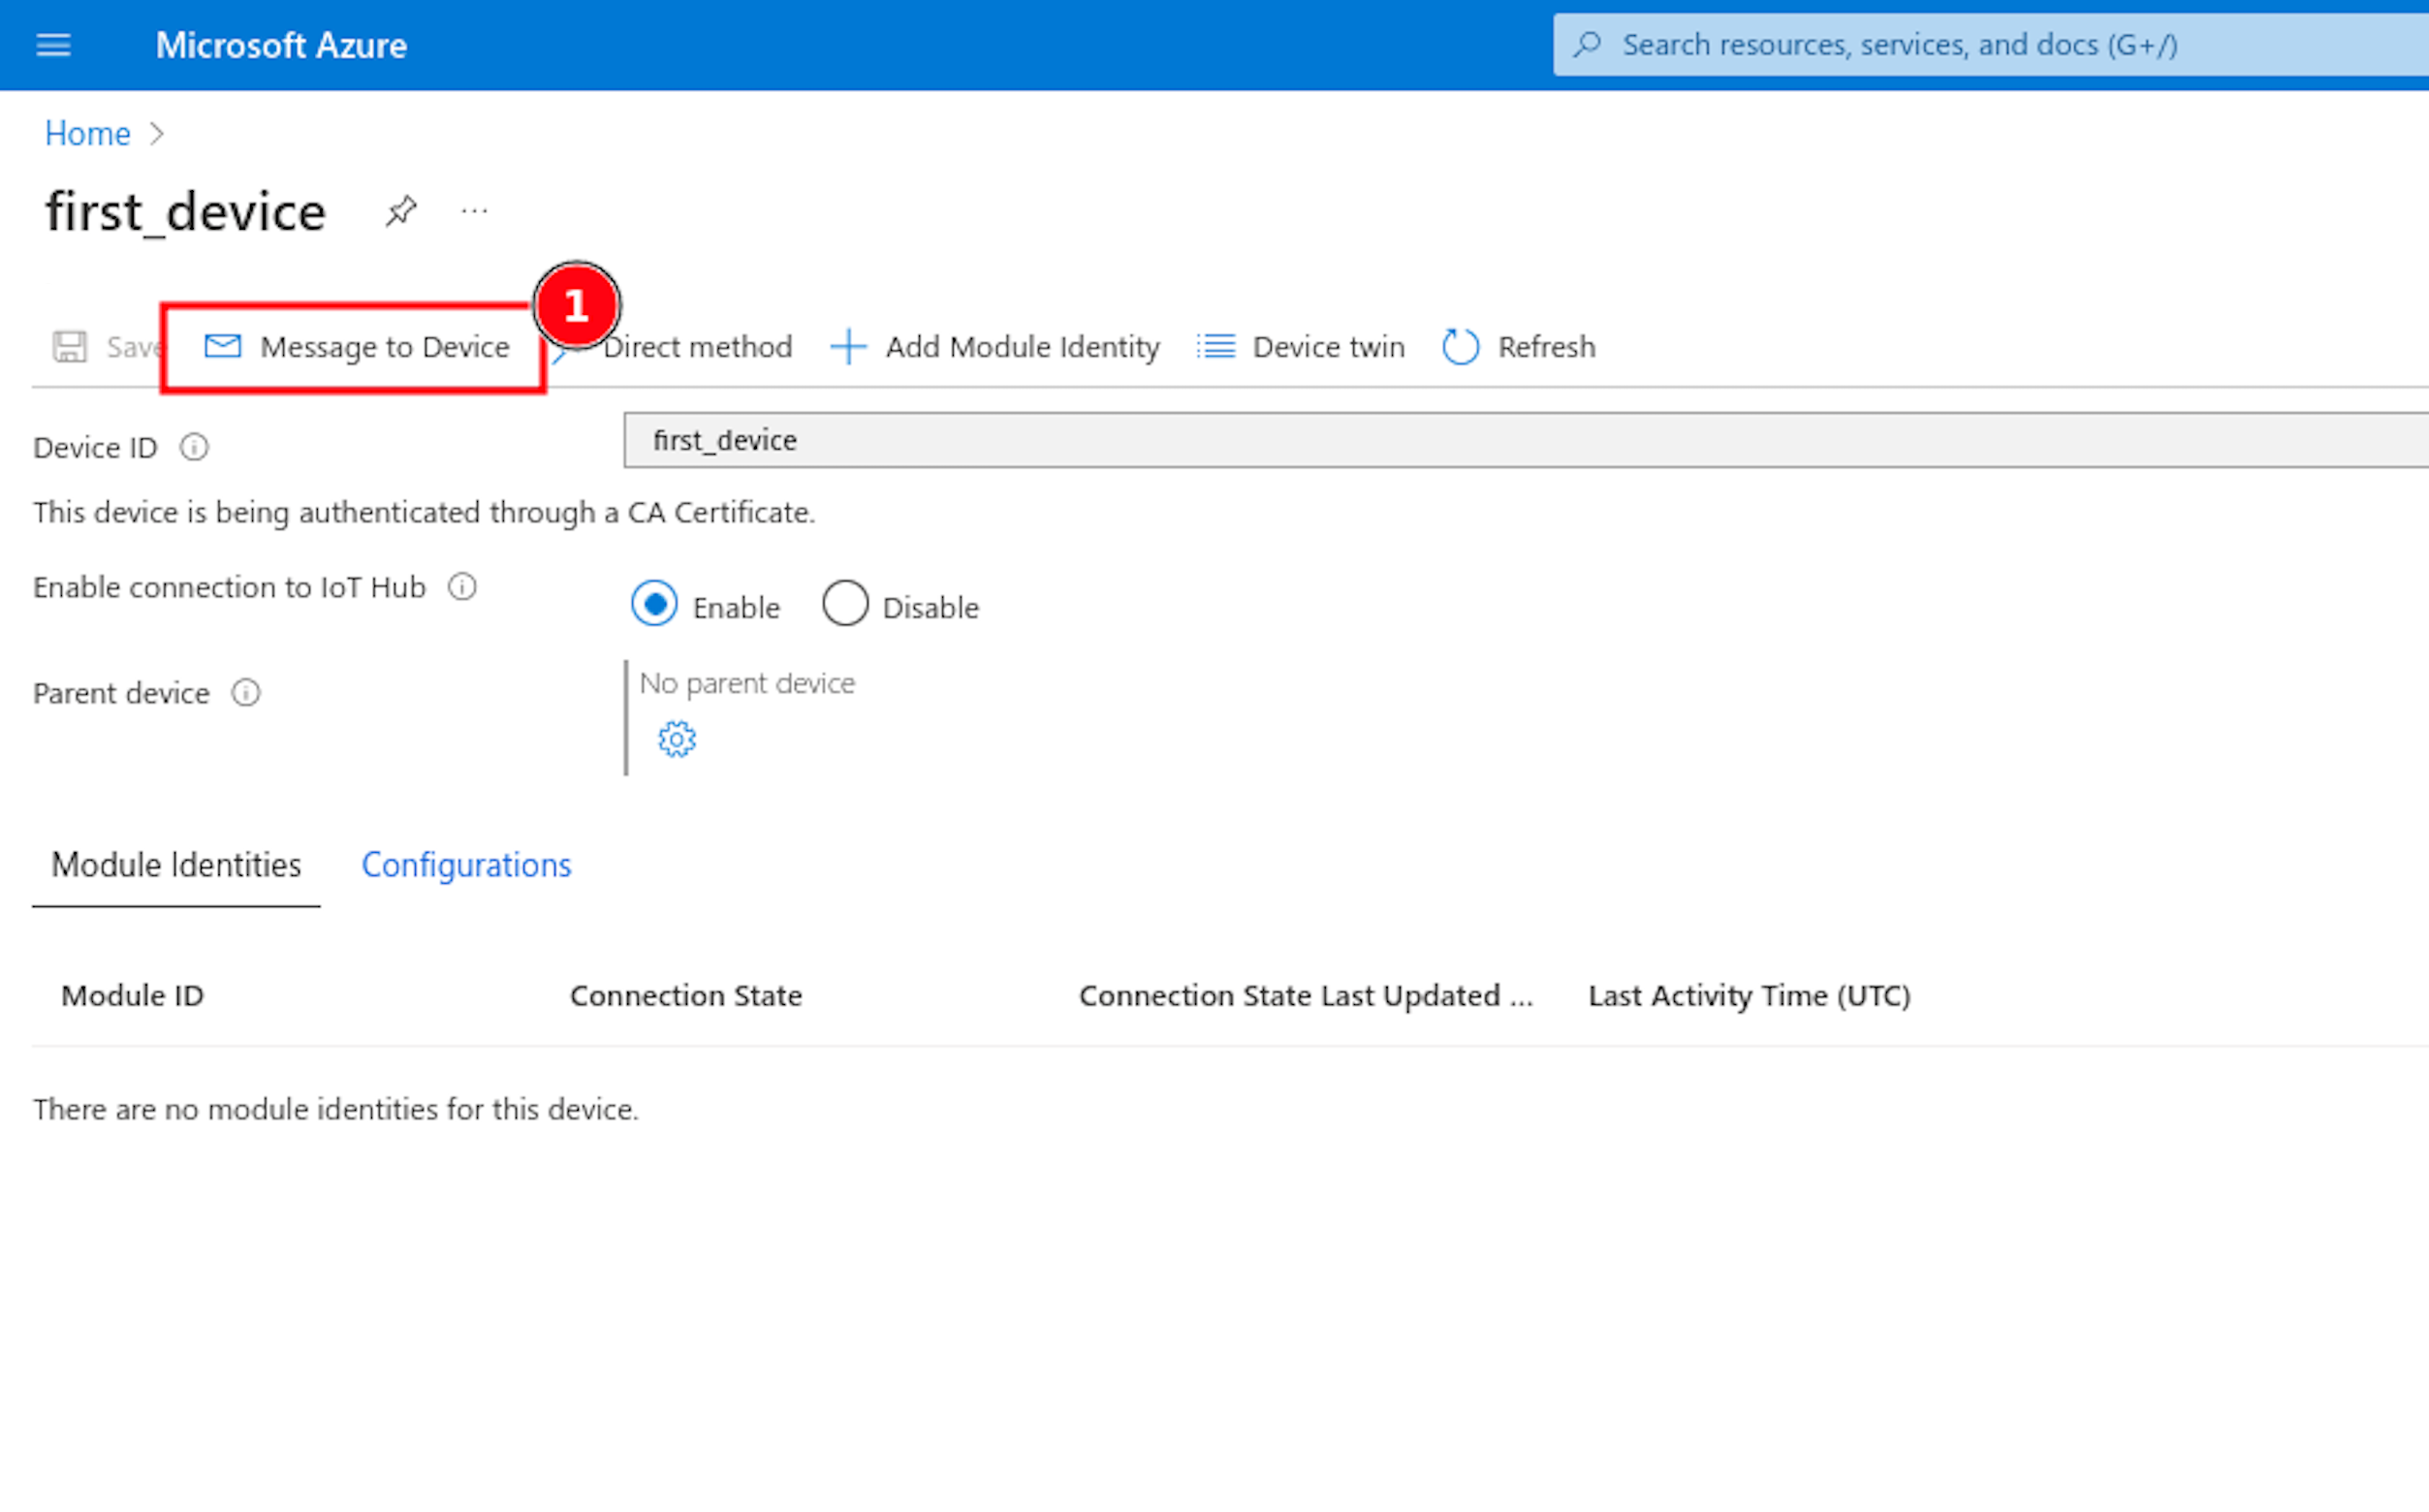
Before running the code, you should go to your IoT Hub dashboard. Select Devices from the sidebar, and choose the device we created for our Pico LTE. Then, click the Message to Device button to open the form to send a message from cloud-to-device.
Run the "mqtt_subscribe.py" script that you opened in Thonny IDE, and return to look to Message to Device panel, send a message and look to the console output.
The output you get in the code should look like this:
Updated 8 months ago