Getting Started
This section will lead you step by step to create a cellular connection with the Raspberry Pi Cellular IoT Kit (LTE-M)
The Raspberry Pi 4G/LTE Cellular IoT Kit provides all the components you will need for establishing an internet connection on your Raspberry Pi using the Sixfab CORE solution.
Getting started is pretty straight forward, first you will setup the hardware then complete the Sixfab CORE installation. Each of the steps are mentioned in detail below.
System Requirements
To getting started with the Raspberry Pi 4G/LTE Cellular Modem Kit, first check the following requirements.
Hardware Requirements | Software Requirements |
---|---|
Raspberry Pi 3,3B+ and 4 | - Raspberry Pi OS 10(Buster) or newer - Ubuntu Server 20.04.3 or higher |
Hardware Setup
1. Attach the mini PCIe module to the HAT

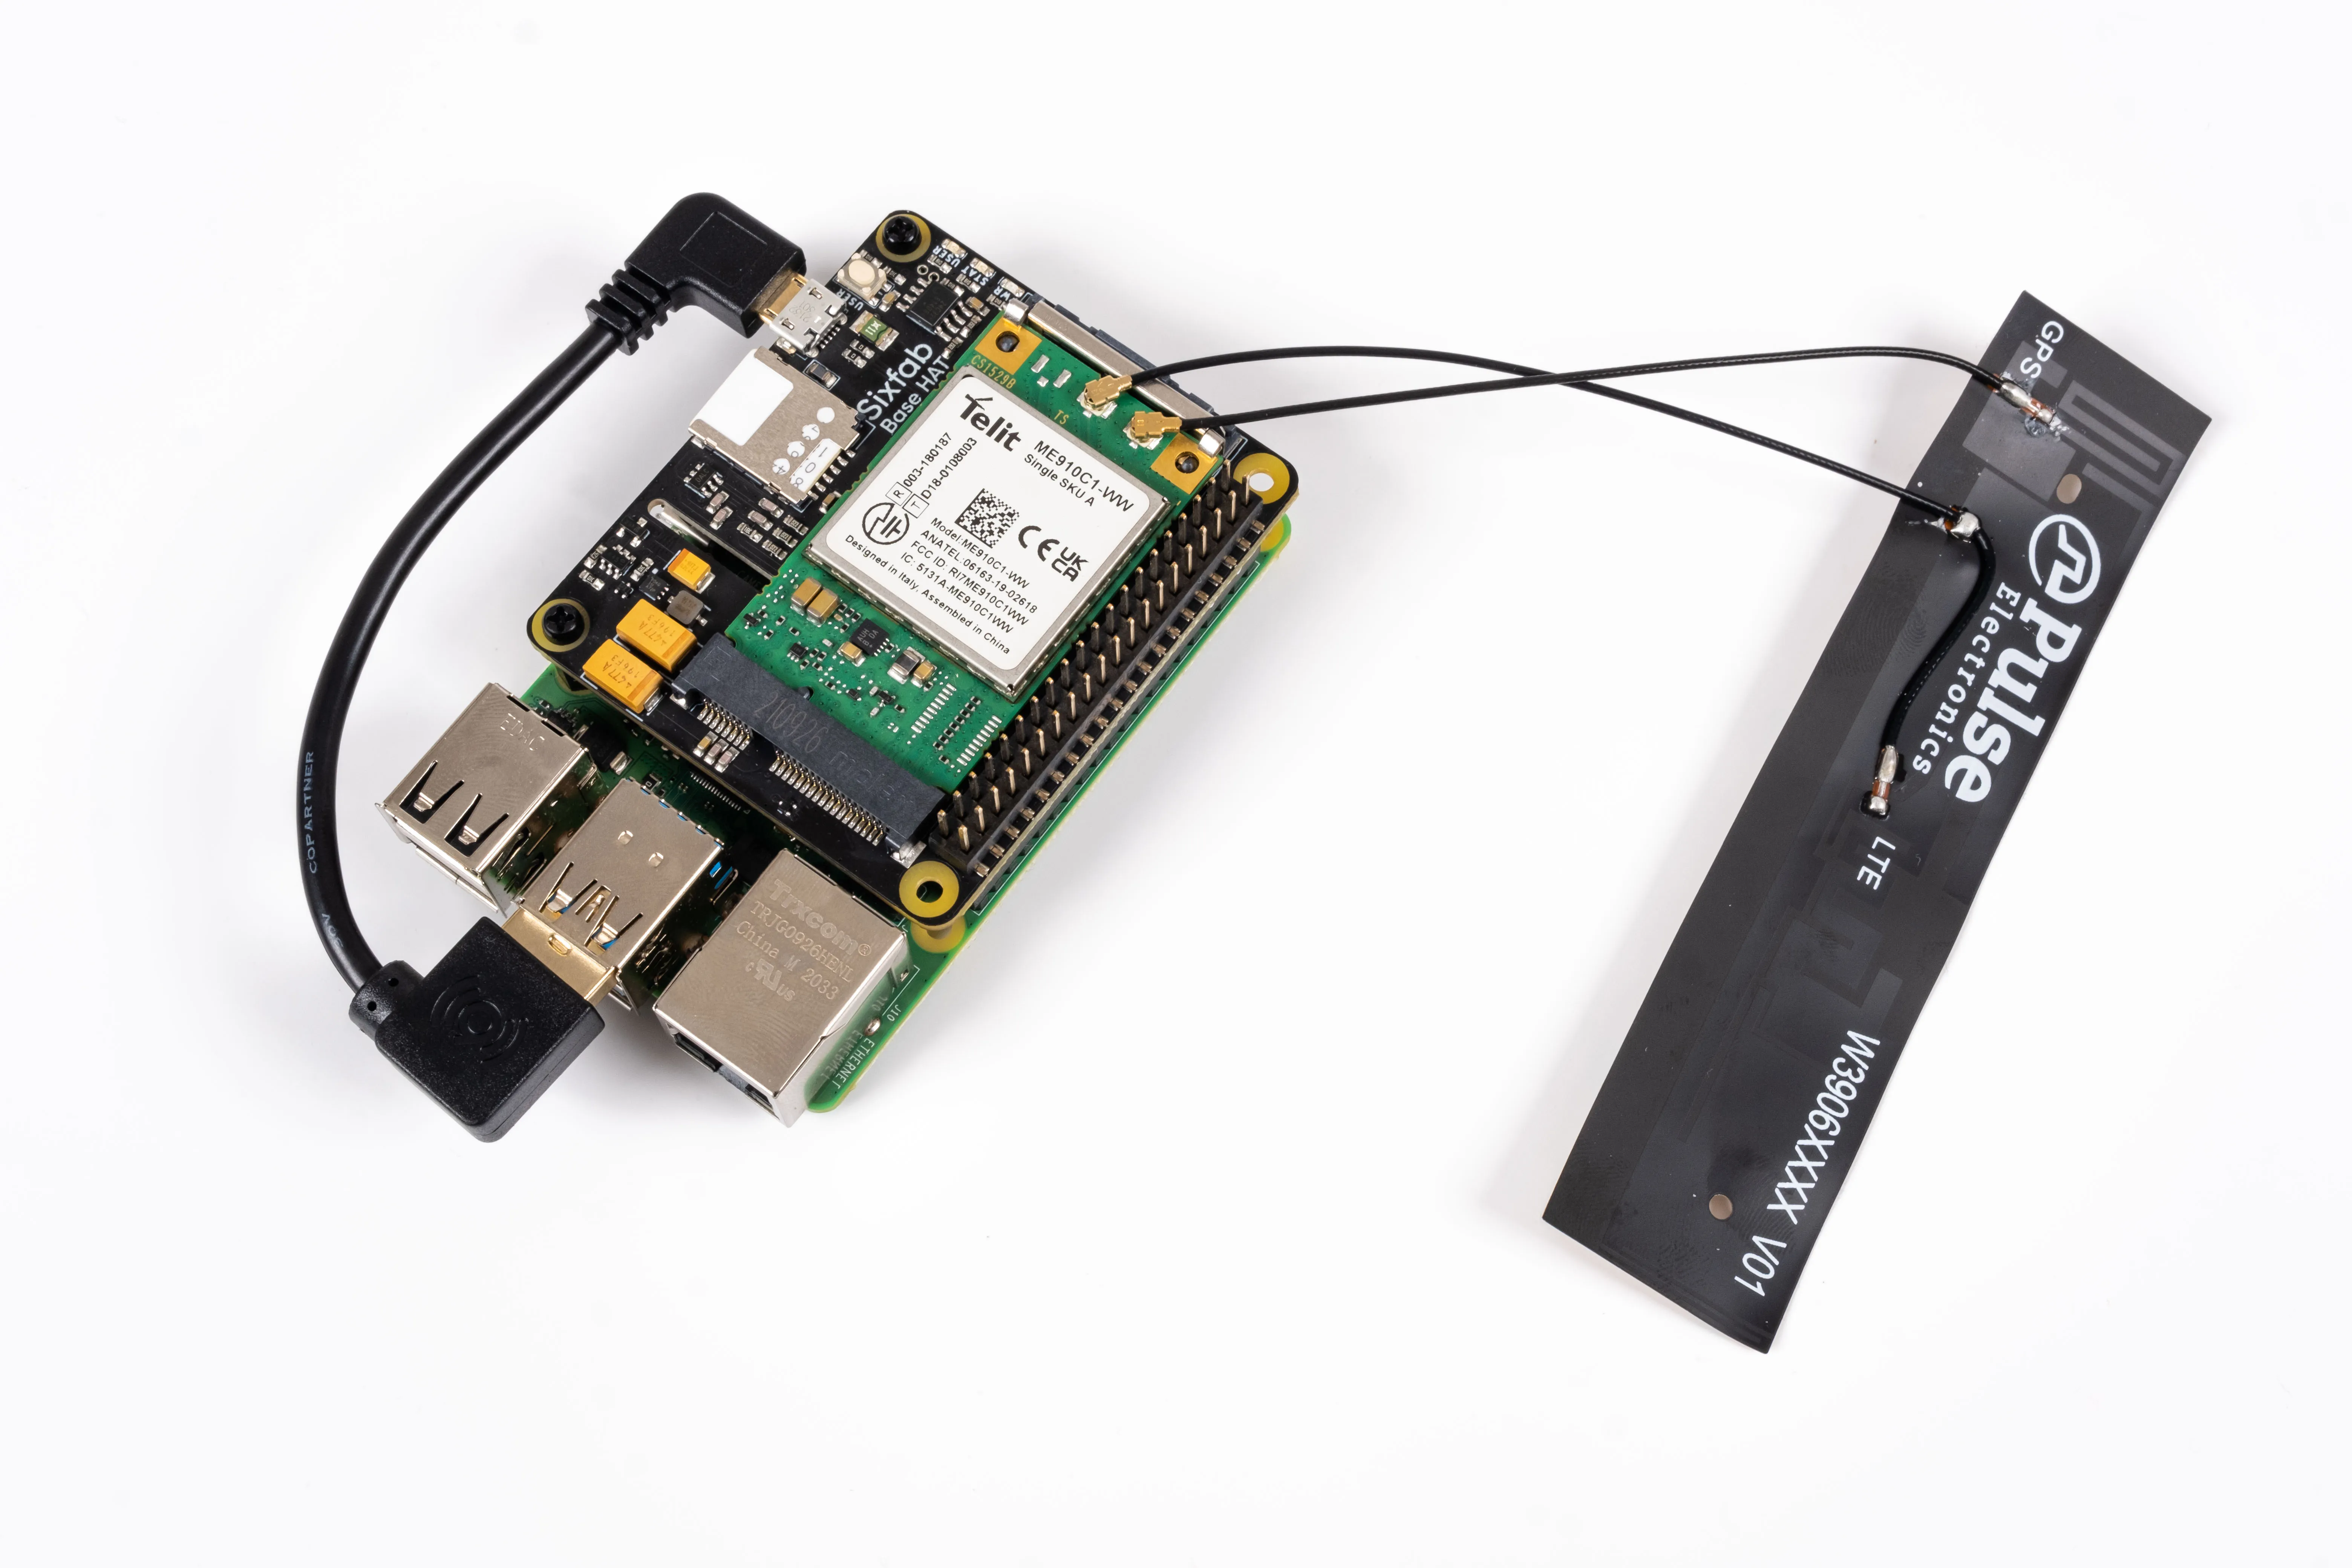
2. Attach the antenna to the mini PCIe module
Make sure the right antenna is connected to the right port. Attach LTE full band PCB antenna/LTE connector of the LTE-GNSS dual antenna to the main Antenna interface/diversity antenna interface & GPS Antenna portion goes to the GNSS antenna interface.

Telit ME910C1-WW Antenna Interface

3. Attach header and Sixfab SIM

4. Attach it to the Raspberry Pi

📖 Note
For a clean install and avoiding installation errors, plug Micro USB into HAT after the software setup is complete.
5. Plug the power supply into a socket and connect it to your Raspberry Pi’s power port
Software Setup
We have completed the hardware setup, now we will install Sixfab CORE for a smooth and reliable cellular connection. Register SIM, create device and run installation code. That is all.1. Sign In
Head over to connect.sixfab.com and log in with your credentials.
2. Register your first SIM and Add Coupon/Credit
If you are logging into Connect for the first time, follow the 'Quickstart' steps first. If not, continue with step 3.
Register your SIM with its ICCID and giving it a name.

Add your credit card or add credit using the $25 coupon code provided by Sixfab that comes with the kit.

Adding credits using Coupon Code


3. Register a SIM
Register and activate a SIM from the "SIM -> Register a SIM" section.
Skip this step if you already have an active registered SIM.
4. Create Device
Now everything is ready to install Sixfab CORE on the device.
An active Sixfab SIM is required to create a device. Activate the SIM from the SIM details page.

View your available SIM cards by going to "SIM -> My SIMs". Click on the "Create Device" link in the row the SIM for which you will create the device.

📖 Note
If you want to continue without creating a device in the Sixfab CORE, you can use it according to the user manual of the module used. You can follow the tutorials we prepared for PPP, QMI and ECM protocols supported by these modules here. Sixfab CORE is highly recommended for a robust and reliable connection.
5. Select Region and Board for Device
Here, choose according to your region.
Region | Description |
---|---|
Global | For devices to be deployed Worldwide |
EMEA | For devices to be deployed in Europe, the Middle East and Africa |
APAC | For devices to be deployed in Asia-Pacific only |

6. Copy the Installation Code

7. Keep the USB Cable unplugged from the HAT
If the USB cable is plugged in, unplug the USB.
8. Run the installation code
Open a terminal on the Raspberry Pi and run the installation code you have just copied.
9. Plug the USB cable to the HAT
Once the installation is completed successfully, Hit Enter to reboot the Raspberry Pi and plug the USB cable to the HAT.
10. Installation Complete
Refresh the device page after the installation is complete. The following dashboard will appear with the device information. After a successful connection, please wait for 3-5 minutes for the data to appear on the dashboard.

Updated 8 months ago