
ThingSpeak with MQTT
Pico LTE ThingSpeak Connection
Before starting this Pico LTE tutorial, the Pico LTE SDK installation and configuration steps must be completed. Below are the system requirements for this tutorial. If you haven't followed the SDK installation steps, please refer to the page below before proceeding with the tutorial. The details of these steps will not be covered in this tutorial.
System Requirements
| Hardware Requirements | Software Requirements |
|---|---|
| • Sixfab Pico LTE • Micro USB cable |
• Thonny IDE |
If you have completed all the requirements, you are ready to send a message to Telegram with the Pico LTE device.
Let's get started!
Preparing Coding Environment
- Download the Pico LTE SDK repository to your local machine. If you have already downloaded it, skip this step.
- Open script "examples → thingspeak → mqtt_publish.py or mqtt_subscribe.py from the repository via Thonny IDE.
- If you haven't, create a config.json file in the root directory of Pico LTE device.
Create a Channel
- Sign In to ThingSpeak™ using your MathWorks® Account credentials, or create a new account.
- Click Channels > MyChannels.
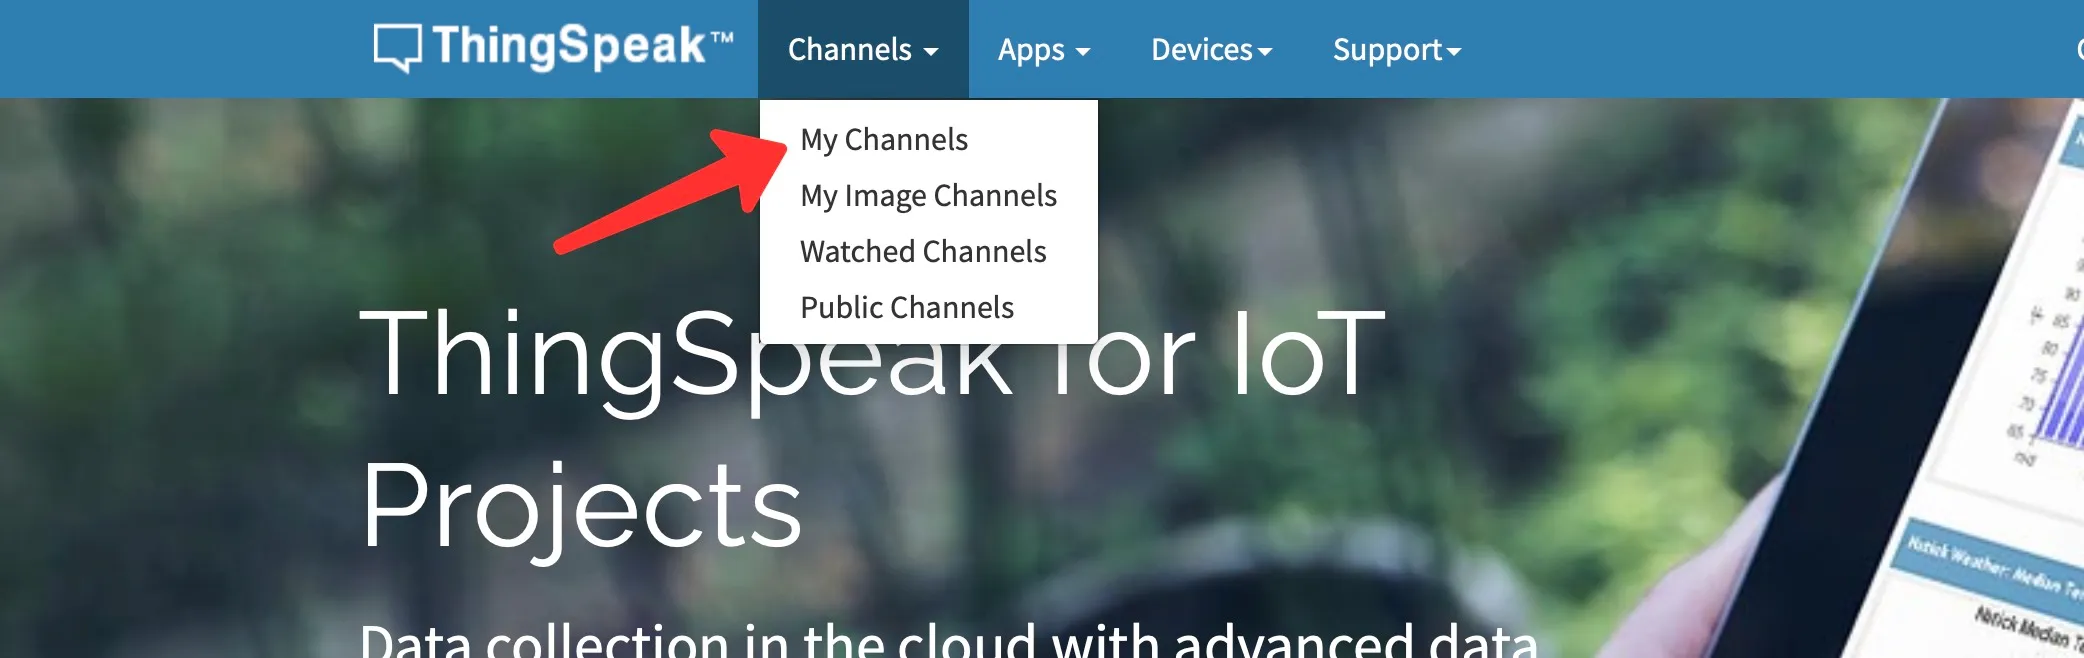
- On the Channels page, click New Channel.
- Check the boxes next to Fields 1–2. You can set other values as you wish. These settings can also be changed after creating the channel.
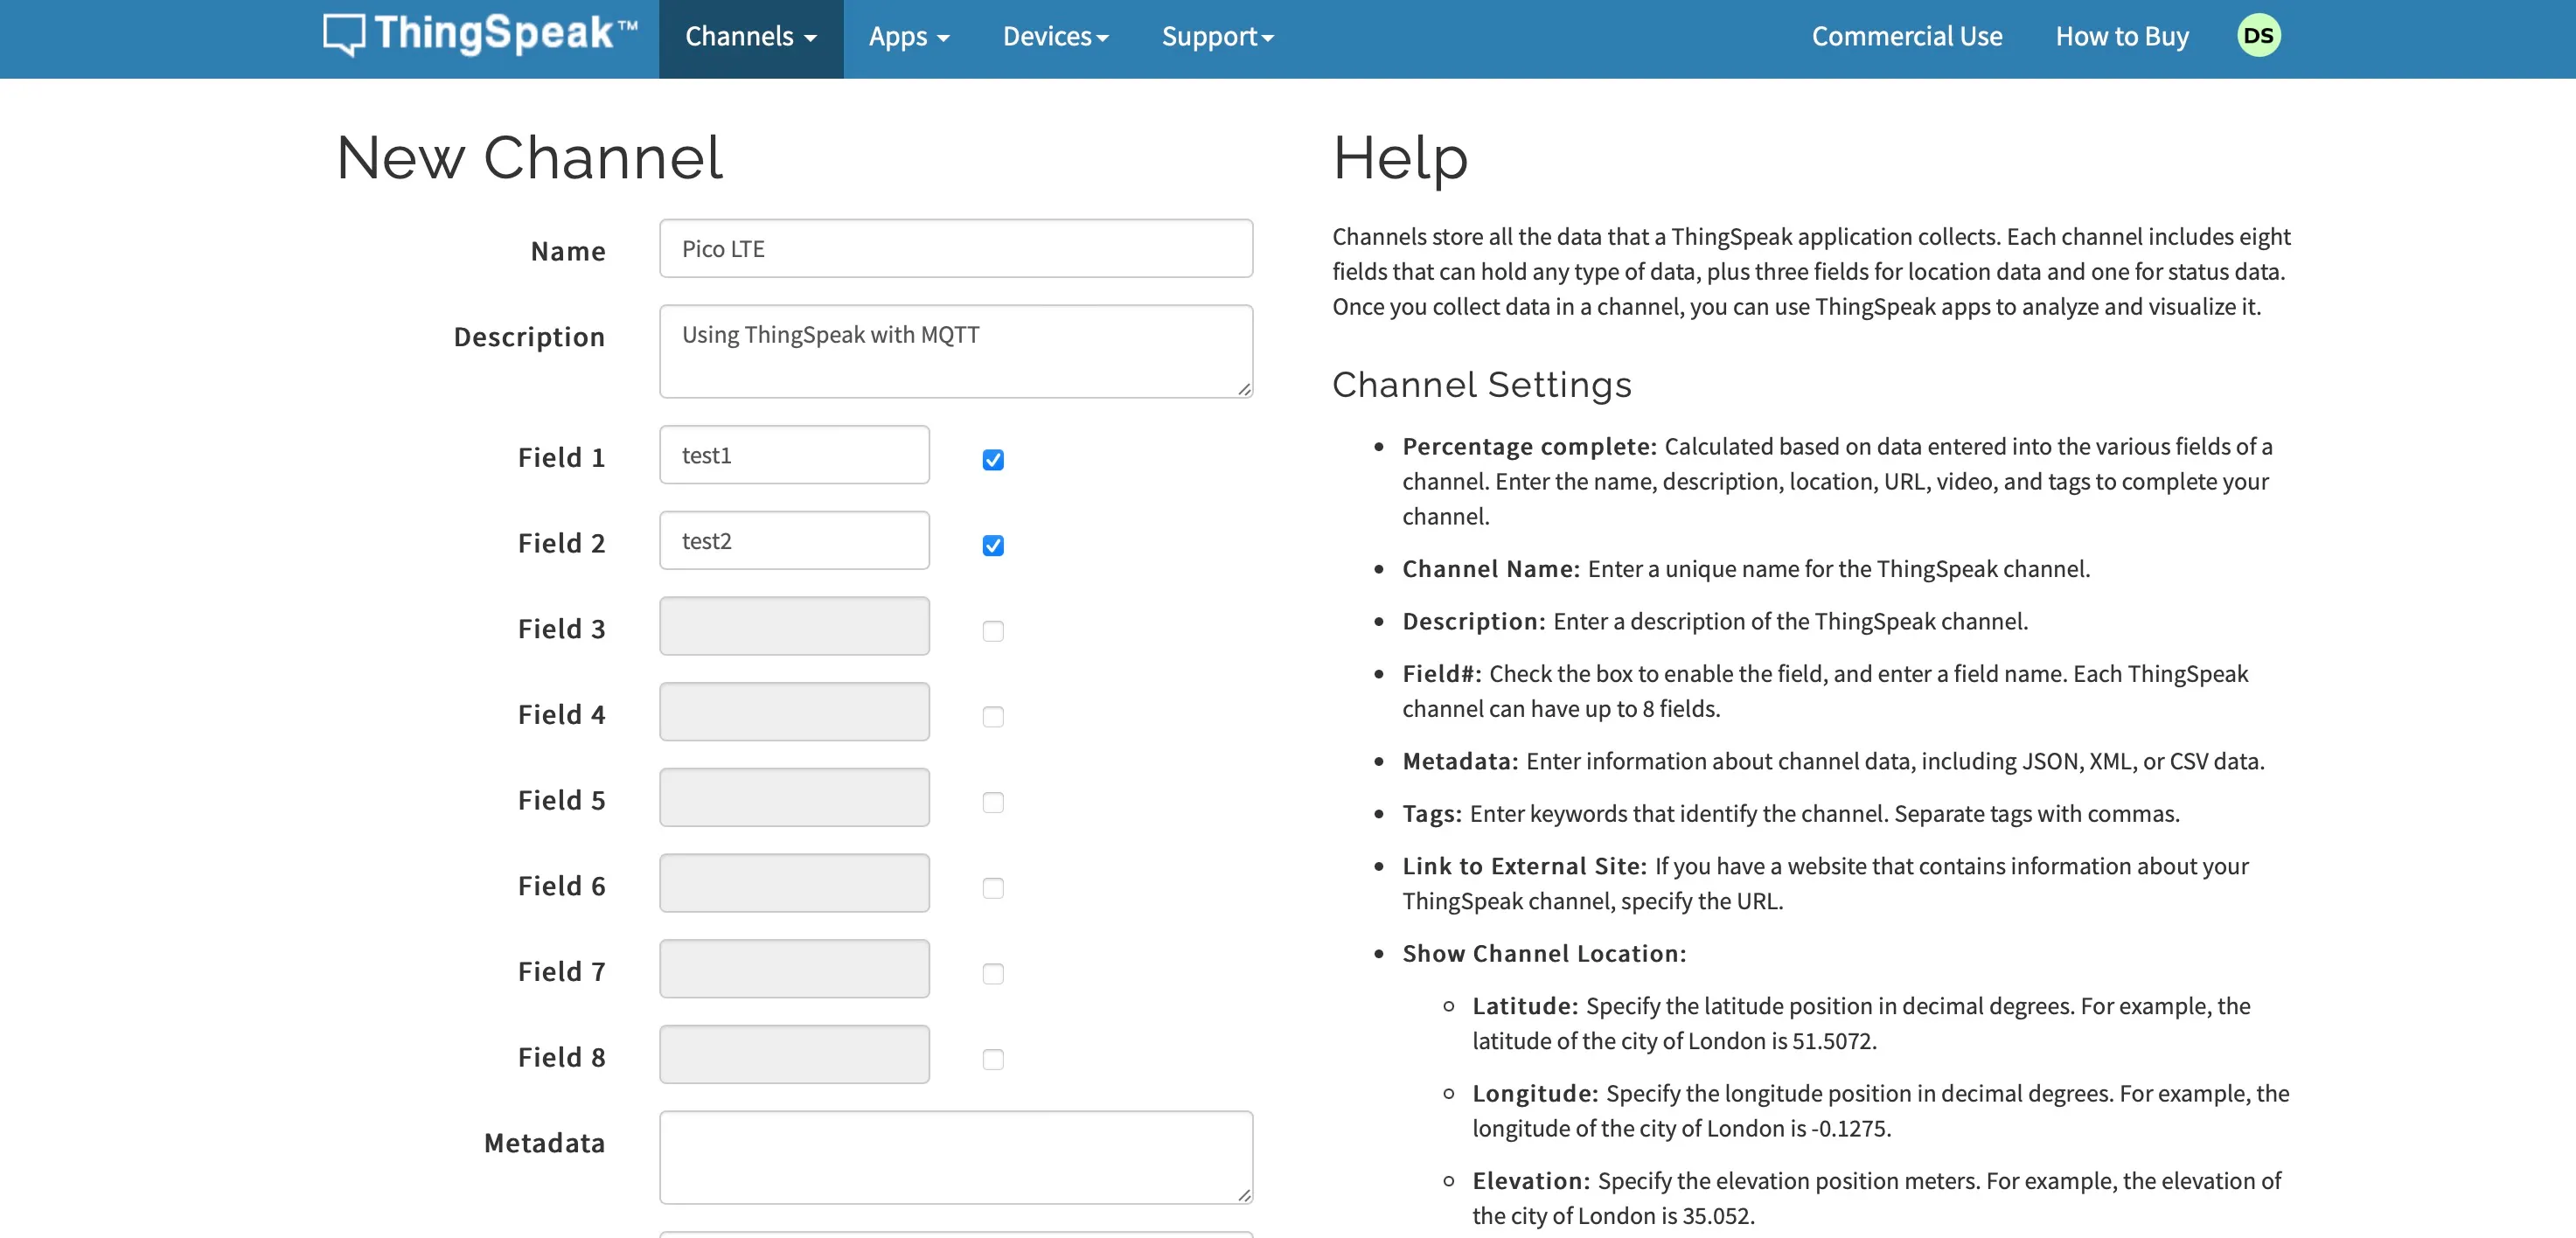
- Click Save Channel at the bottom of the settings.
You now see these tabs:
- Private View: This tab displays information about your channel that only you can see.
- Public View: If you choose to make your channel publicly available, use this tab to display selected fields and channel visualizations.
- Channel Settings: This tab shows all the channel options you set at creation. You can edit, clear, or delete the channel from this tab.
- Sharing: This tab shows channel sharing options. You can set a channel as private, shared with everyone (public), or shared with specific users.
- API Keys: This tab displays your channel API keys. Use the keys to read from and write to your channel.
- Data Import/Export: This tab enables you to import and export channel data.
Your channel is available for future use by clicking Channels > My Channels.
Create a ThingSpeak MQTT Device
MQTT access to your channels, including credentials, is handled by a ThingSpeak MQTT device. Your device is configured with the credentials necessary for your MQTT client to communicate with ThingSpeak, and for authorizing specific channels. Use the following steps to create an MQTT device.
- In the ThingSpeak menu click Devices > MQTT.
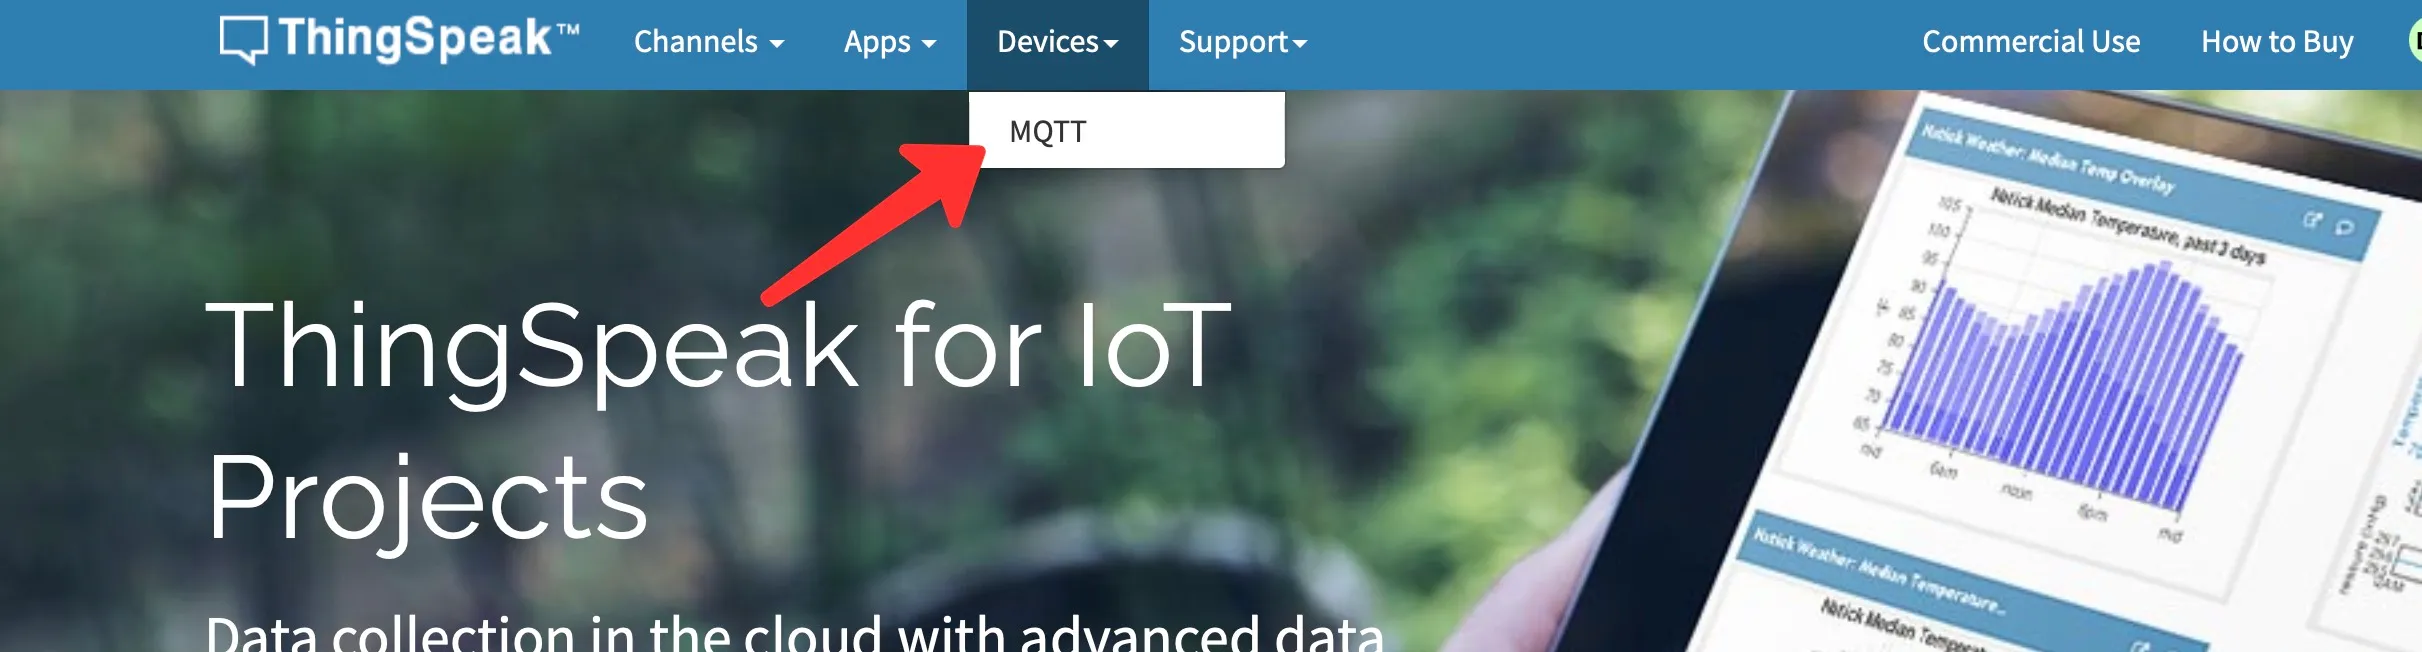
- On the MQTT Devices page, click Add a new device.

- Fill in the Add a new device dialog:
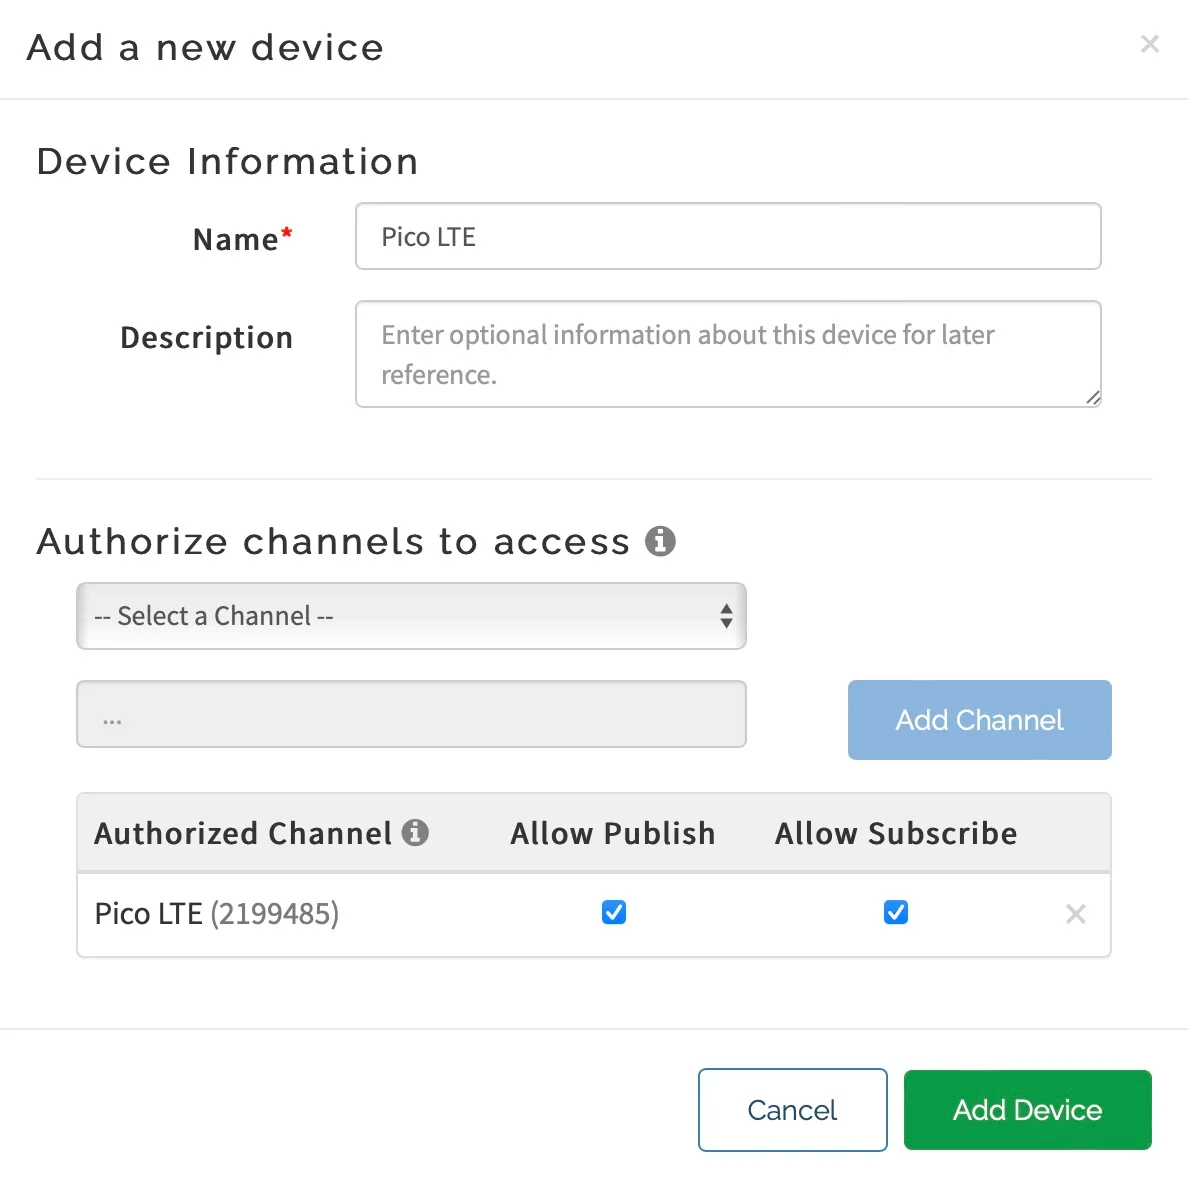
- Provide a device name.
- Provide an optional description.
- In the Authorize Channels section, select the channel you created from the list menu, then click Add Channel. Repeat this until you have all the channels you want connected to the device in the Authorized Channel list. Set each to allow publish and allow subscribe as needed.
- Click Add Device.
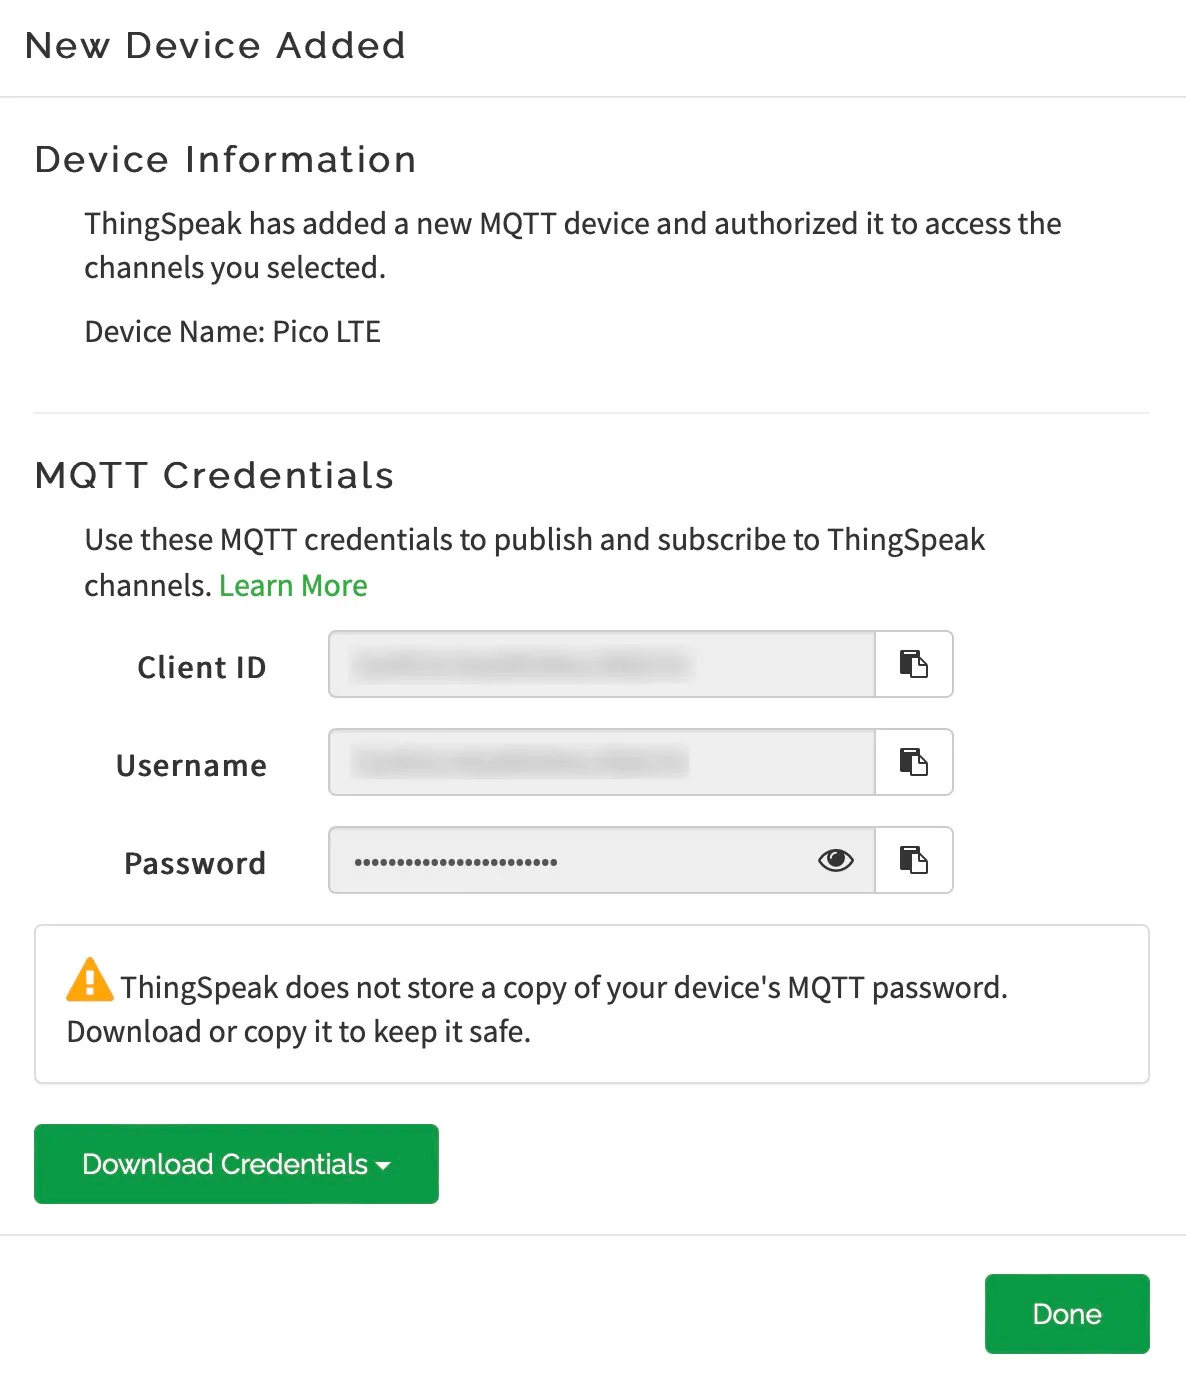
- At this point, ThingSpeak generates a list of credentials for your device that includes client ID, username, and password. You can view and copy these items from this page, or click Download Credentials to save the credentials in a local file. Important: Record or save your credentials now, as you will not get another opportunity to view or save the password.
- Click Done to complete the device creation.
Your new device now appears on the MQTT Devices page. You can alter your device settings and add channels to it by clicking Edit. You can use the client ID, username, and password in your MQTT client to access your ThingSpeak MQTT device for publishing and subscribing to its channels.
- MQTT Credentials
While adding the new device, click Download Credentials > Plain Text. Keep this file safe as we will be using the following steps.
Publishing Data to ThingSpeak using MQTT in Pico LTE
This example shows how simple it can be to send data to ThingSpeak using MQTT.
-
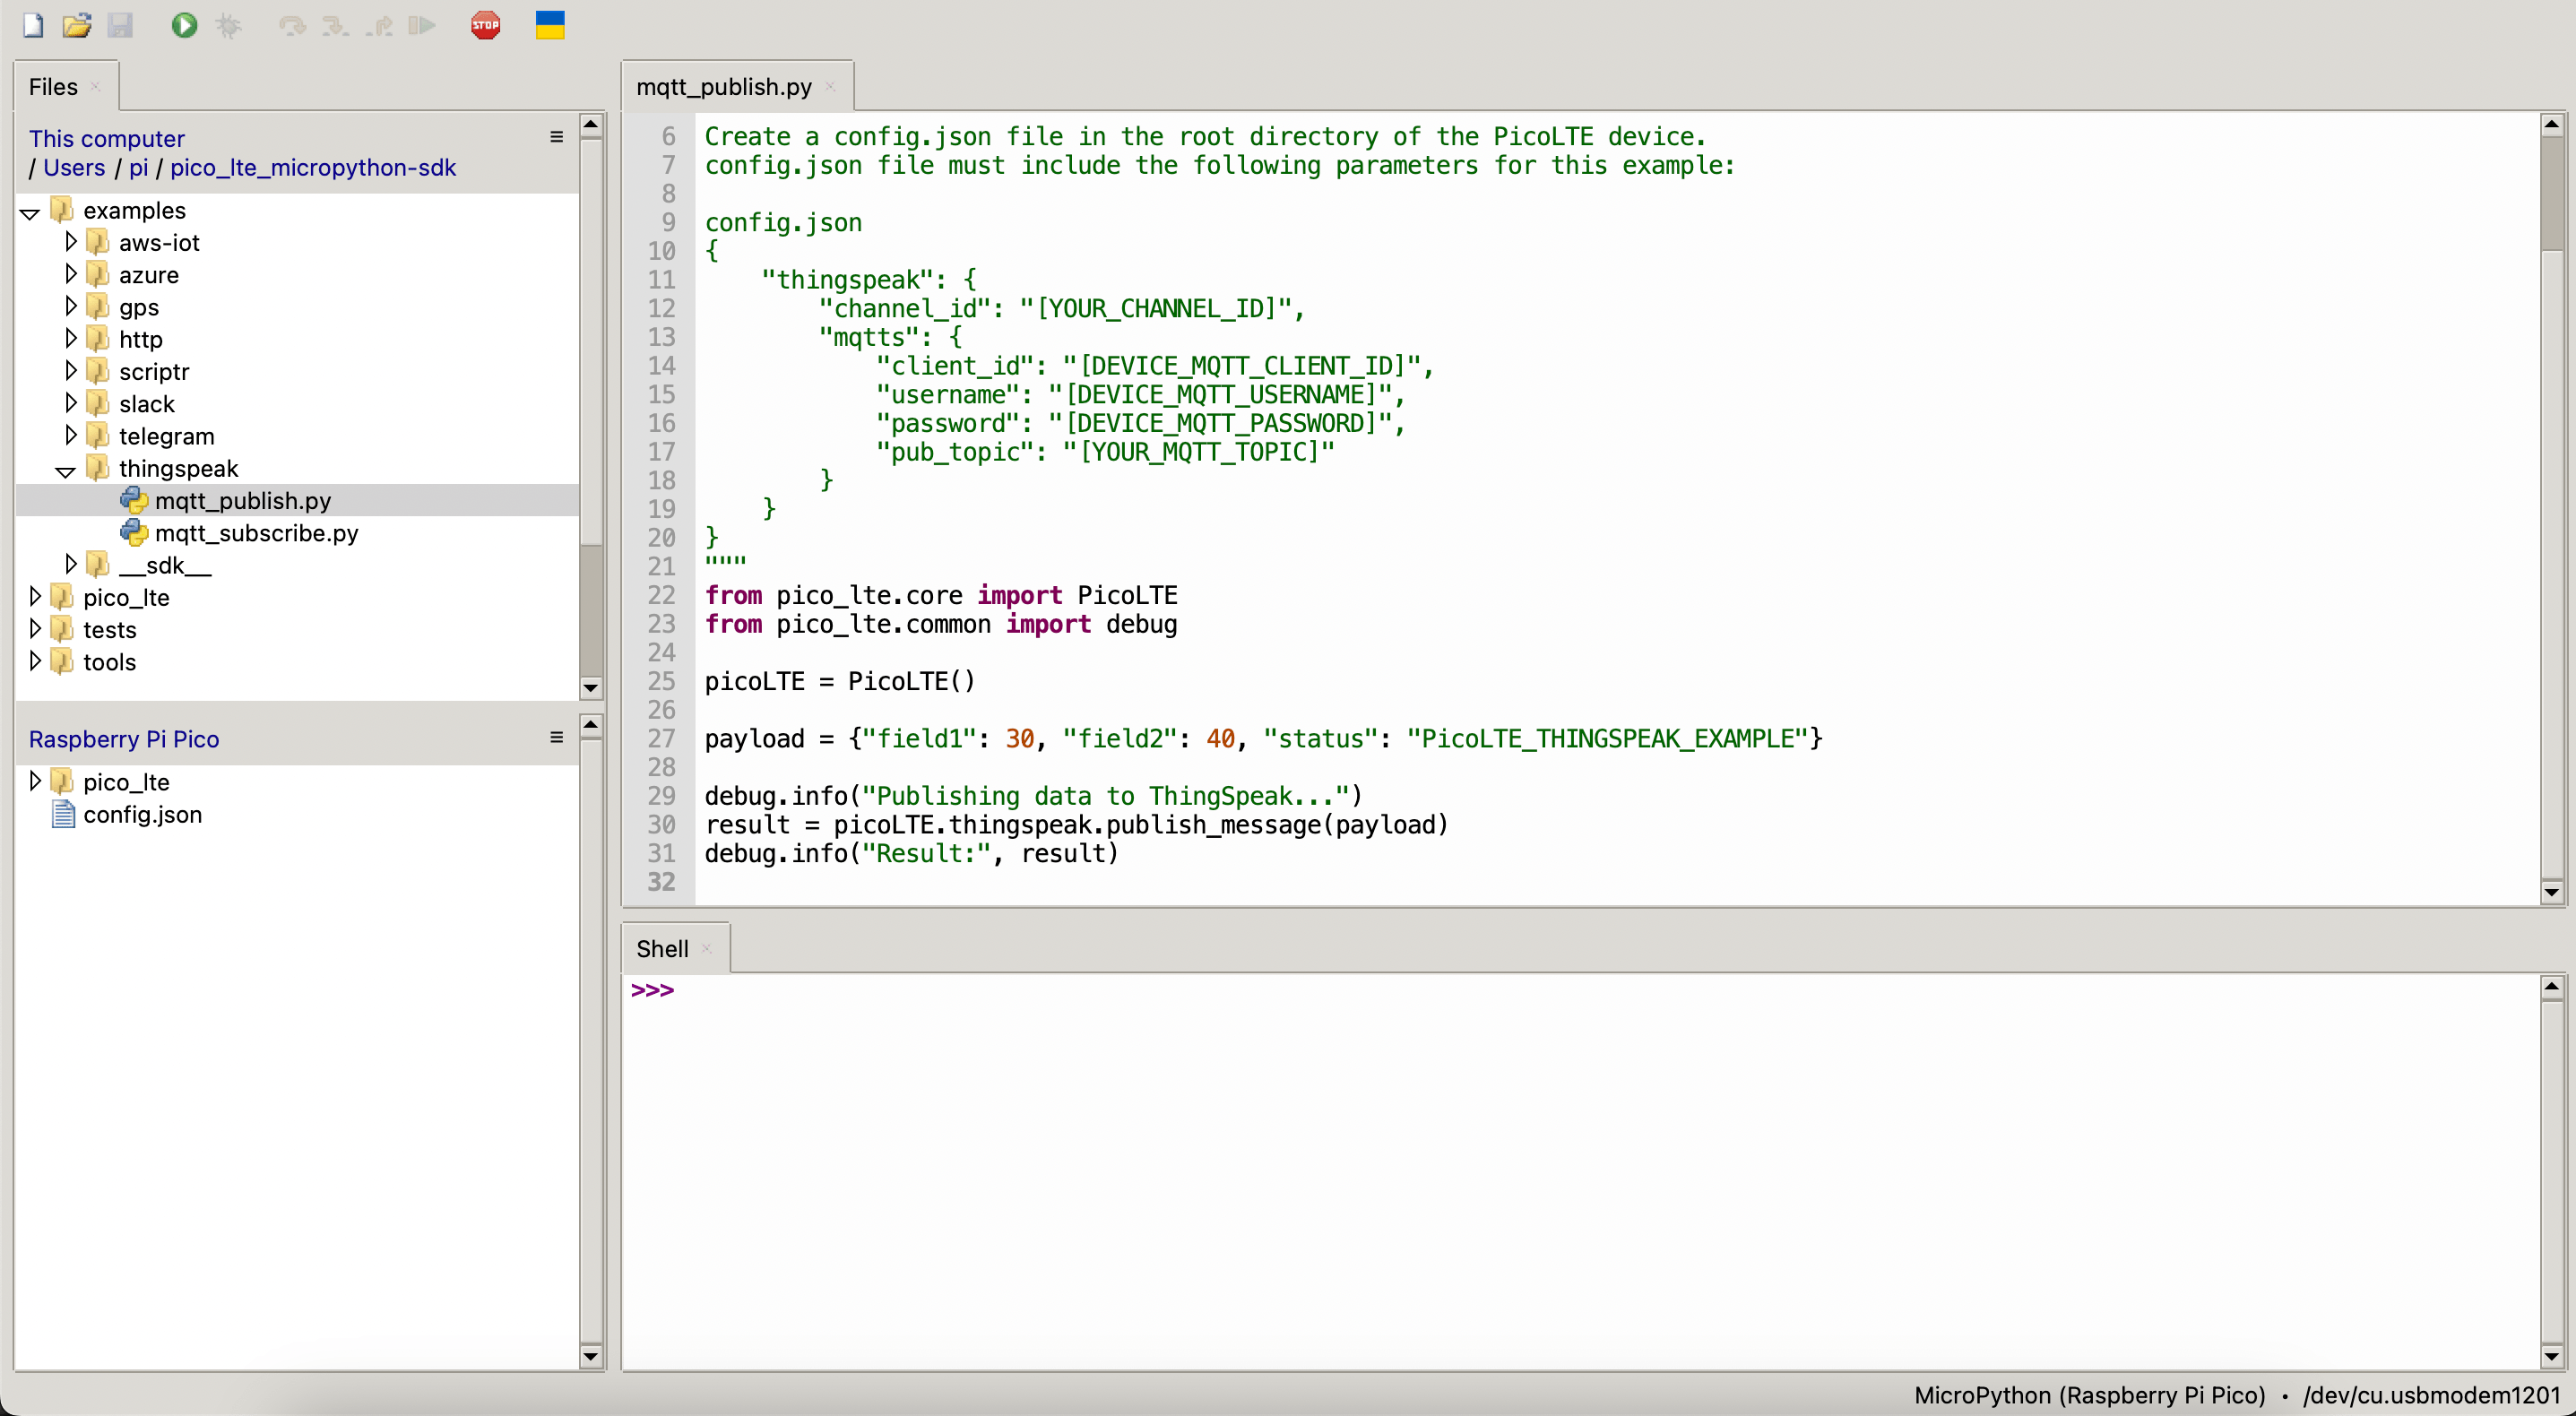
Copy the following code block into the config.js file and enter your channel_id, client_id, username, password and pub_topic. To find your Channel ID, refer to channel info on the Channels → My Channels tab.
{
      "thingspeak": {
          "channel_id": "YOUR_CHANNEL_ID",
          "mqtts": {
              "client_id": "DEVICE_MQTT_CLIENT_ID",
              "username": "DEVICE_MQTT_USERNAME",
              "password": "DEVICE_MQTT_PASSWORD",
              "pub_topic": "YOUR_MQTT_TOPIC"
          }
      }
}
pub_topic: "channels/[CHANNEL_ID]/publish"
Then save it to your Pico LTE device.
Run the "mqtt_publish.py" script that you opened in Thonny IDE.
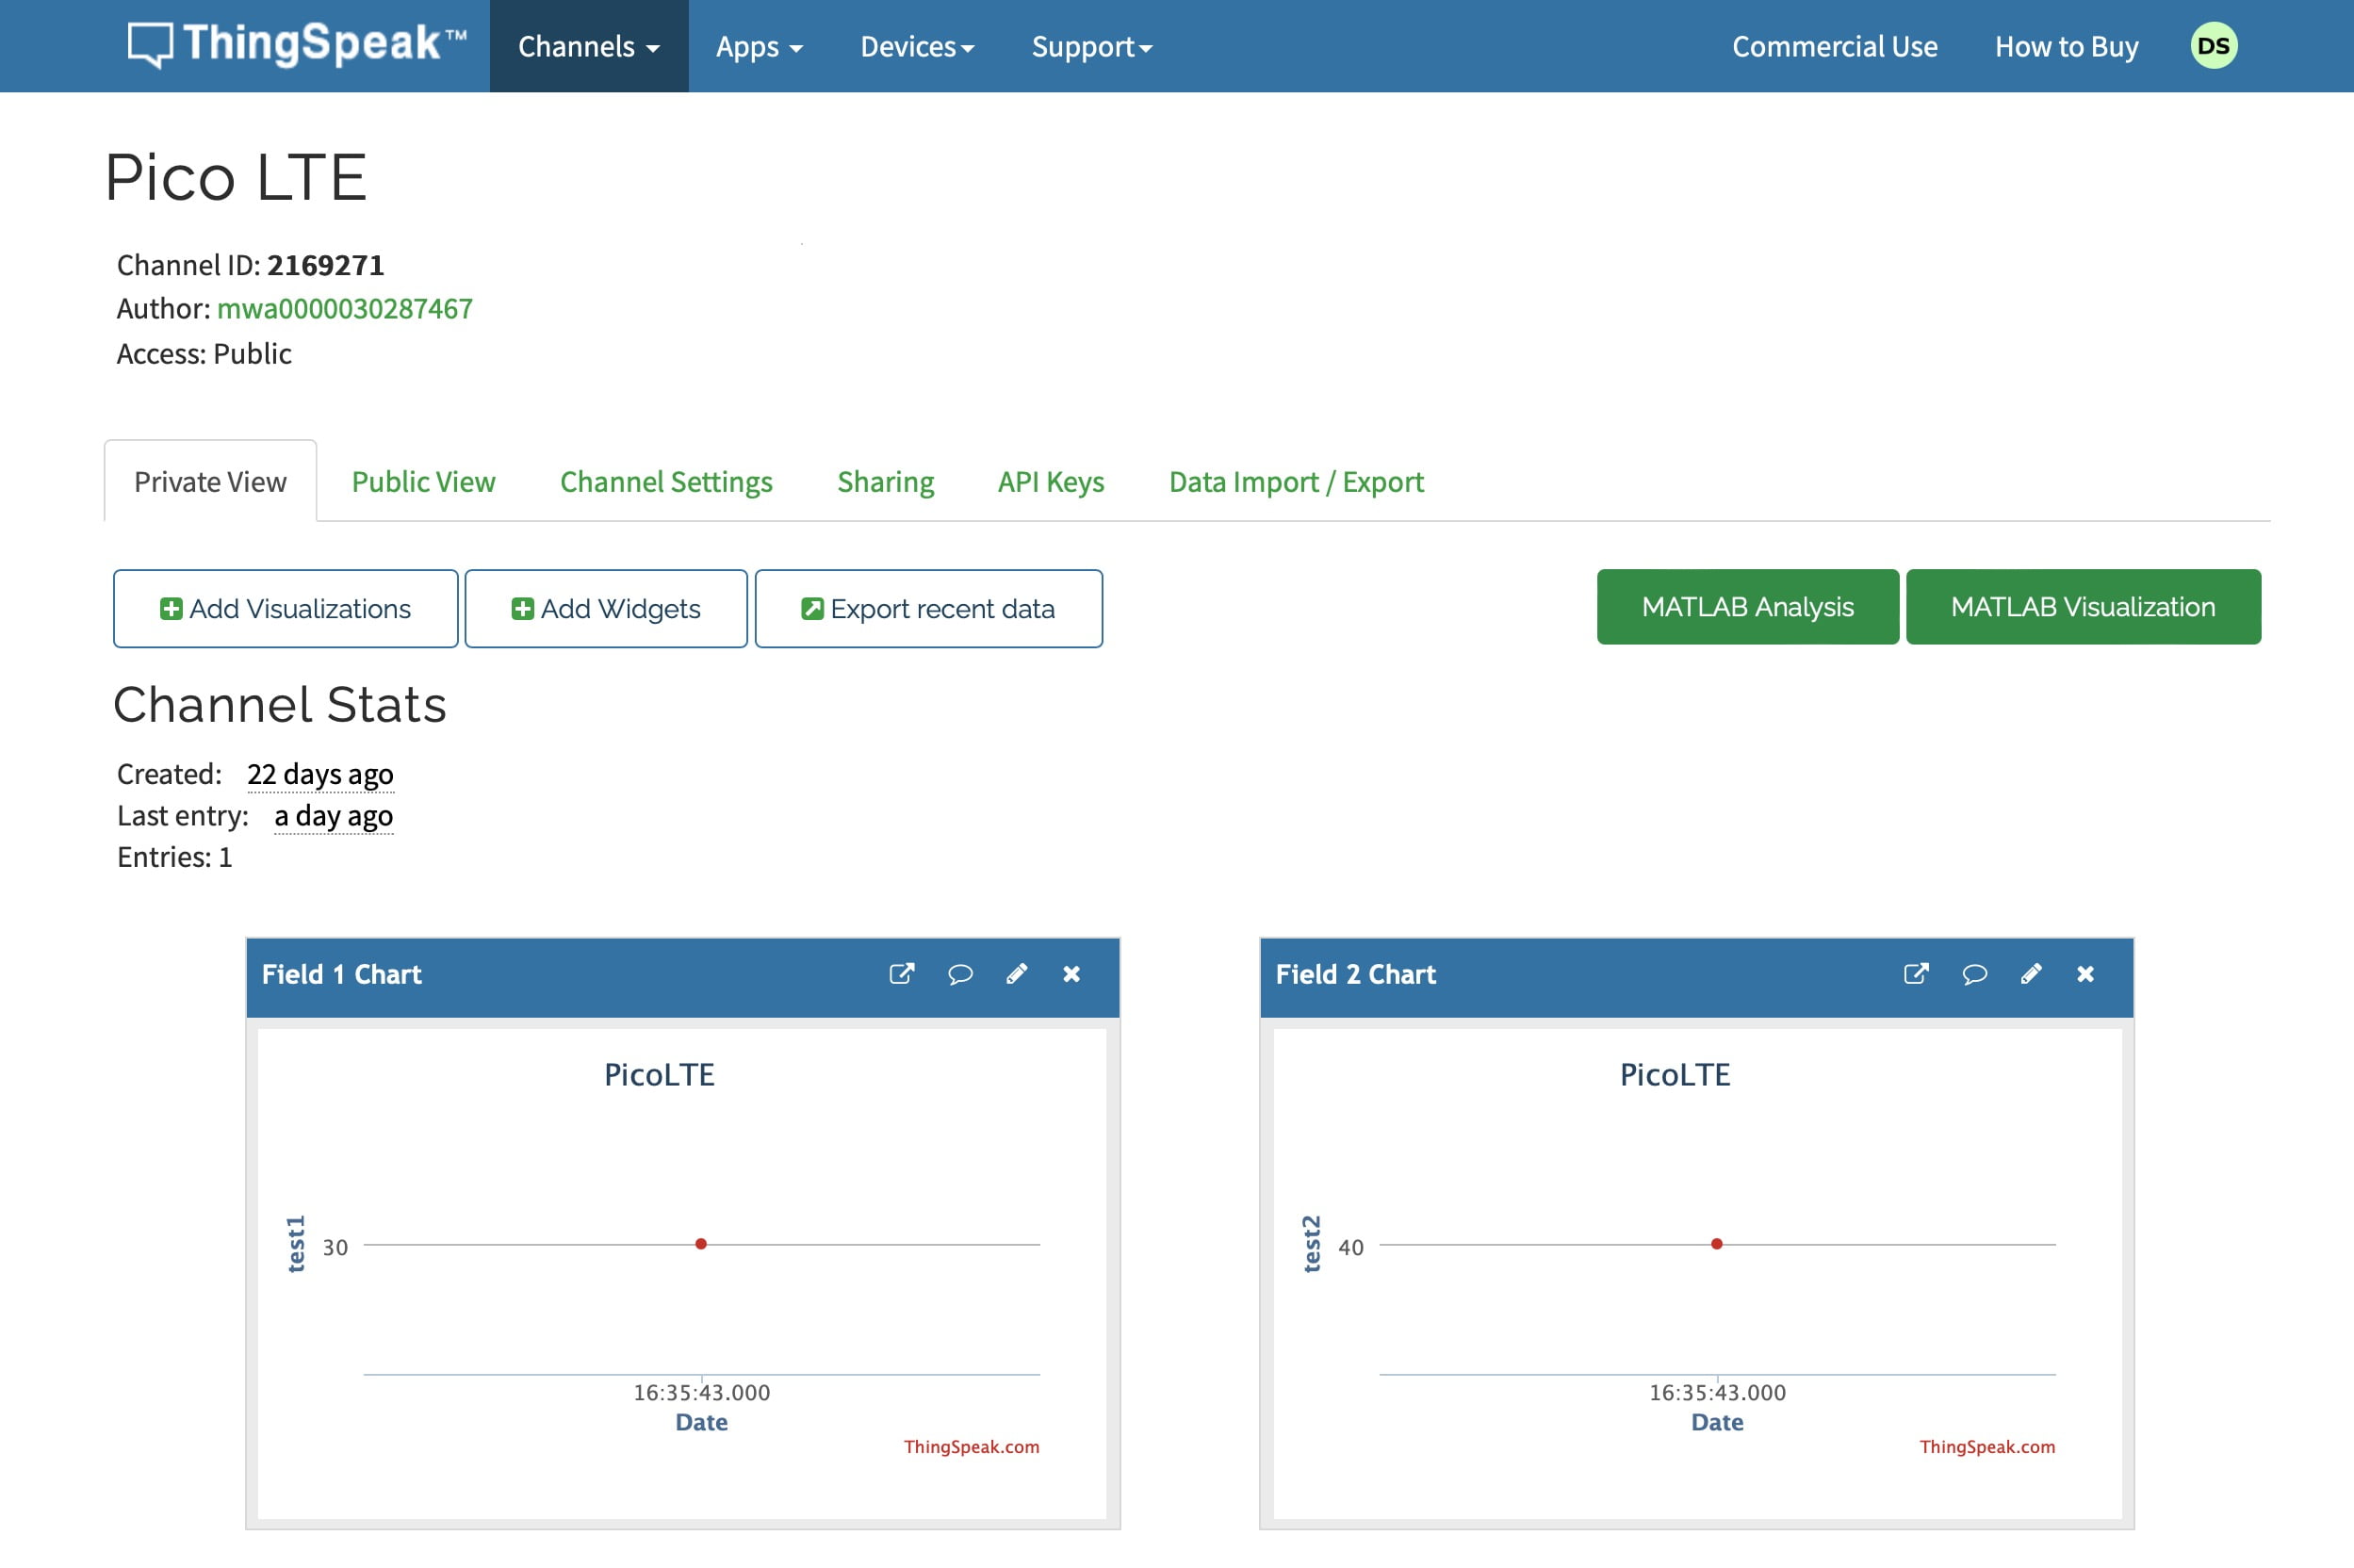
The output you get in the code should look like this:
If the process is successful, a message will be sent to the channel as in the photo:
Subscribing (Cloud-to-Device) ThingSpeak using MQTT in Pico LTE
When a client subscribes to a broker it needs to provide a topic and QOS.
-
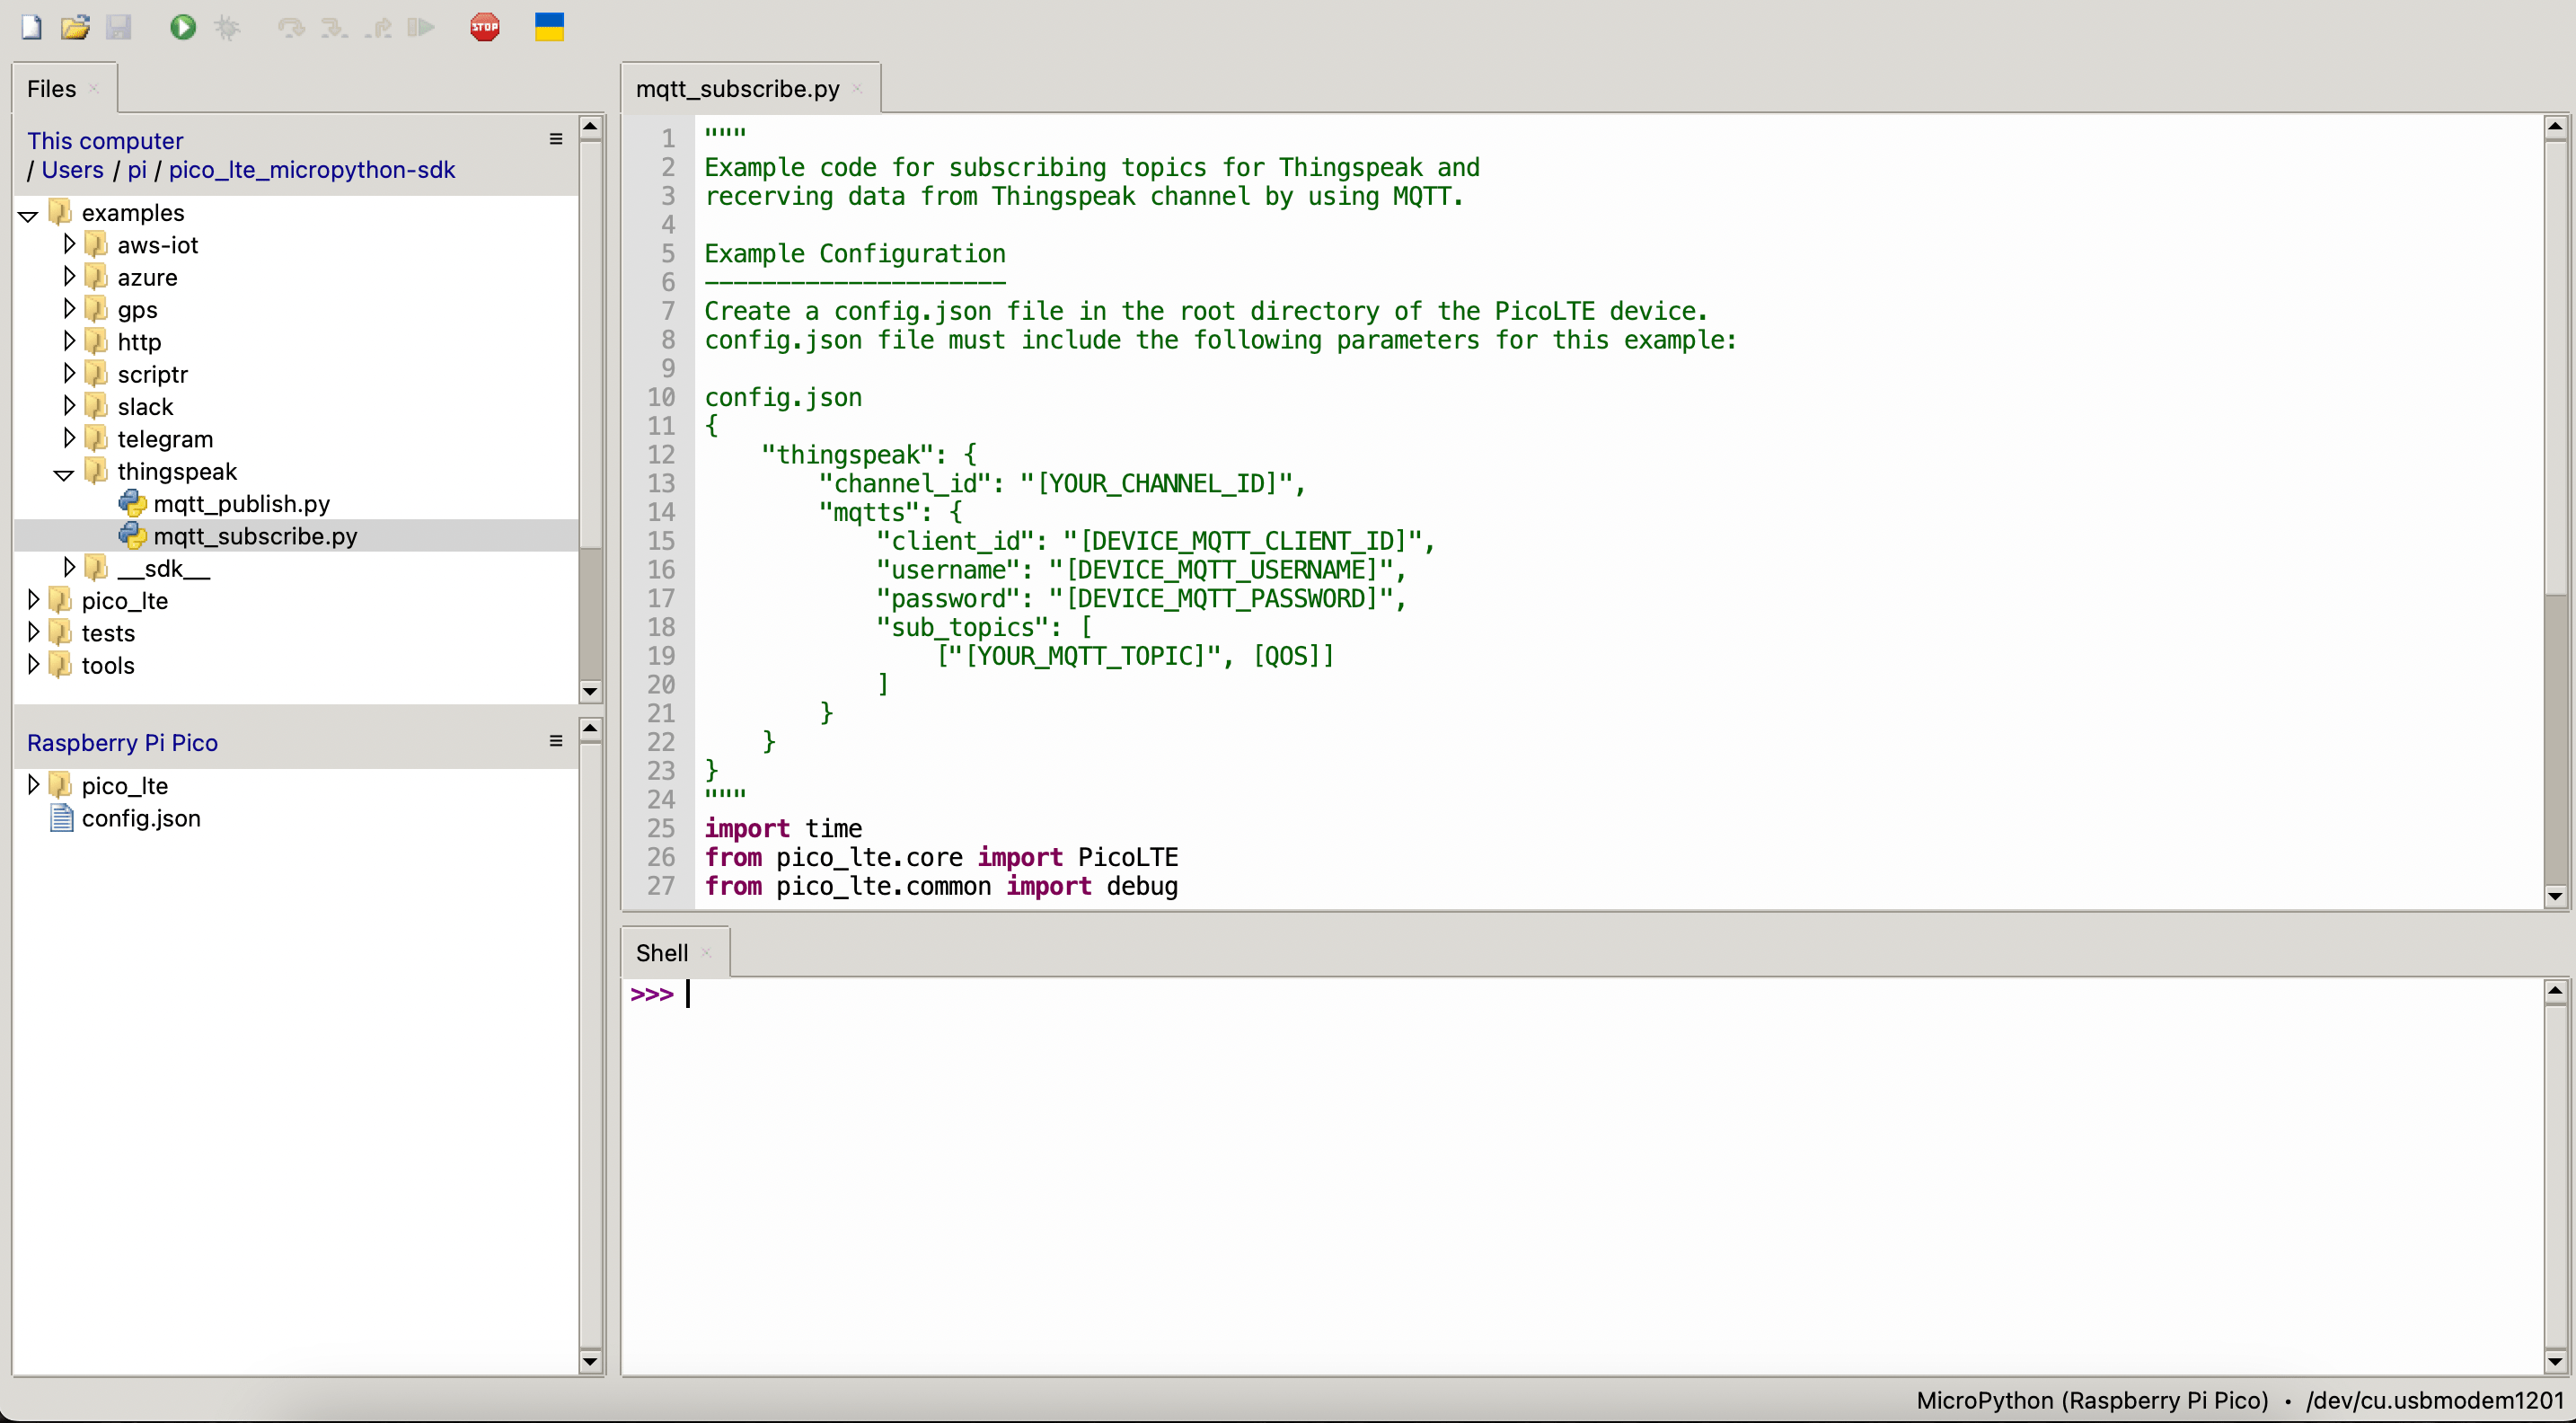
Copy the following code block into the config.js file and enter your channel_id, client_id, username, password and sub_topics. To find your Channel ID, refer to channel info on the Channels → My Channels tab.
{
      "thingspeak": {
          "channel_id": "YOUR_CHANNEL_ID",
          "mqtts": {
              "client_id": "DEVICE_MQTT_CLIENT_ID",
              "username": "DEVICE_MQTT_USERNAME",
              "password": "DEVICE_MQTT_PASSWORD",
              "sub_topics": [
                ["YOUR_MQTT_TOPIC", QOS]
            ]
          }
      }
}
sub_topics
- ThingSpeak MQTT supports only QoS 0.
- sub_topics: [ ["channels/[CHANNEL_ID]/subscribe/fields/+", 0 ] ] subscribes to updates to all fields of a channel feed from the specified channel.
- sub_topics: [ ["channels/[CHANNEL_ID]/subscribe/fields/[FIELD_NAME]", 0] ] specifically subscribes to the topic mentioned (such as field1, field2).
Then save it to your Pico LTE device.
Run the "mqtt_subscribe.py" script that you opened in Thonny IDE.
The output you get in the code should look like this:
Updated 8 months ago