
Getting Started
This section will lead you step by step to create a cellular connection with the Sixfab Jumpstart 5G
As the Internet of Things (IoT) continues to expand, 5G networks have become the go-to choice for powering next-generation IoT devices that demand high-speed connectivity and low-latency data transfer. And the good news is that connecting your Raspberry Pi device to the 5G network is easier than you might think!
In this guide, we will walk you through the step-by-step process of connecting to a 5G network using Sixfab Jumpstart 5G on Raspberry Pi. Whether you're a hobbyist or a professional developer, this guide will provide you with all the information you need to get started with 5G connectivity for your IoT device. By the end of this guide, you'll have a fully functional IoT device that's effortlessly connected to the 5G network, ready for you to start exploring and innovating.
📚 Product Manual Available!
Explore all the amazing features and instructions in our product manual. Find all the answers in our product manual. Click here for a smooth sailing experience!
Overview of the operating system requirements for the kit
The Jumpstart 5G package includes a pre-configured operating system, which is Raspberry Pi OS. This ensures you have a seamless experience with the 5G functionality right out of the box. Hence, there is no necessity for you to install the operating system image onto the SD card.
Compatibility with Raspberry Pi OS, necessary drivers, and libraries
Raspberry Pi OS is based on Debian, so modules that are compatible with Debian-based systems are generally compatible with Raspberry Pi OS as well. The cellular module has built-in support in the Linux kernel and is recognized automatically by the system. No additional drivers are required.
There are specific libraries or software tools available to facilitate communication with the cellular module such as atcom, minicom etc. are already installed. With these tools, a user can send AT commands to the cellular module and establish any communication related to the module.
Establishing a 5G Connection
Follow the steps below to proceed with the installation of the Jumpstart 5G hardware for establishing a 5G connection.
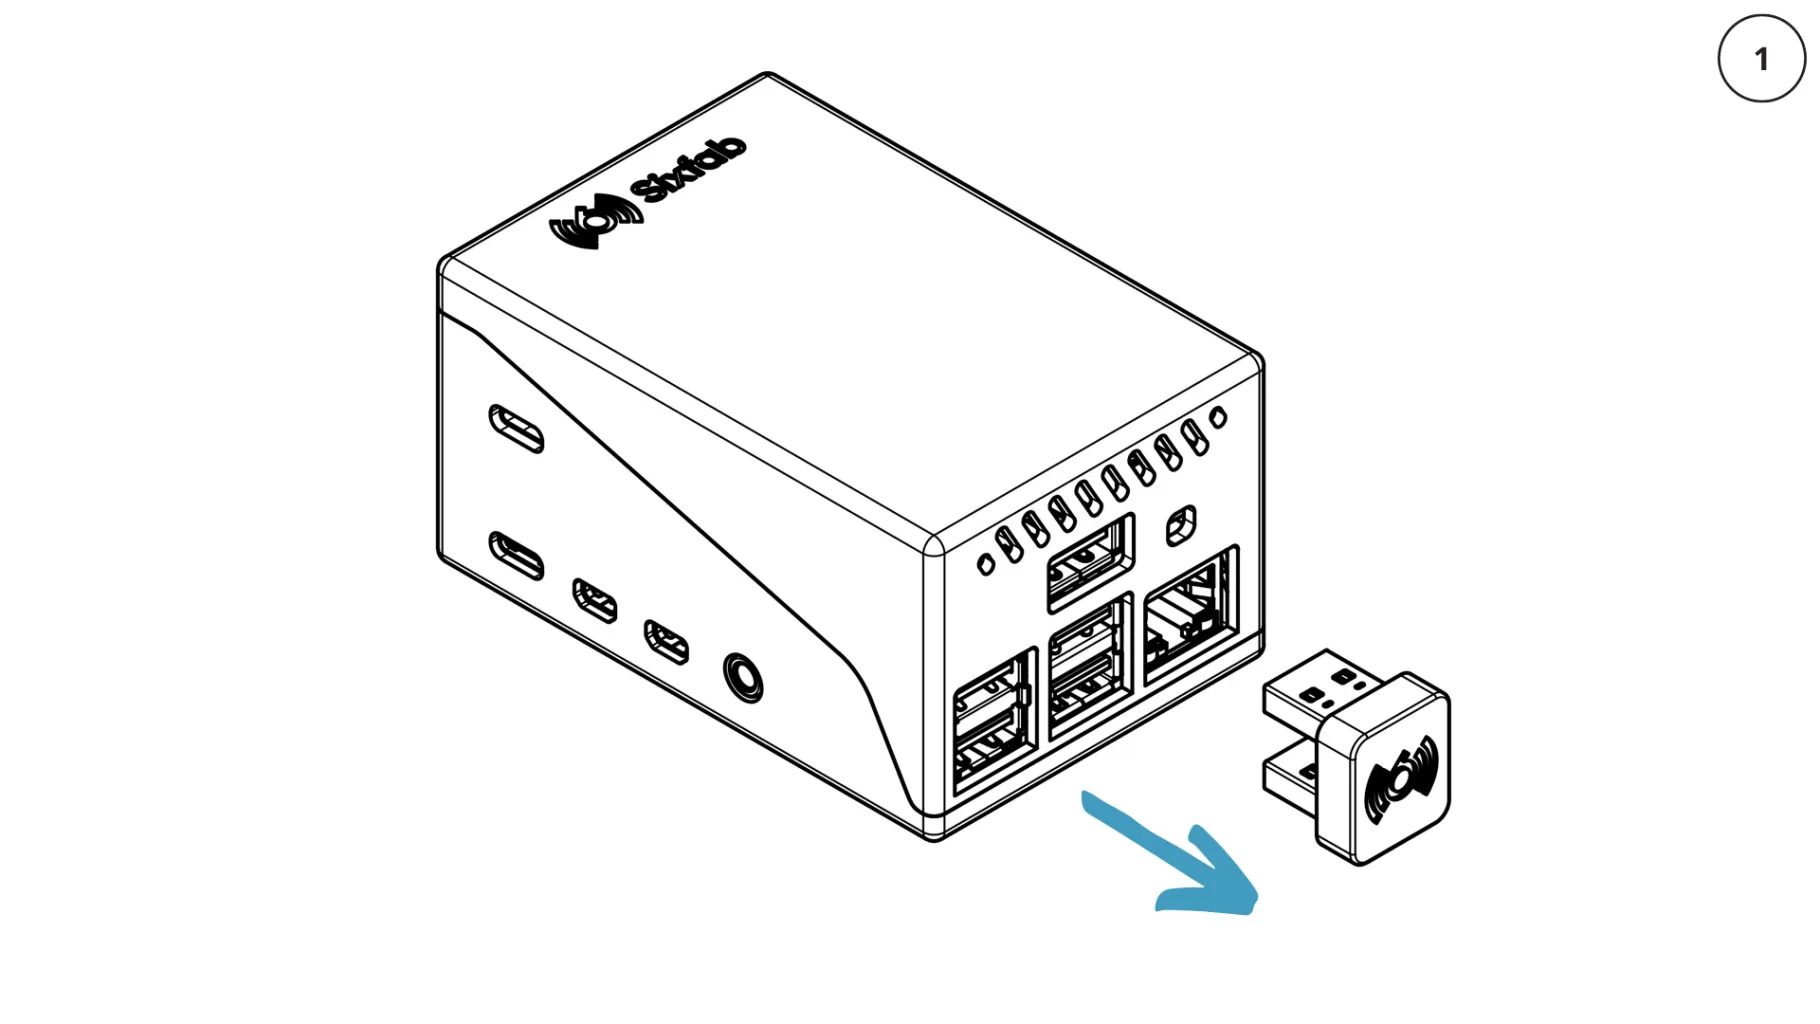
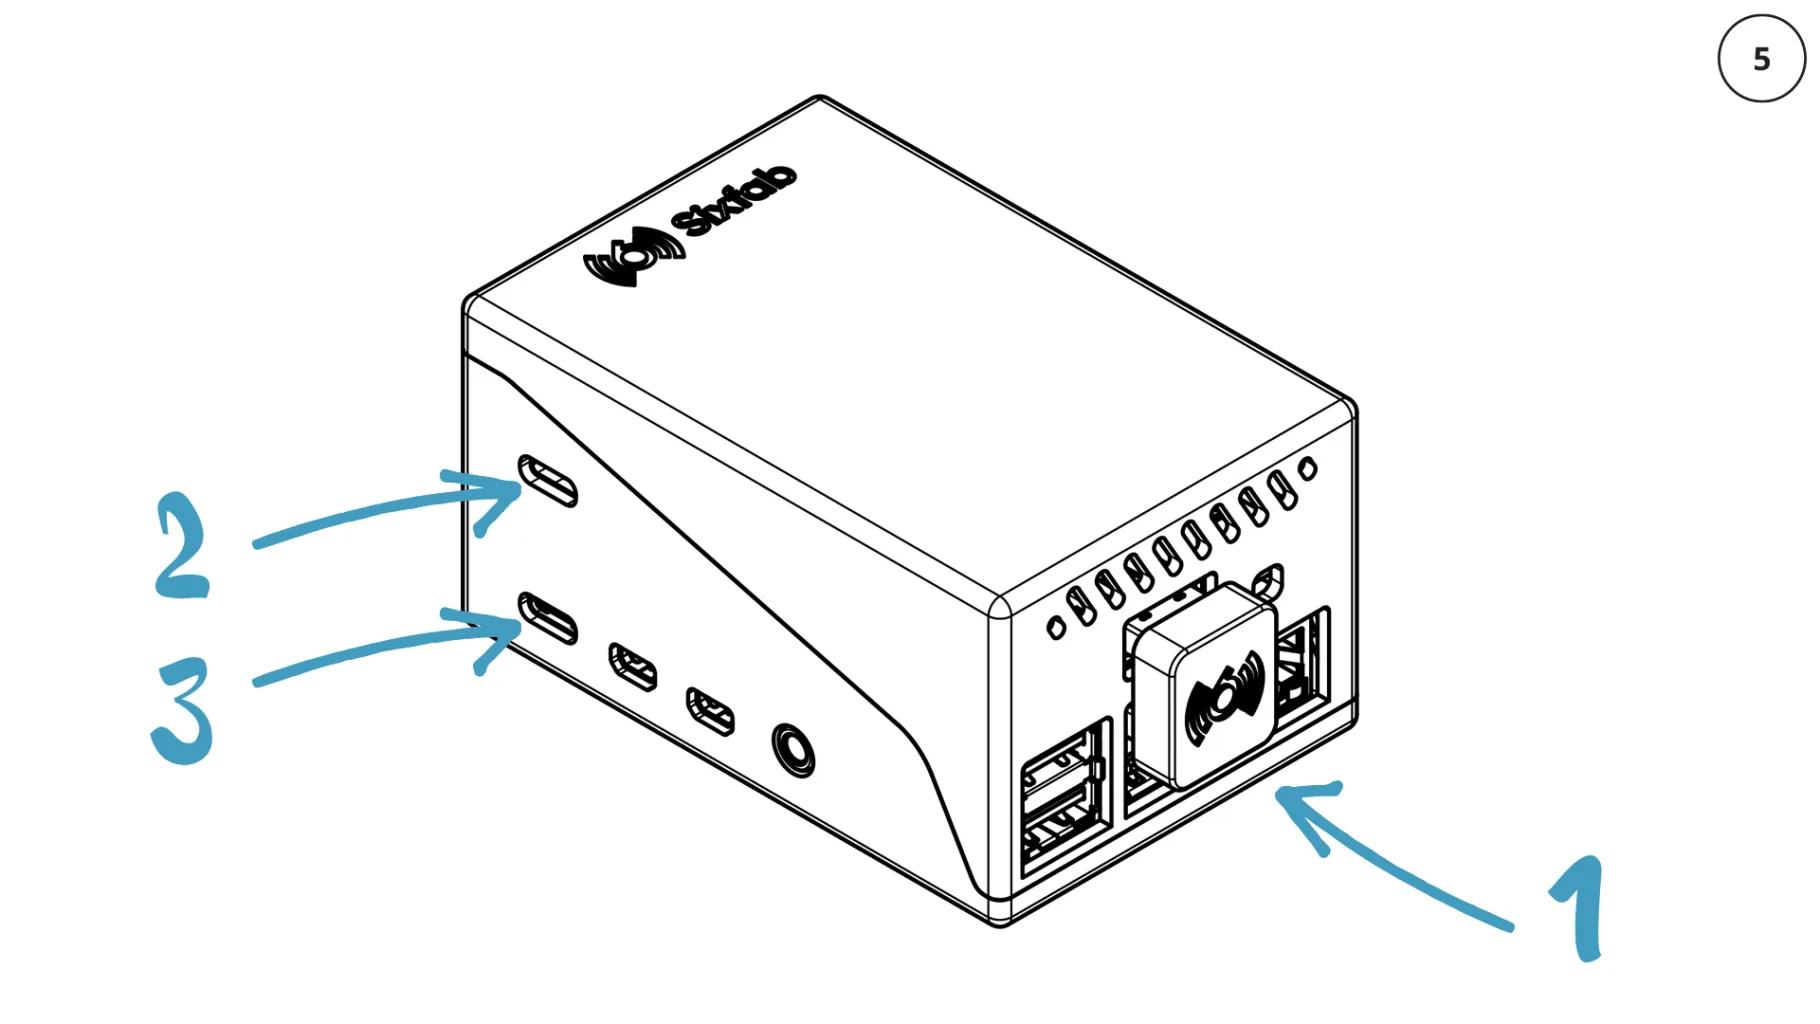
- Unplug the USB 3.0 Bridge Connector
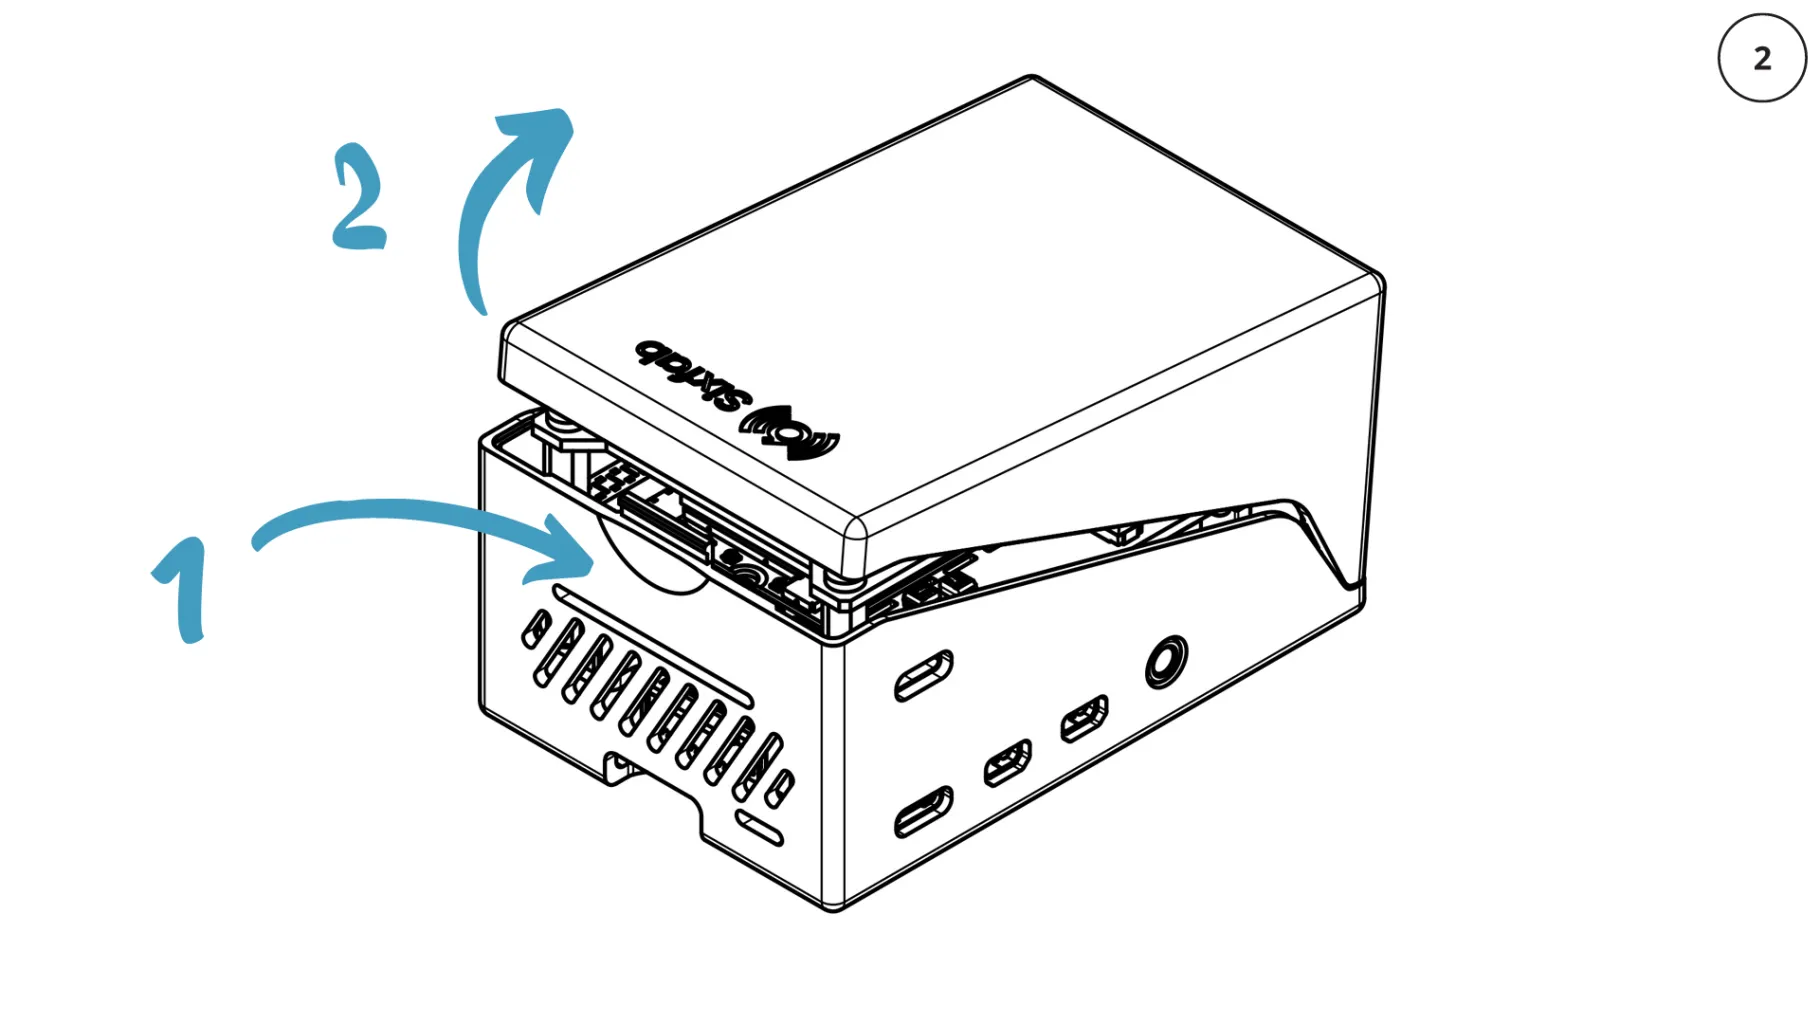
- Push to remove top cover
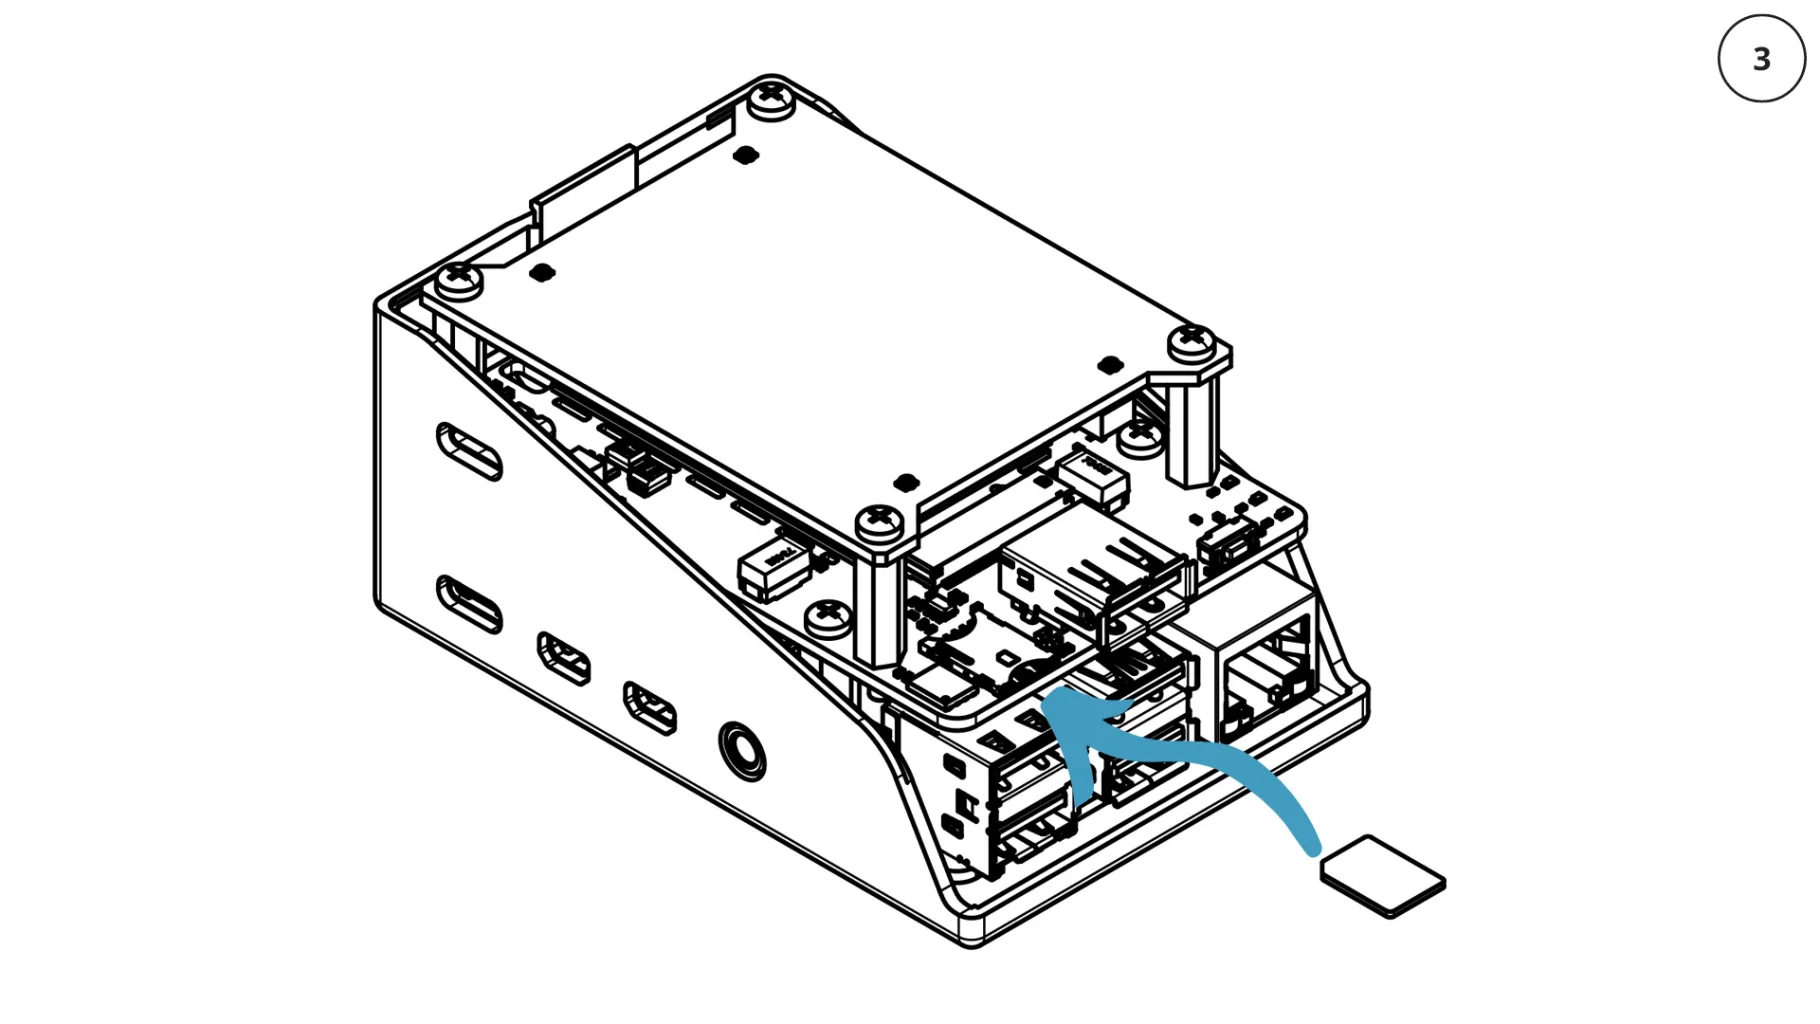
- Plug in the nano type SIM Card (4FF)
Be careful with corner marking!
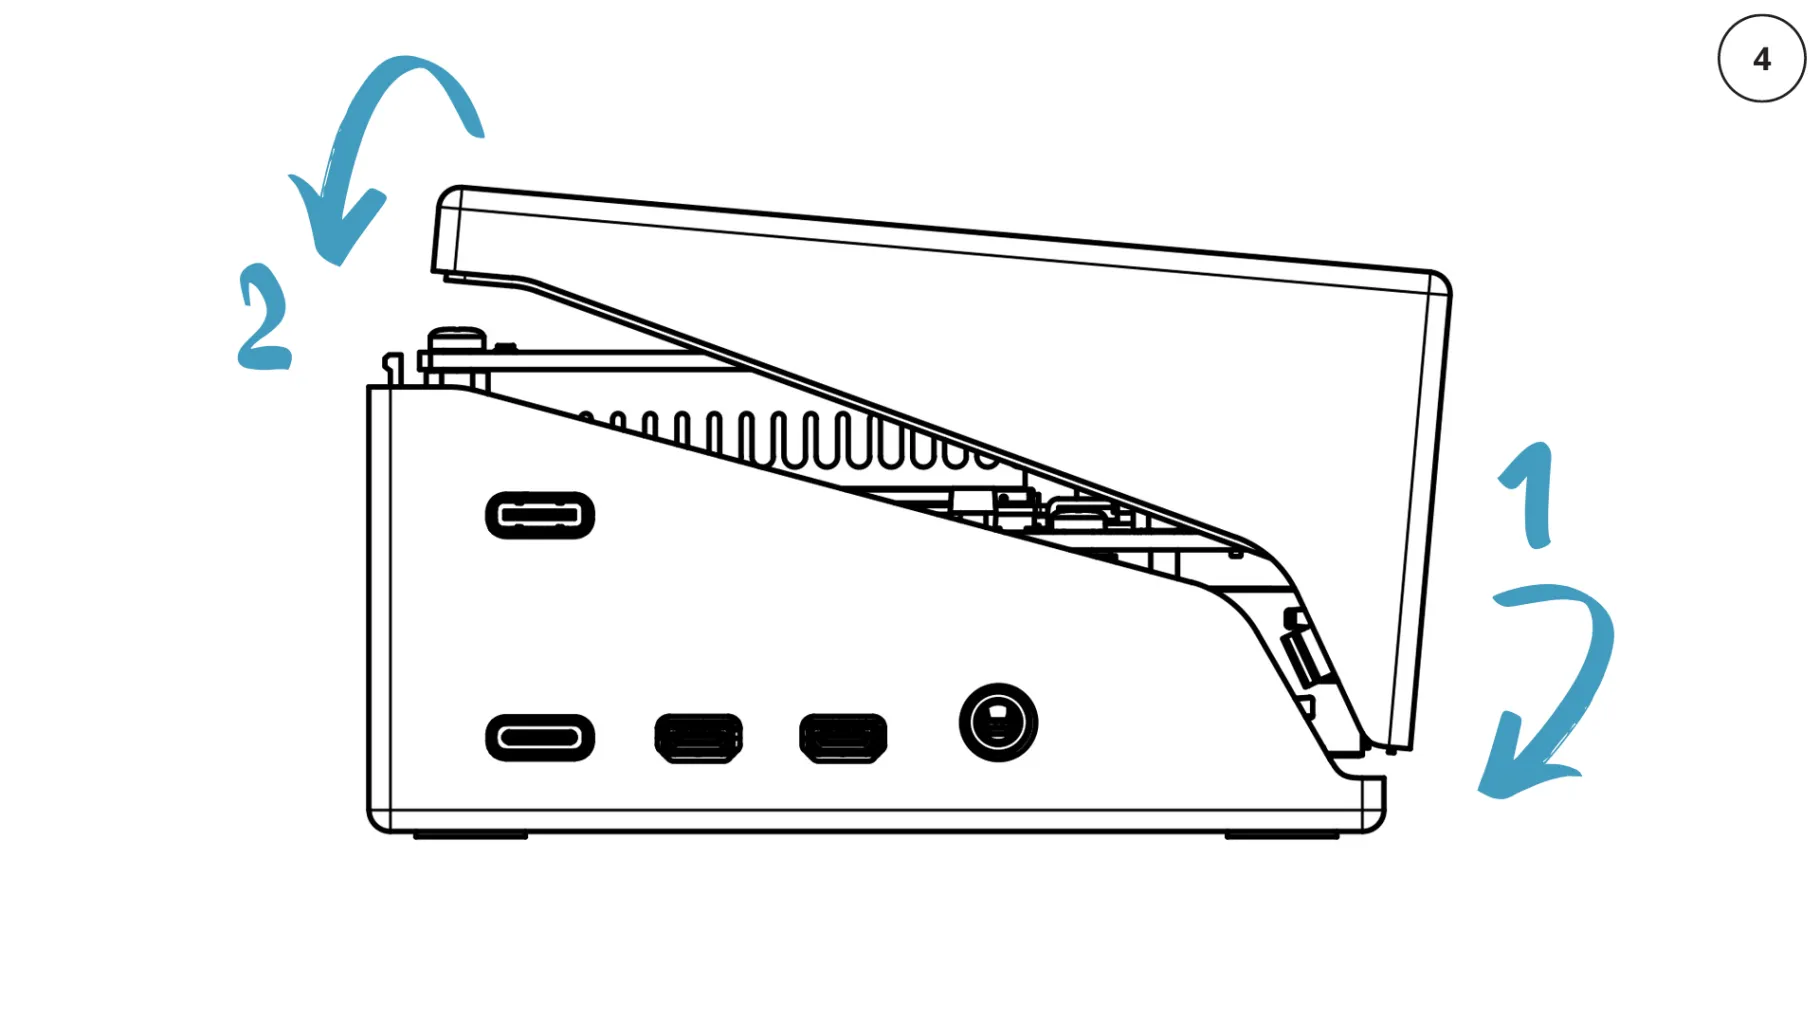
- Assemble the top cover
Align the bottom edge first!
- Connect USB 3.0 Bridge Connector
Plug in a micro HDMI and keyboard/mouse to access the desktop GUI and before powering up the system.
Then plug 2x power adapters in Type-C connectors to power the system on!
- Set only your APN to connect the device to network
🔒 SSH Login
If you want to connect to Jumpstart 5G using SSH, the following are the credentials:Please use the provided credentials to establish an SSH connection to Jumpstart 5G. For your security, remember to change these credentials to something unique and secure.
- Username: pi
- Password: raspberry
- Activate the venv.
For activate the virtual environment use the below commands:source /home/pi/.venv-sixfab/bin/activate - Open the terminal.
Run the command including your network operator's APN: -
atcom AT+CGDCONT=1,\"IPV4V6\",\"YOUR_APN\" - Reset the modem by typing:
-
atcom AT+CFUN=1,1
Wait 50 seconds for the modem to fully function and a few minutes for network registration.
- Test Cellular Internet Connection
Once the internet is active you should see usbX in your internet interface. You can use ifconfig or ipaddr and look for usbX interface.
Now check the assigned IP address and test the connection.
Enjoy being connected with Sixfab Jumpstart 5G!
❗️ Warnings
- 5G uplink and downlink rates depend on the network operator, cell tower, device location, antenna surroundings, and operating system compute load.
- Do not use other than official Raspberry Pi power supplies or Sixfab power adapters to protect electronics and achieve maximum performance.
- Do not block the airflow of device to prevent overheating. The cooling fan automatically works with adjusted speed right out of the box. It should be reprogrammed if a fresh OS image has been overwritten to micro SD cards or the script has changed.
- The device contains highly sensitive electronic circuitry and is an Electrostatic Sensitive Device (ESD). Handling it without proper ESD protection may destroy or damage it permanently.
- The antenna is located at the top of the device. Please do not put it upside down or place anything nearby the device that could affect the signal.
- Please use the Sixfab Jumpstart 5G SIM removal tool included to eject the SIM card to avoid damaging the slot.
Using the Sixfab Jumpstart 5G SIM Removal tool
Updated 4 months ago