Building a 5G Network Data Logger with Google Sheets Integration
Overview
Welcome to this tutorial where we'll guide you through creating a Jumpstart 5G data logger focused on monitoring and logging 5G network metrics. By integrating Google Sheets, we'll transform your Jumpstart 5G into a valuable tool for real-time monitoring and analysis of key 5G network performance parameters.
Making your Jumpstart 5G keep track of your 5G network helps you see if it's working well. You don't need to be a computer expert—this project is for anyone who wants to learn and have fun with technology. By the end, you'll have a smart logger that shows you important information/parameters about your 5G network.
Now, let's go through each step to make your 5G network logger. It's easy and fun!
Hardware Preparation and Cellular Connection
Hardware setup and cellular connection steps are mentioned on the Getting Started page. It's necessary to visit there before starting this tutorial.
Prerequisites
Let's ensure our systems meet the following requirements before starting any configuration:
- In addition to your cellular network interface (called 'usb0'), it must also have a wired or wireless network interface.
- On our Raspberry Pi OS system, we should have administrator privileges.
- Make sure you can access the internet from the 5G cellular interface / send pings.
Google Sheets API Setup
Create a Google Cloud Platform project
To begin using any of the Google Workspace APIs, you must first have a Google Cloud Platform (GCP) project. This project serves as the foundation for all of Google's cloud computing services, including their API library. The process of setting up a project and utilizing the APIs is entirely free. Simply follow the steps provided here to create your GCP project. The procedure is designed to be straightforward.
-
To begin, open the Google Cloud Console and log in with your Google account credentials.
-
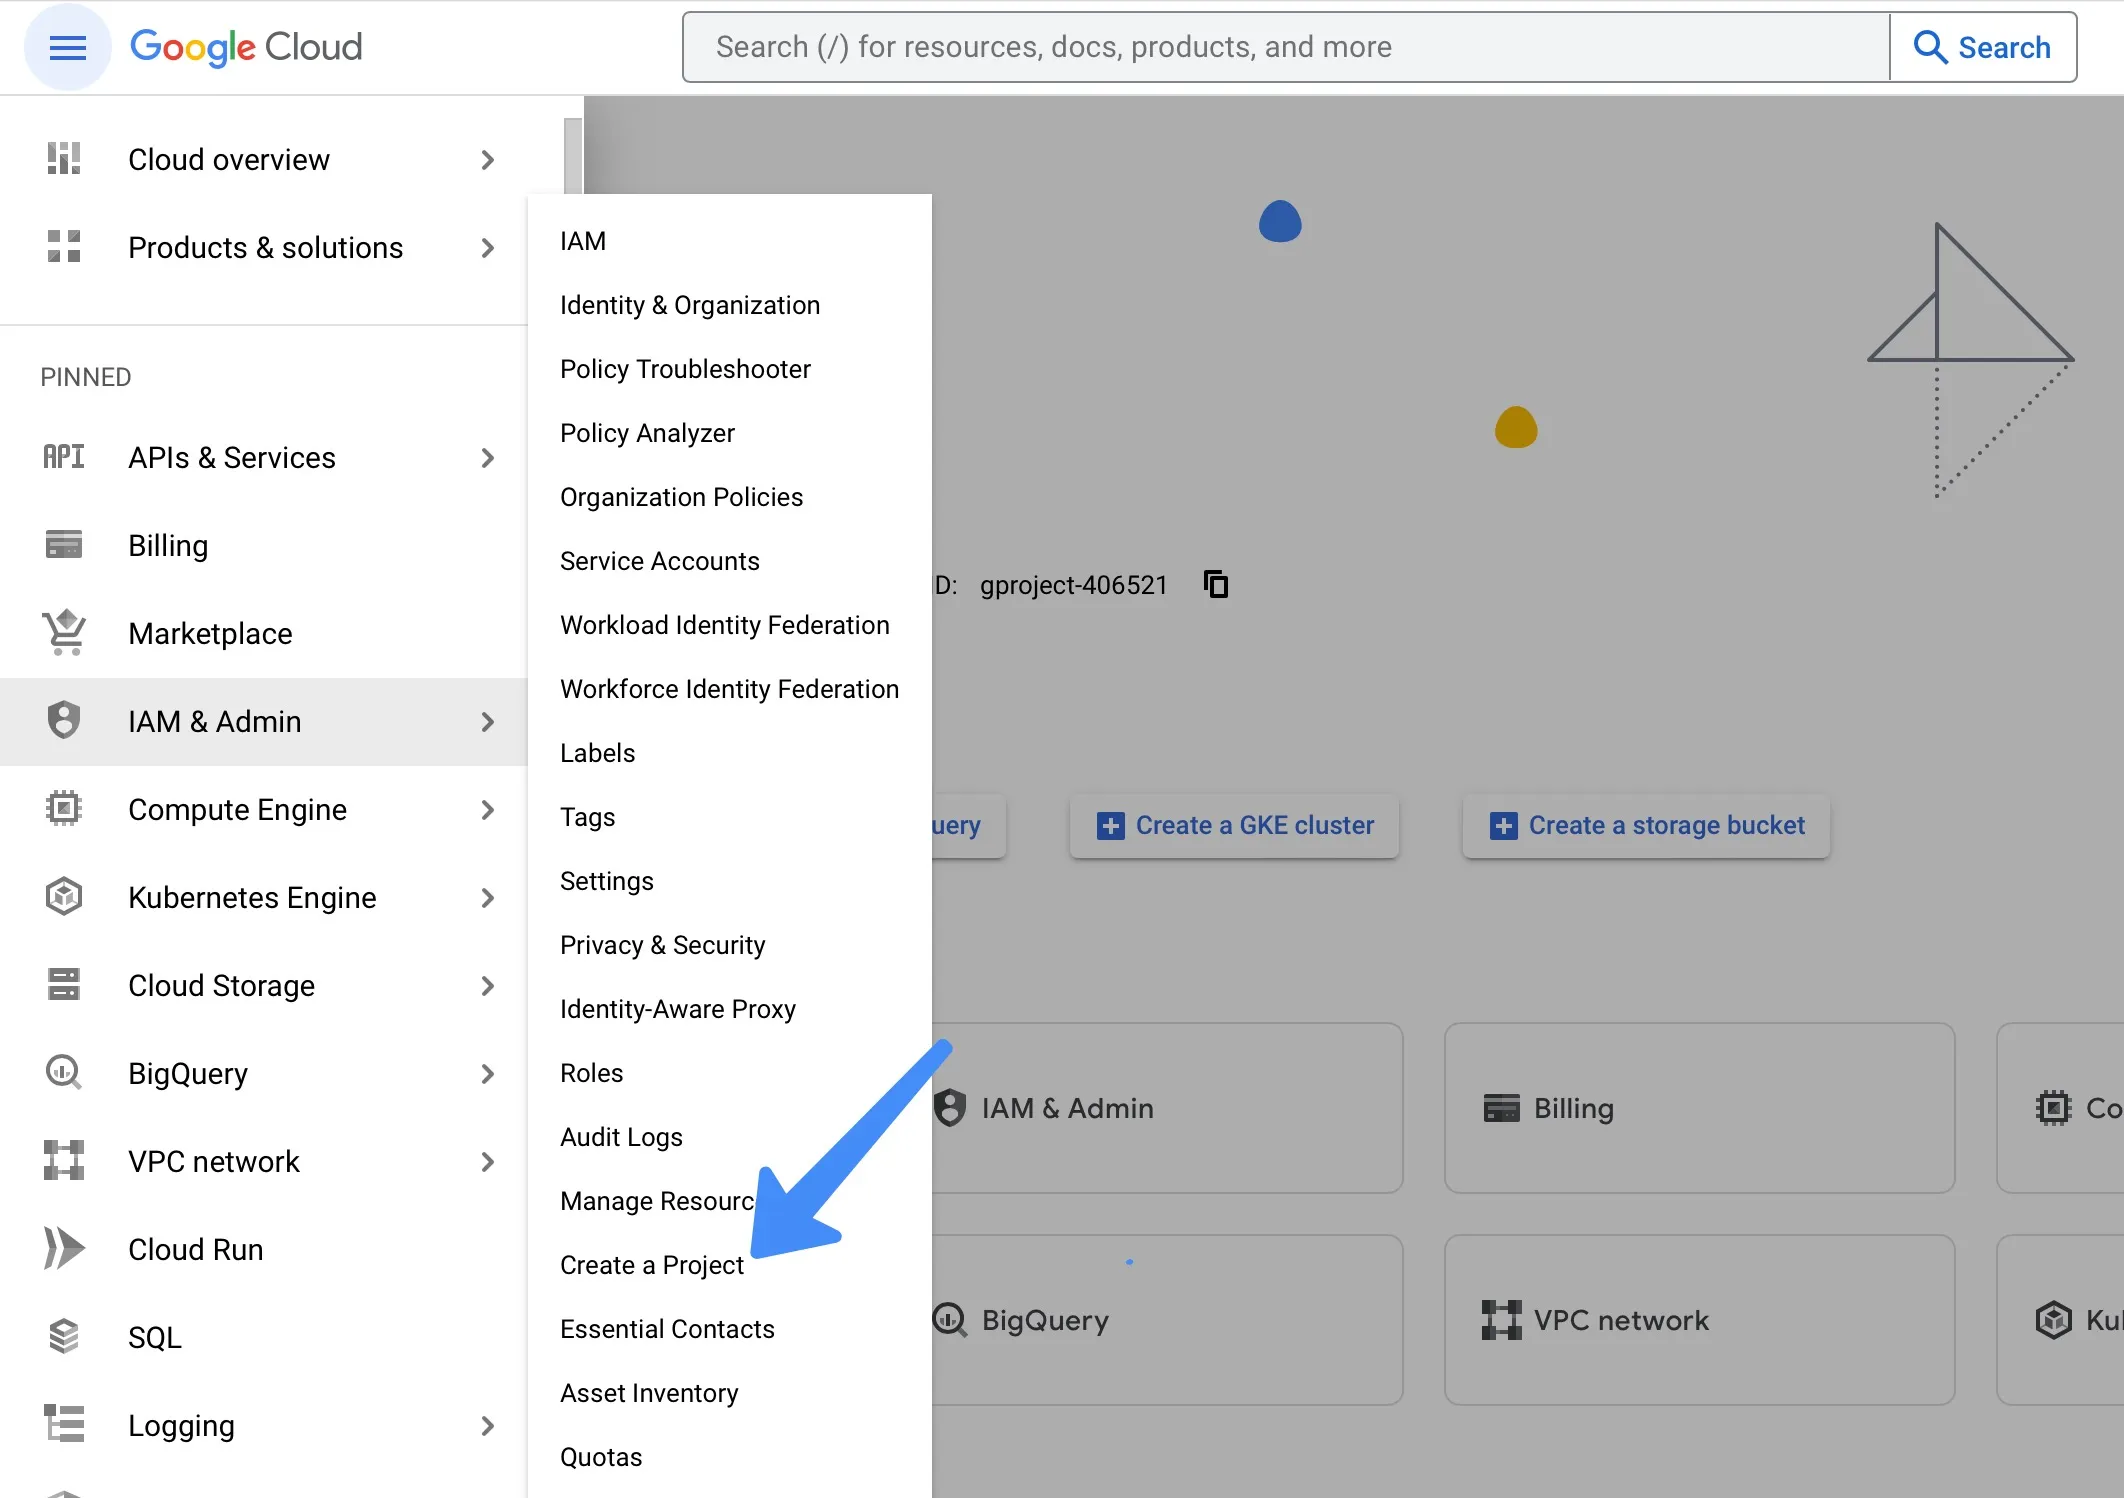
Click on the main menu icon (hamburger) located in the upper-left corner of the screen. From the drop-down menu, select "IAM & Admin" and then choose "Create a Project".
-
Enter a name for the new project. Beneath the project name input field, you'll find the automatically generated Project ID in a smaller font. It is derived from the project name you entered.
-
Click on the "Create" button to proceed with creating the project.
Enable access to Google Sheets and Google Drive API
After successfully creating a new Google Cloud Platform project, follow these steps to enable the Google Sheets API for your project:
-
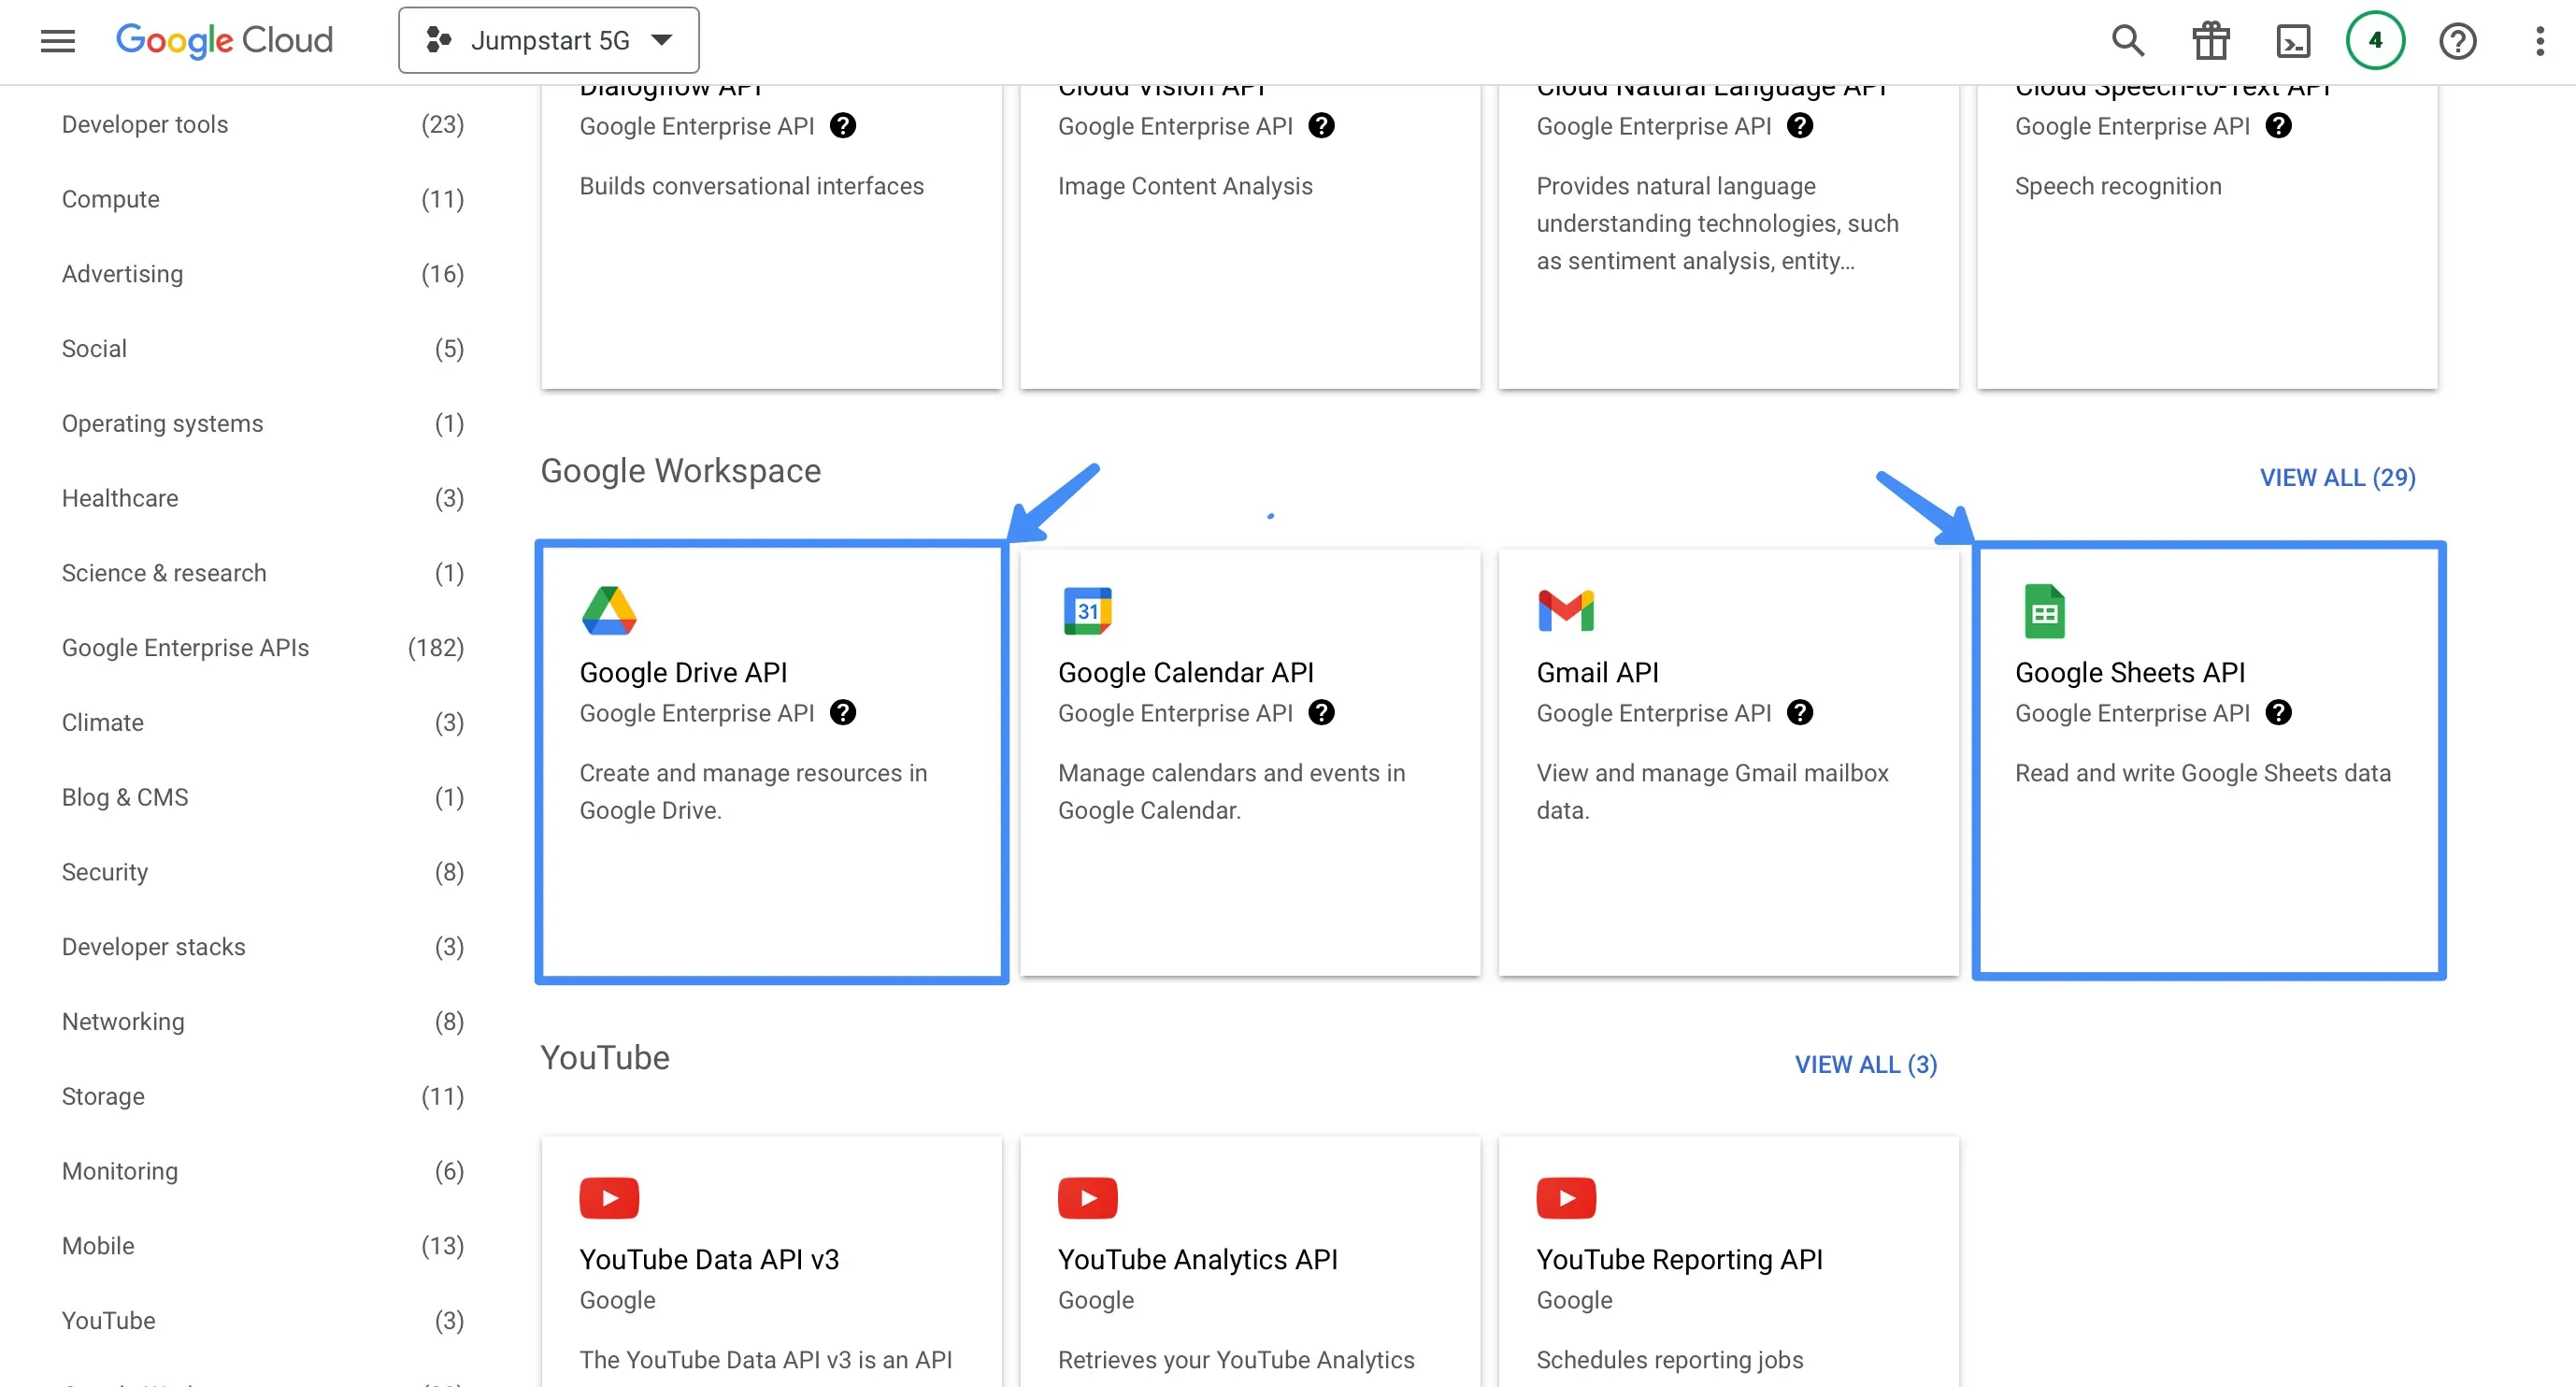
On the Dashboard page, click the main menu icon in the upper-left corner. Then, select "APIs & Services -> Library".
-
Scroll down to the Google Workspace section on the Library page and locate the "Google Sheets API" and "Google Drive API".
-
Once on the Google Sheets API page, click on Enable.
-
The Google Sheets API is now enabled for the new Google Cloud Platform project created project.
Creating Google Service Account
Once both APIs are enabled, we need to create a Service Account in the Google Cloud Platform to allow Google Cloud Python libraries to interact with Google Cloud APIs on behalf of our account user. The Service Account will allow us to connect Python to Google Sheets API.
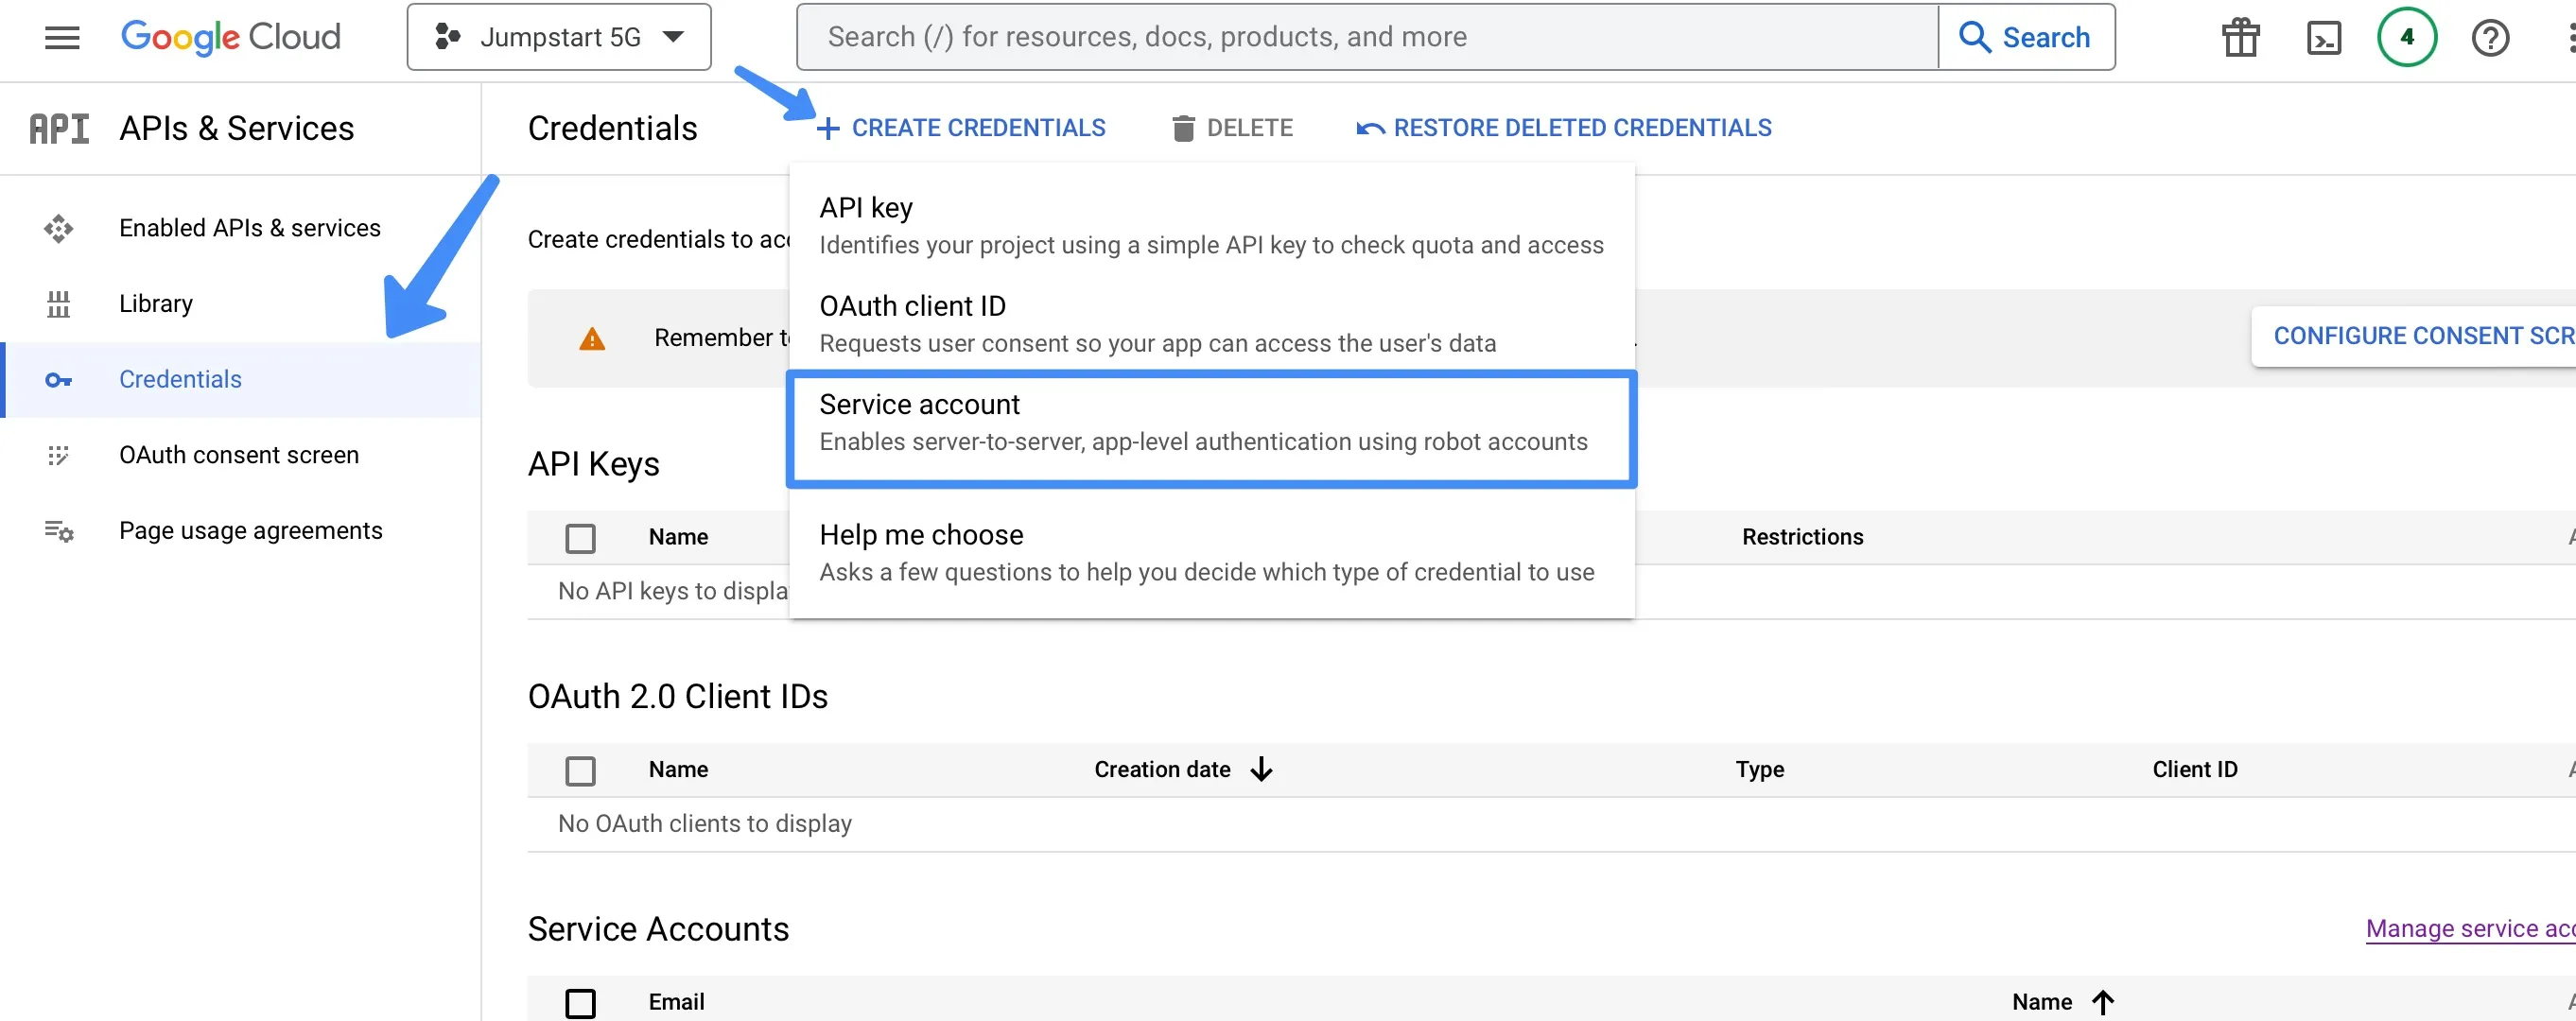
To achieve this goal, use the left-side navigation pane and select APIs and Services -> Credentials menu.
Create credentials for the Service account. A Service account is a special account intended to represent a user who needs access to certain resources in your Google Cloud Platform account but is not necessarily a person. Service accounts are commonly used for application-level authentication from your scripts or backend applications.
Fill in Service account details:
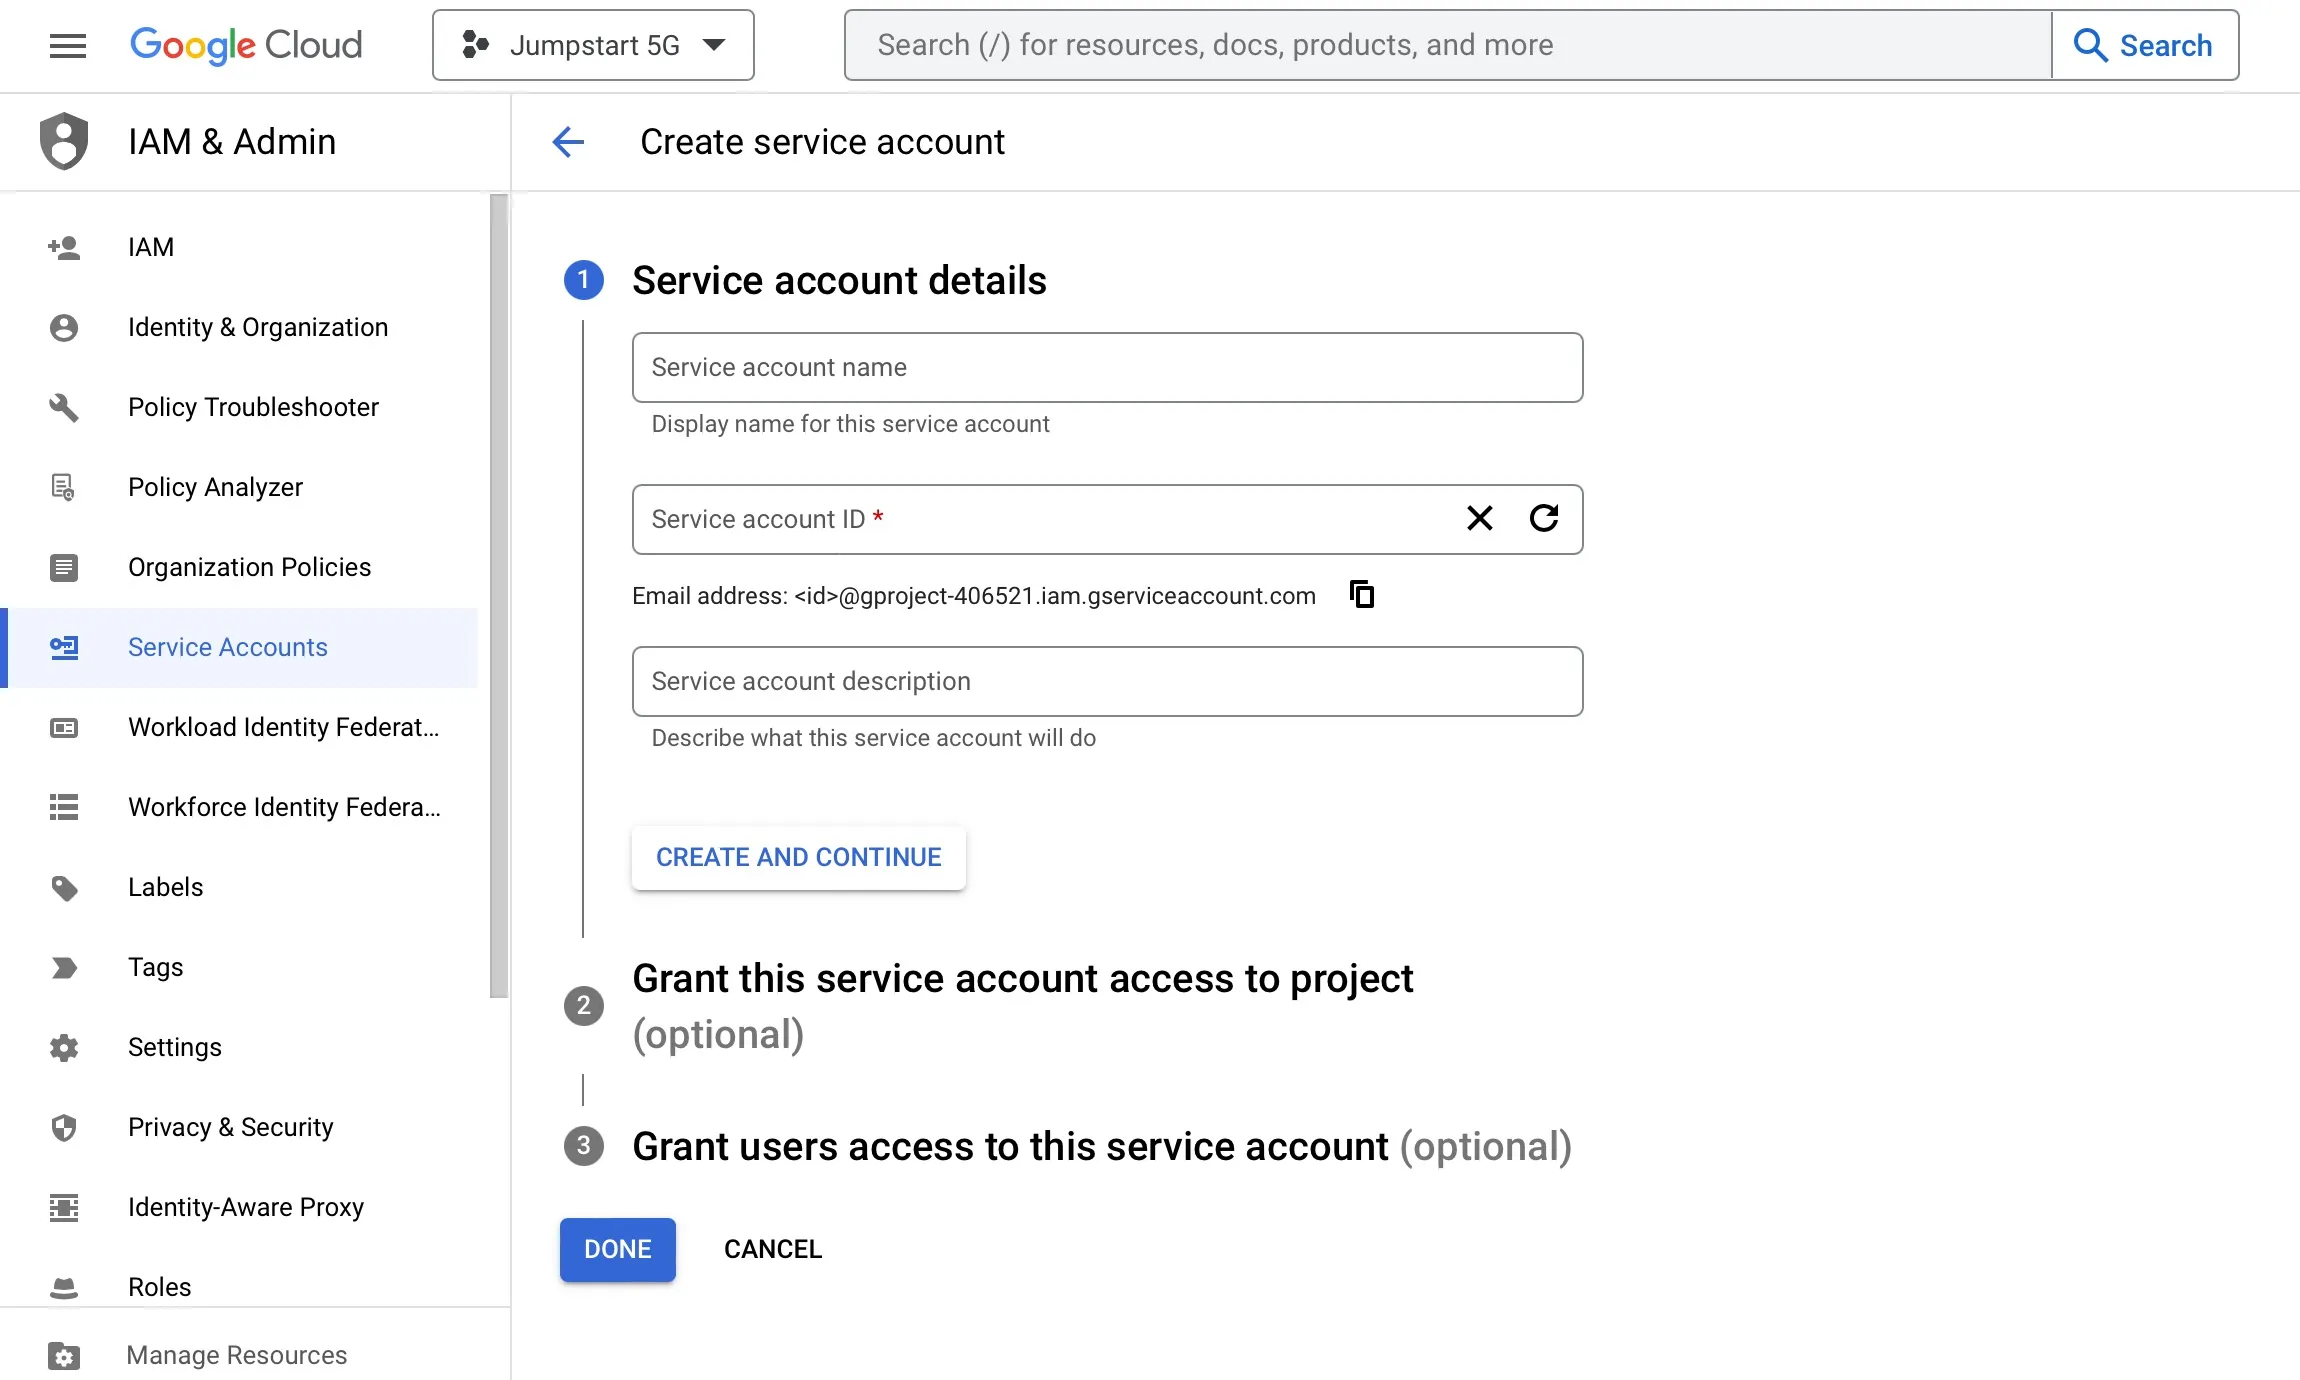
- Service account name – the name of the Service account (login), for example, GCPSheetsServiceAccount.
- Service account ID – Google will generate it based on your input in the previous field. Usually, there’s no need to change anything here.
- Service account description – Type something meaningful not to forget the purpose of this Service account.
Next, we need to grant Service account access to our project. Select Editor. This role will provide the required permission to interact with the account resources.
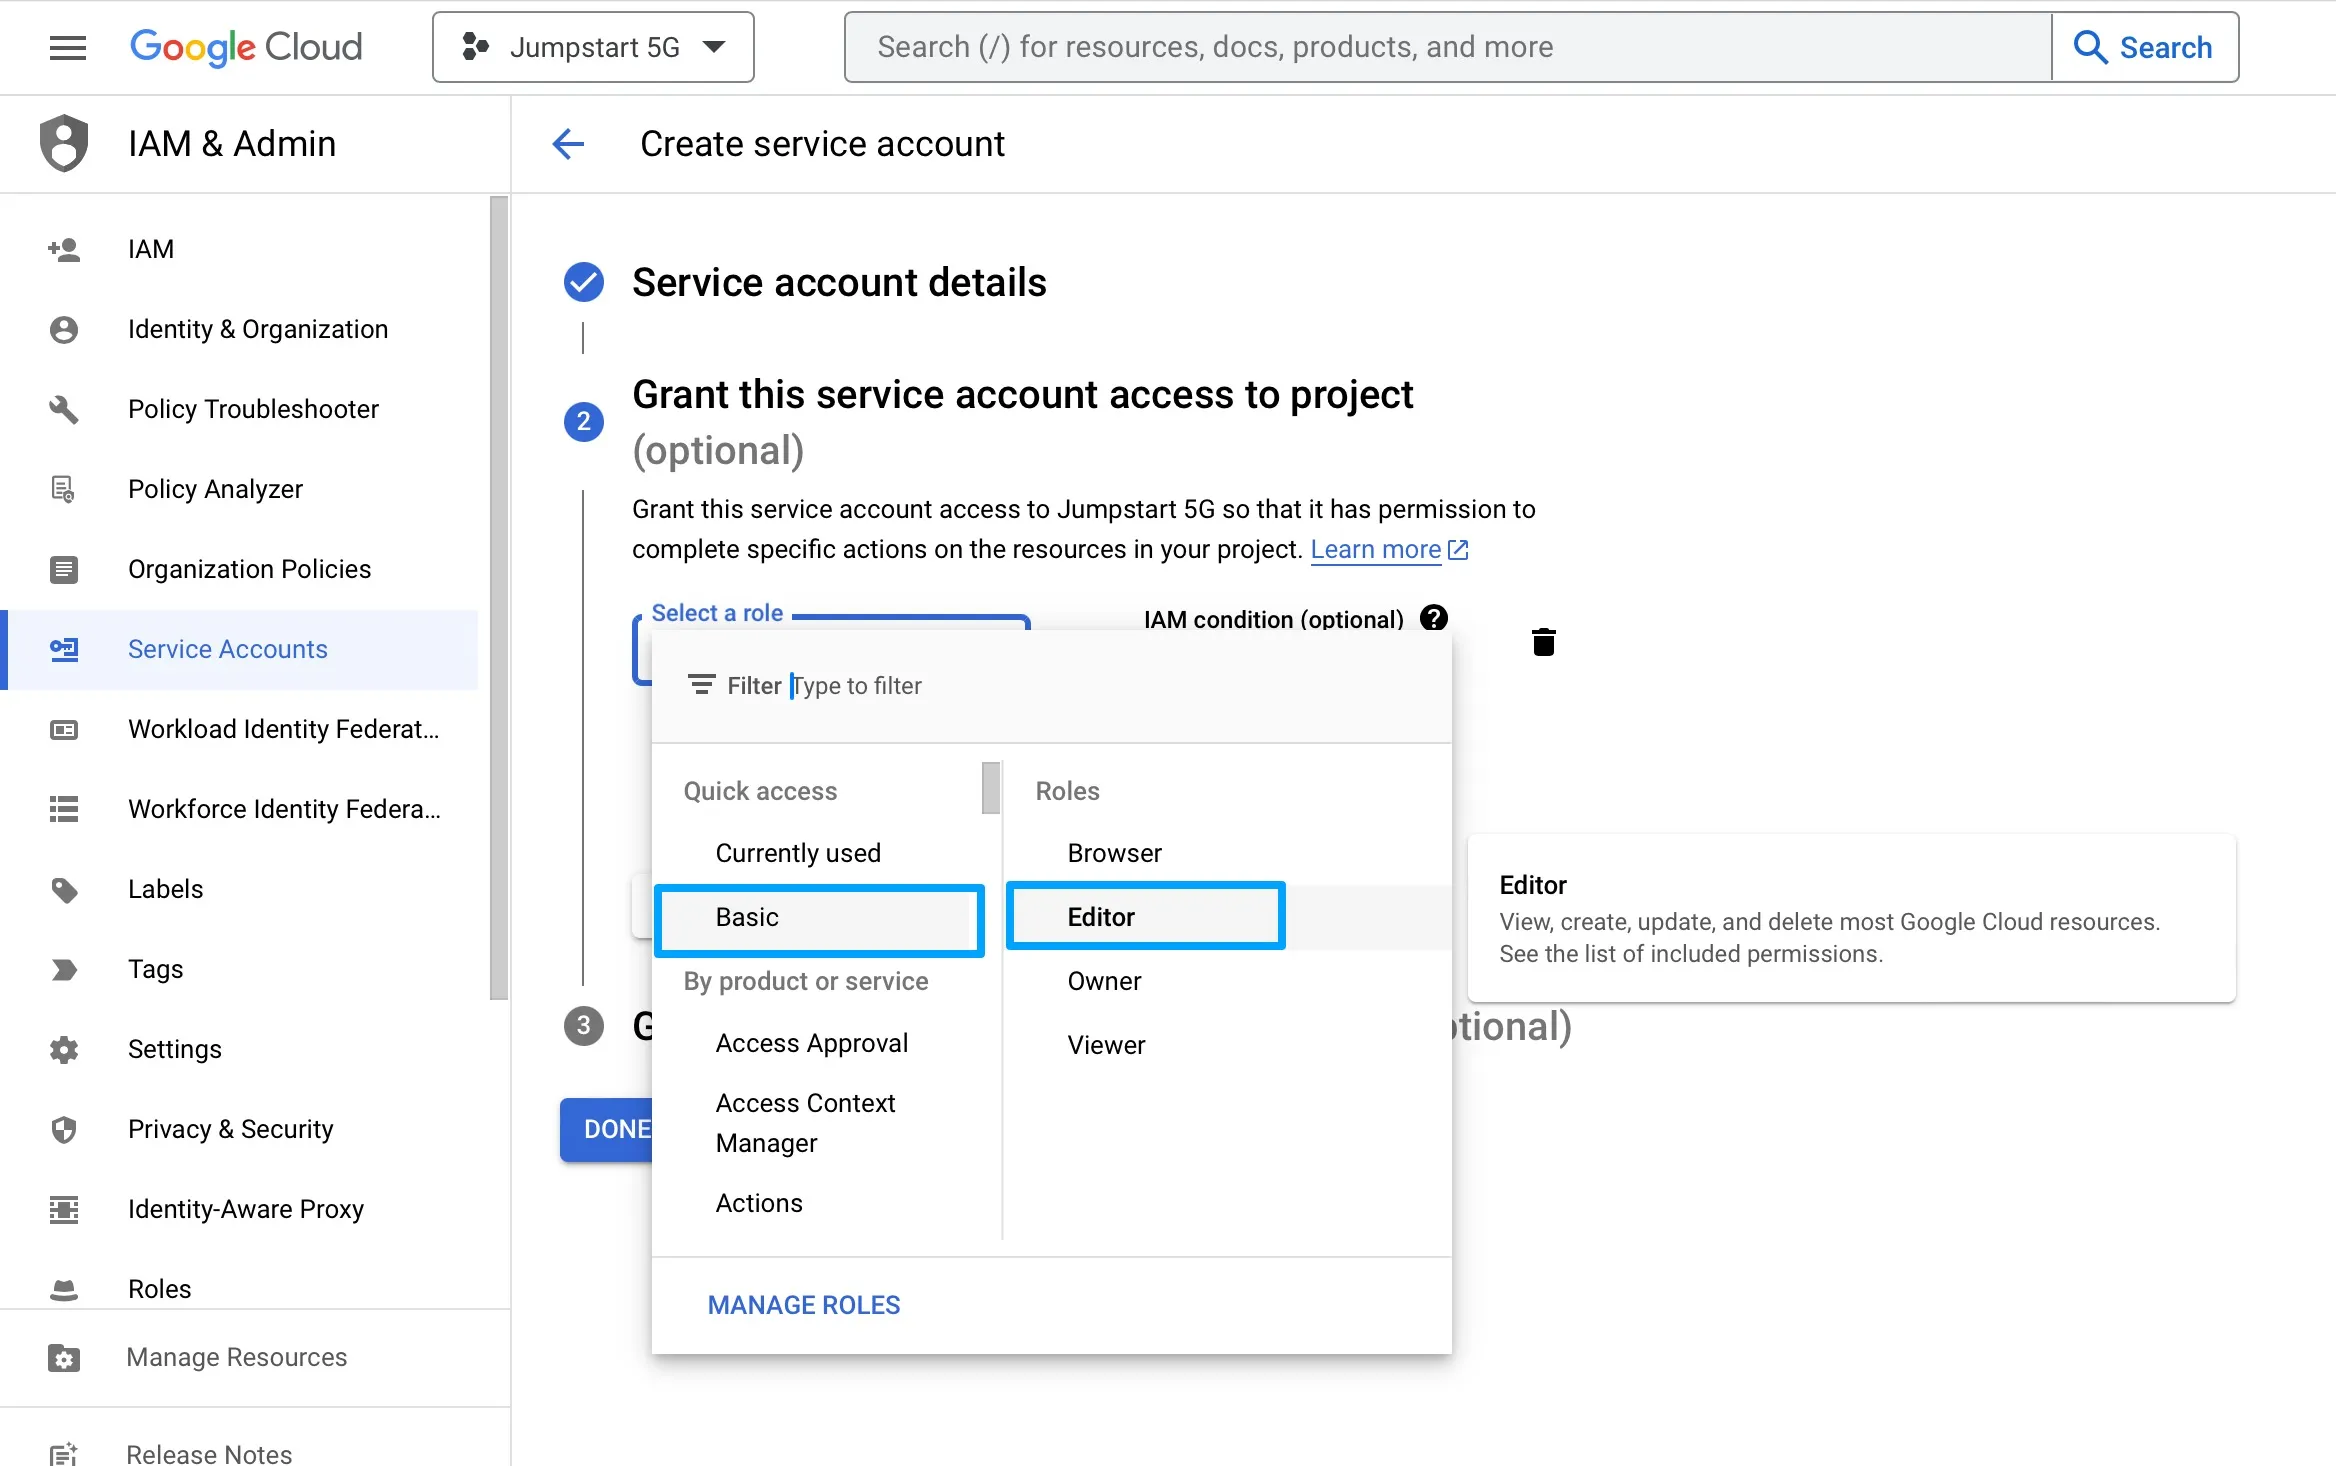
We click on Continue.
The last step is optional, so we click the Done button.
Create API keys for Google Cloud Client Python library
At this step, we need to create a Python Google Sheets API key for the Service Account, which we’ll be using in our scripts to interact with Google Cloud APIs on behalf of our service account.
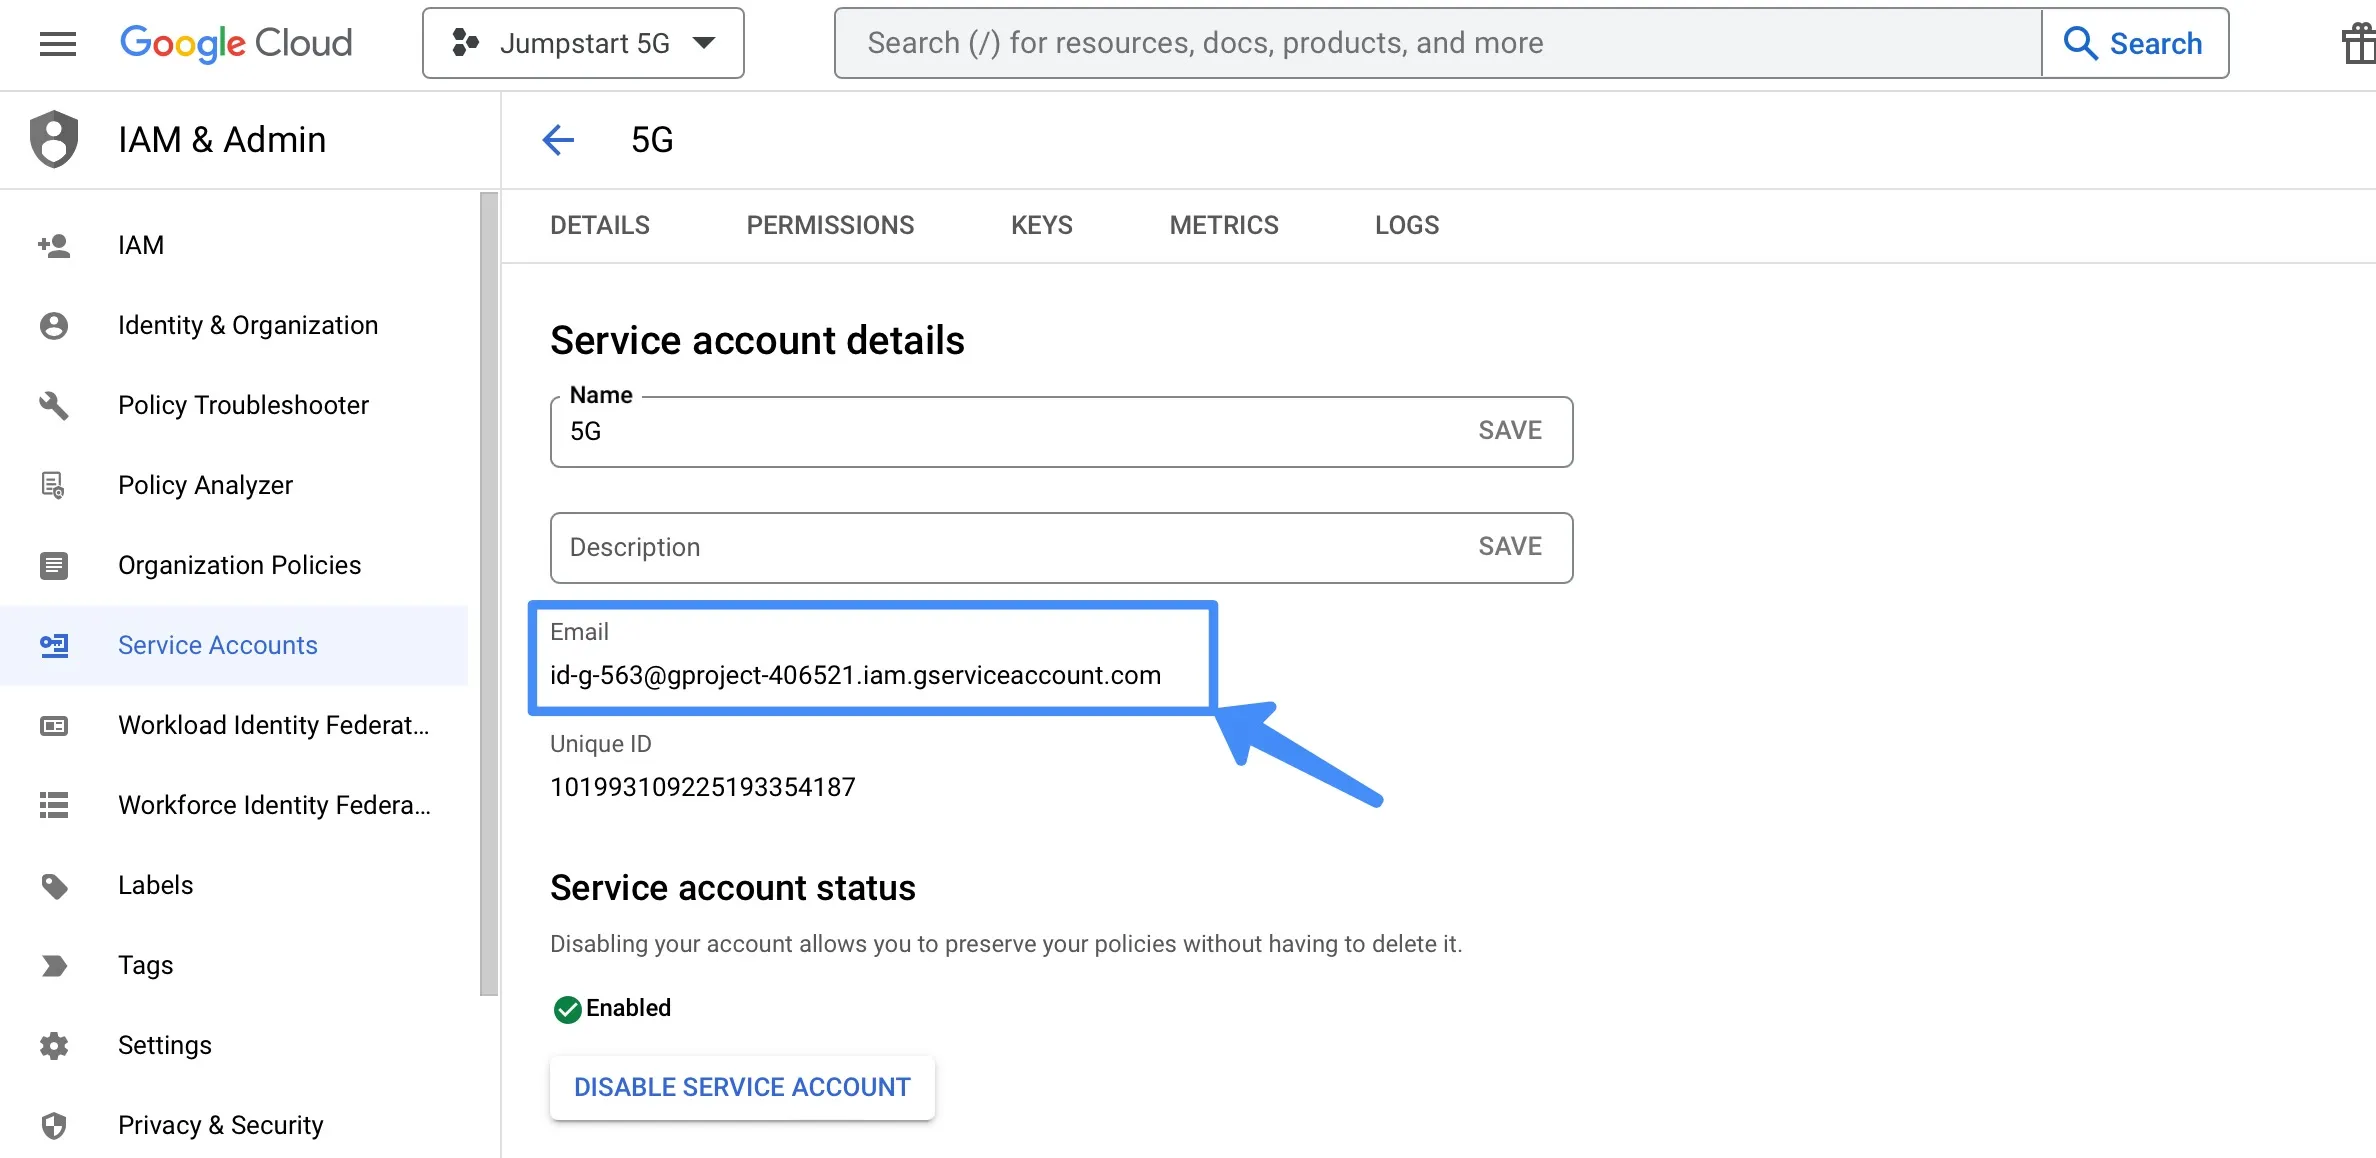
Click on the Service account to configure it.
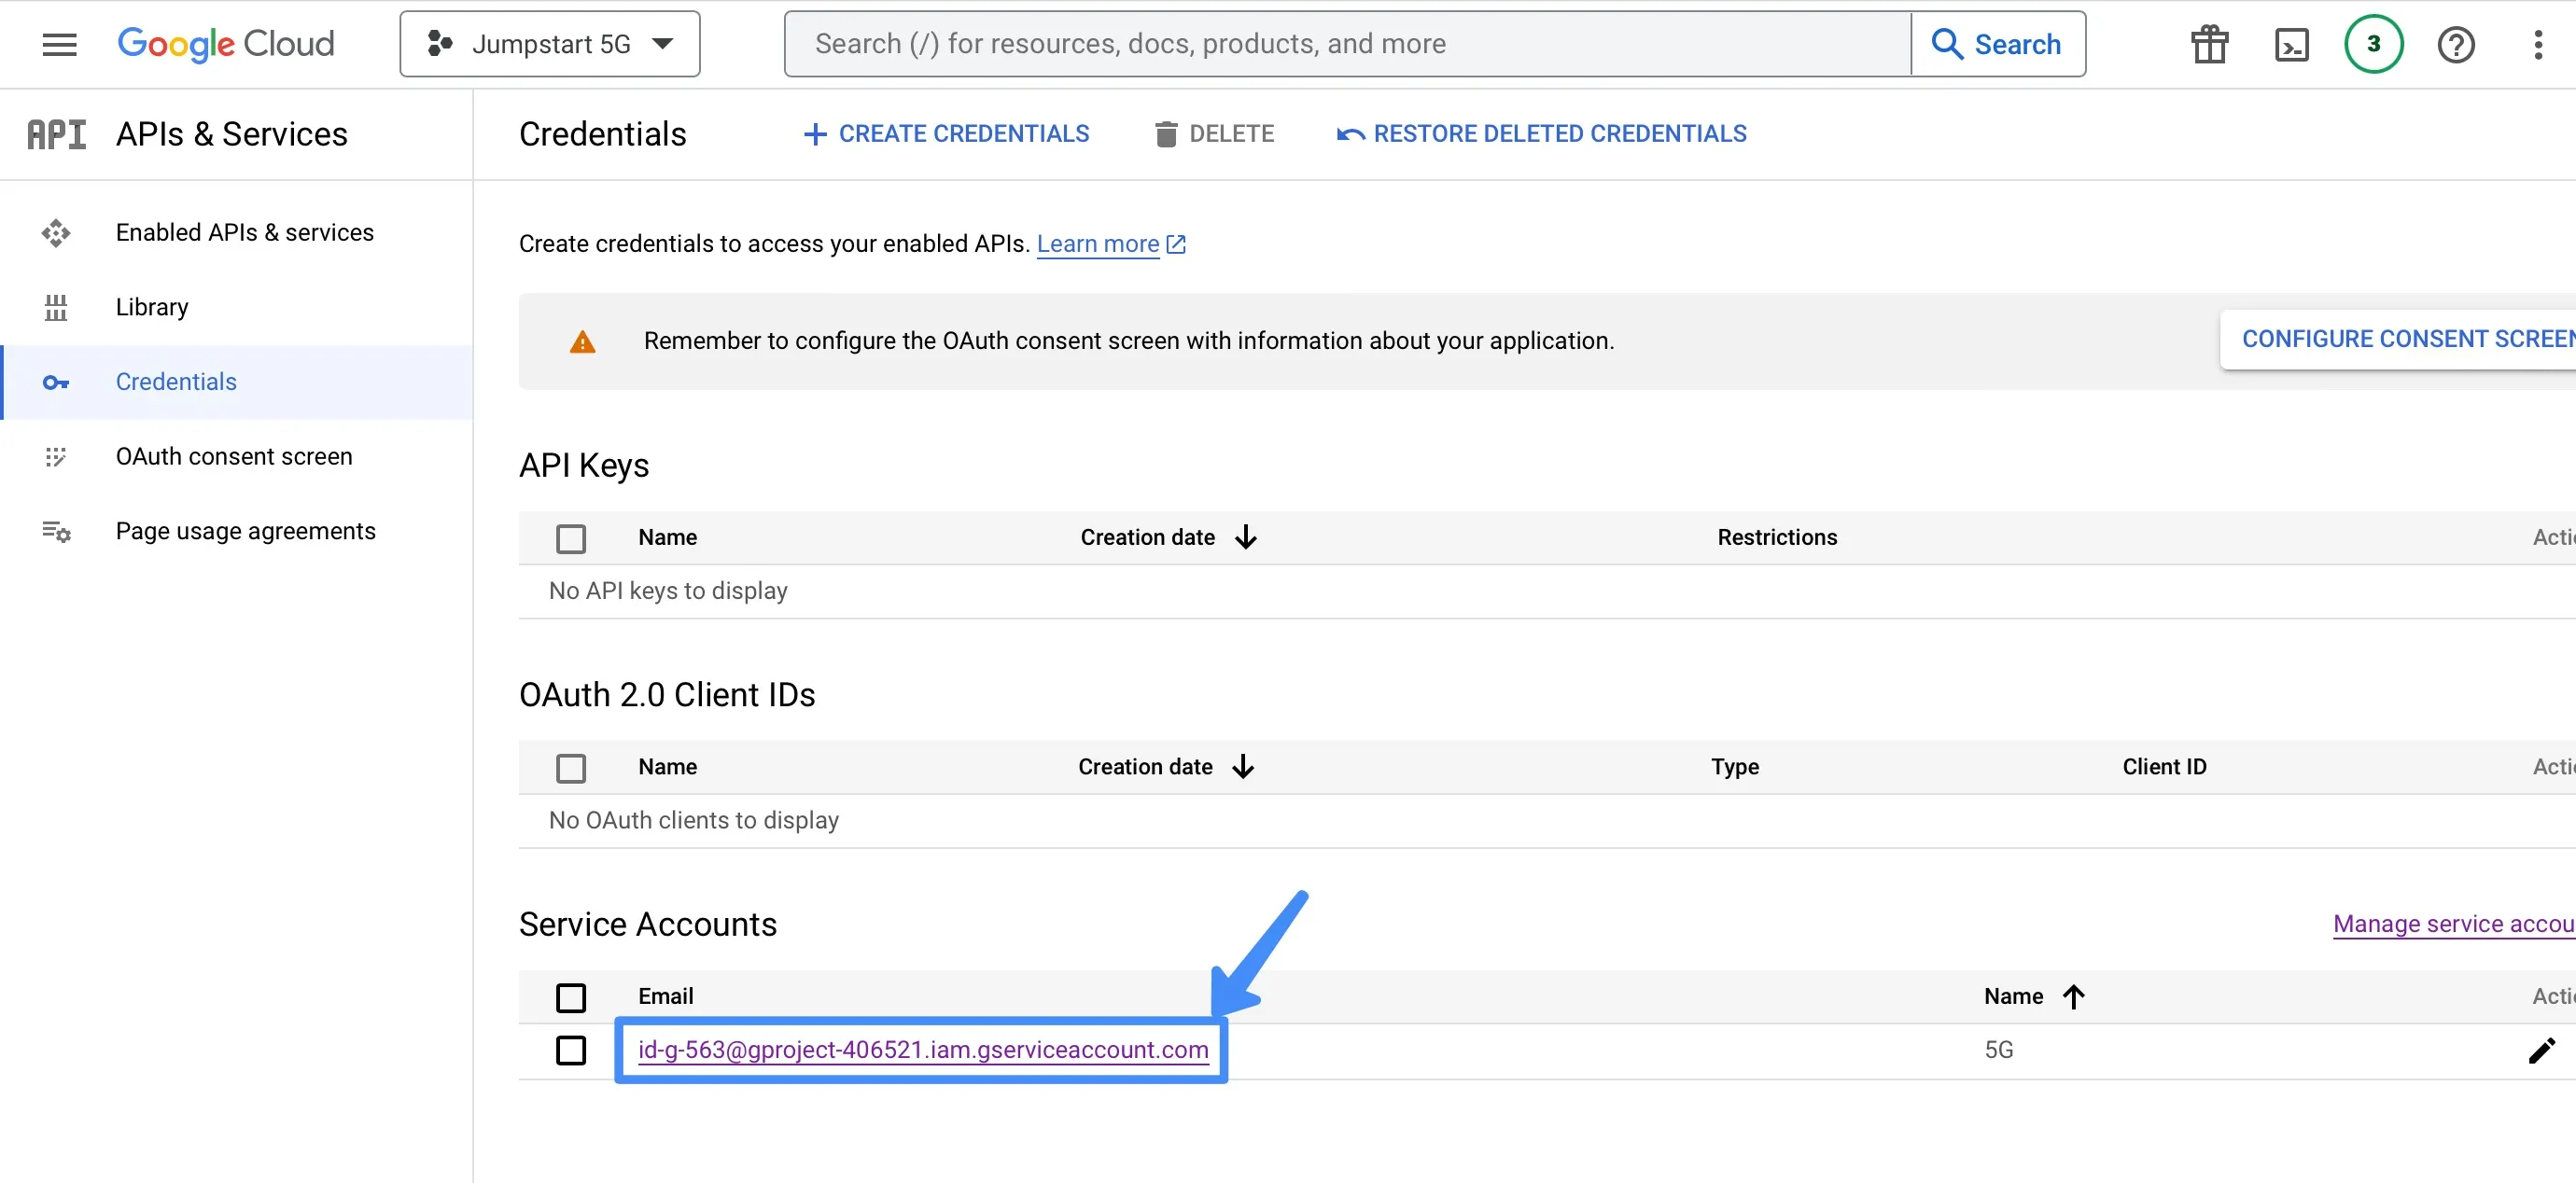
The service account has an email we will use later, so copy it somewhere.
Now we go to the Keys tab and then select "Add key -> Create new key".
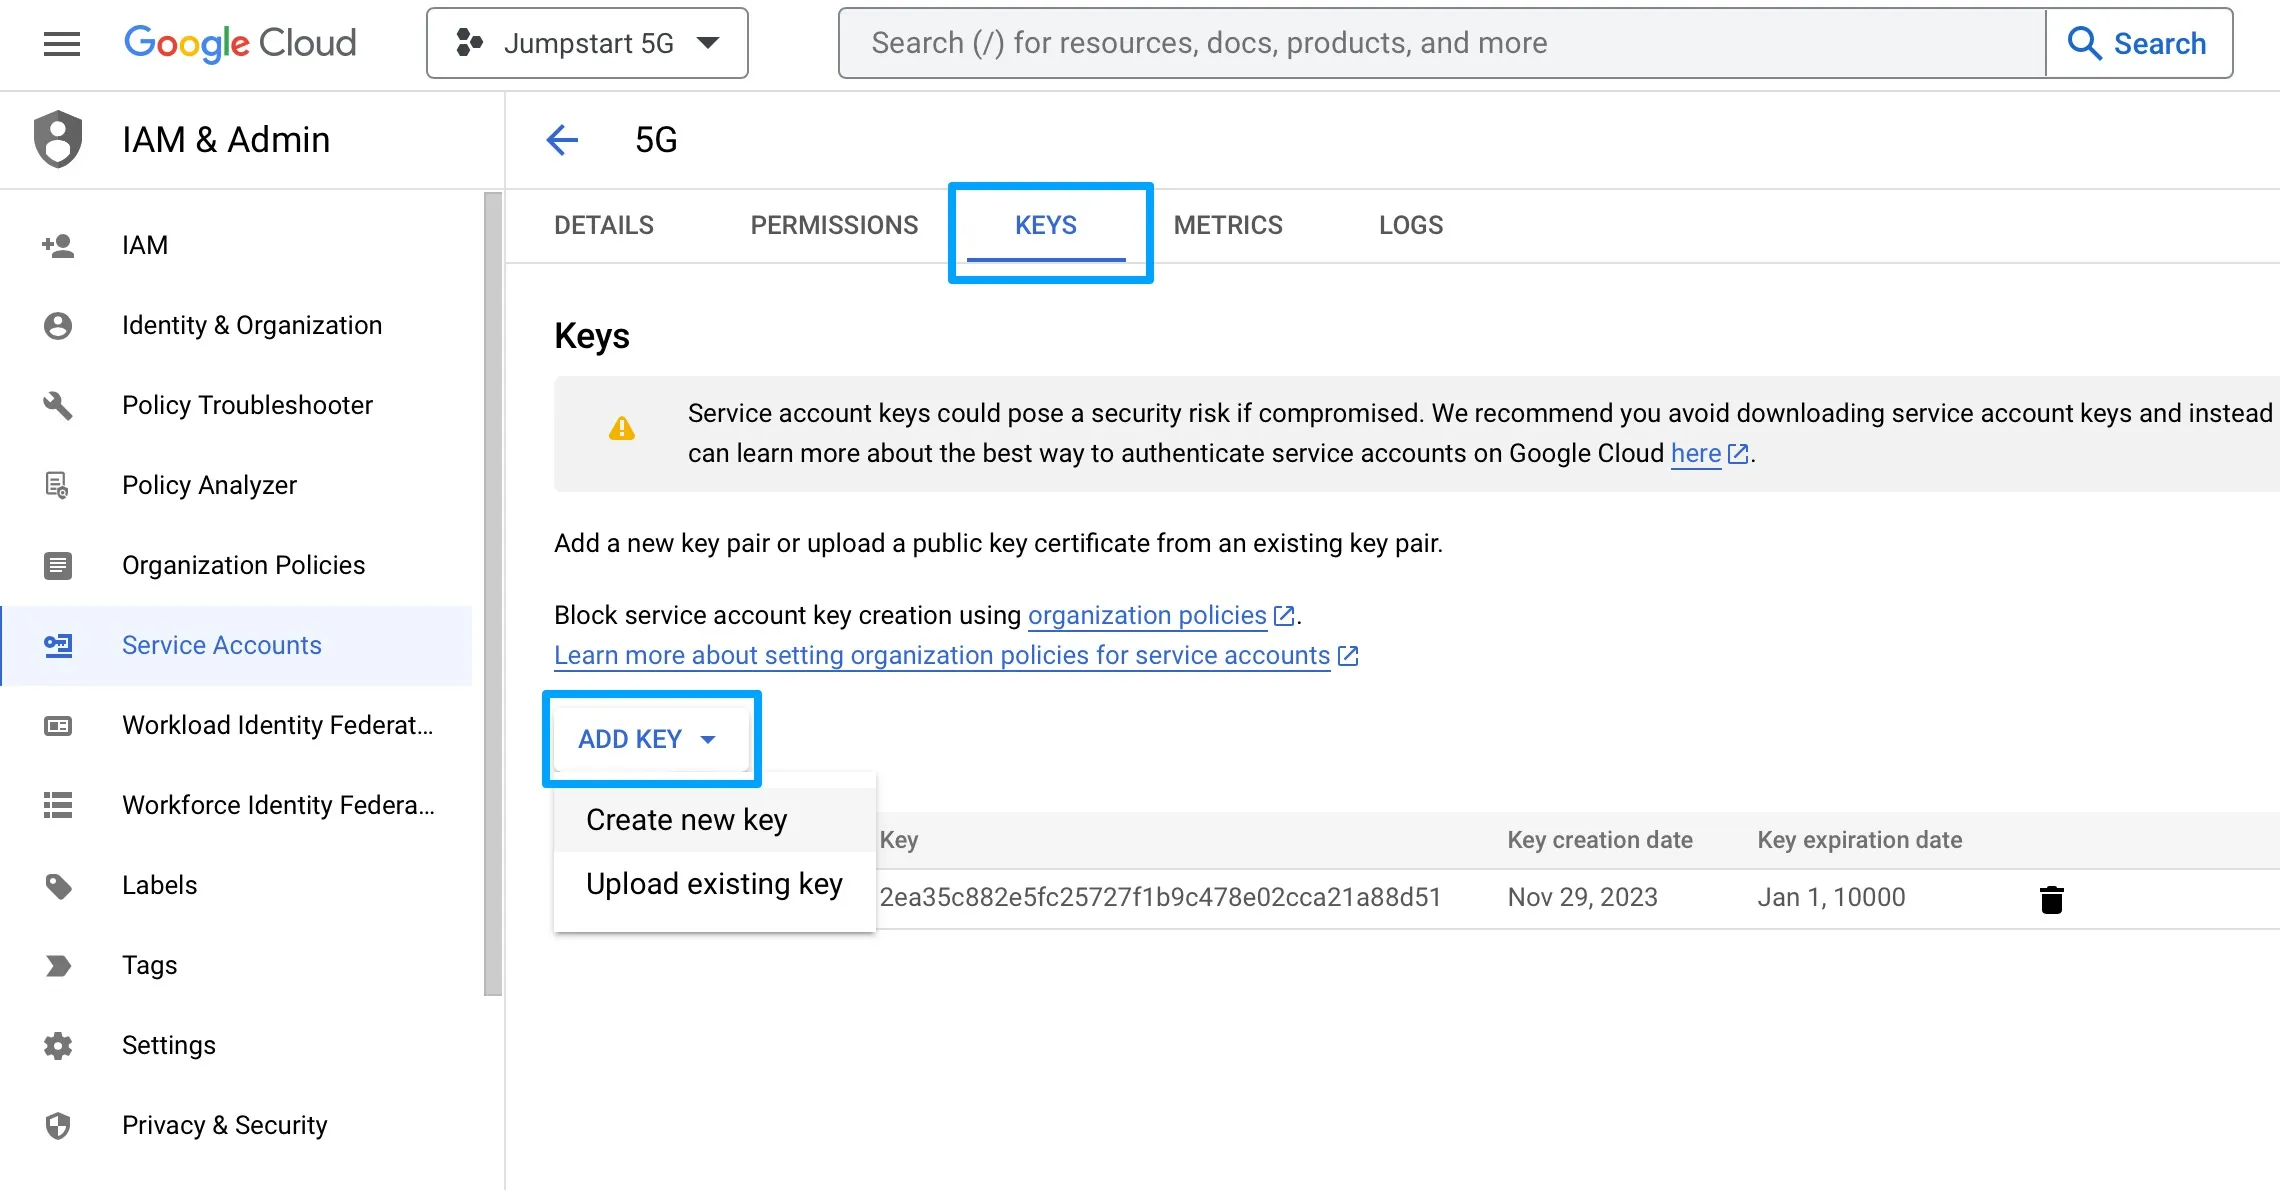
Choose the JSON key type, and then click on the CREATE button to save the file with the key.
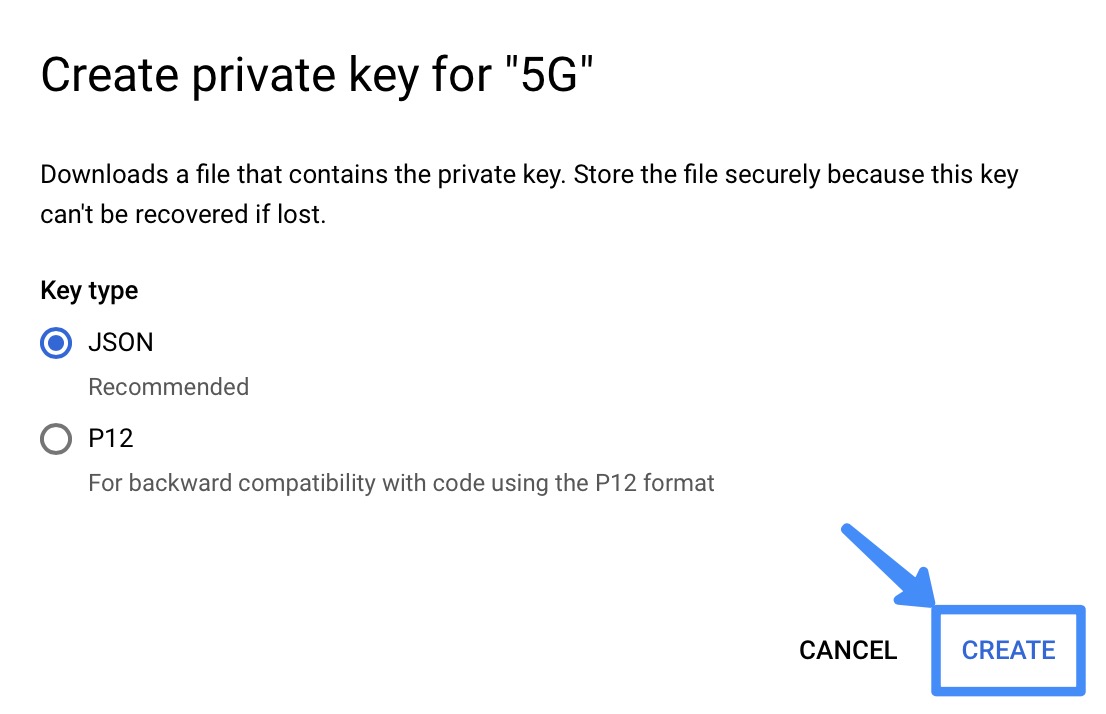
The downloaded key file needs to be moved to the same folder where the example Python script will be created.
Copy this JSON file to Raspberry Pi and save its path. We will use it in the code editing step.
The content of the JSON file looks something like this:
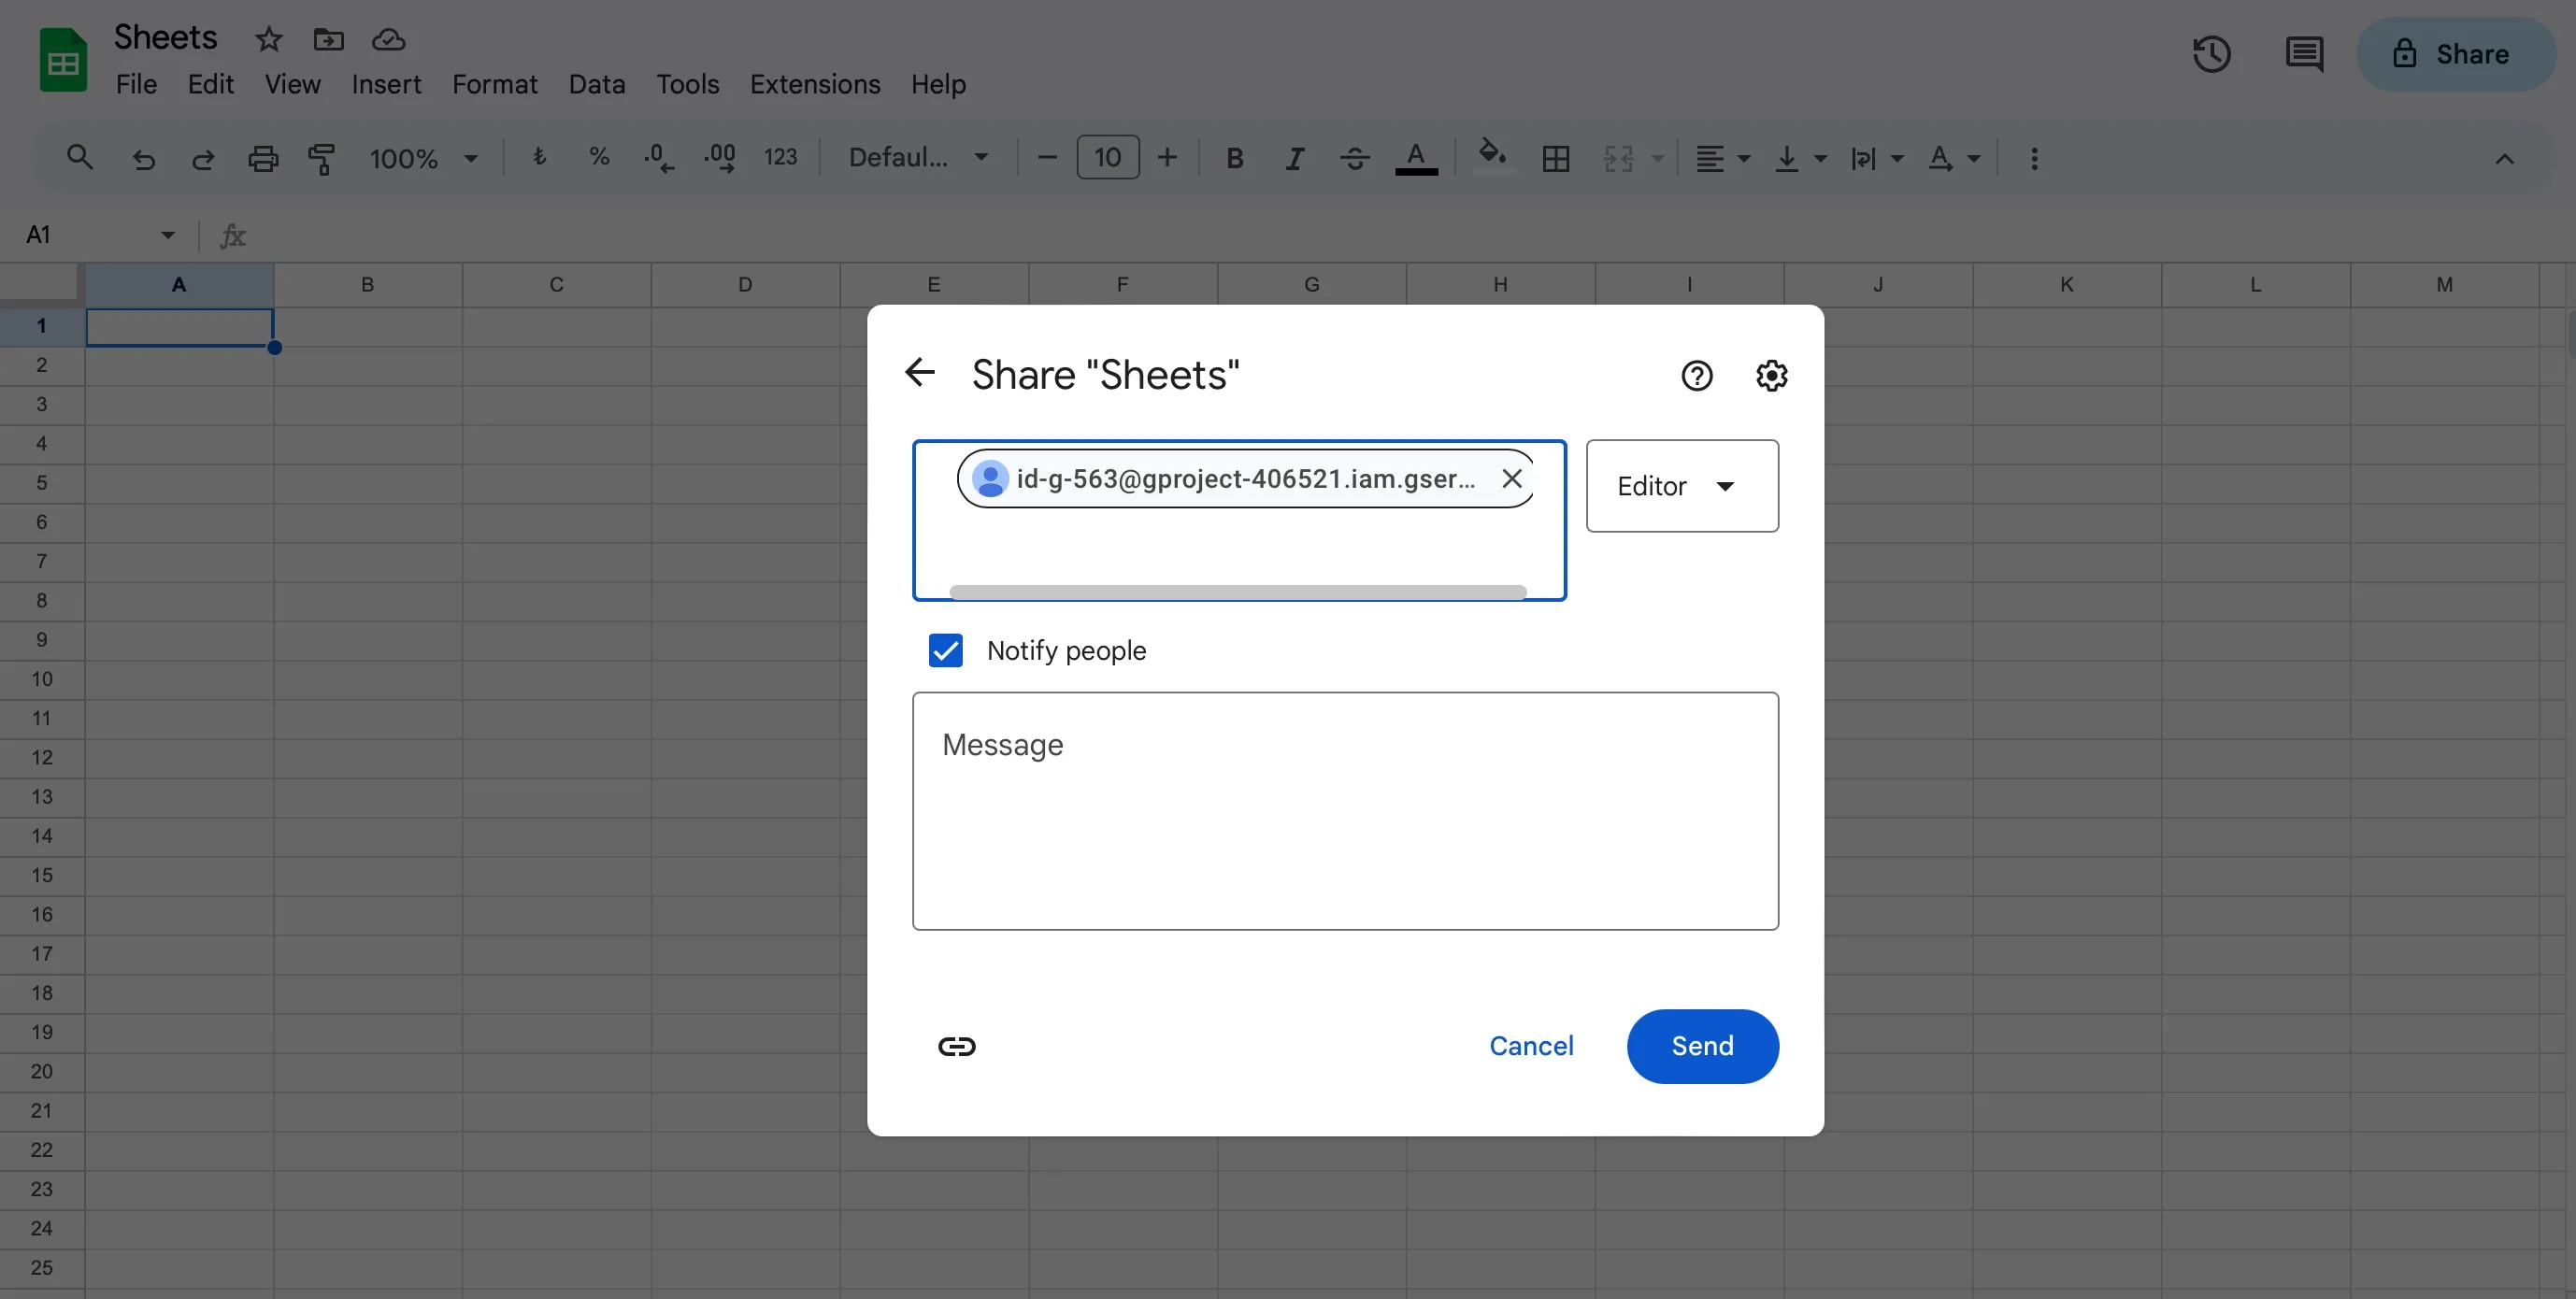
Share Spreadsheet to Service Account
- Click on the green Share button in the upper right corner of the new Google Sheets spreadsheet.
- When the dialog opens, paste the Google Cloud Service Account e-mail address you copied into the Add people and groups field.
- Uncheck the Notify people option and click Send.
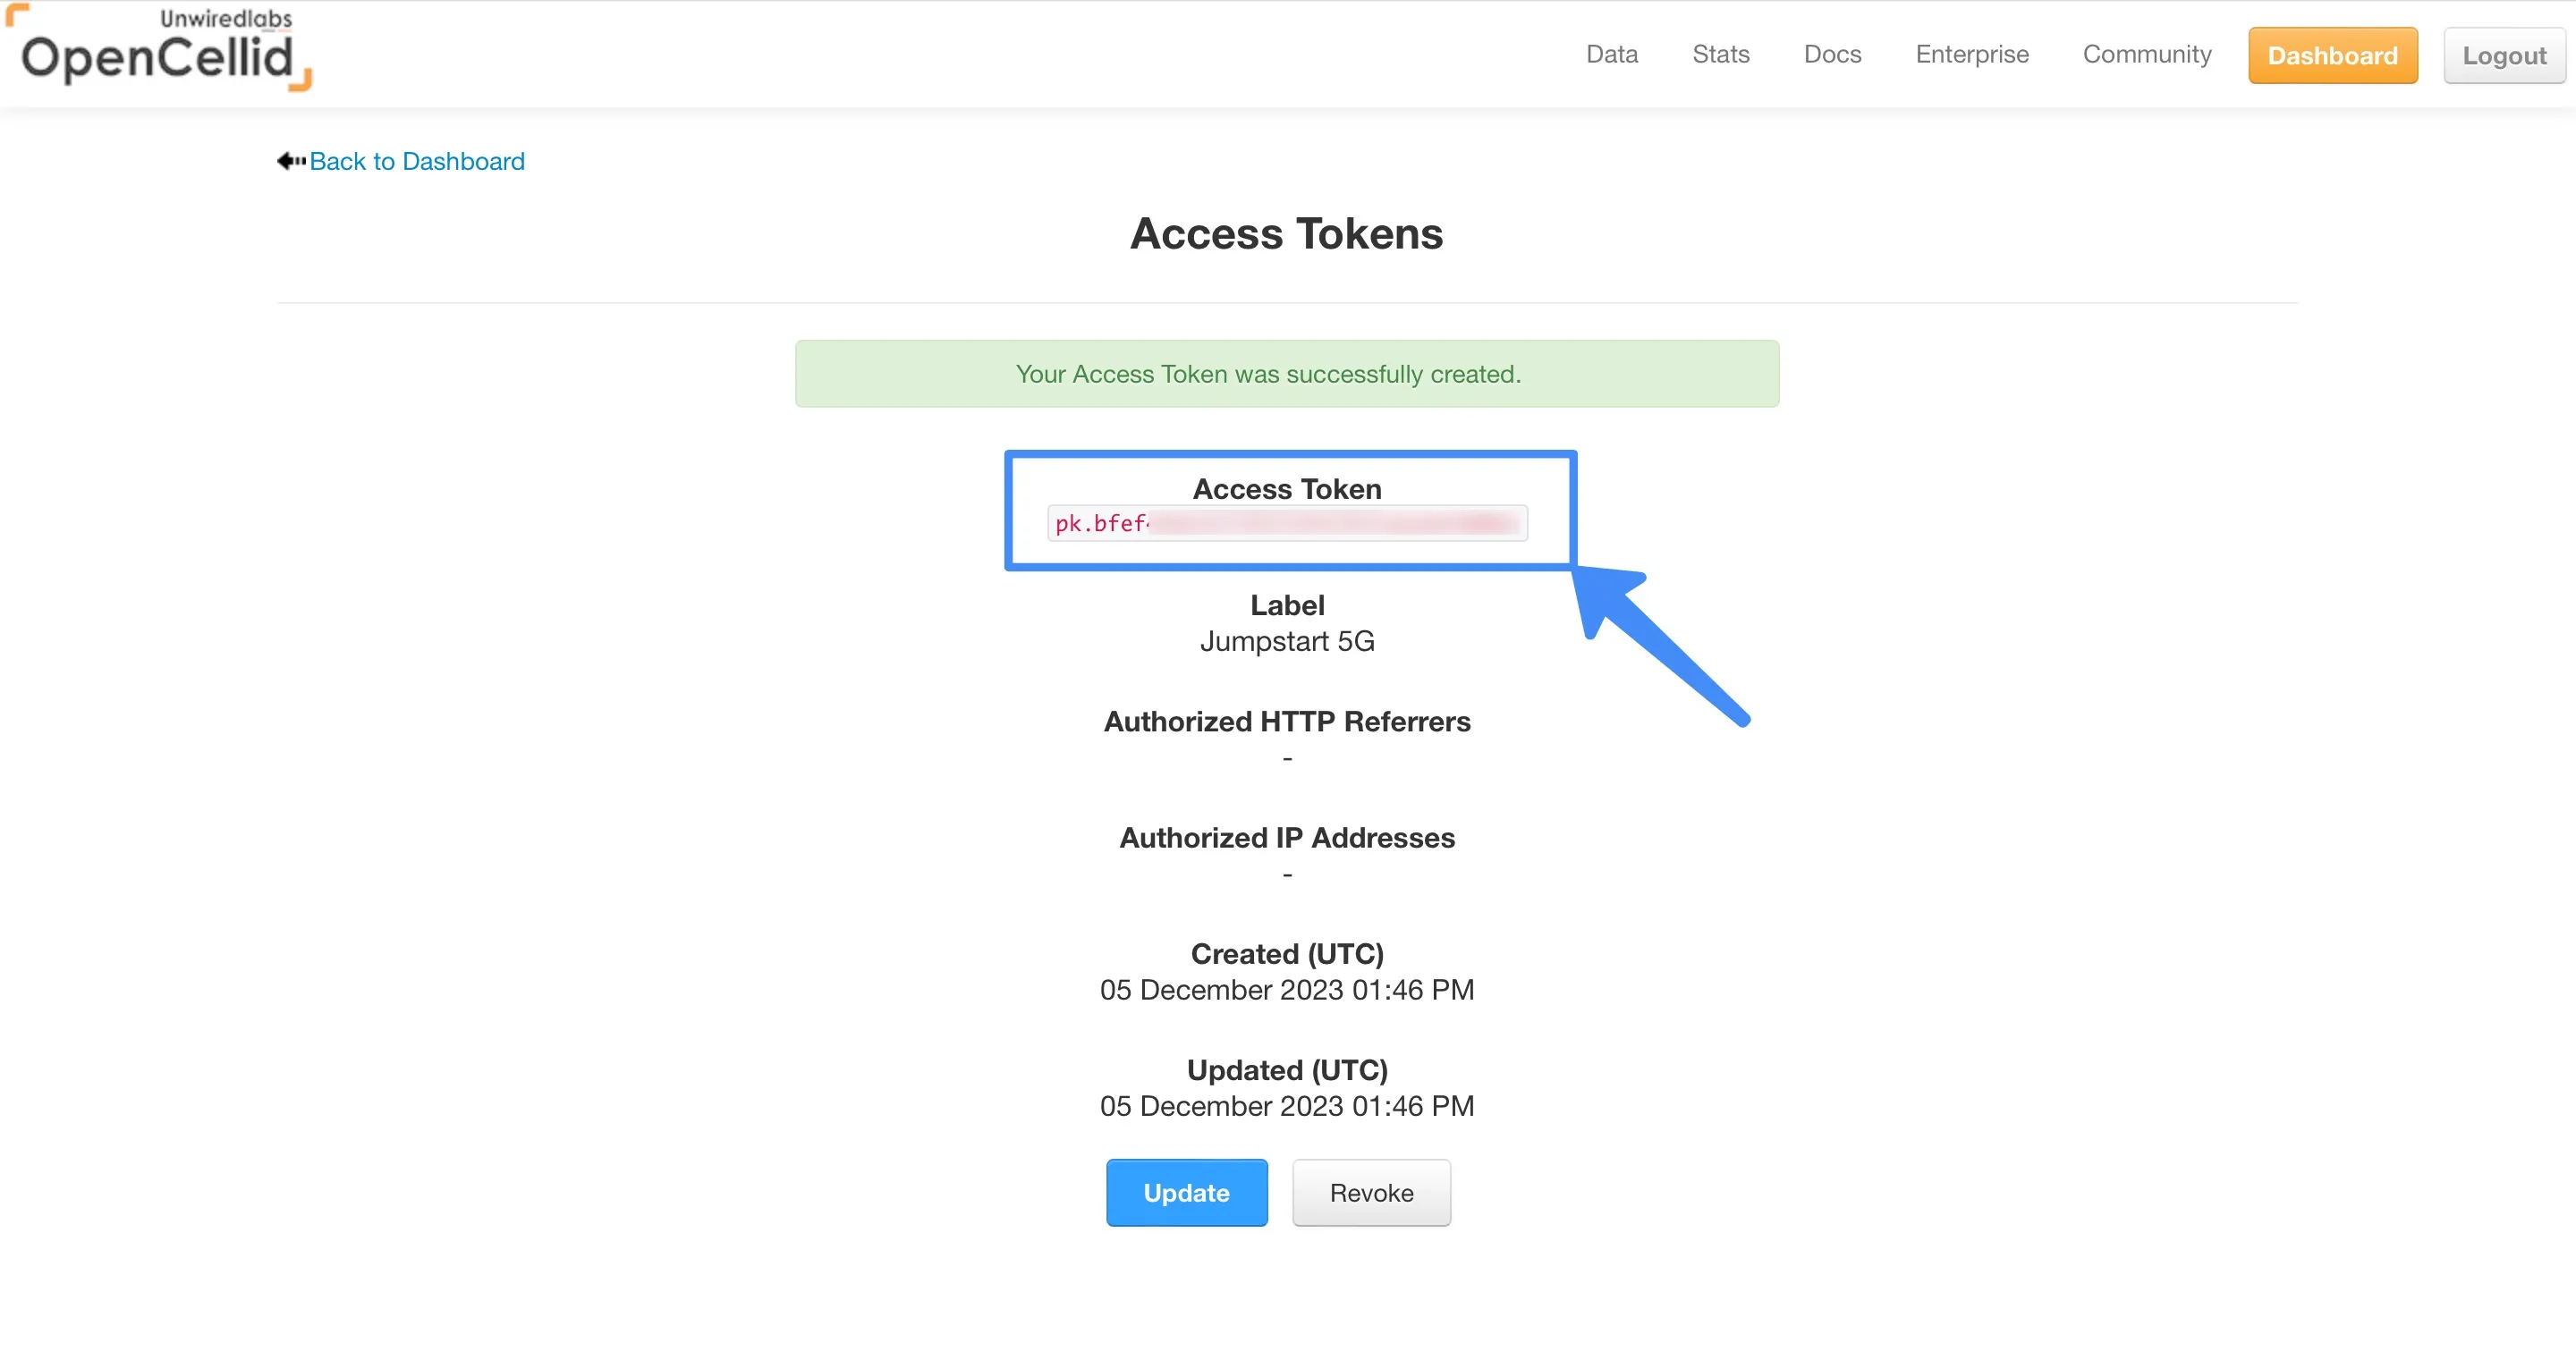
Opencellid API
- Create an OpenCelliD account and log in.
- Go to Dashboard -> API Access Tokens page and create a Token by clicking the "Create Access Token" button. You just need to enter a label.
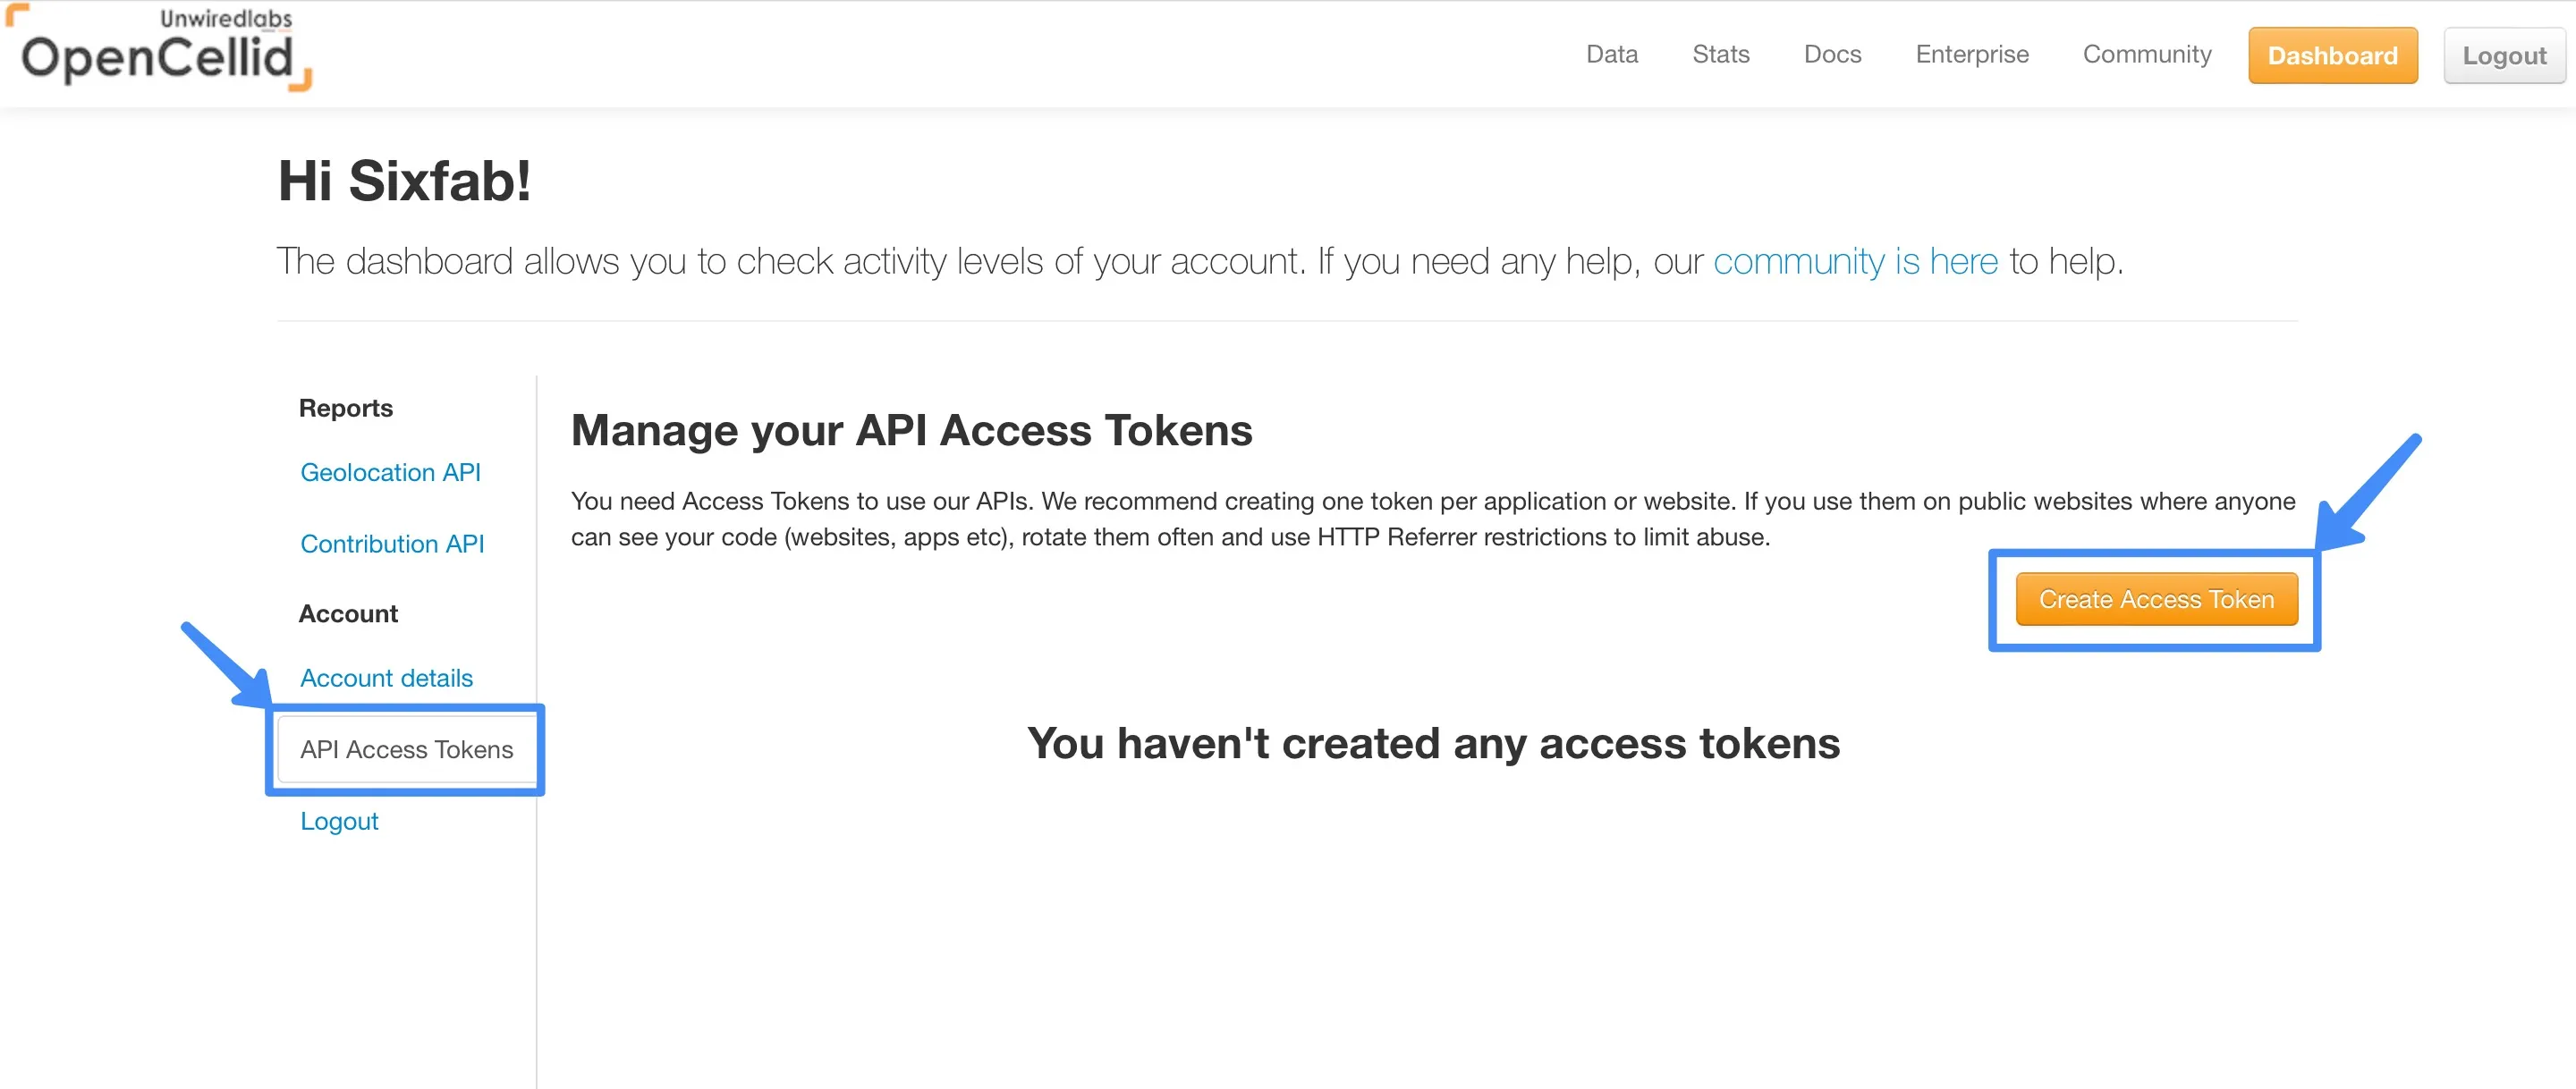
- Copy this Token and save it. It will be added to your Code in the following steps.
Prepare your Jumpstart 5G
Make sure your Jumpstart 5G is up to date and has internet access (Cellular connection as well as WiFi or Ethernet). Update it with the following command.
sudo apt updateInstall Python Libraries
From Bookworm onwards, packages installed via pip must be installed into a Python virtual environment using venv.
Install the virtual environment in the folder where you downloaded the Python script, then install the libraries.
See Raspberry Pi's official "Using pip with virtual environments" documentation for details.
Install the required Python libraries using pip.
pip3 install gspread oauth2client atcomPython Code
Download this Python script and copy it to Jumpstart 5G.
Edit Code
There are lines in the code that need changes. Fill in the parts within the quotes ("") according to your own credentials and save the changes.
Lines that need changes in the code:
- credentials_file = "" # Path to the created private key
- spreadsheet_id = "" # Read the description below
Your new Google Sheets spreadsheet will have a URL like:
https://docs.google.com/spreadsheets/d/1mIiwOcq46S4WTkw516kCaT5pr4ViMaEMX_53fD3tado/edit#gid=0
Enter the portion of the URL string starting after d/ and ending before /edit.
In other words, you would write down 1mIiwOcq46S4WTkw516kCaT5pr4ViMaEMX_53fD3tado using this example.
- worksheet_title = "" # Name of the single sheet from which the data needs to be accessed.
- api_key = "" # Opencellid API Key
Test Your Script
Manually run your script to ensure it's working without errors.
The Script should run within your virtual environment that you have created earlier as it uses the packages installed using pip.
python3 /path/to/your/script.pySet Script Permissions
Ensure your script has execution permissions.
sudo chmod +x /path/to/your/script.pyScheduling Script with Crontab
The crontab is a scheduling system for running tasks at specific intervals. This cron job will not work as the virtual env is not activated before running it. First, activate virtual env then run the script.
Edit it to run your script every 5 minute.
crontab -eAdd the following line, replacing /path/to/your/data_logger.py with the actual path to your Python script:
*/5 * * * * /usr/bin/python3 /path/to/your/data_logger.pyThat's it! Your Raspberry Pi should now automatically collect and upload data to Google Sheets every 5 minutes.
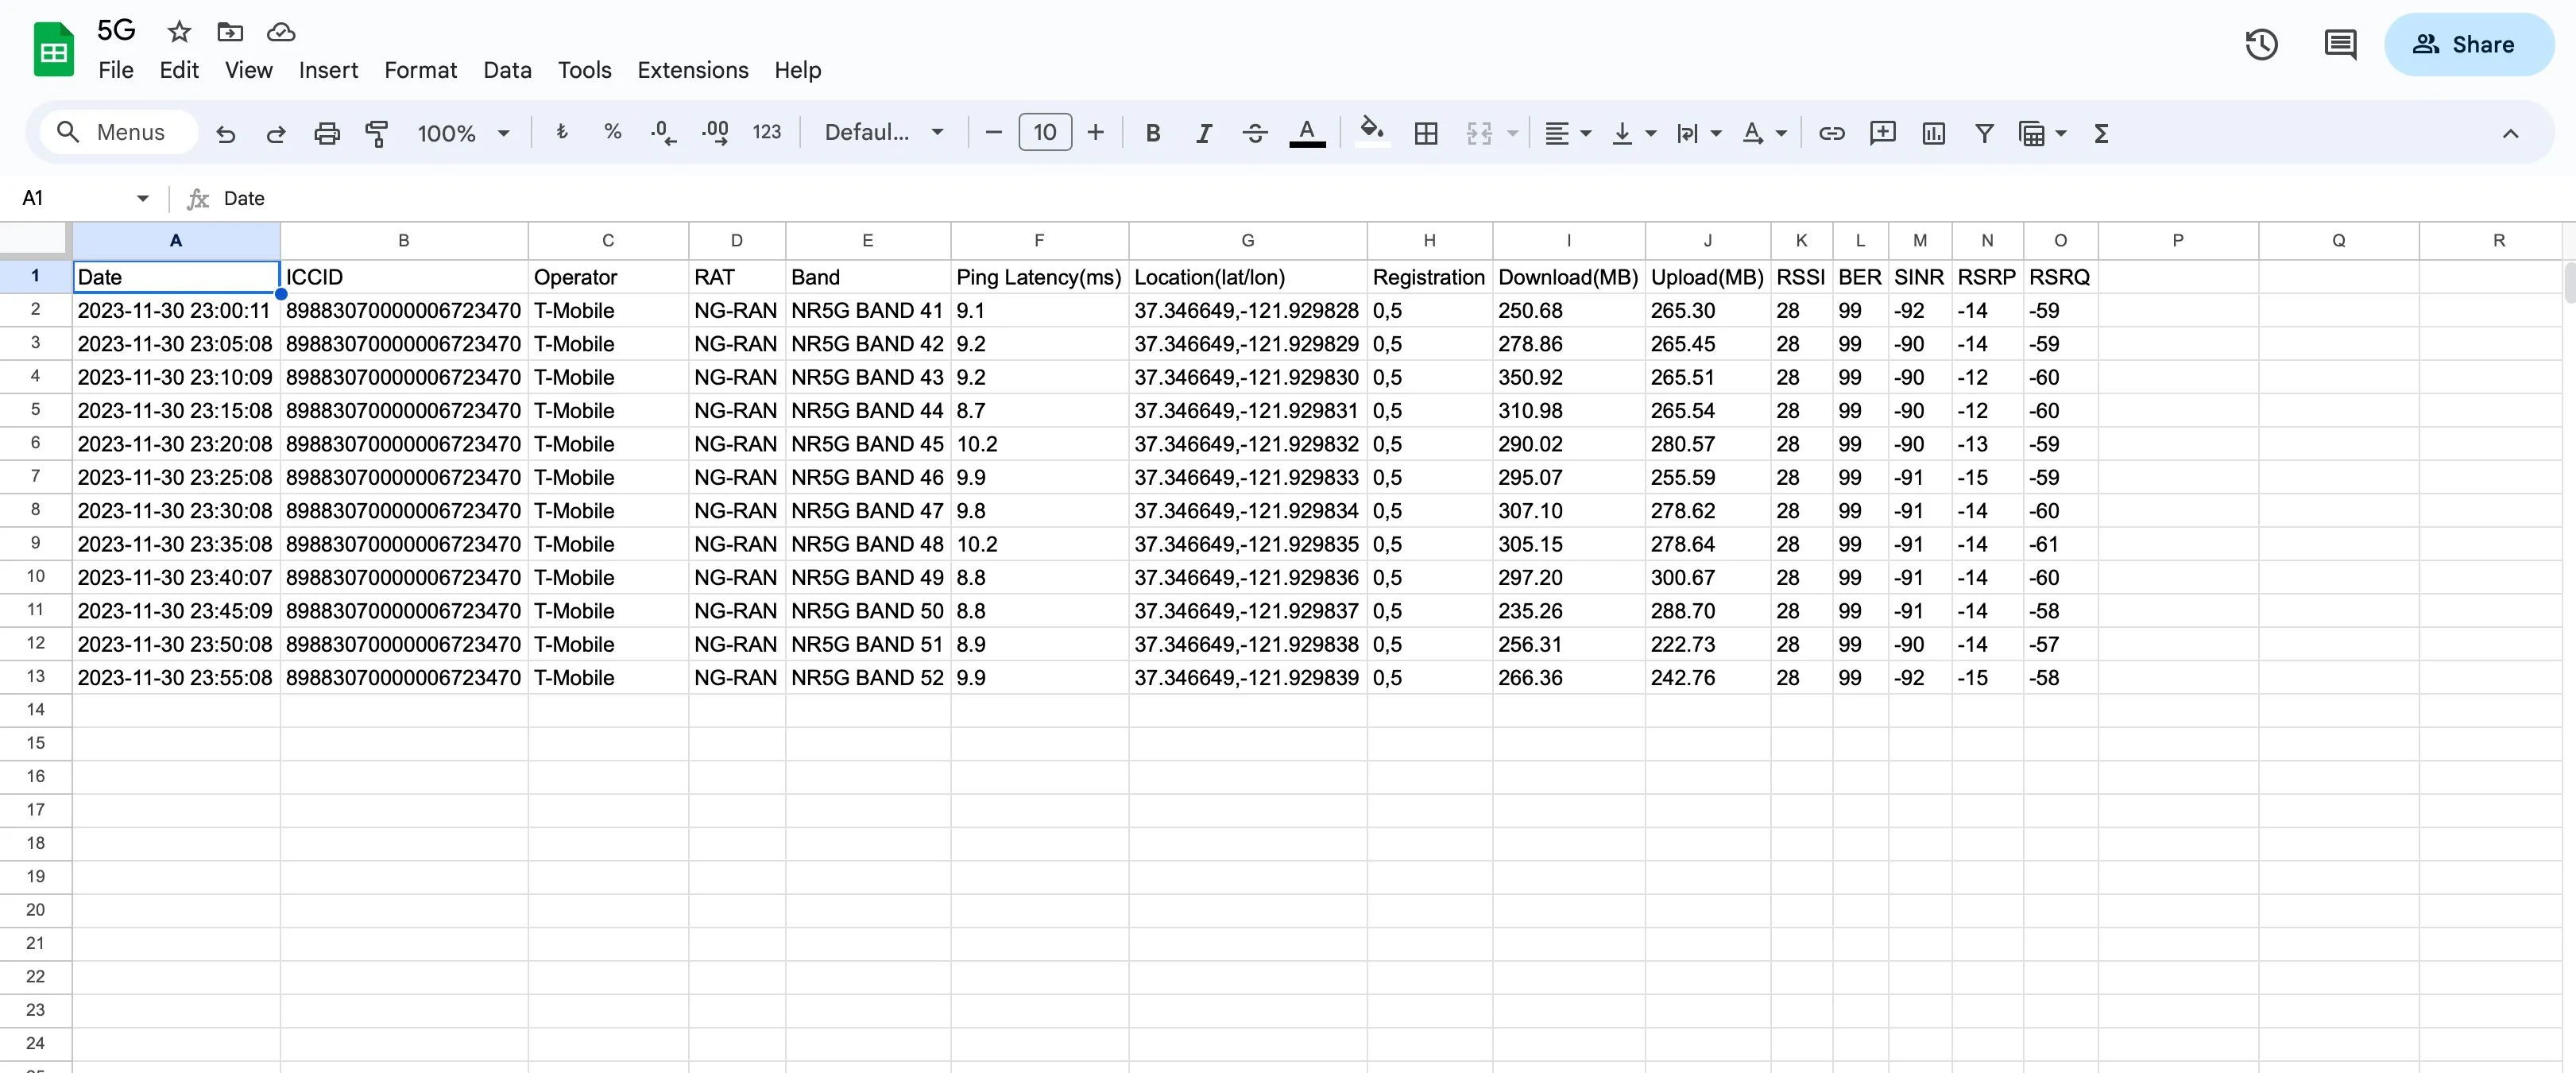
Check your Google Sheet to confirm that data is being updated.
Updated 6 days ago