
Sharing the Cellular Connection via LAN
In this guide, we will learn how to share cellular internet over ethernet using Jumpstart 5G
Overview
In this guide, we will learn how to share the active internet connection with the highest priority over ethernet using Raspberry Pi. Essentially, we'll configure the Jumpstart 5G to share the internet it receives through cellular interface with a connected computer using the ethernet port.
This tutorial enables portable internet access to devices with an Ethernet connection through 5G and allows access to be expanded by more devices using the same internet connection.
Now, let's proceed step by step to prepare your Jumpstart 5G for sharing cellular internet!
Hardware Preparation and Cellular Connection
Hardware setup and cellular connection steps are mentioned on the Getting Started page. It's necessary to visit there before starting this tutorial.
An ethernet cable is also needed.
Sharing the Cellular Connection via LAN
Let's ensure our systems meet the following requirements before starting any configuration:
- In addition to your cellular network interface (usually called 'usb0'), it must also have a wired or wireless network interface.
- On our Raspberry Pi OS system, we should have administrator privileges.
- Make sure you can access the internet from the 5G cellular interface / send pings.
NetworkManager TUI
Jumpstart comes with Debian 12 "bookworm" OS that has Network Manager by default. Hence we will be using nmtui. nmtui stands for "NetworkManager Text User Interface." It is a command-line tool that provides a text-based interface for managing network connections on Linux systems that use NetworkManager. NetworkManager is a service that manages the network connections on a Linux system, and nmtui offers a convenient way to interact with it using a terminal.
This procedure describes how to configure networking using the text user interface tool, nmtui.
With nmtui, users can easily configure and manage network settings, such as wired and wireless connections, IP addresses, DNS settings, and more, all within a text-based environment.
Step 1: Disable ModemManager
Disable the ModemManager service if installed. If it is not installed, skip to the next step.
To disable the ModemManager service, open a terminal and run the following command:
sudo systemctl disable ModemManager.serviceStep 2: Start the nmtui tool
sudo nmtuiGoto edit a connection
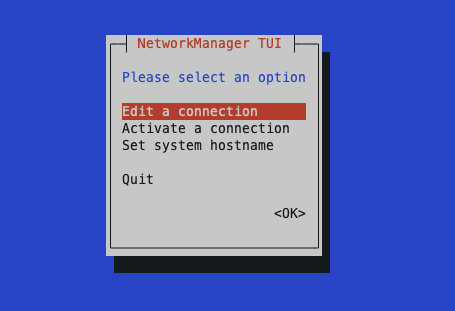
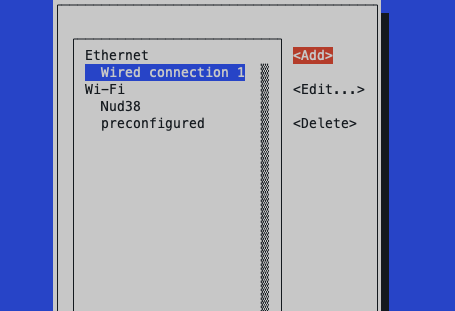
Step 2: Enter <Add>
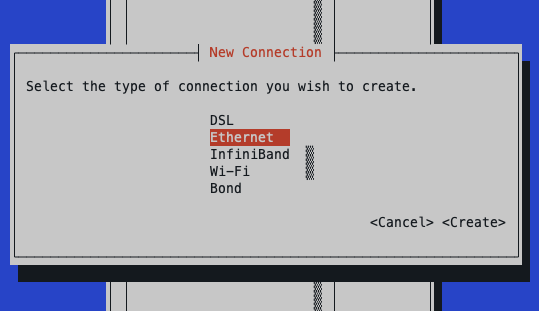
Step 3: Select Ethernet as type
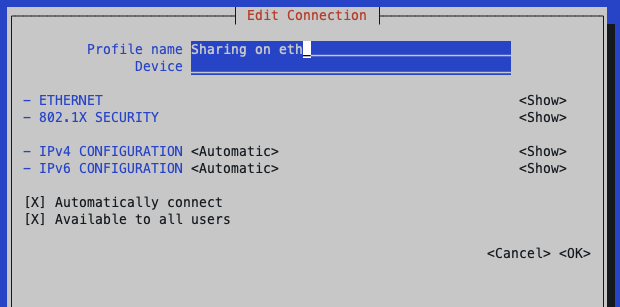
Step 4: Give it a profile name
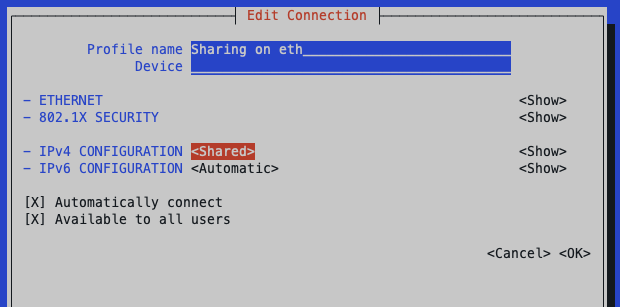
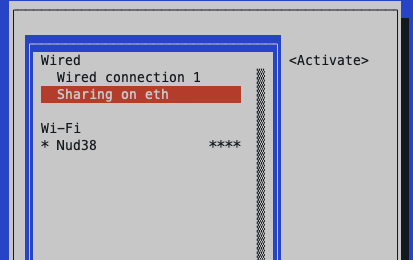
Step 5: Change IPv4 Configuration to <Shared> then hit <OK>
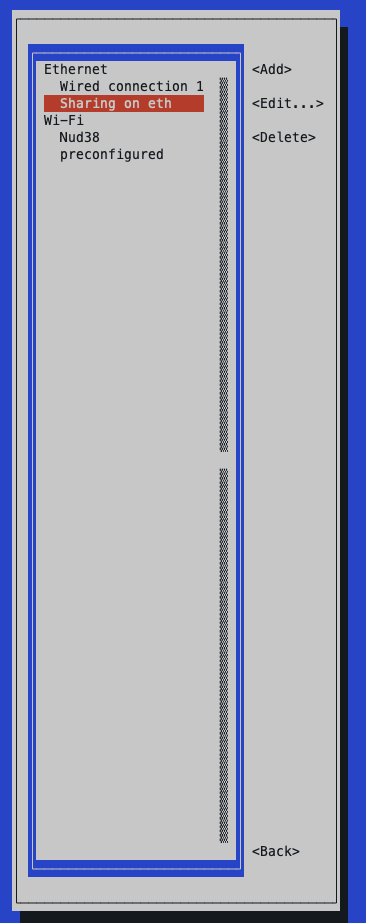
Step 6: Now it will appear on the list
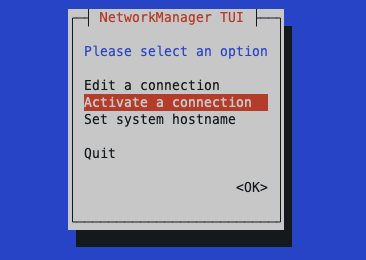
Step 7: Click on <Back> and enter Activate a connection
Step 8: Select the recently created interface and Activate it
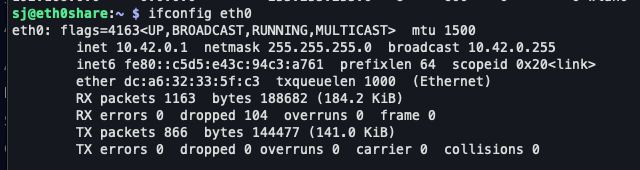
Once activated you will able to see IP of eth0 starting with 10.42.x.x
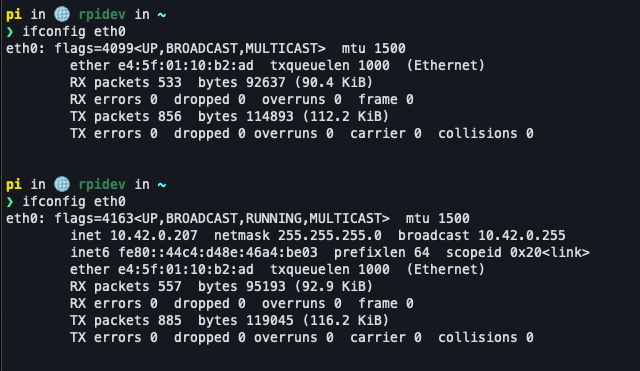
Connect ether to your desired device(In my case it is another Raspberry Pi), you can see the IP in 10.42.x.x format as below.
Reference
Updated 4 months ago