Manage & Deploy Applications
Learn how to easily manage and deploy applications on your ALPON X4 micro-edge computer using the Sixfab Connect platform.
Manage & Deploy Applications
Deploy and manage containerized applications on your ALPON device through the Sixfab Connect platform. This guide covers two deployment methods, container access options, and day-to-day application management.
linux/arm64 platform. Most official images on Docker Hub (nginx, redis, mysql, etc.) provide ARM64 variants.
Getting Started with Application Deployment
ALPON devices use container-based application deployment to provide a robust, scalable, and efficient environment. Containers run in isolated environments, reducing conflicts and ensuring better resource utilization.
Two deployment methods are available:
Pull ARM64-compatible images directly from Docker Hub. No additional setup required — ideal for getting started quickly with pre-existing images.
Build and push your own custom images to the Sixfab Registry. Recommended for tailored functionality, specific configurations, or production deployments.
Deploying a Container from Docker Hub
Pull an ARM64-compatible image directly from Docker Hub and deploy it on your ALPON device without additional configuration. The following steps use nginx as an example.
- Log in to the Sixfab Connect platform.
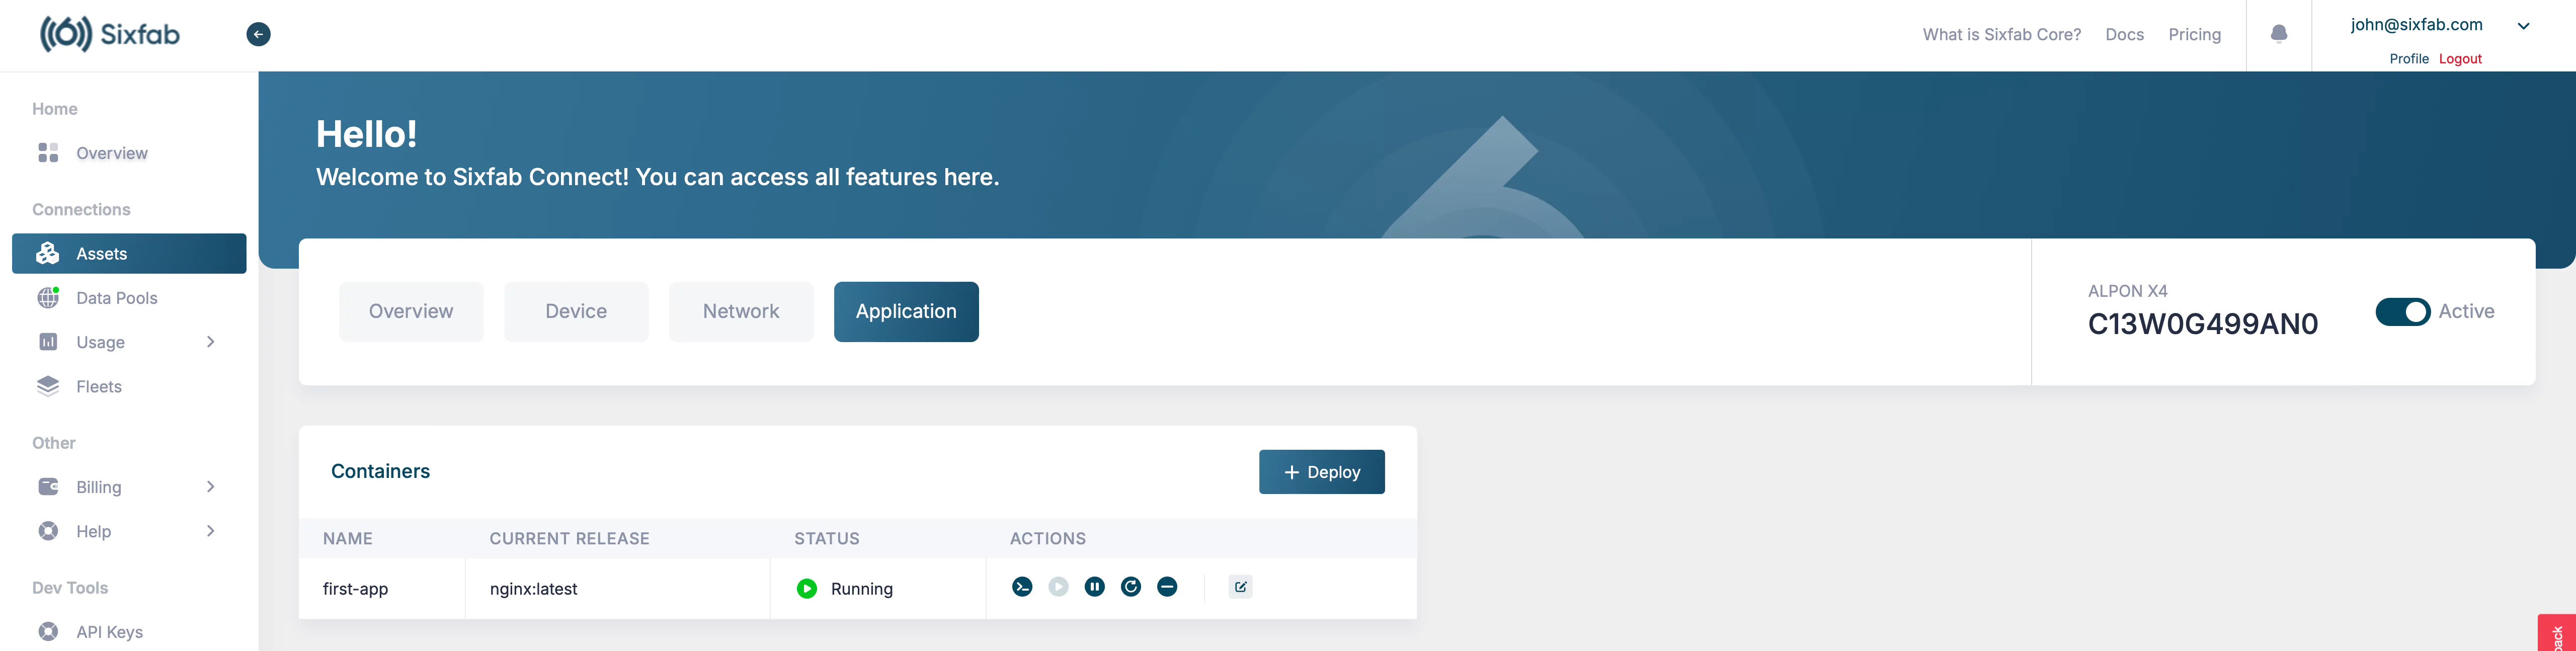
- Select your registered ALPON device under Assets.
- Click the Applications tab.
- Click + Deploy to start creating a new container.
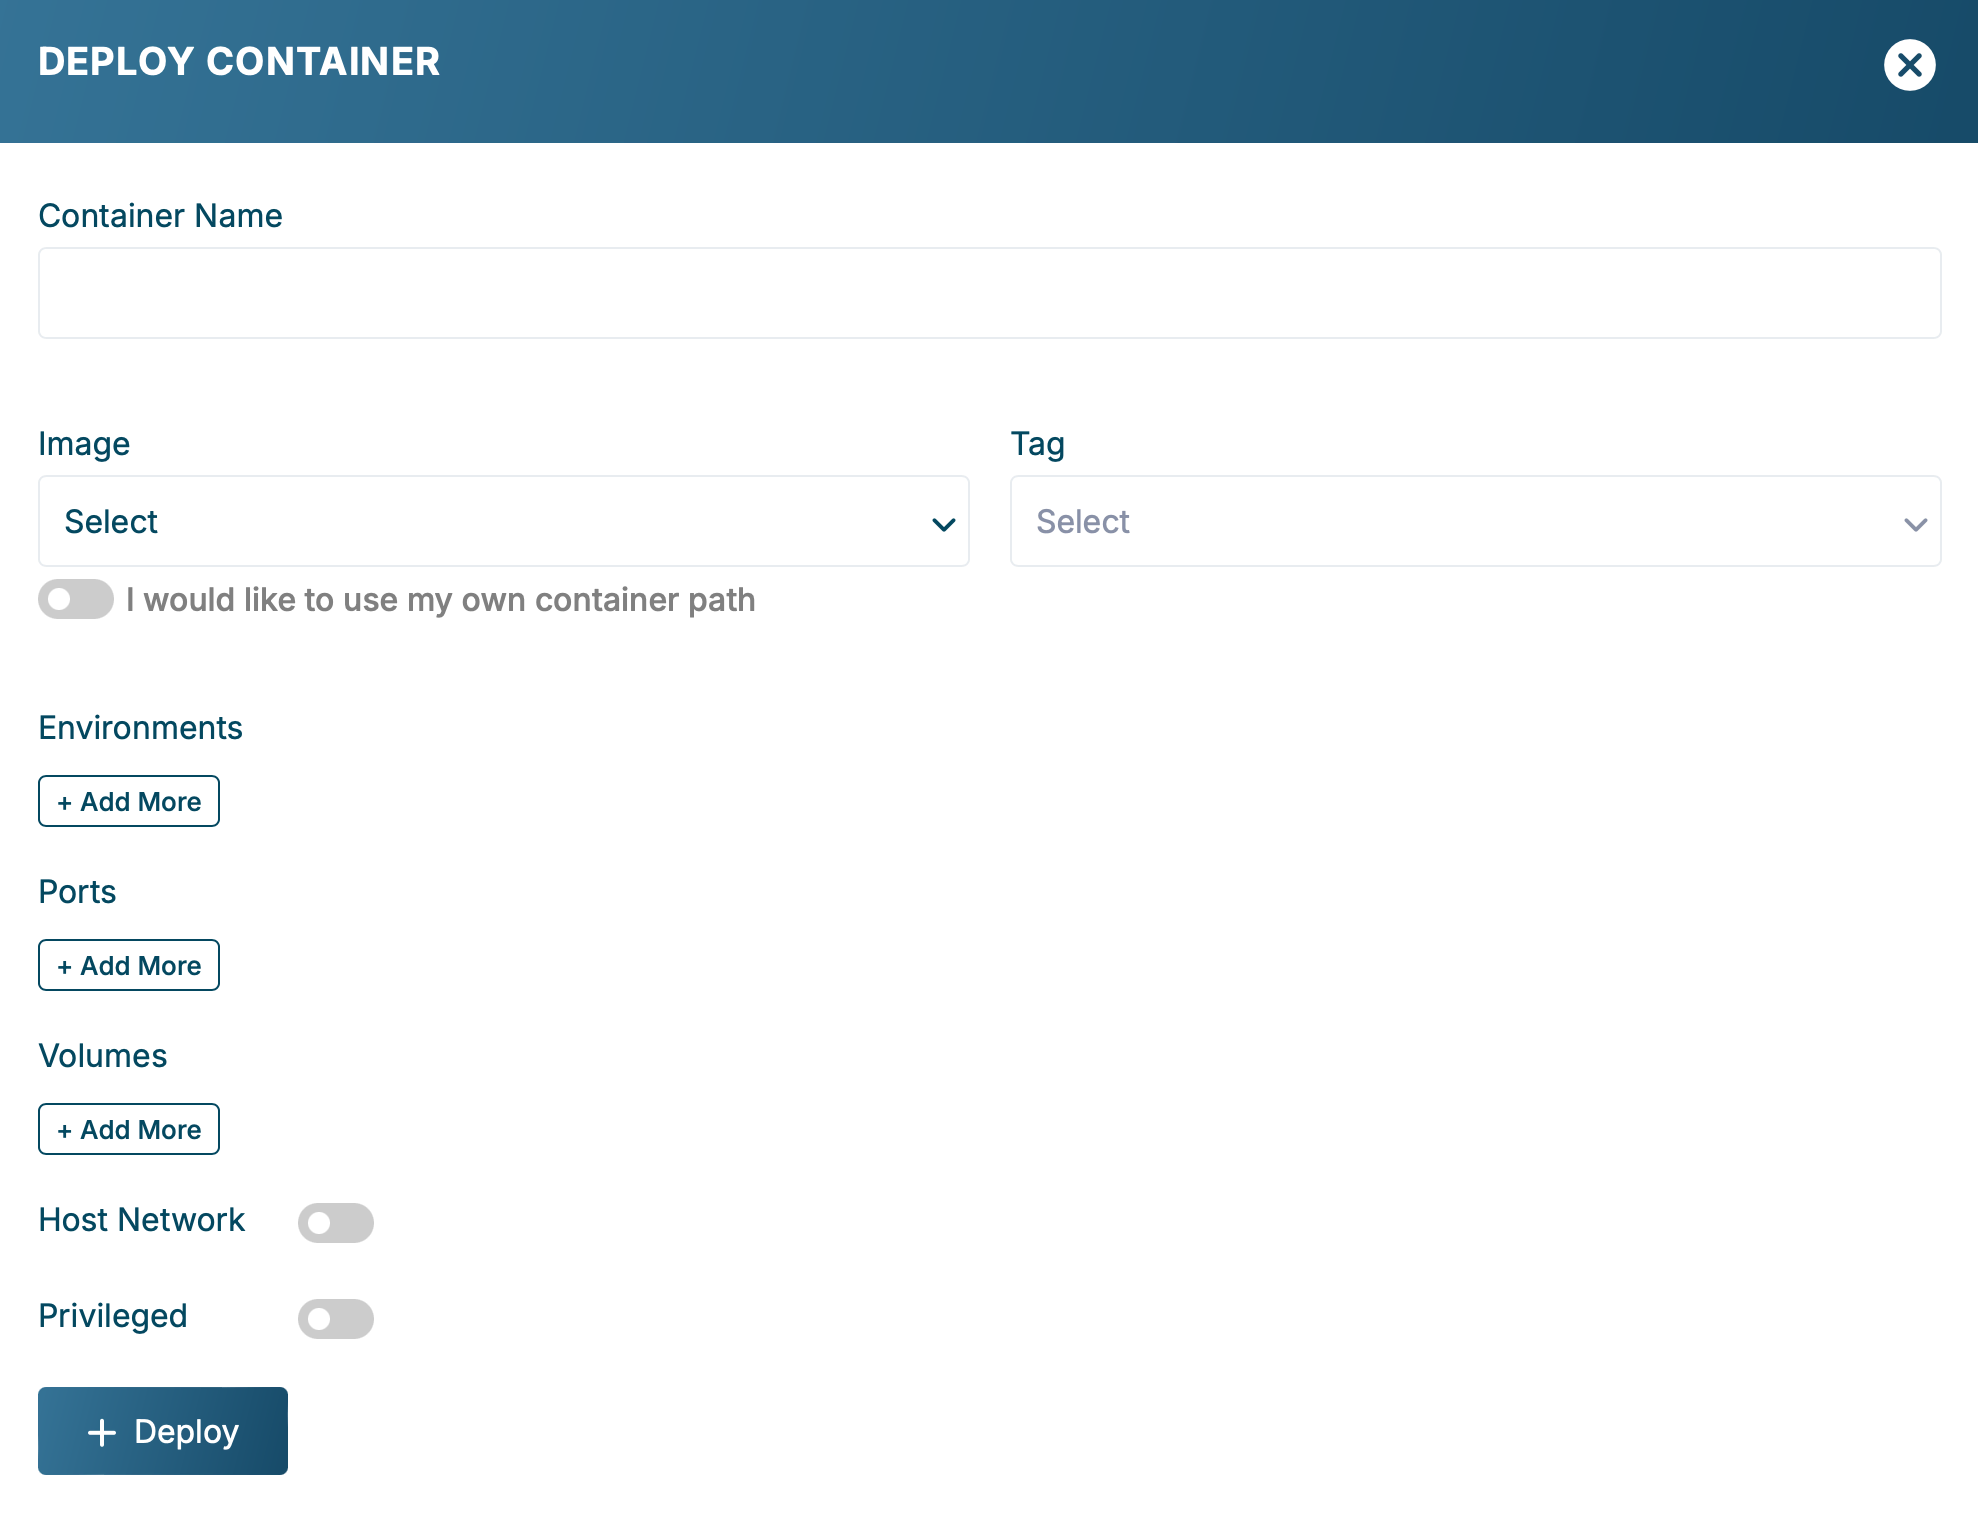
MyNginxApp).nginx:latest). This pulls directly from Docker Hub.DATABASE_URL: my-database-url).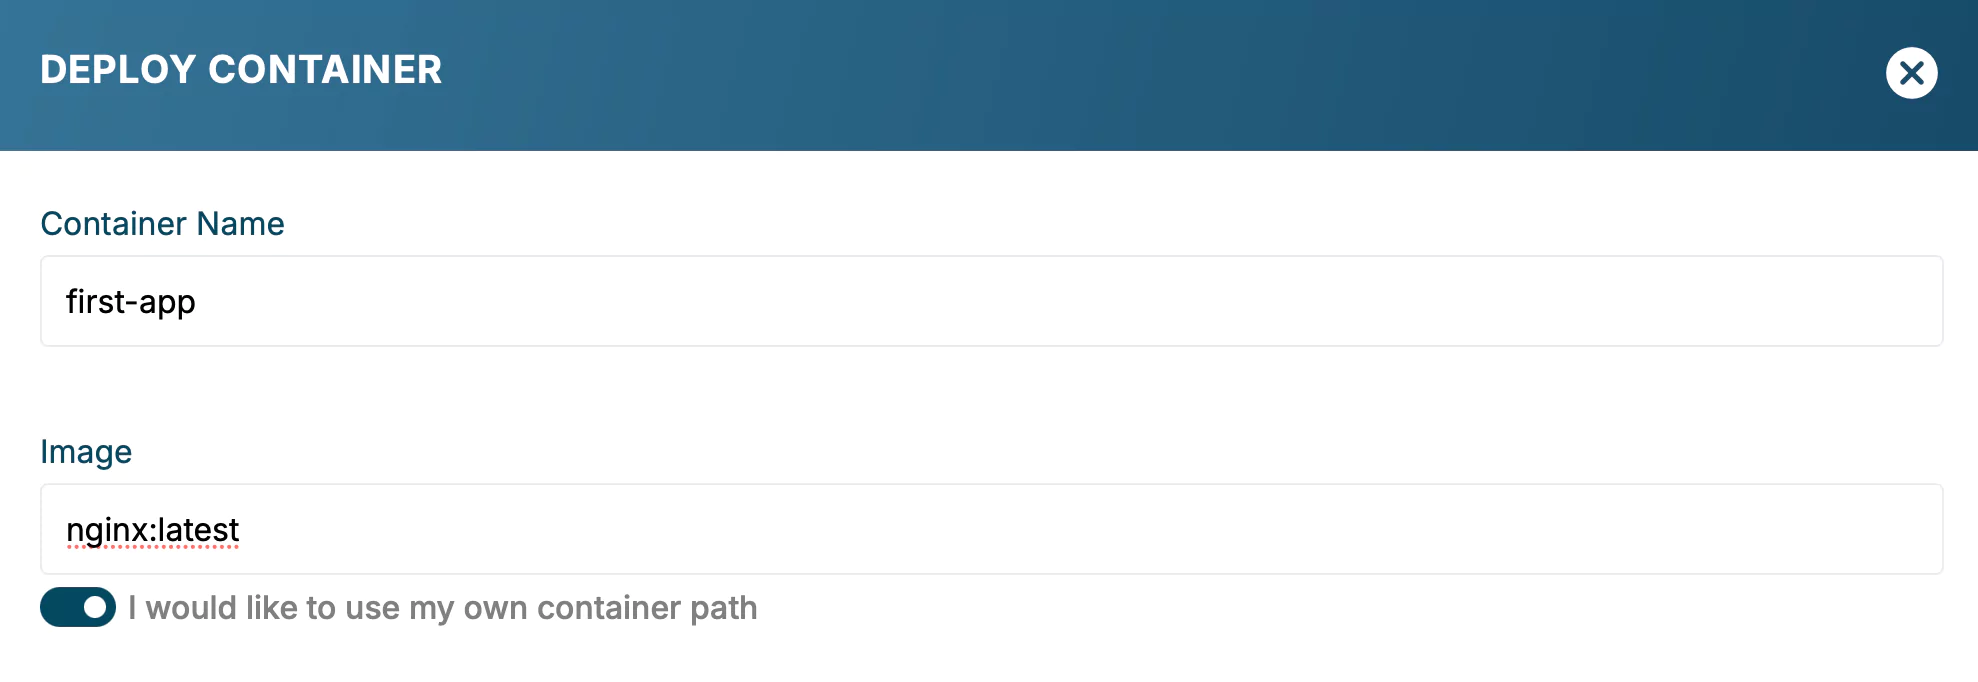
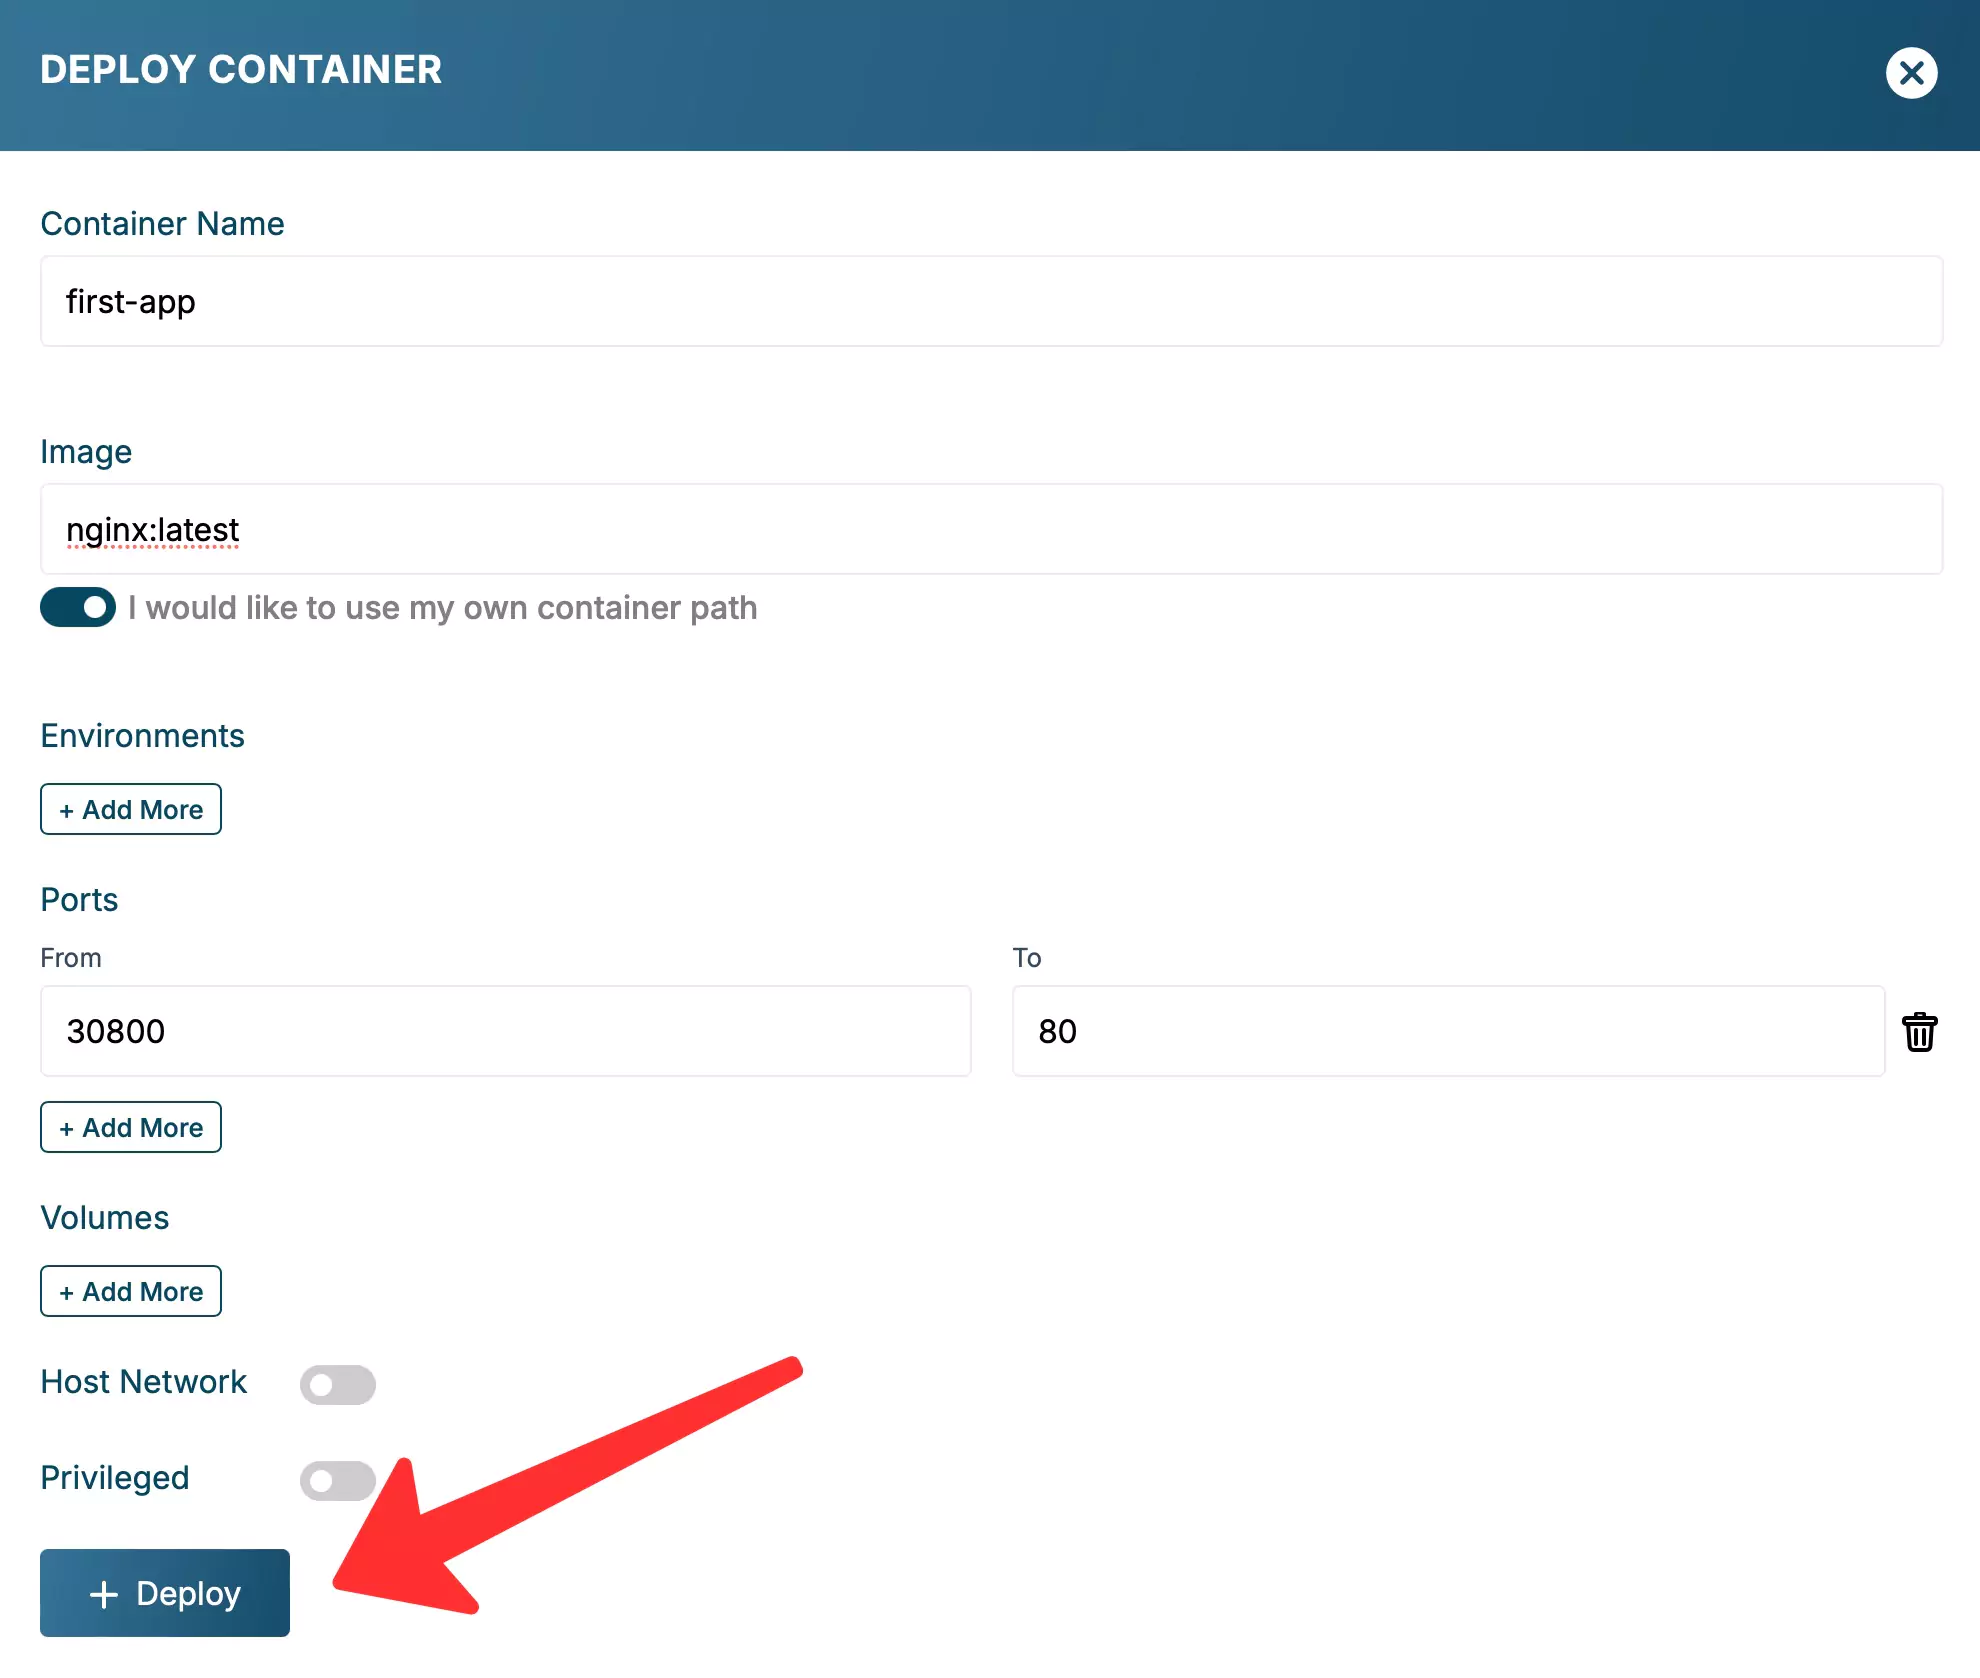
Review the configuration to ensure all fields are correct, then click + Deploy to launch the container.
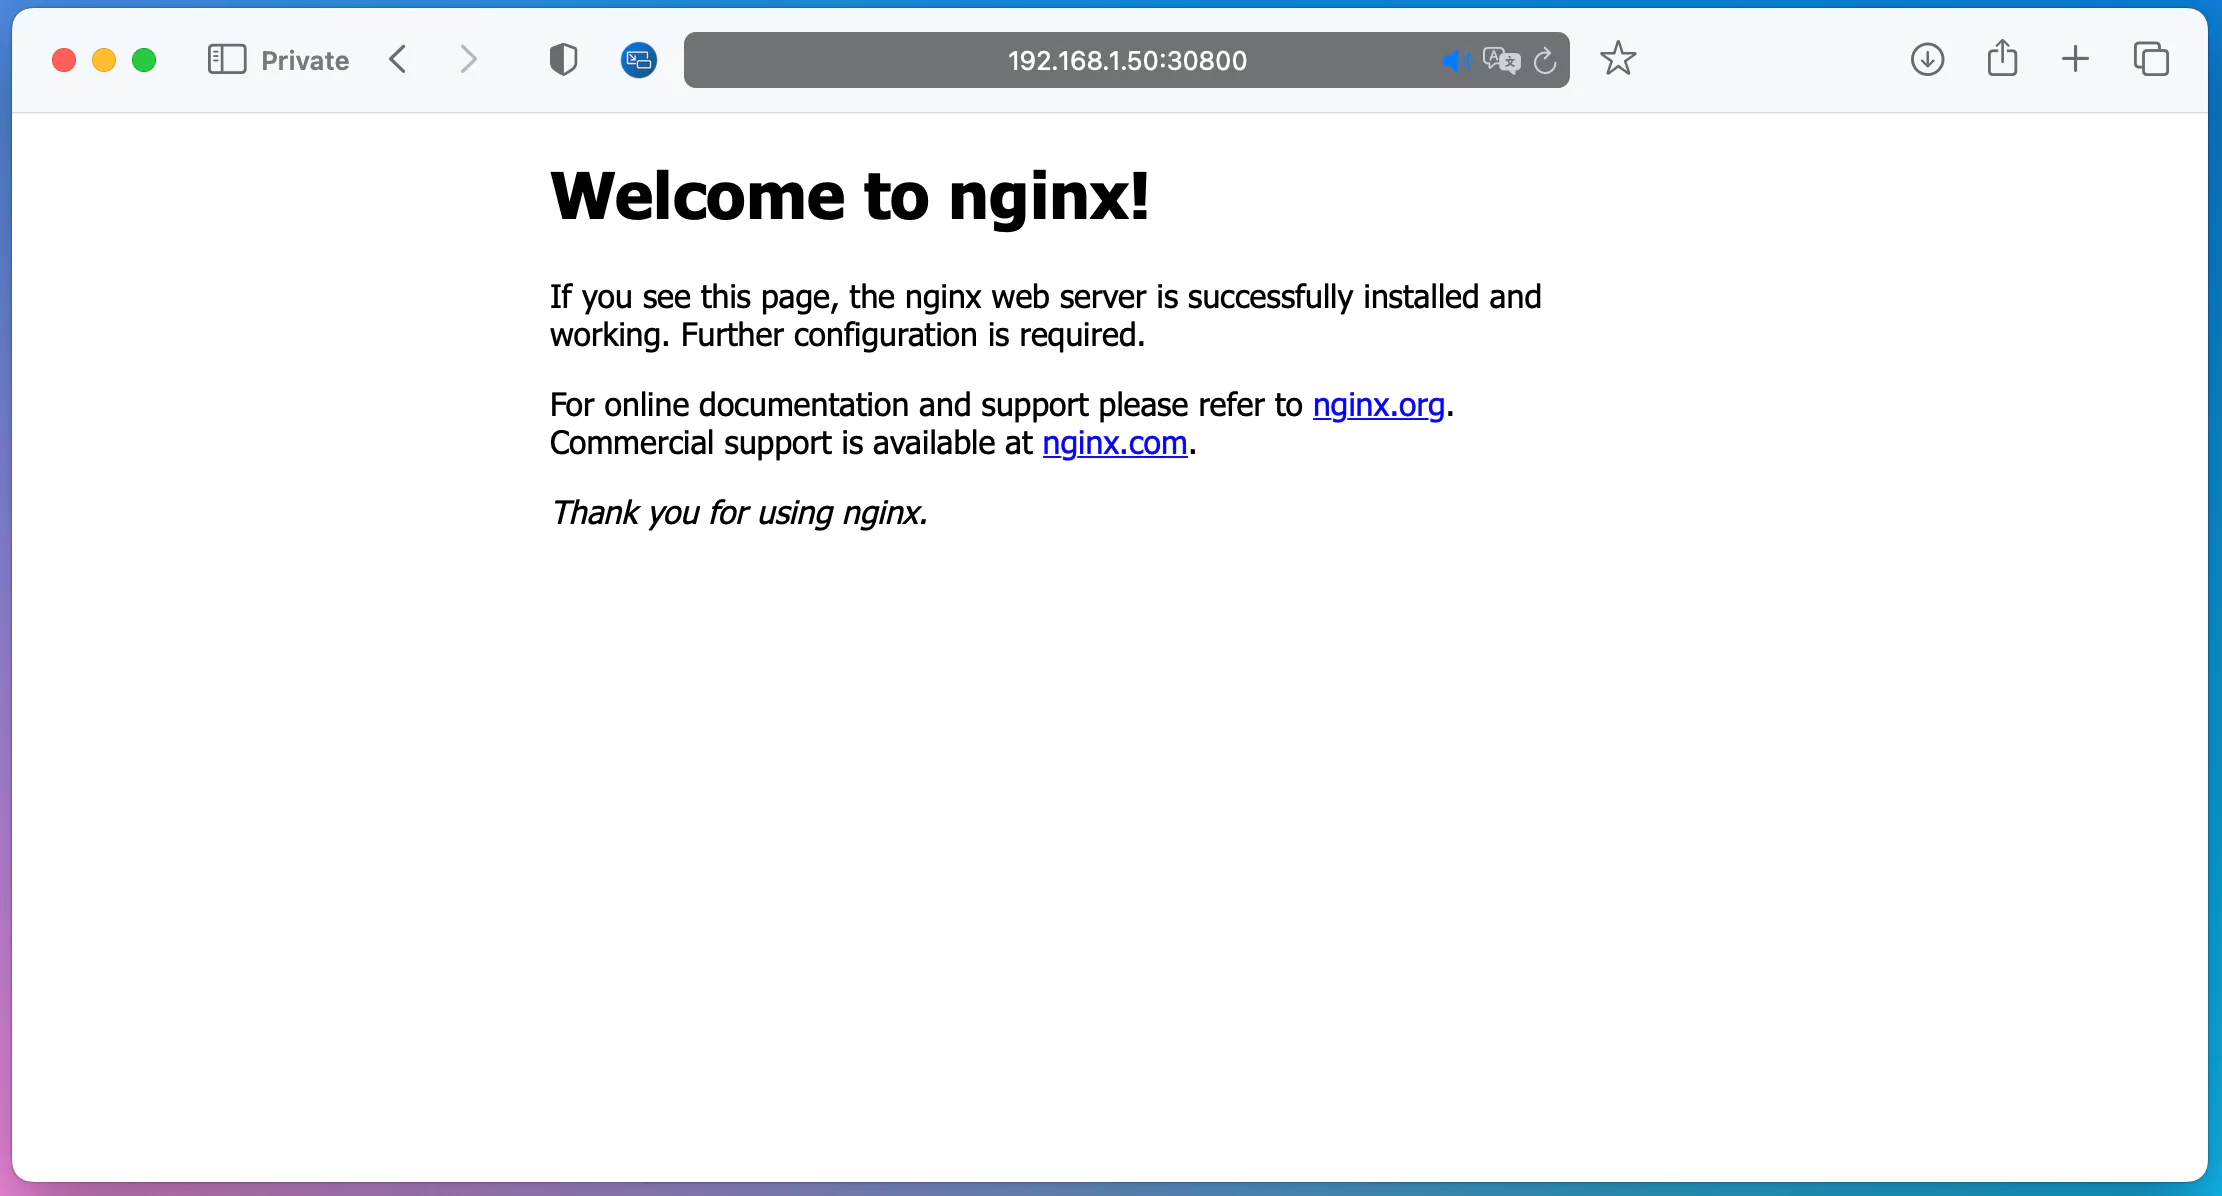
Once deployed, the application will be accessible via the mapped port (e.g., http://[Device_IP]:30800).
Deploying a Custom Image via Sixfab Registry
For advanced use cases, build your own container image and push it to the Sixfab Registry. This method is recommended when you need specific configurations, custom application logic, or preloaded content.
Ensure Docker and Docker Buildx are installed on your local computer.
Install Docker
- Windows and Mac: Download Docker Desktop from the official Docker website. Docker Buildx is included by default.
- Linux: Follow the Docker documentation for your distribution, then verify Buildx is available:
docker buildx version
Create a Dockerfile
Create a file named Dockerfile in your project directory. Example for testing:
FROM nginx:stable-alpine

RUN echo "Test successful, actively running." > /usr/share/nginx/html/index.html
Build the Image
Navigate to the directory containing the Dockerfile and run the following command. The --platform linux/arm64 flag ensures the image is compatible with your ALPON device.
docker buildx build --load --platform linux/arm64 -t first-app:latest ./
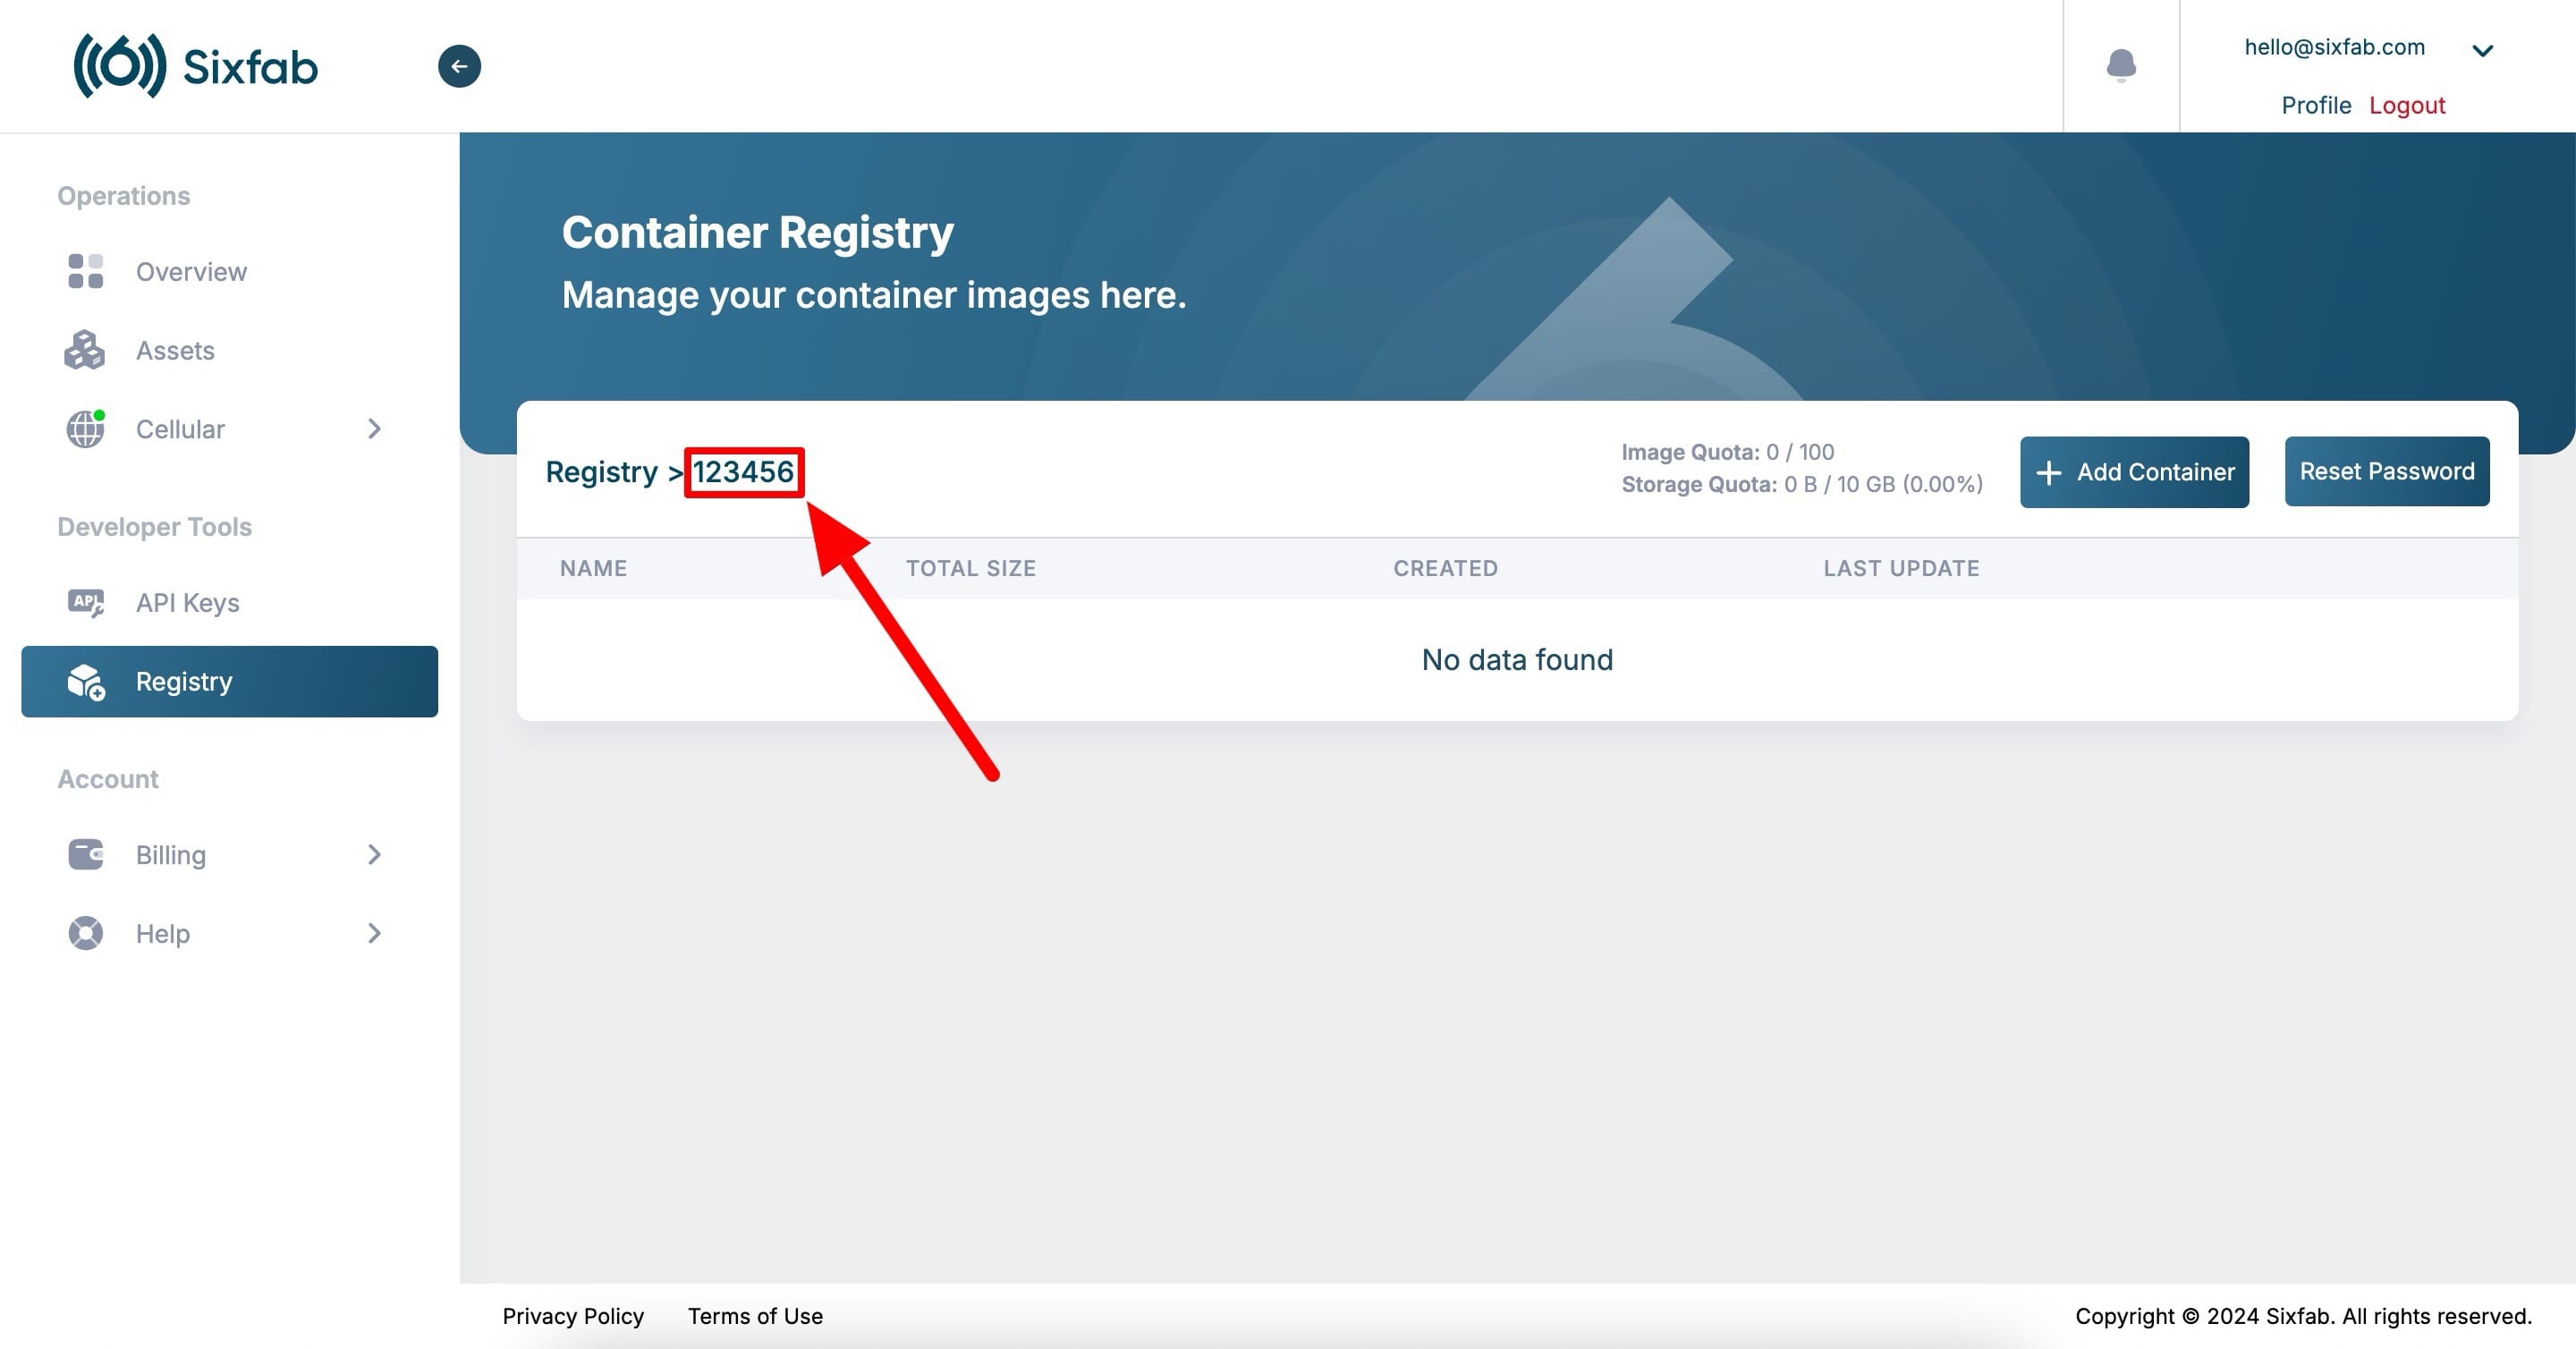
Find Your Registry Username
Log in to Sixfab Connect, navigate to the Registry page, and locate your username at the top of the page.
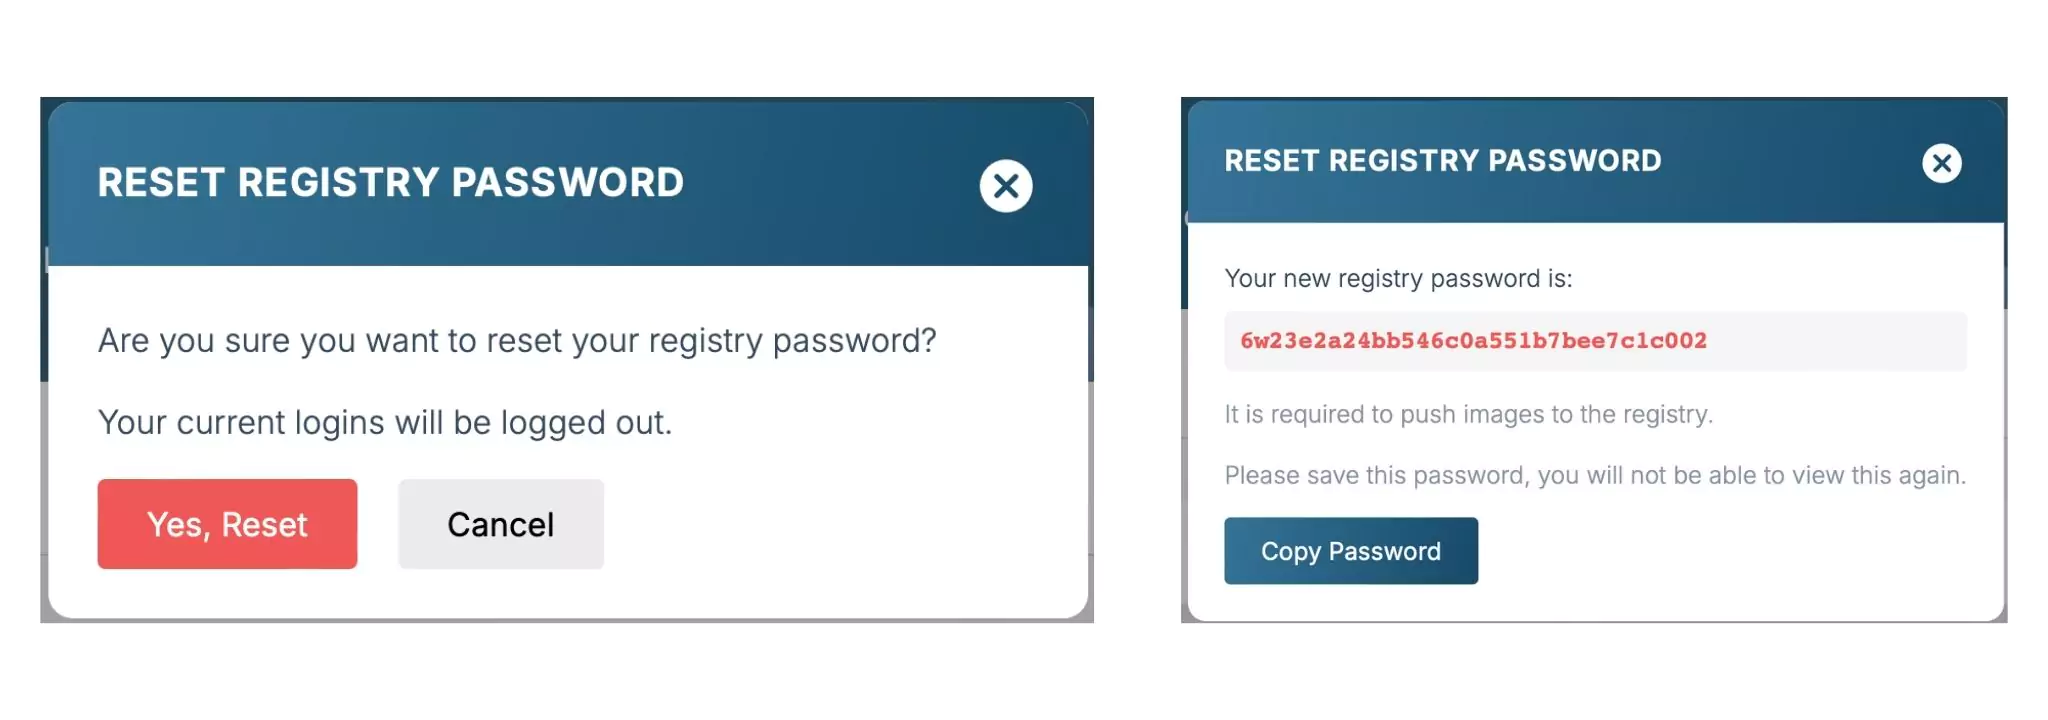
Set Your Registry Password
If you have not set a registry password yet, click Reset Password on the Registry page and follow the on-screen instructions.
Log in to the Registry
docker login cr.sixfab.io --username [your_username]
Enter your registry password when prompted.
Verify the Local Image
docker images
REPOSITORY    TAG       IMAGE ID       CREATED        SIZE
first-app     latest    4bfb6d85adc2   1 hours ago    53.1MB
Tag the Image
docker tag first-app:latest cr.sixfab.io/[your_username]/first-app:latest
Push the Image
docker push cr.sixfab.io/[your_username]/first-app:latest
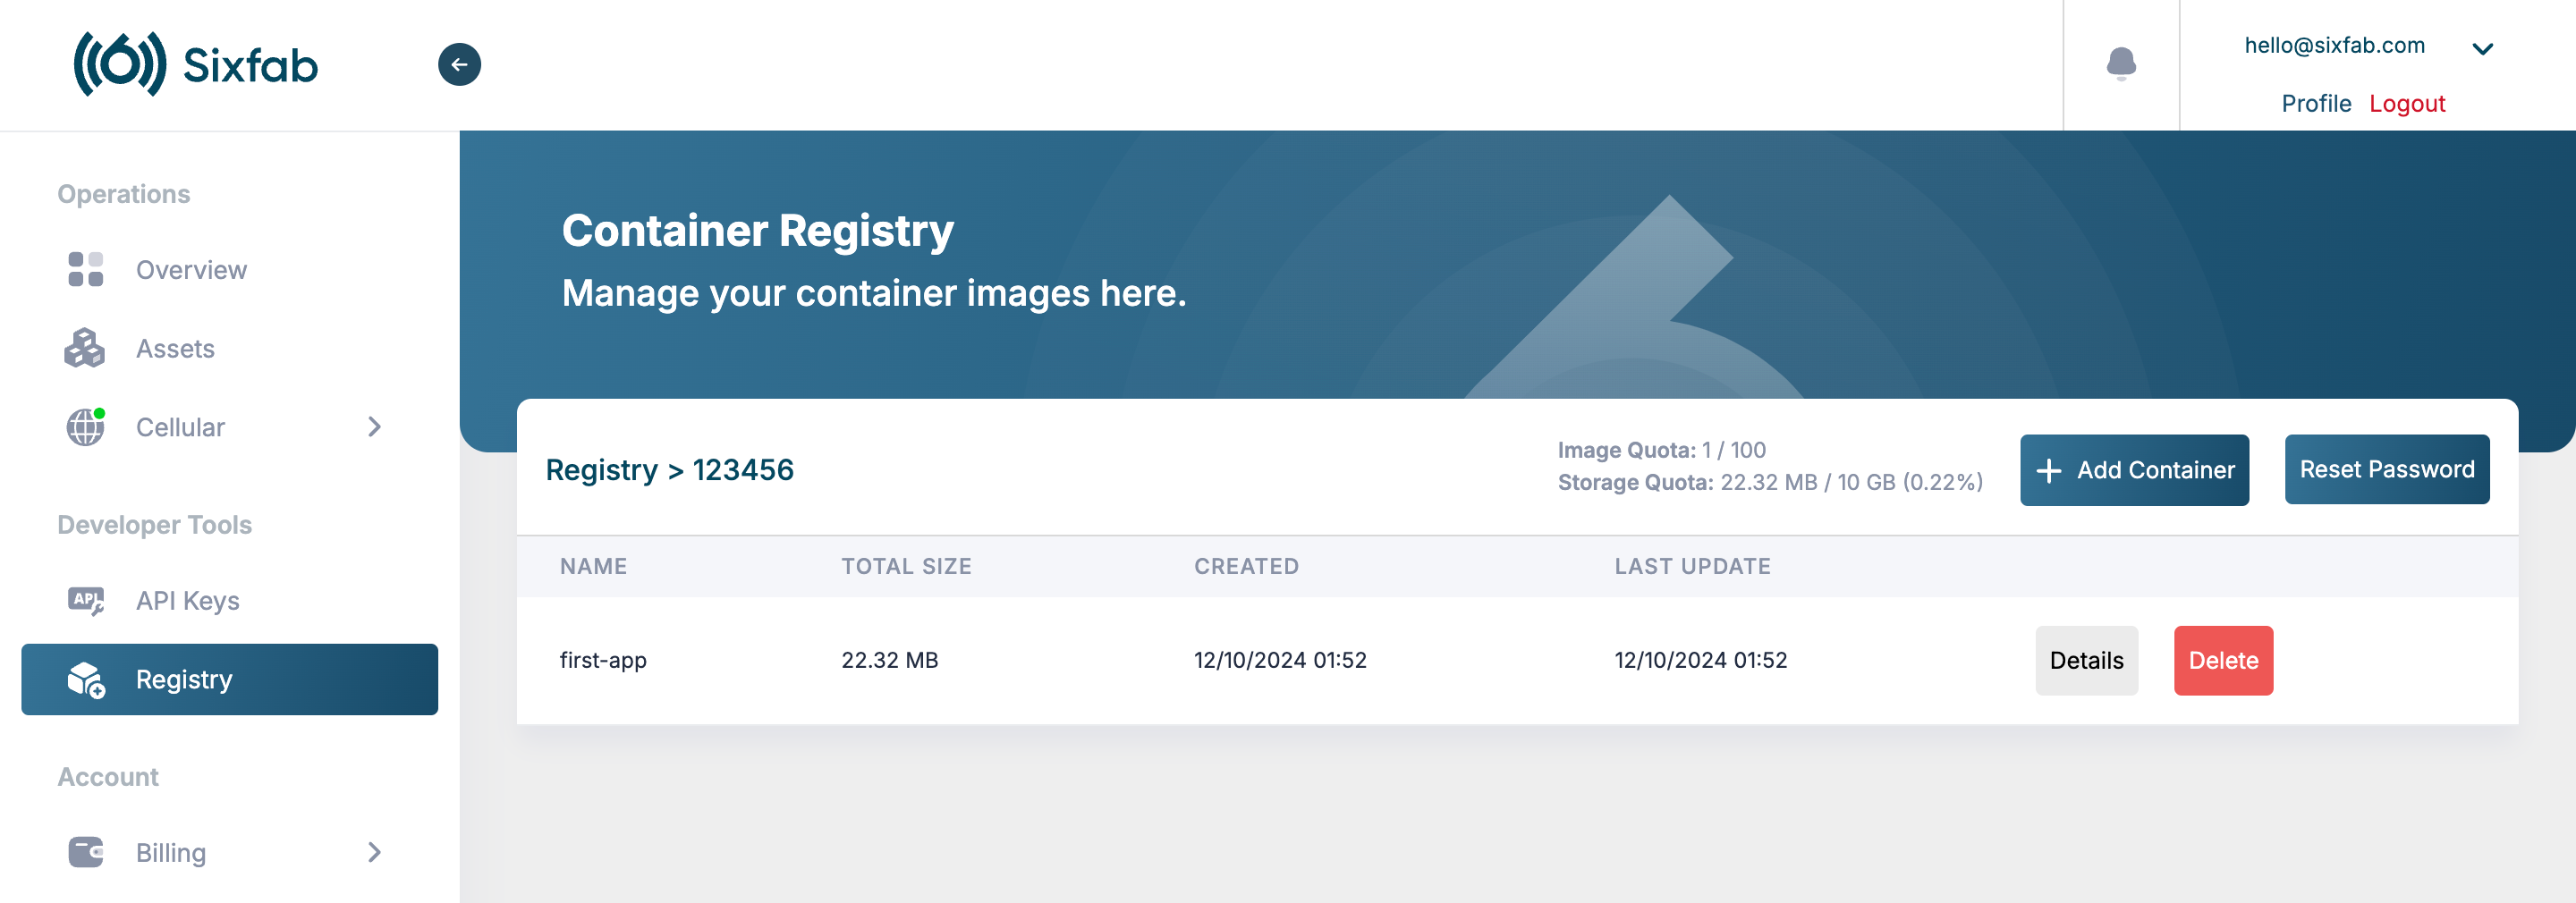
Verify in the Registry
Once the push is complete, refresh the Registry page on the platform to confirm the image appears and is ready for deployment.
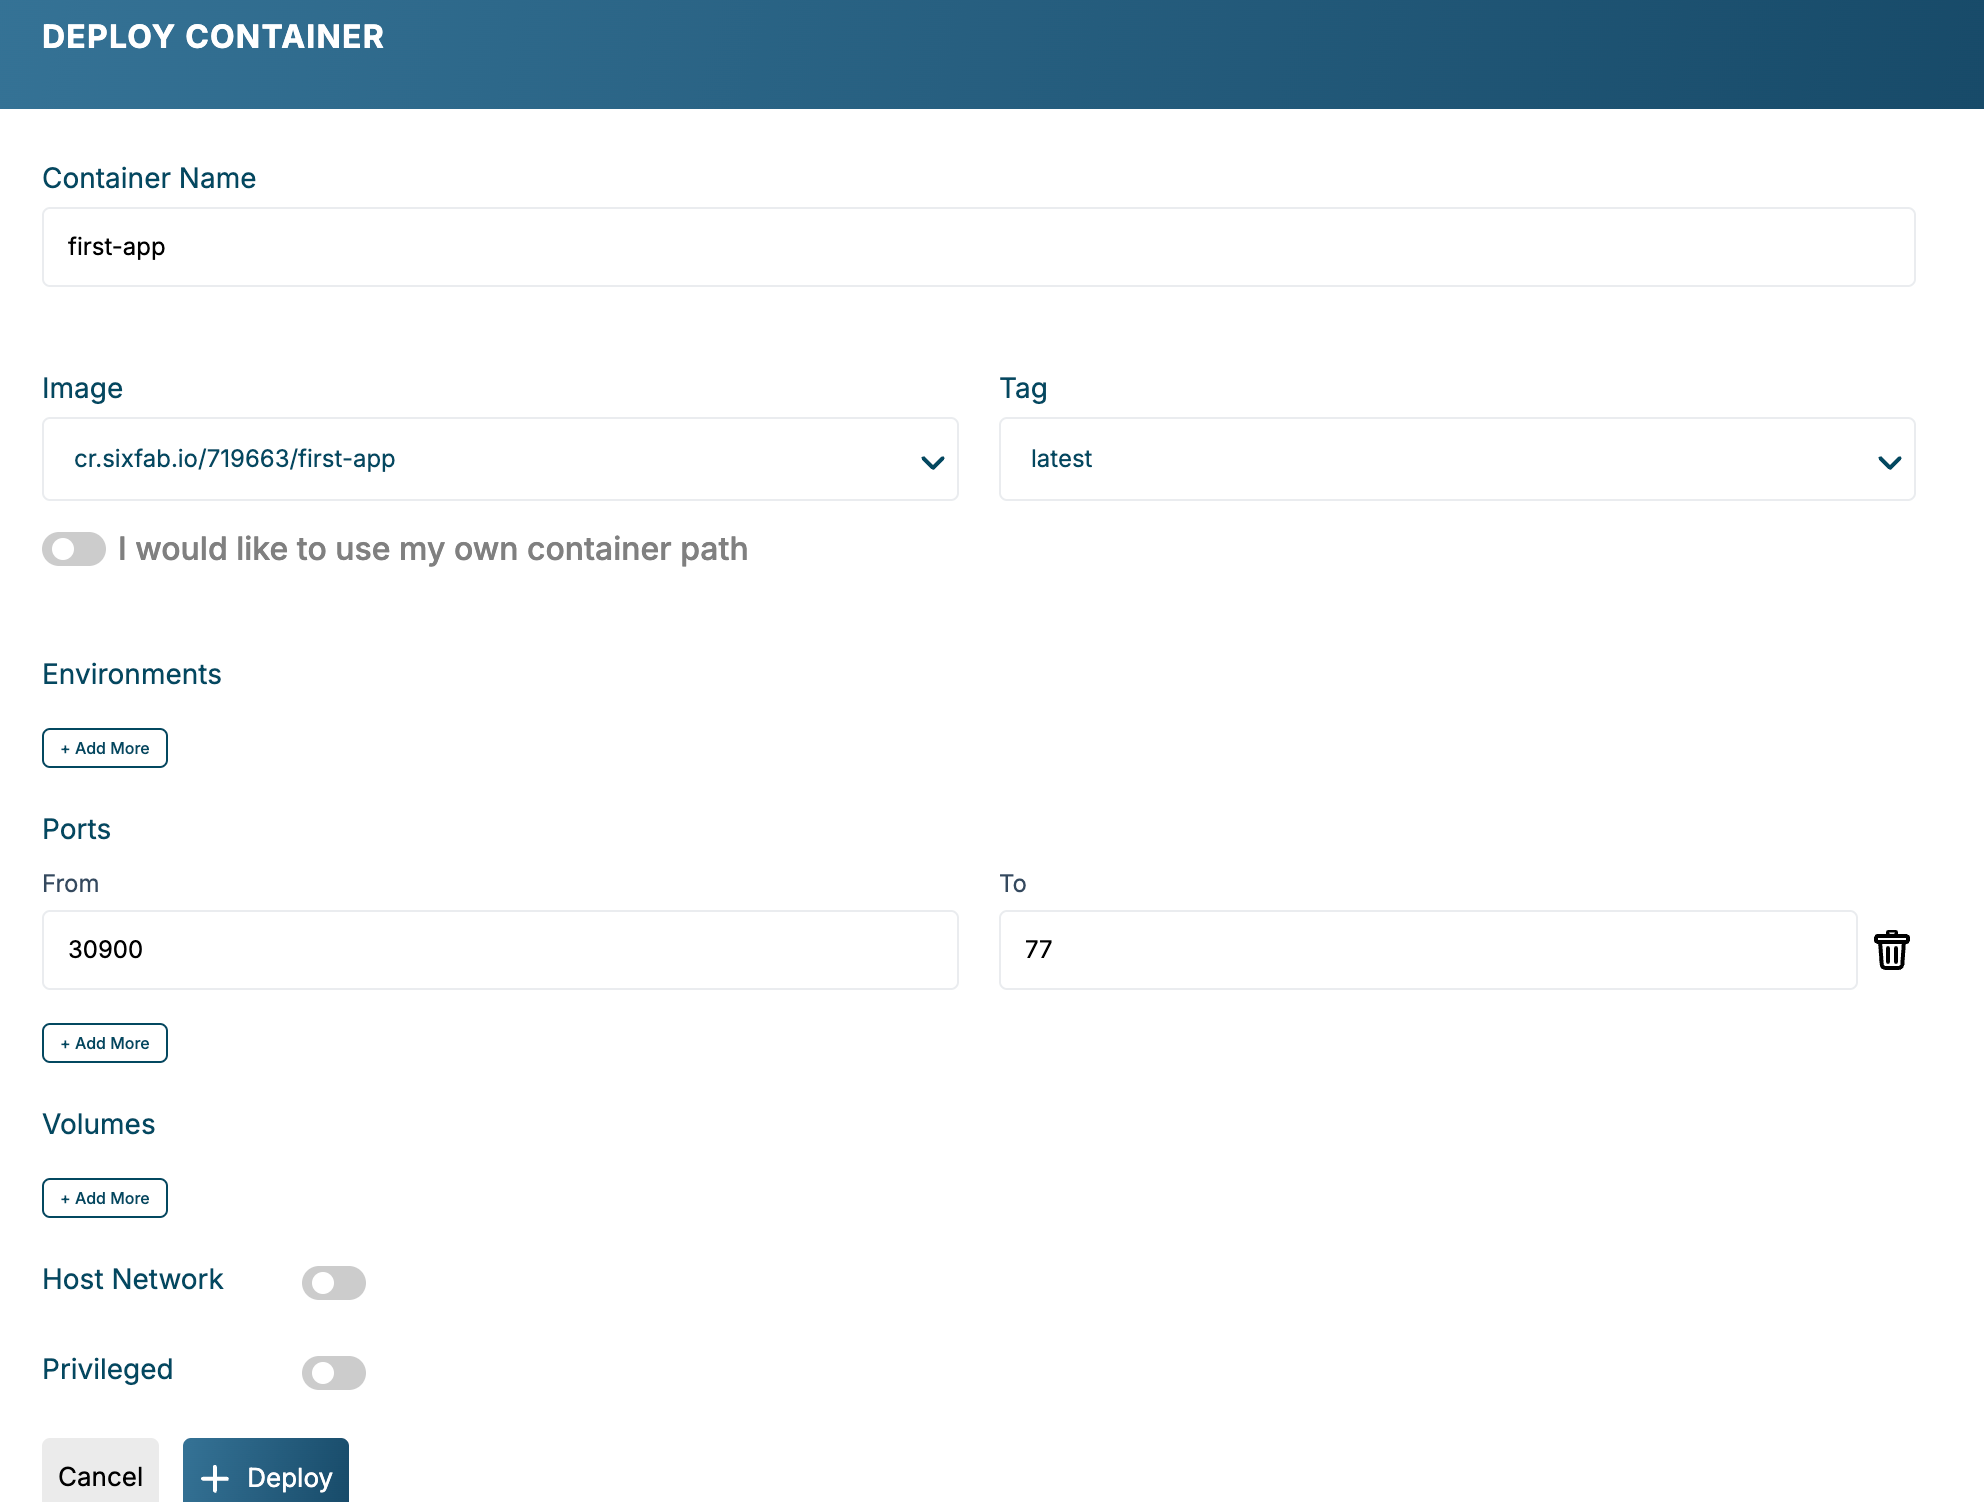
Go to the Applications tab on your device's asset page and click + Deploy.
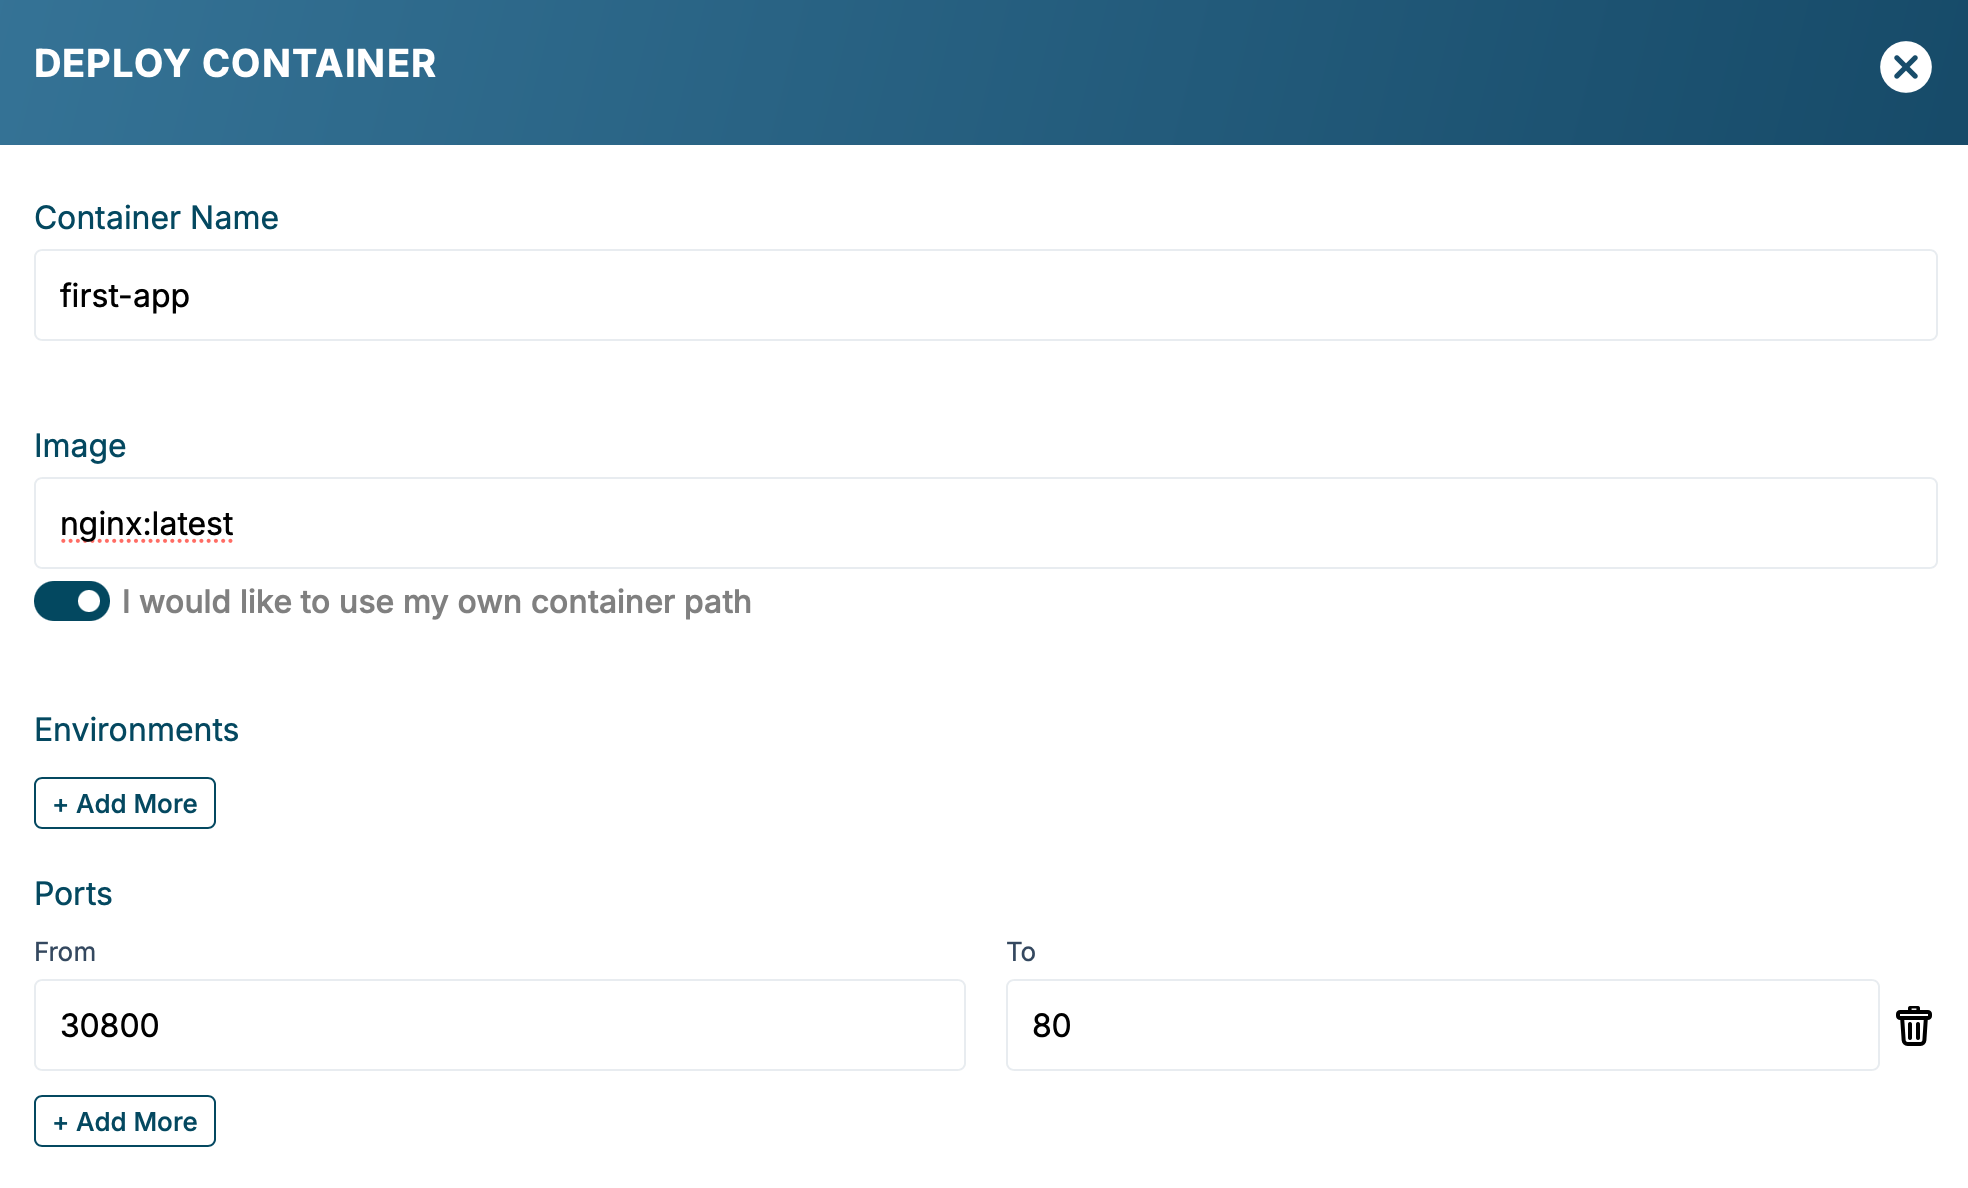
- Container Name: Provide a name for your container.
- Image: Select the image you just pushed from the Sixfab Registry dropdown.
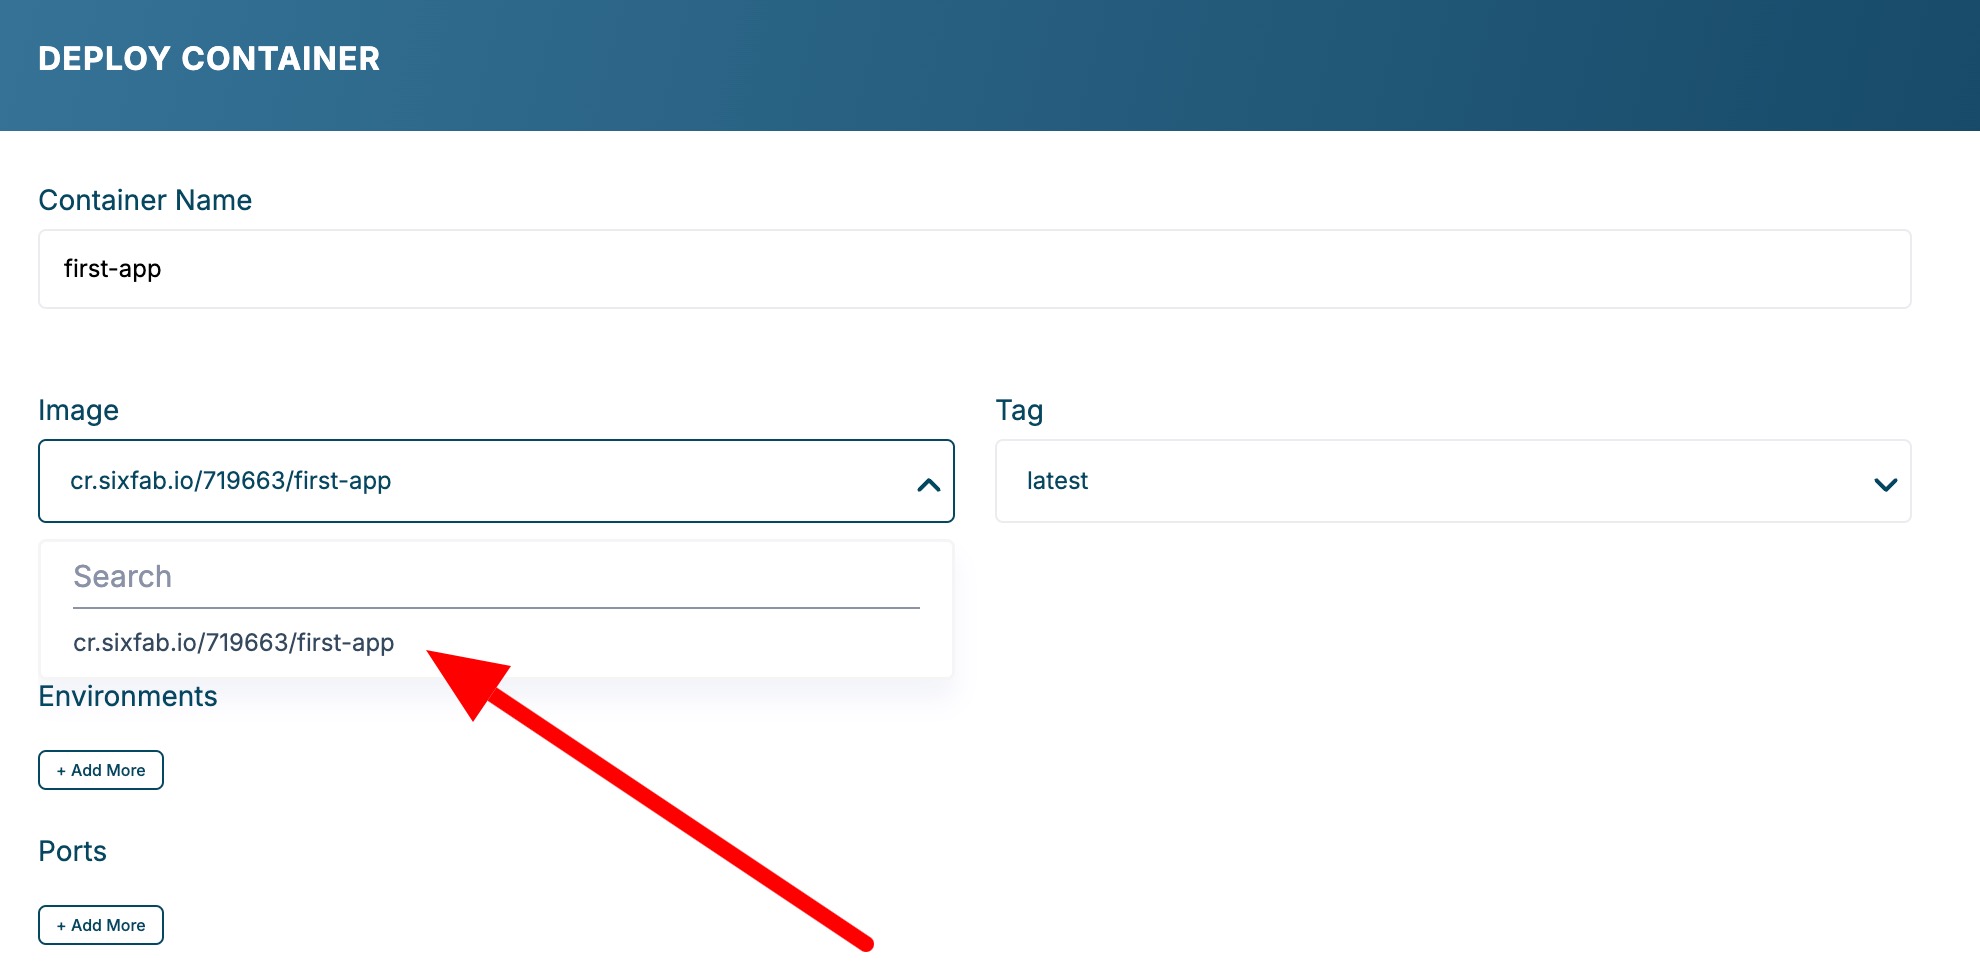
- Port: Assign a unique port. If 30800 is already in use, assign 30900 or another available port in the 30000–32767 range.
- Review and Deploy: Double-check the configuration, then click + Deploy.
Access to the Container
Once deployed, there are three ways to access a running container depending on your network setup.
Access from Local Network
Find your device's IP address on the Network tab of the platform, then open a browser on any computer connected to the same network:
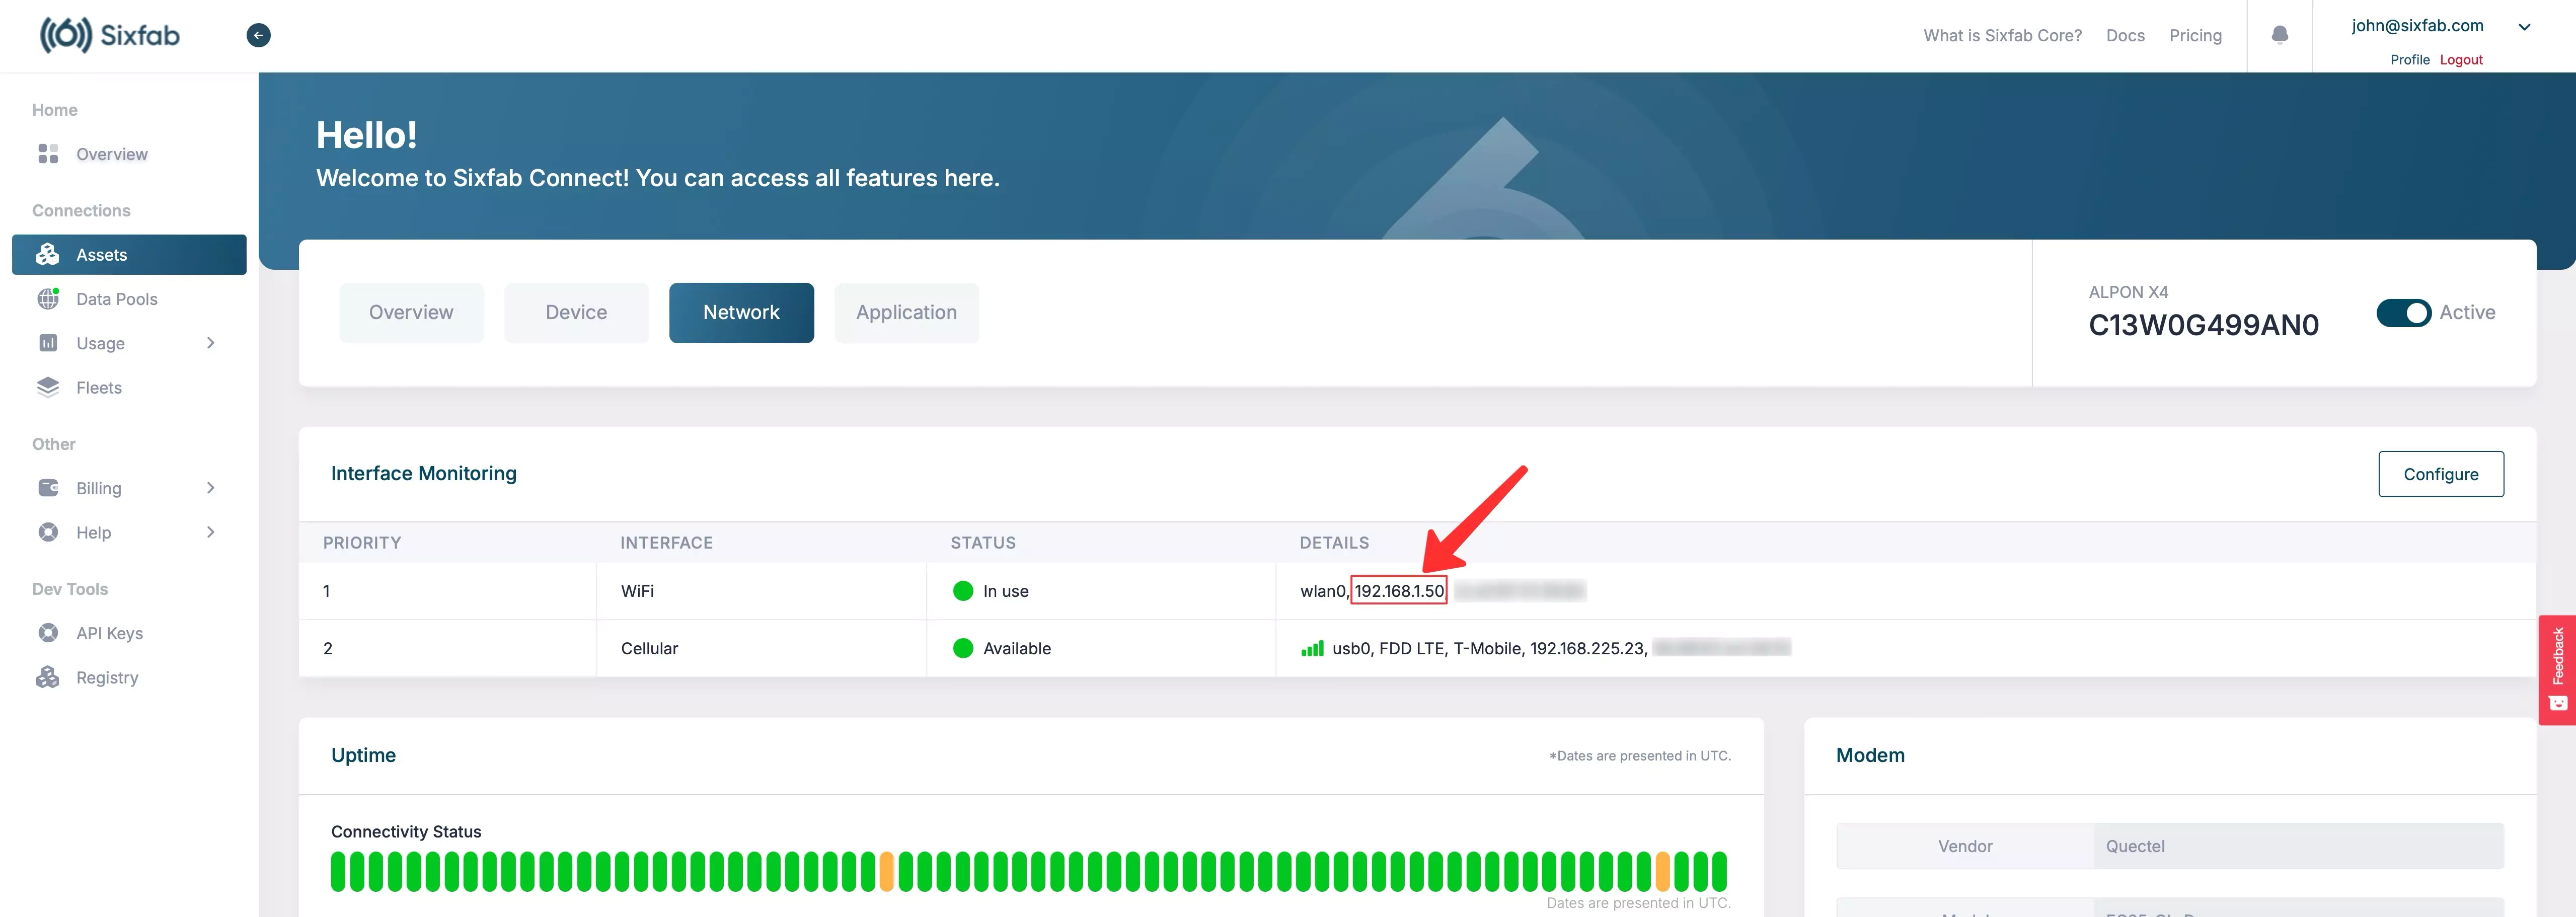
http://[Device_IP]:30800
Access via Remote Terminal
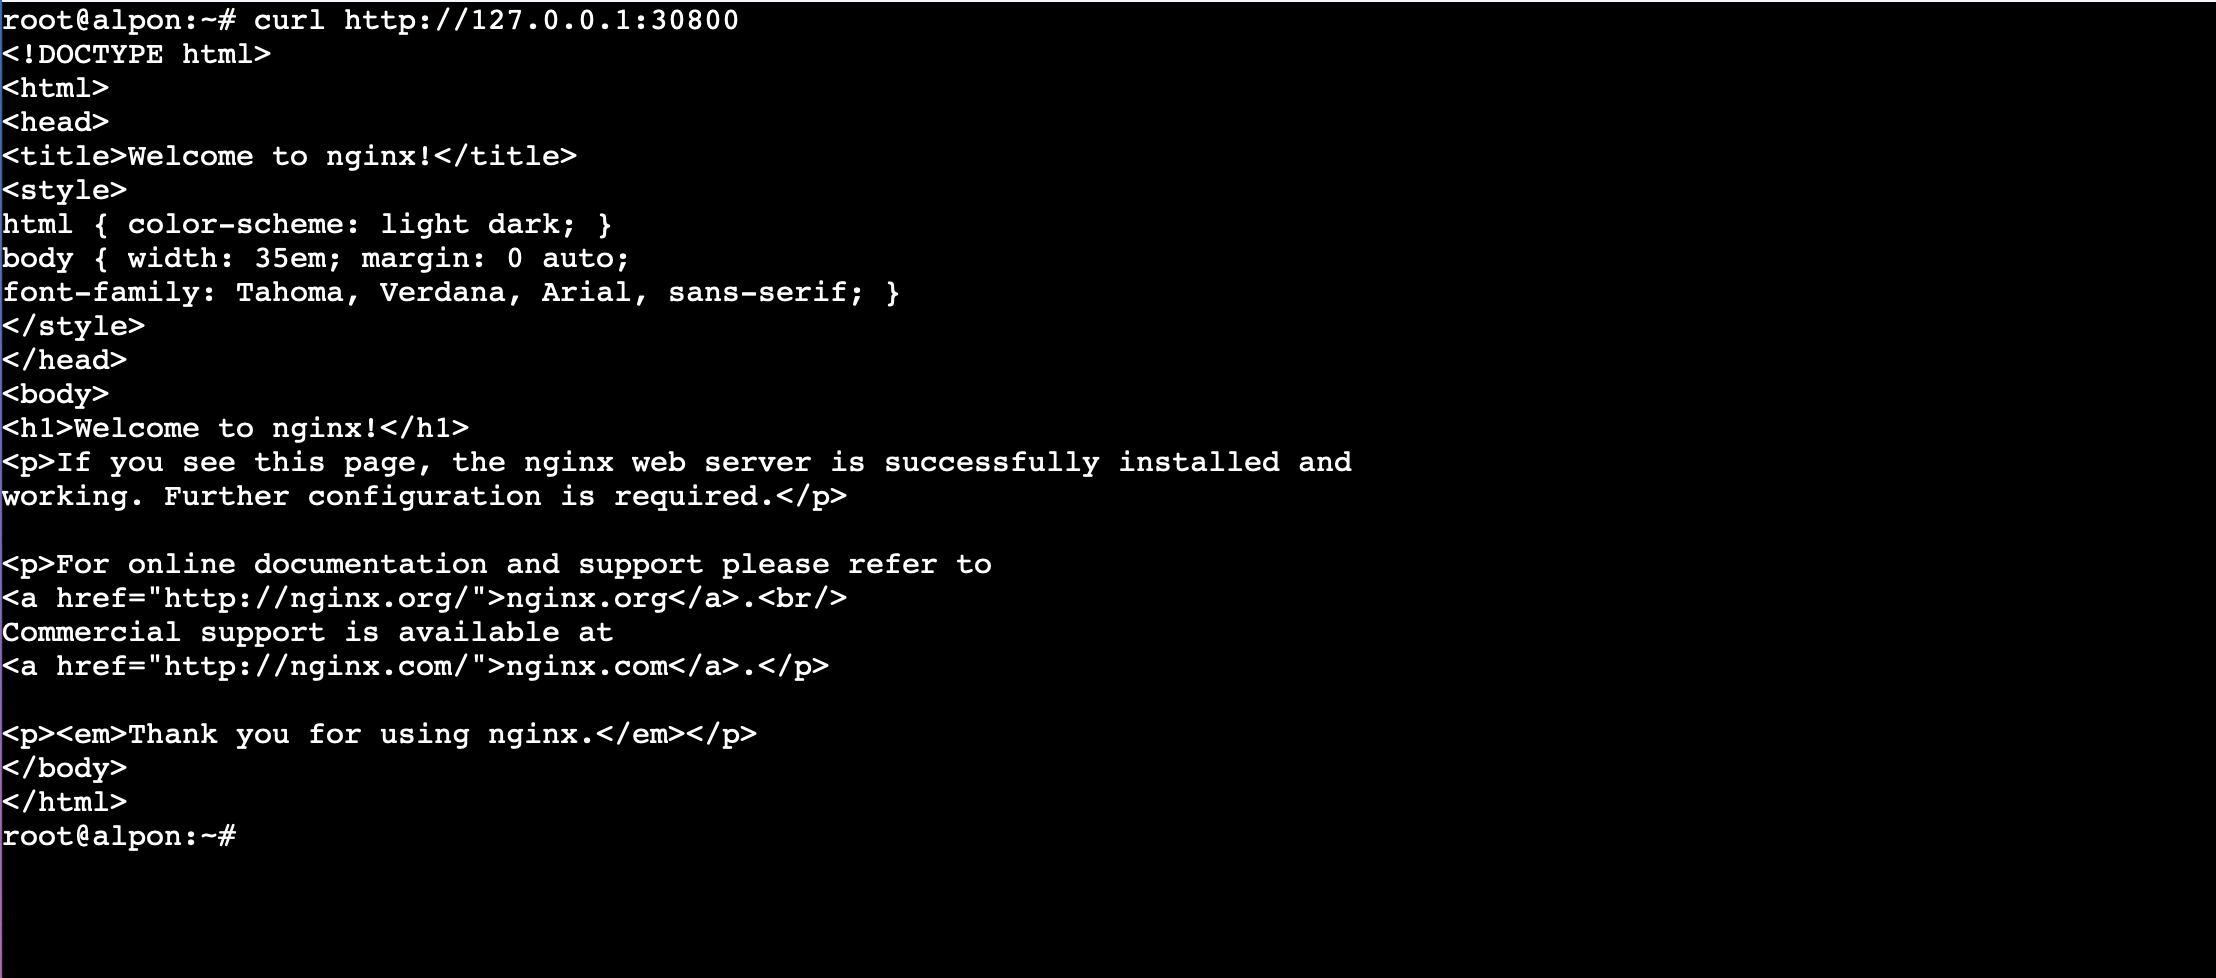
If the device is not on the local network, go to the Device tab and click Open Remote Terminal. Then run:
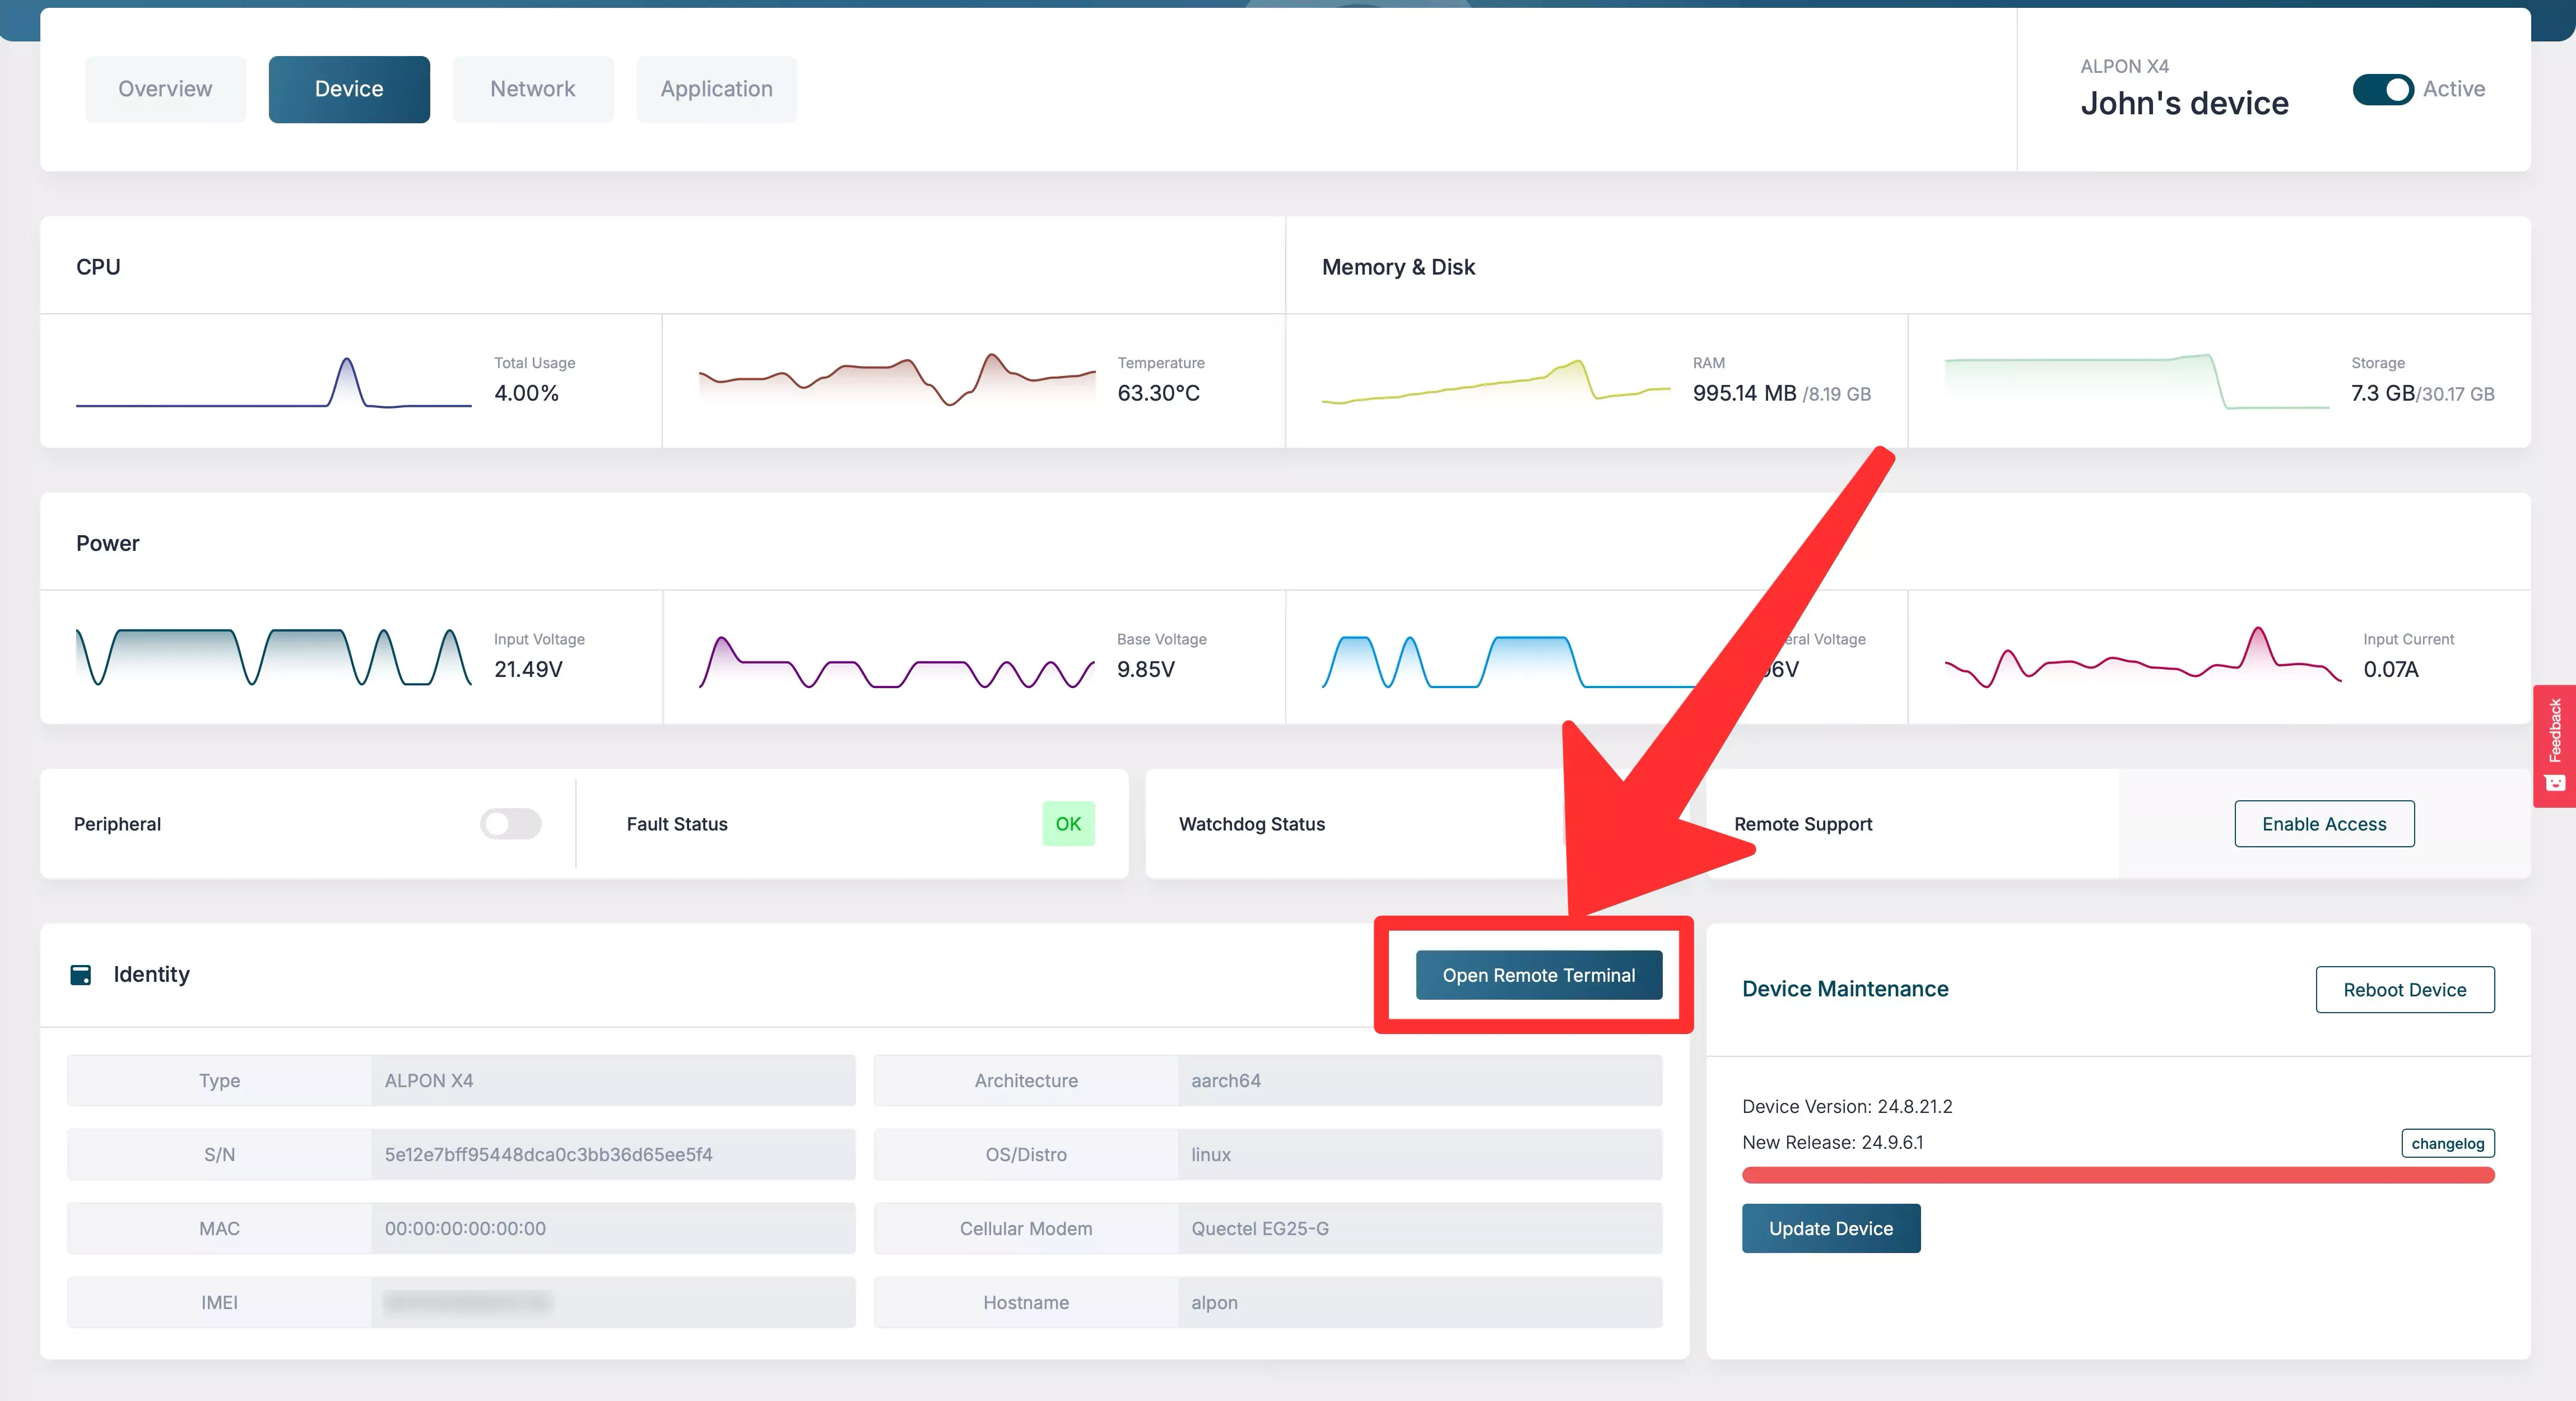
curl http://127.0.0.1:30800
Access via Monitor Connected to Device
Connect a monitor via HDMI, open a browser on the device, and navigate to http://127.0.0.1:30800.
Manage Containers
Once deployed, containers can be monitored and controlled directly from the Sixfab Connect platform.
