
Getting Started
This section will lead you step by step to create a cellular connection with the Sixfab CORE
Sixfab CORE Service Discontinuation NoticeWe want to inform you that Sixfab CORE will no longer be available starting from December 31, 2025. After this date, users with the Raspberry Pi 4G/LTE Cellular Modem Kit and NVIDIA Jetson Nano 4G/LTE Cellular Modem Kit will no longer be able to install or use Sixfab CORE on their devices.
To set up cellular communication on your devices, we recommend following the ECM (Ethernet Control Model) tutorial available on our website, which will guide you through the process of establishing a reliable cellular connection without the use of Sixfab CORE.
Manage your Raspberry Pi remotely with Raspberry Pi Connect, providing a browser-based terminal and management tools. This service simplifies remote access, making SSH setup unnecessary, especially for cellular connections. For more details, visit the official Raspberry Pi Connect documentation.
We understand this change may affect your current setup, and we are here to assist you during the transition. If you have any questions or need support, please don't hesitate to contact us.
Thank you for your understanding and continued trust in Sixfab.
Welcome to Sixfab CORE, your gateway to hassle-free cellular IoT connections for Single Board Computers (SBCs). This guide will walk you through the essential steps to get started with Sixfab CORE, enabling you to seamlessly set up your cellular modem, configure the operating system, and establish a robust connection for your IoT devices.
System Requirements
Sixfab CORE needs some requirements. It cannot be installed on devices other than these. To install and manage Sixfab CORE on your device, please refer to the system requirements provided below.
Hardware
The kits listed below encompass all the necessary hardware components you require.
- Raspberry Pi 4G/LTE Cellular Modem Kit
- Raspberry Pi 3, 3B+, 4 or 5
Software
It is only compatible with the operating system listed below and not with any other.
- Raspberry Pi OS version, released on March 15, 2024
Supported Modules
Except for the cellular modules listed below, Sixfab CORE does not support any other module.
Quectel
- EC25 - A, E, EUX
- EC21 - A, E
- EG25 - G
Telit
- LE910Cx - EU, NF, AP
Note: The Telit LE910C4 module is not compatible with the 32-bit Raspberry Pi Debian Bookworm operating system. Therefore, this module should only be used with the 64-bit Raspberry Pi OS with Debian Bookworm.
Sixfab SIM
Sixfab CORE only supports devices that utilize Sixfab SIM. If you intend to use a different SIM, please refer to the Tutorials page to follow the appropriate cellular connectivity guide suitable for your needs.
1. Hardware Setup
Please follow the hardware installation instructions provided on the 'Getting Started' page of the kit you possess, or refer to the Raspberry Pi 3G/4G & LTE Base HAT - Getting Started page for Raspberry Pi.
2. Sign In
Head over to connect.sixfab.com and sign in using your login credentials.
3. Add Coupon Code (optional)
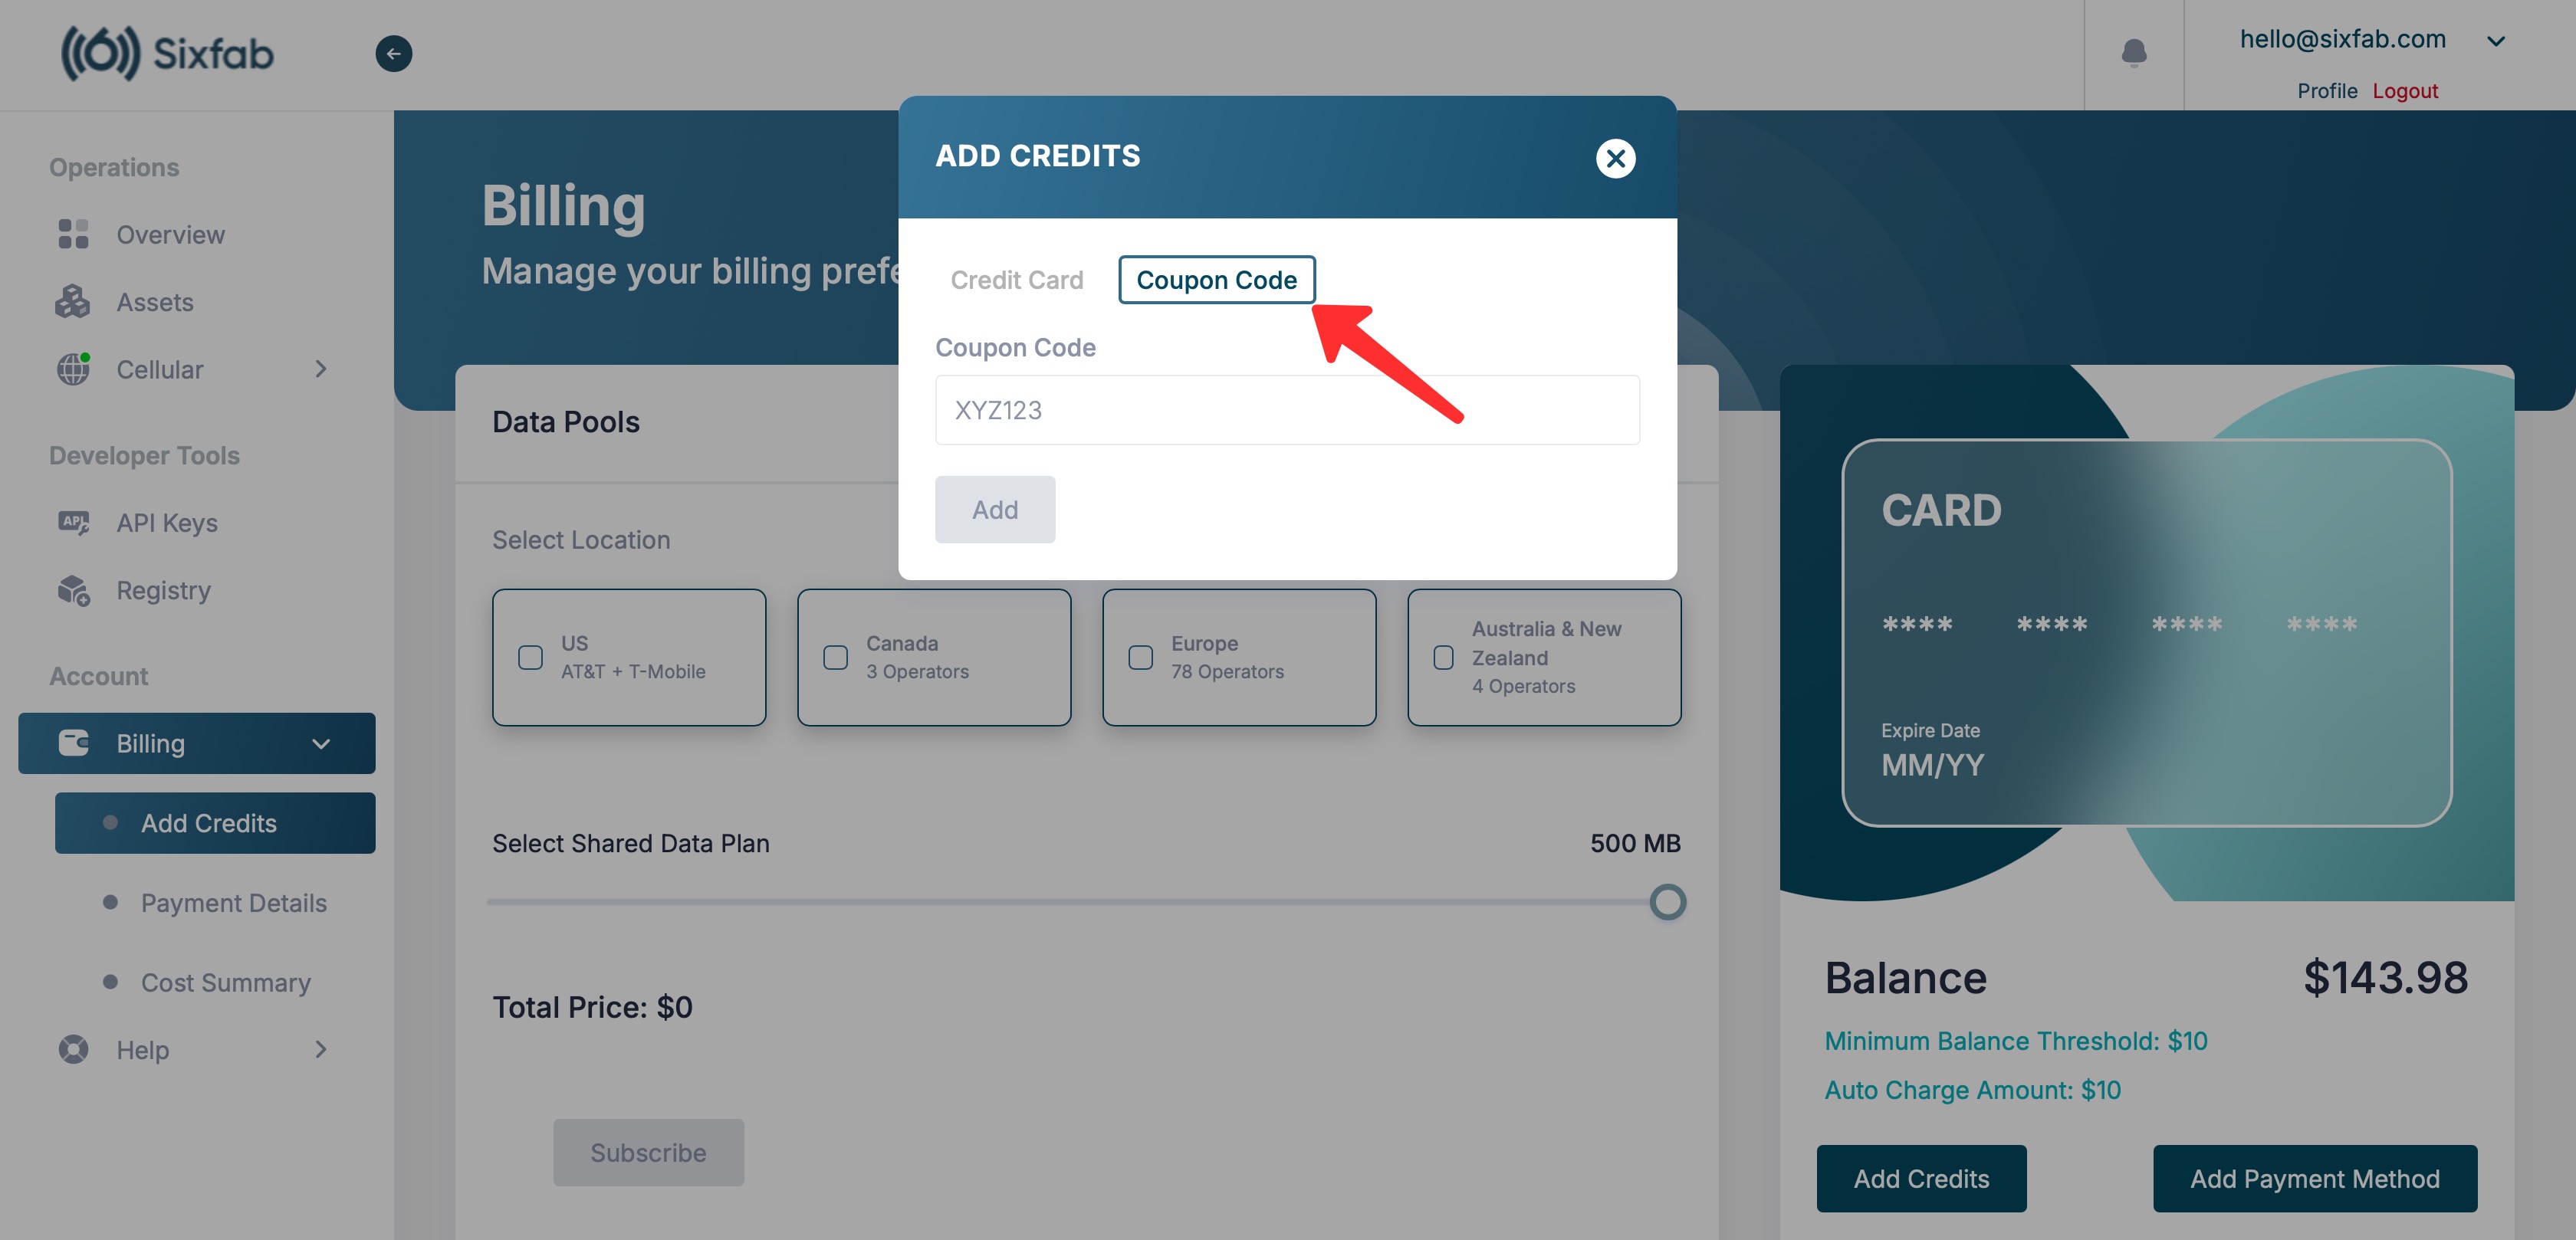
If you have a credit coupon, use it from the dashboard by going to Billing -> Add Credit -> Coupon Code and enter your code.
4. Register Asset
To initialize the Sixfab CORE device, an active Sixfab SIM asset is required.
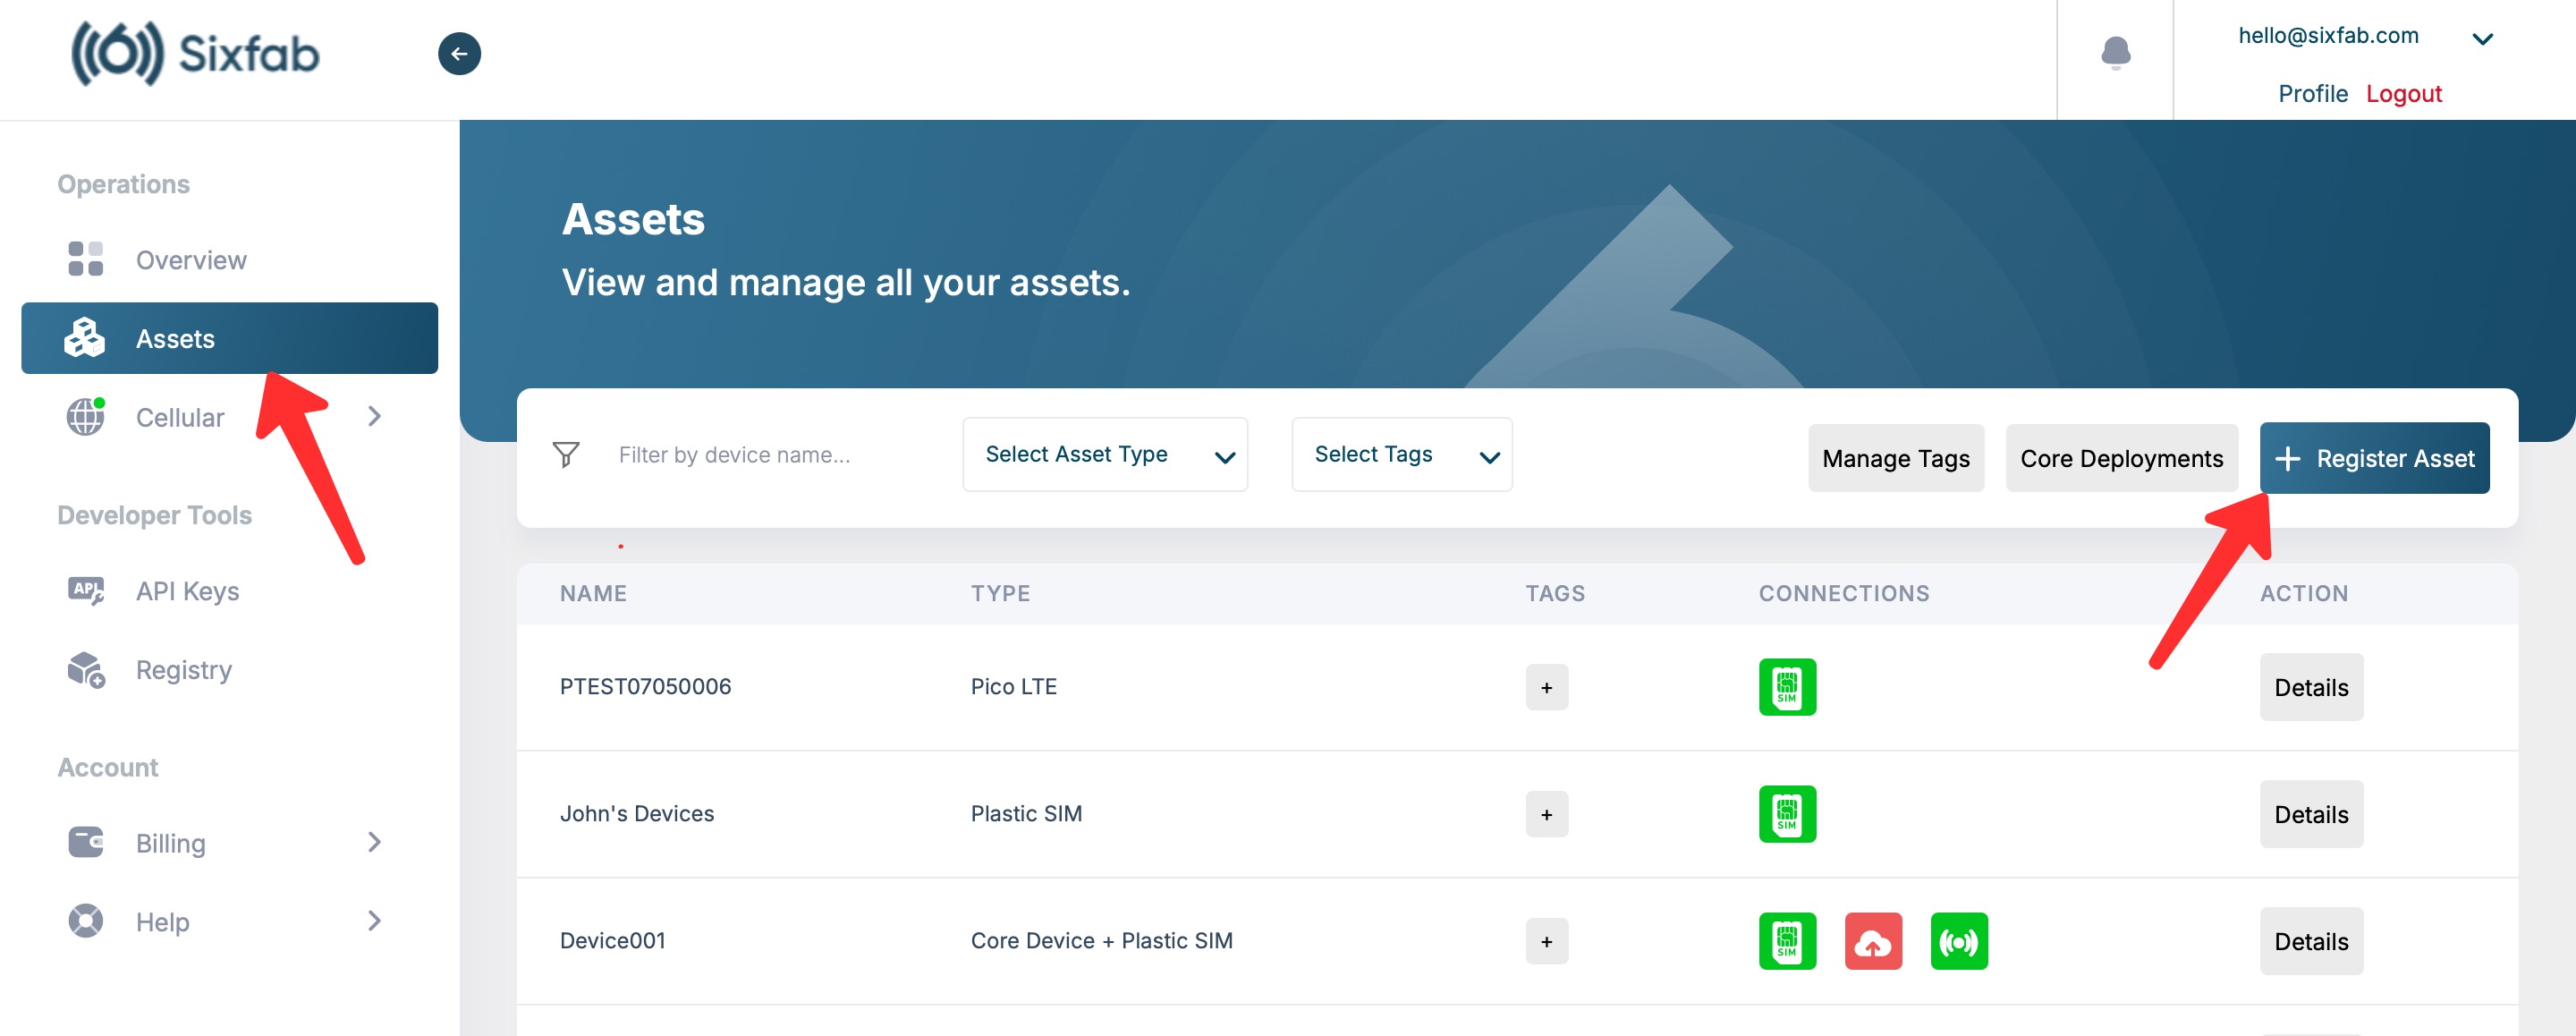
If you don’t have one, please register and activate a SIM from the "Assets -> + Register Asset" section.
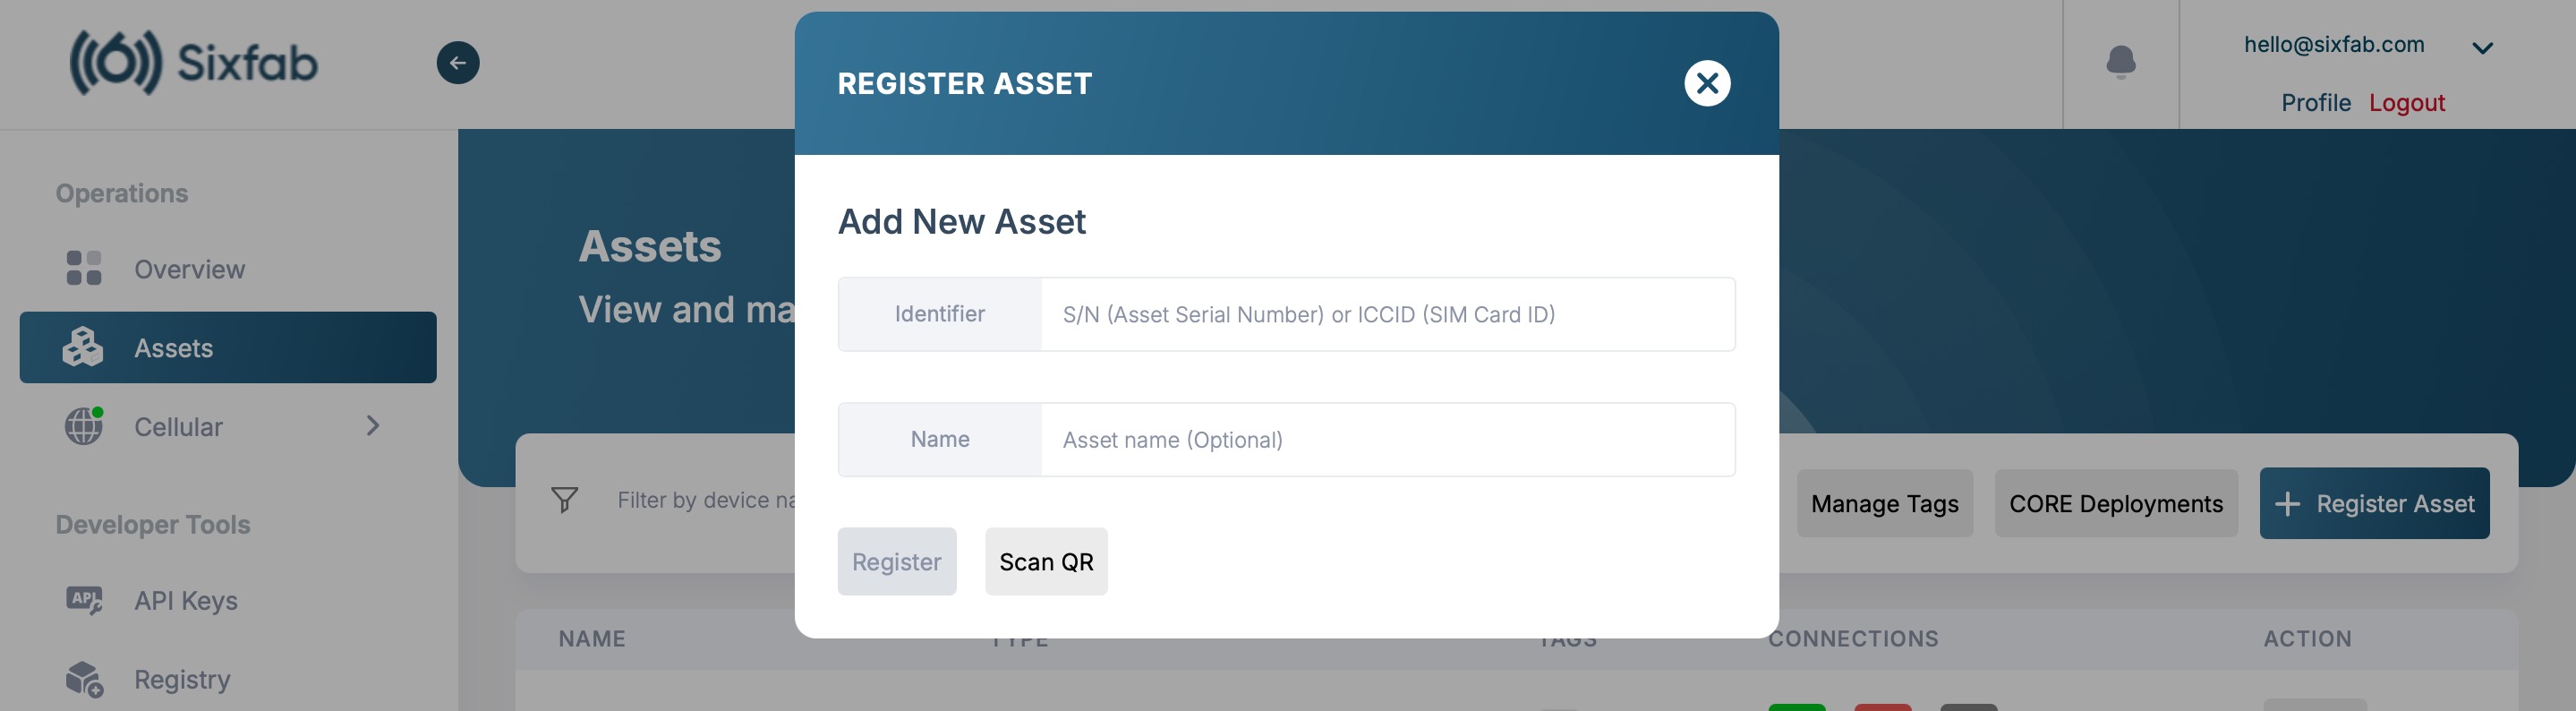
Enter ICCID (SIM Card ID) and Asset name (optional), then click the "Register" button.
Skip this step if you already have an active registered asset..
5. Create CORE Device
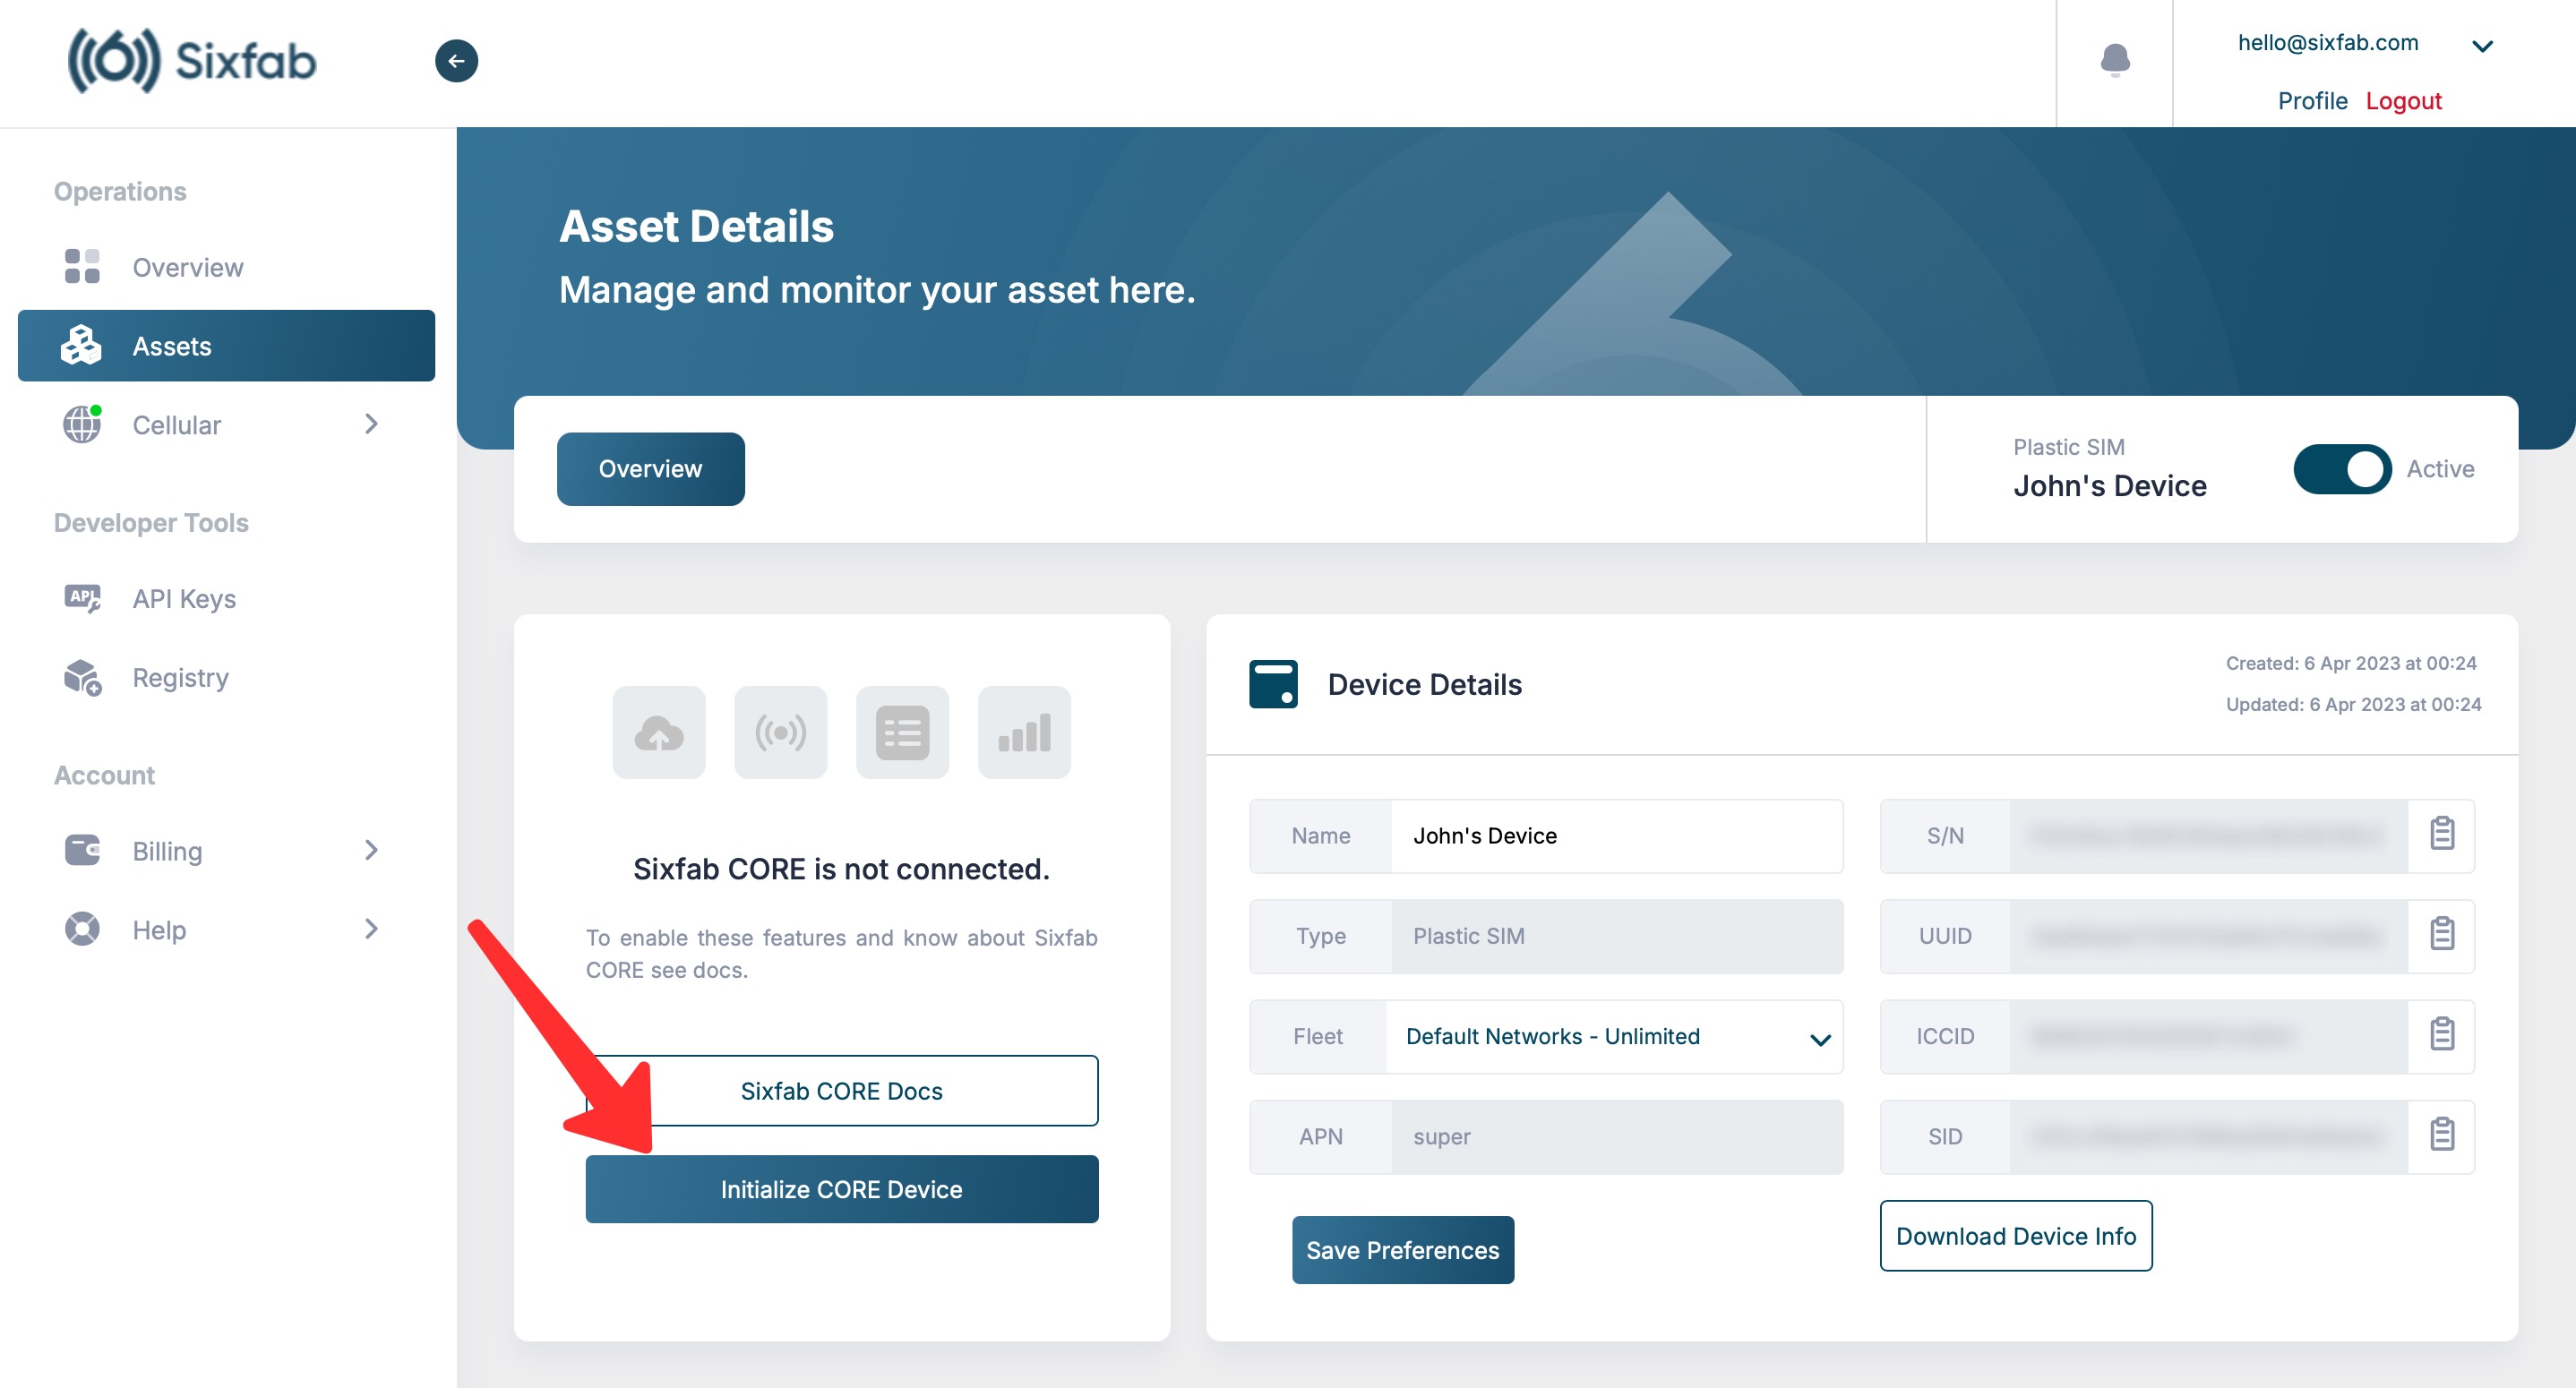
Navigate to the details of the asset you want to install the CORE device for on the Assets page.
Click on the 'Initialize CORE Device' button located in the Sixfab CORE section within the asset details.
6. Select Board
Select the hardware board you want to install Sixfab CORE on and proceed.

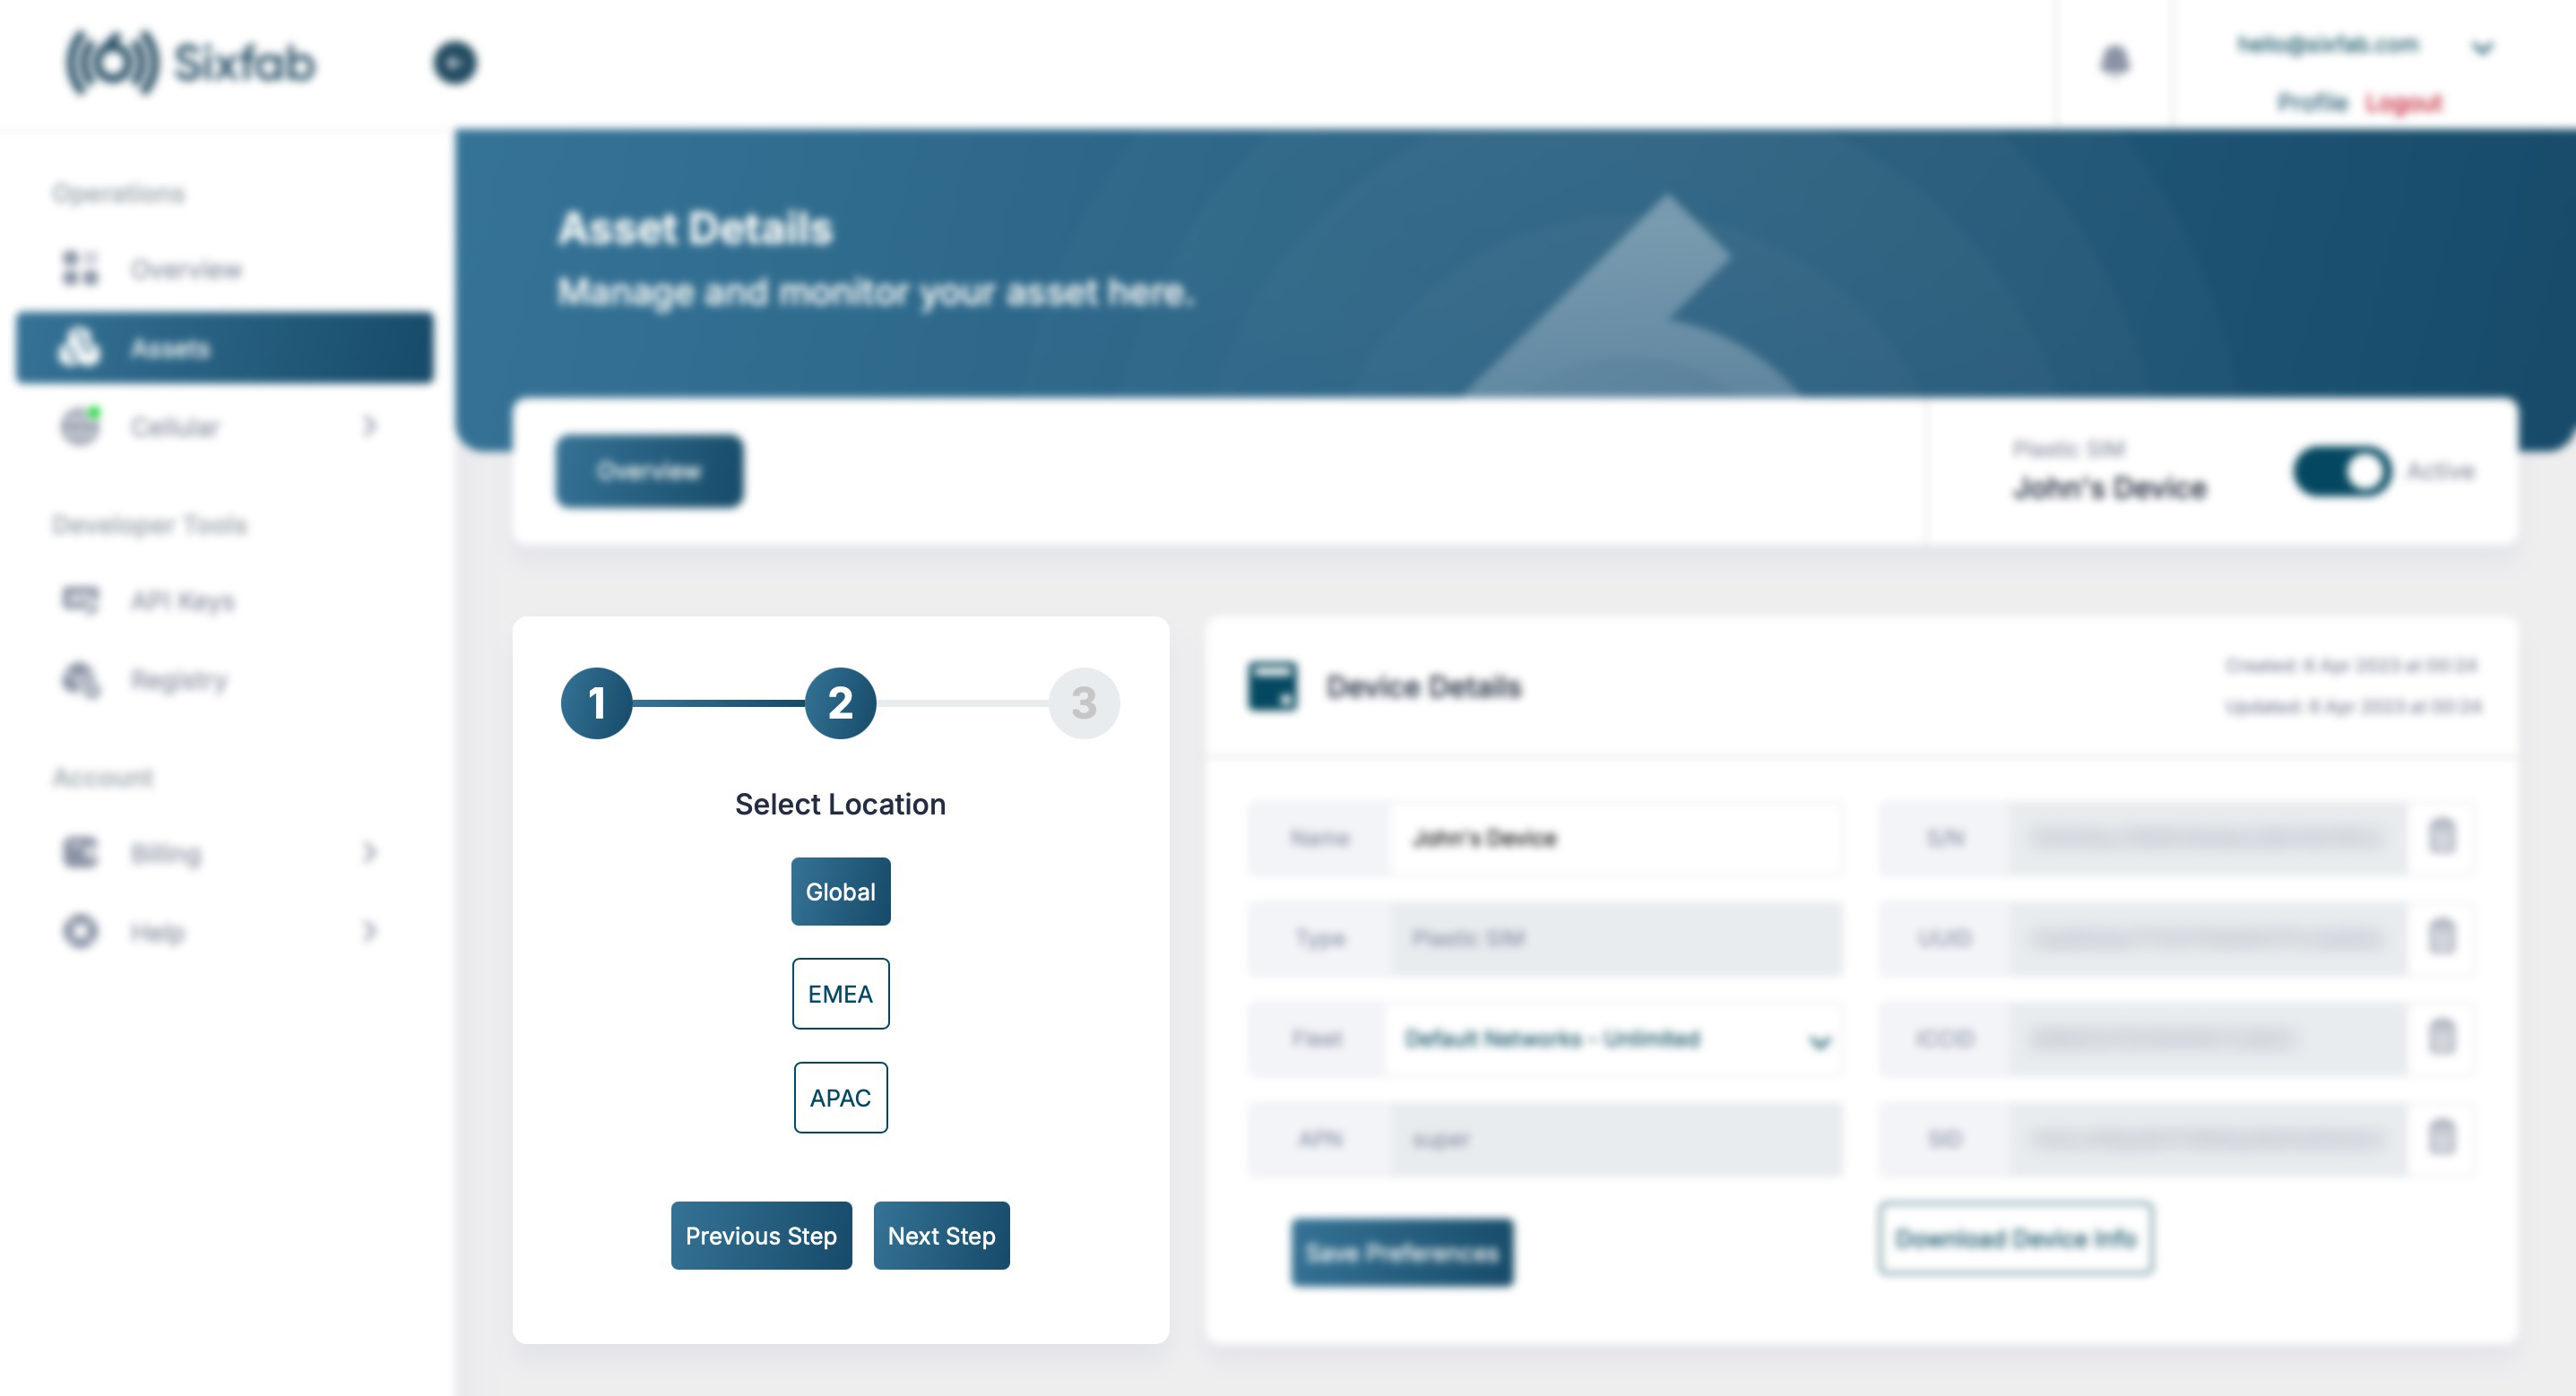
7. Select Location
Here, choose according to your location.
| Region | Description |
|---|---|
| Global | For devices to be deployed Worldwide |
| EMEA | For devices to be deployed in Europe, the Middle East and Africa |
| APAC | For devices to be deployed in Asia-Pacific only |
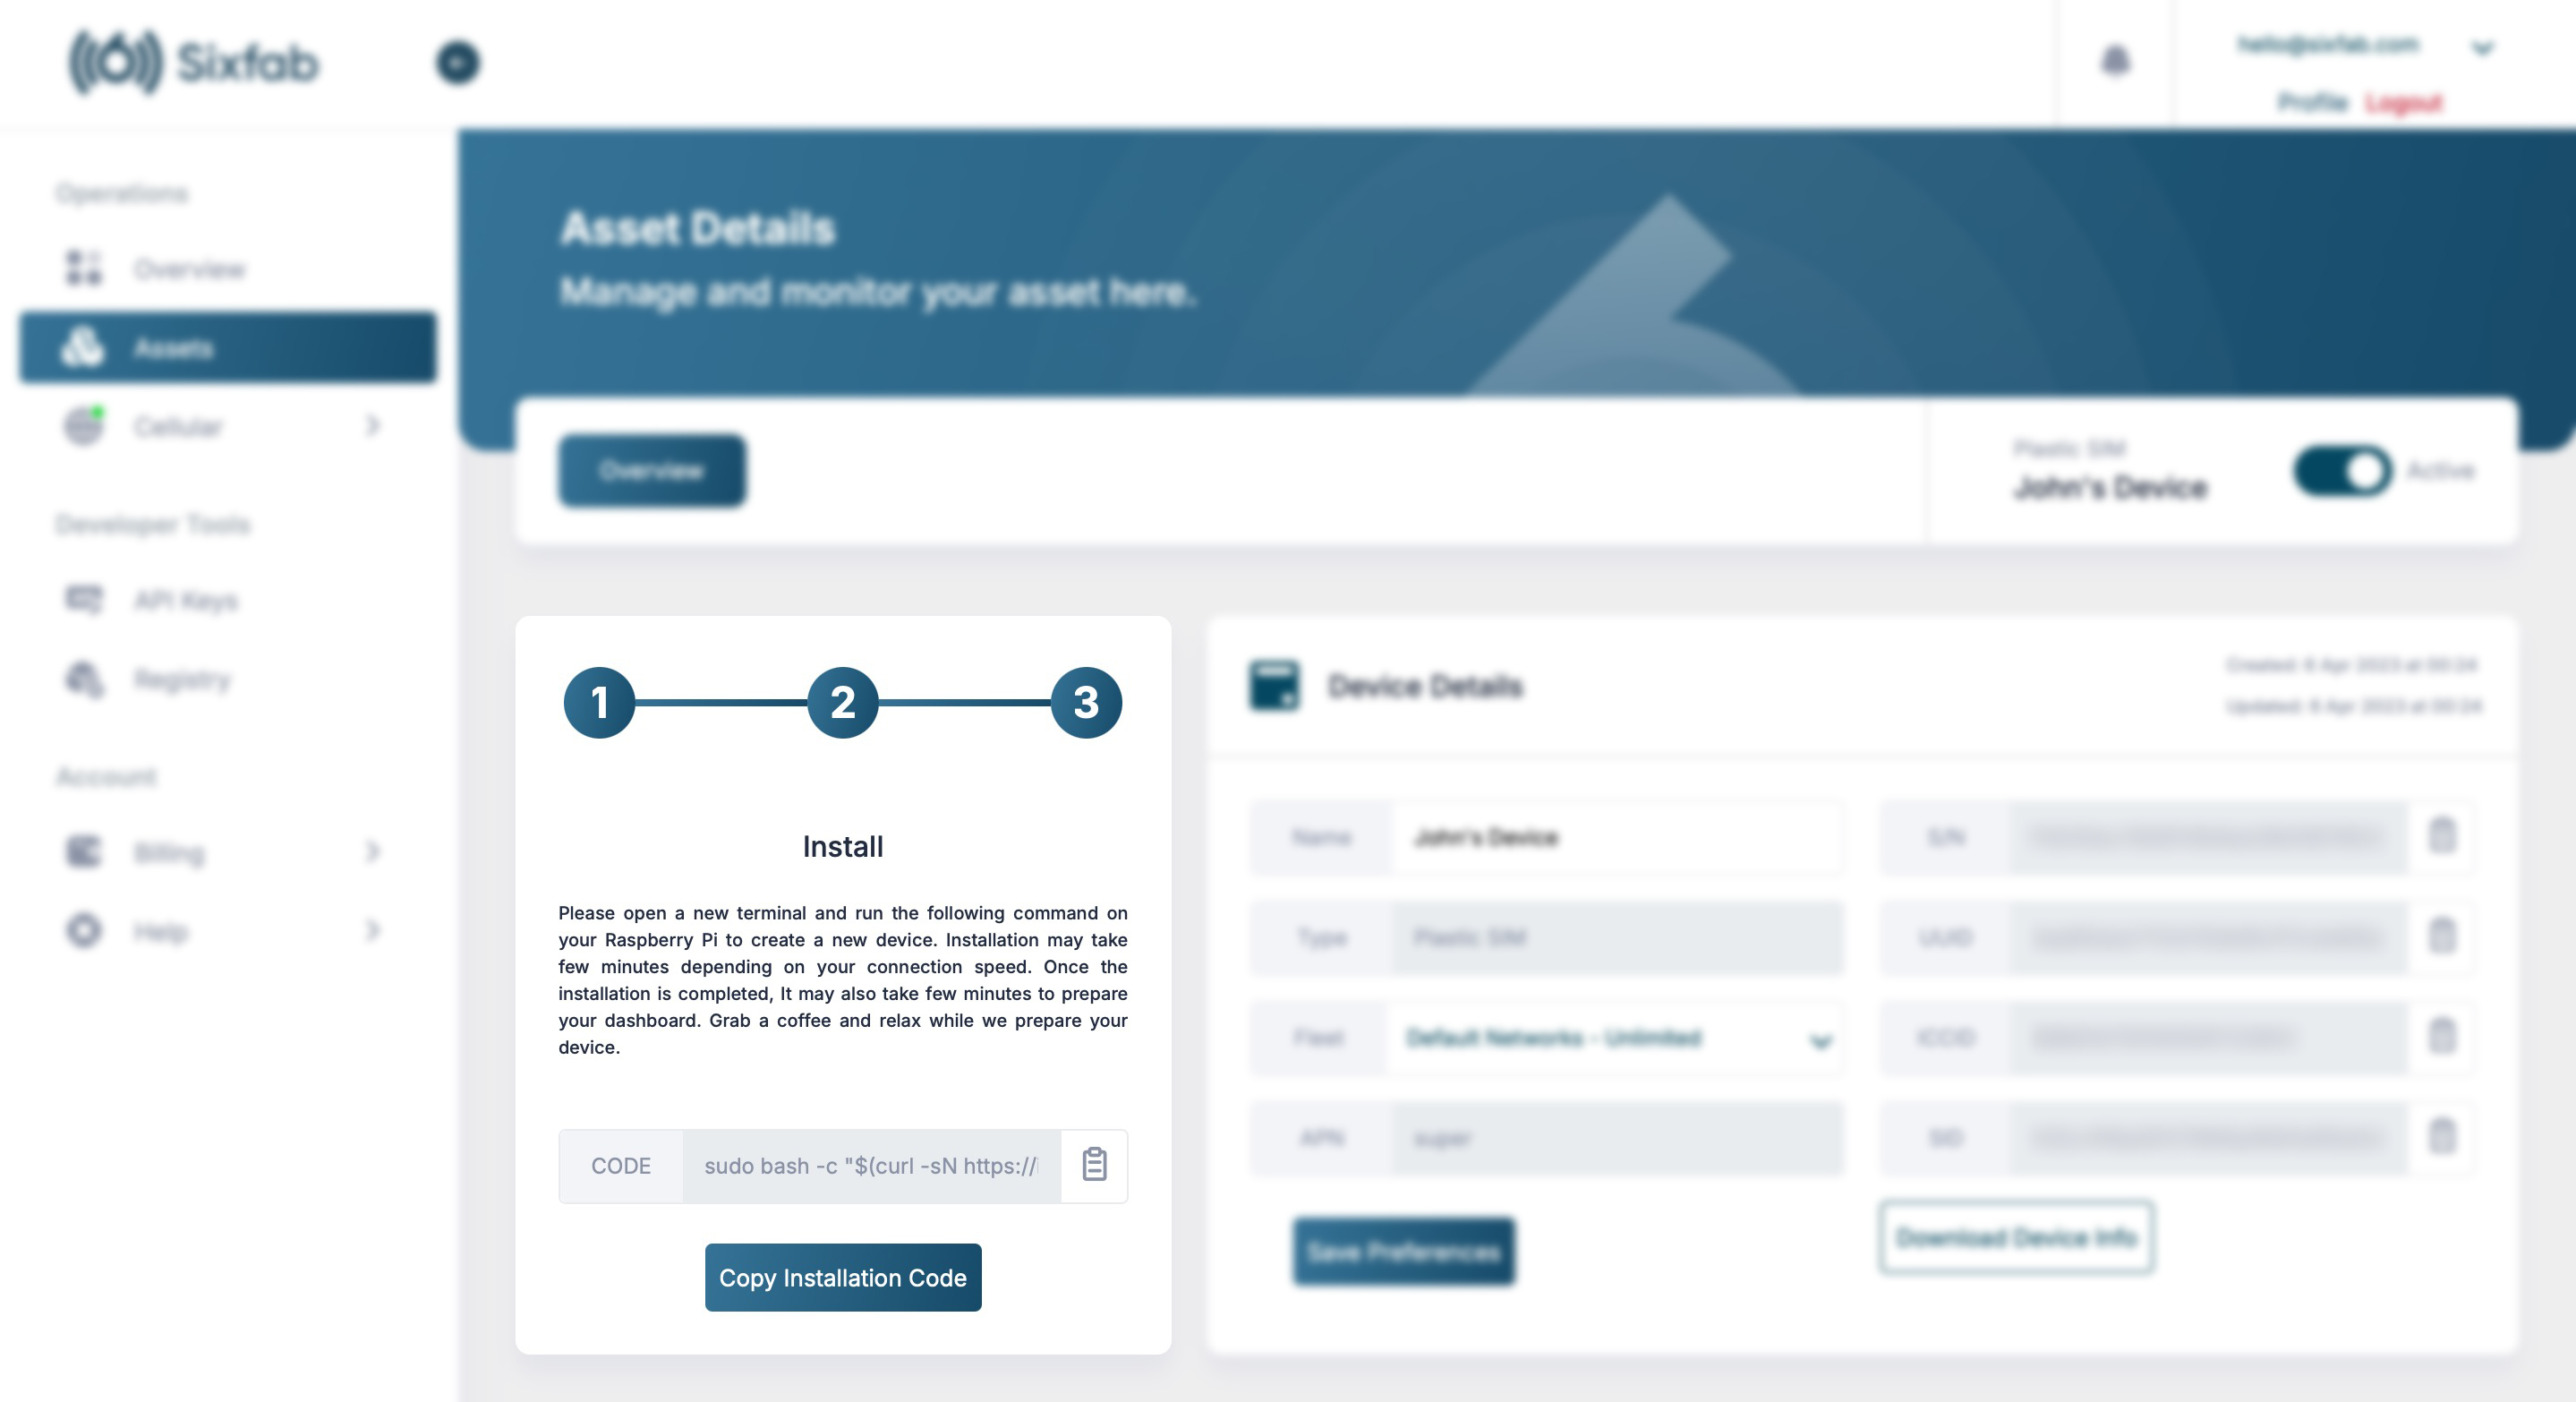
8. Copy Installation Code
9. Unplug USB Adapter
If it is already plugged in, please unplug the USB adapter from the HAT.
10. Run Installation Code
Open a terminal and run the installation code you have just copied.
11. Plug the USB cable
After the installation is successfully completed, press 'Enter' to restart the device, and then plug the USB cable to the HAT.
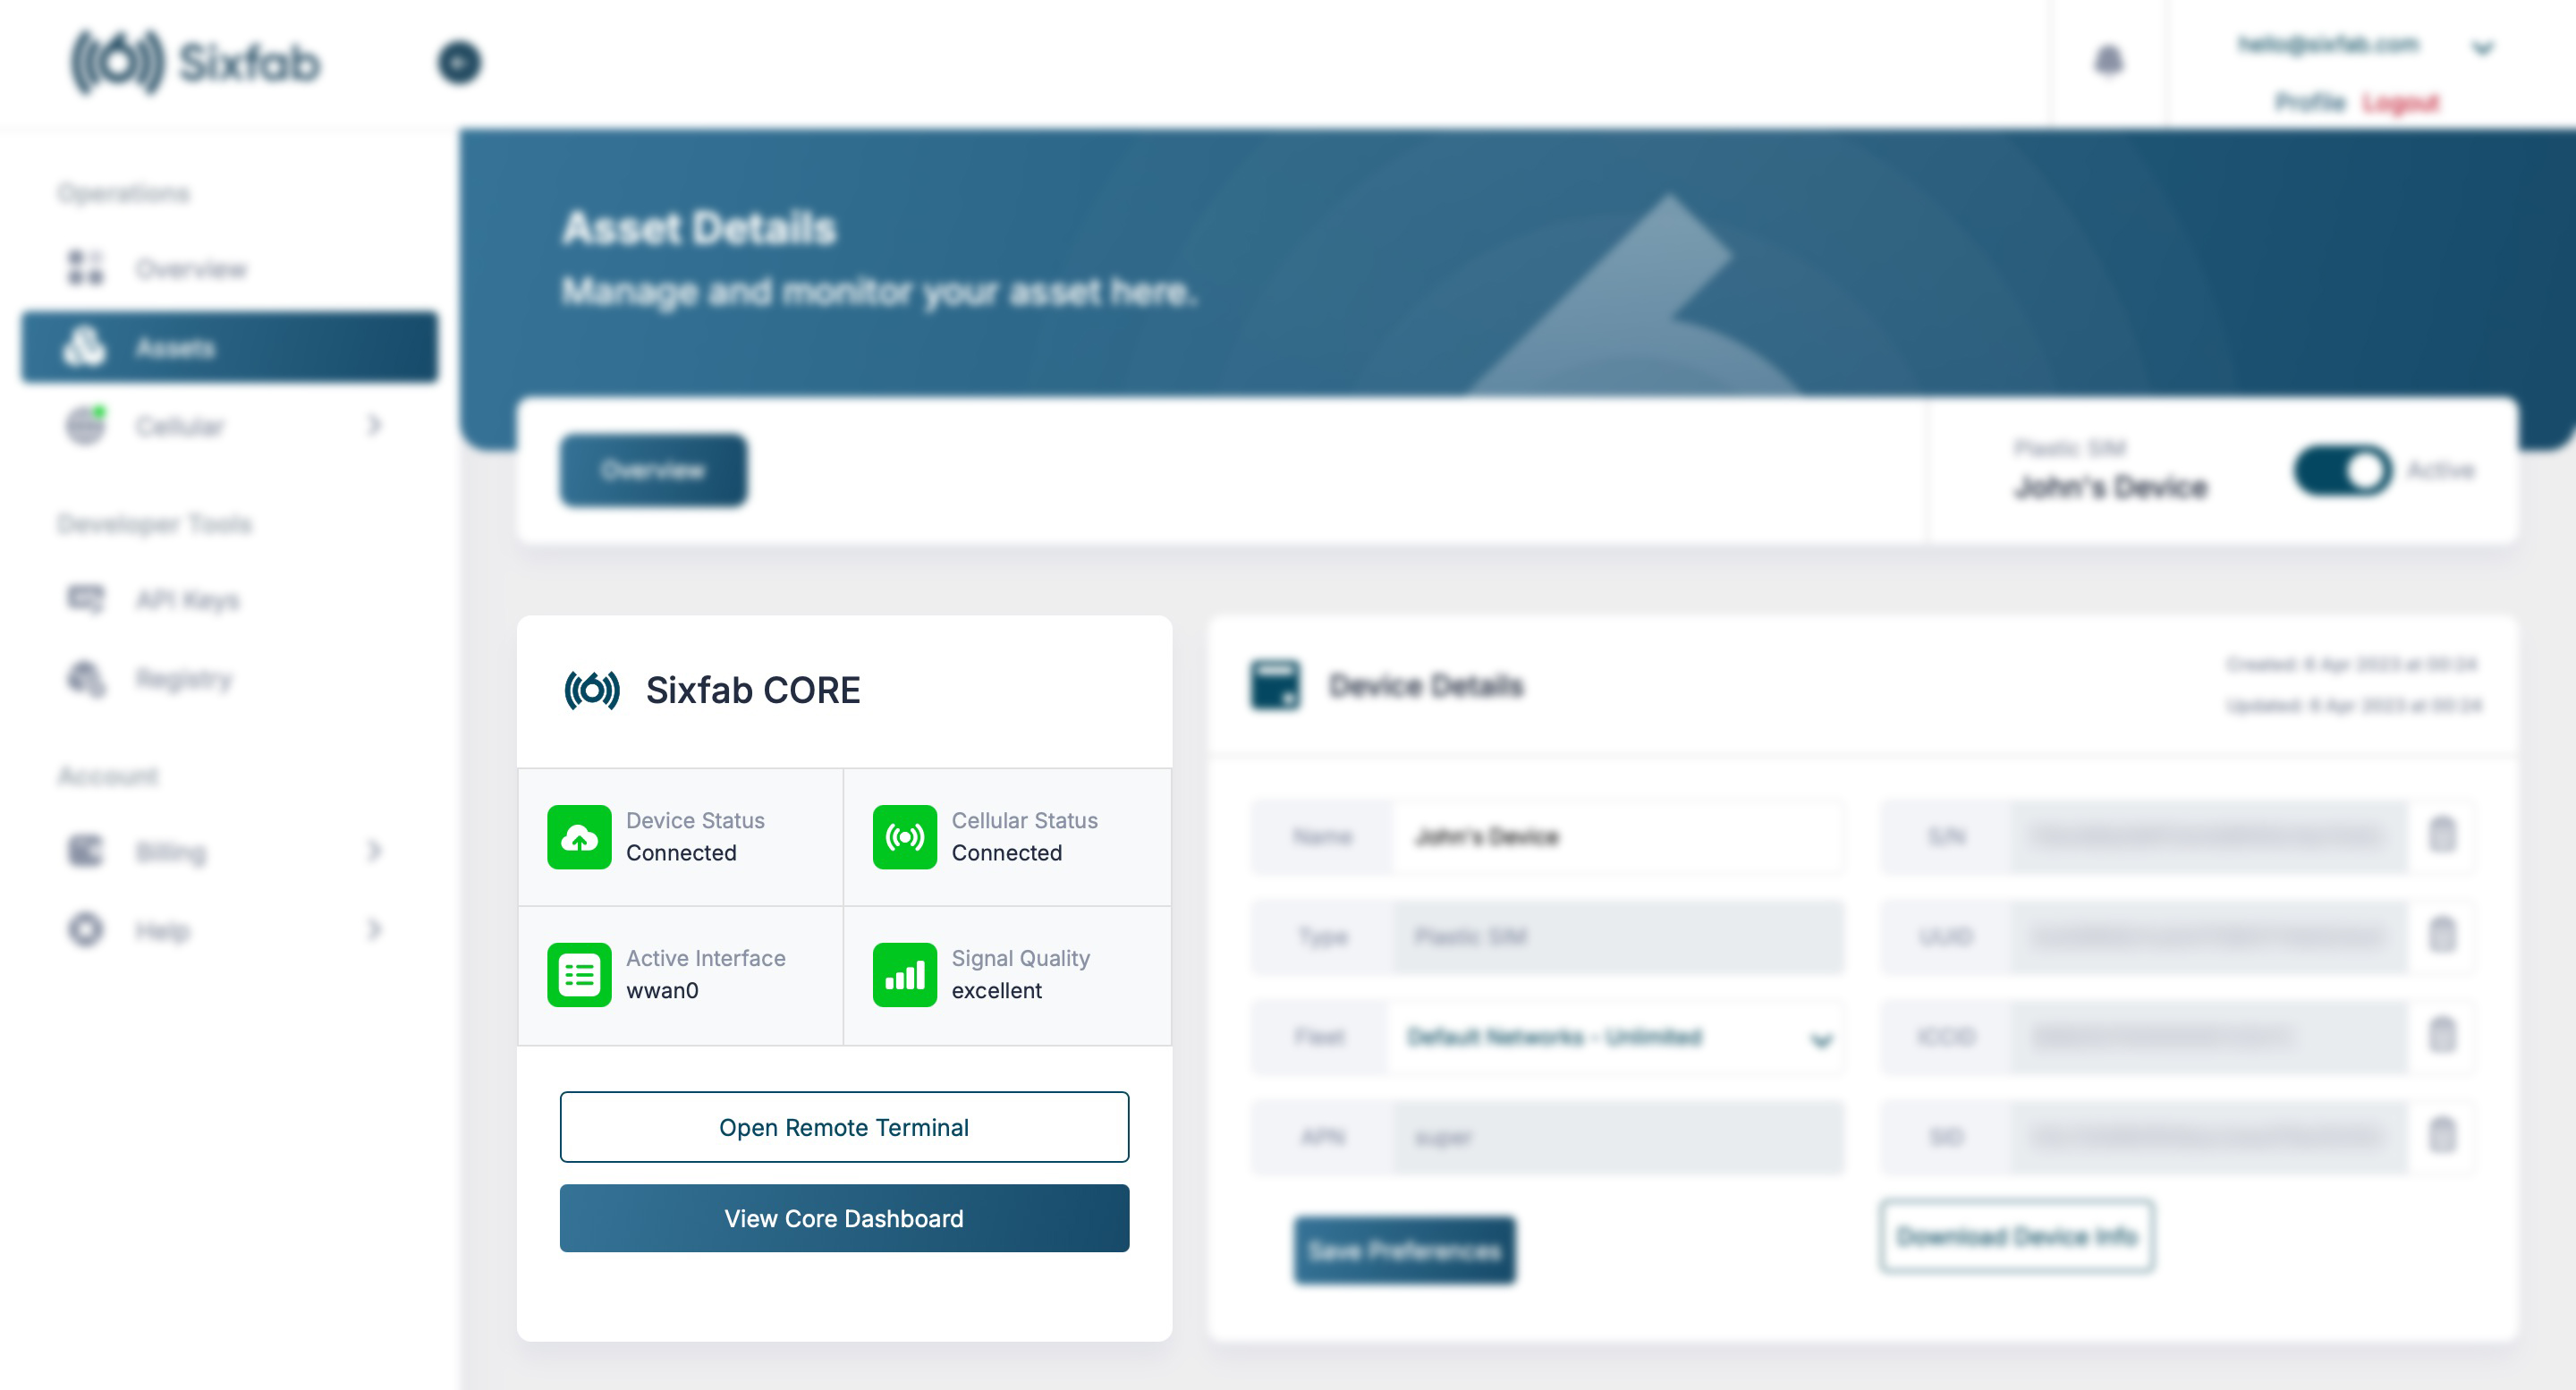
12. Enjoy Hassle-Free IoT Connectivity
Congratulations! You've successfully set up Sixfab CORE for your device. Your IoT devices are now seamlessly connected, and you have the tools to monitor, diagnose, and manage them remotely. Explore additional features and customization options within the Sixfab CORE dashboard for an optimized IoT experience.
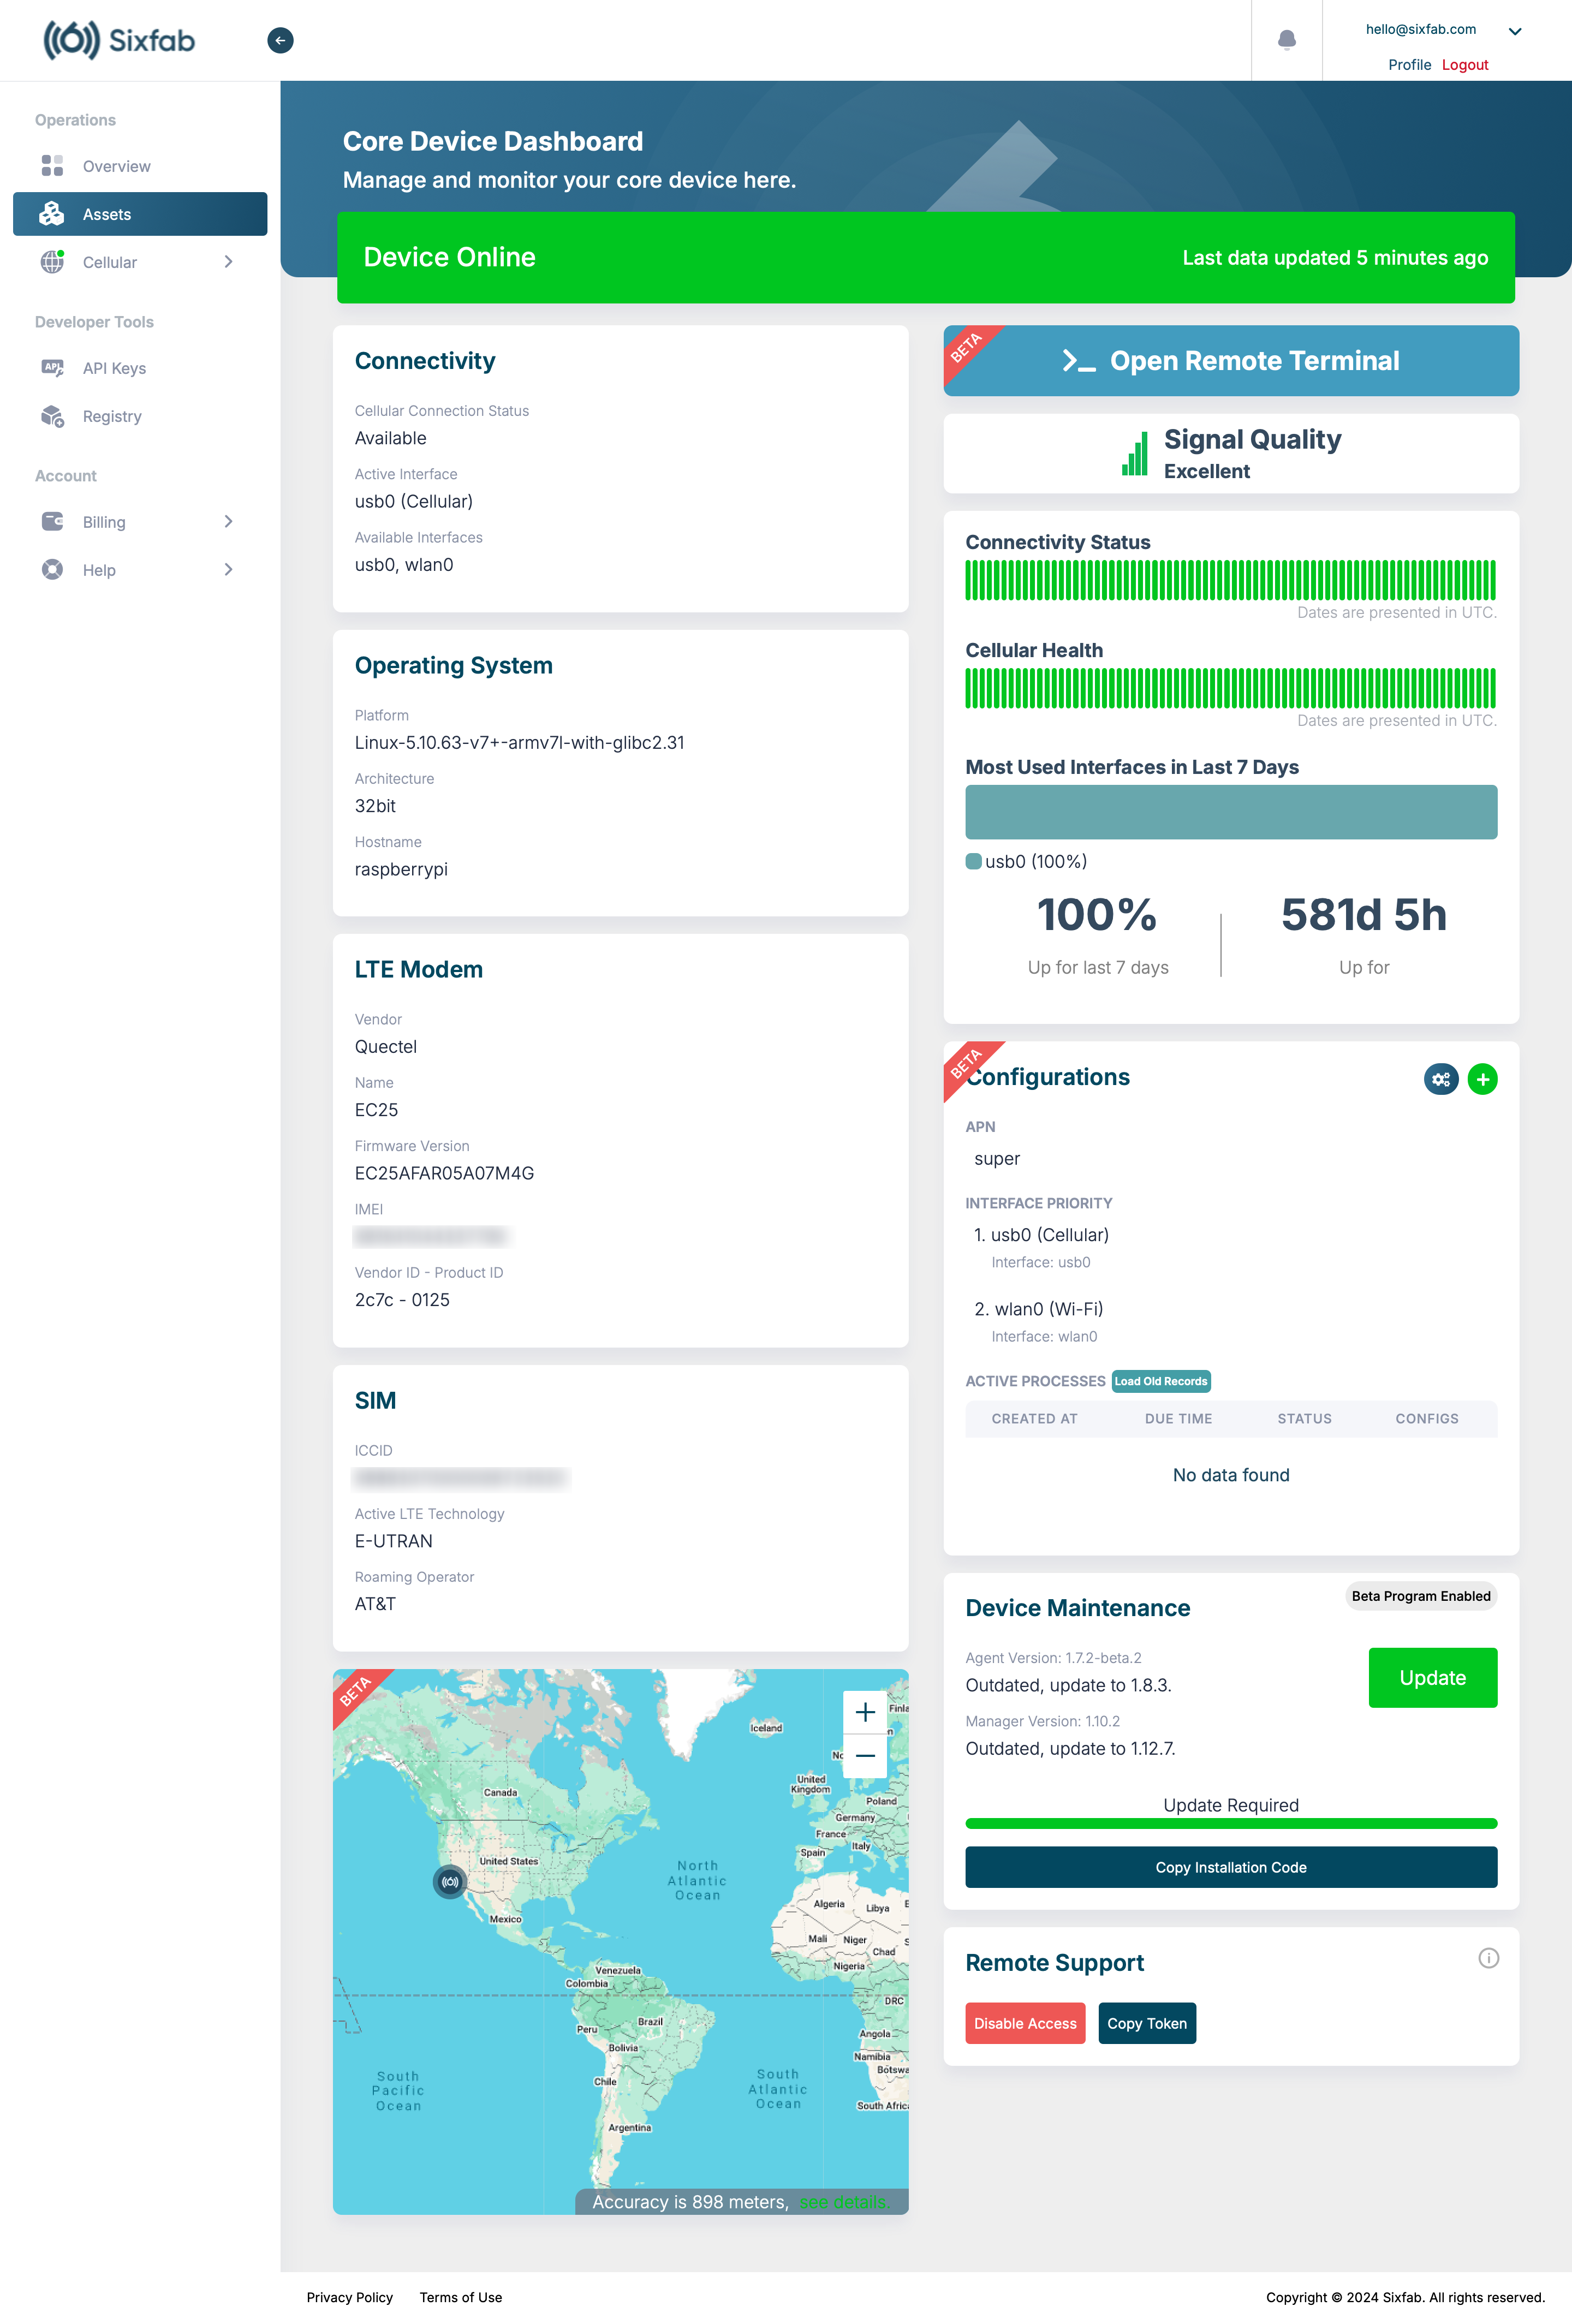
After the installation is complete, it may take up to 5 minutes for the services to configure your modem, set up your cellular internet connection, and complete other necessary settings. Once everything is ready, you can click View CORE Dashboard to check the data on your dashboard, as shown below.
📖 Firmware Check for Telit modules
Check the Firmware version under the LTE Modem. The AT#SWPKGV command returns the firmware revision details.
As for now, the latest FW versions are:
- Telit LE910C1 - NF : 25.21.260
- Telit LE910C1 - EU : 25.21.220
- Telit LE910C4 - NF : 25.21.660
- Telit LE910C4 - EU : 25.21.670
- Telit LE910C4 - AP : 25.21.680
If the module has an old FW, you can find the latest FW in the module's firmware tab on the "Cellular Modems Technical Documents and Compliance" page.
Follow the Telit Firmware Upgrade Guide