
Hardware Assemble
This section will lead you step by step to create a cellular connection with the Raspberry Pi 4G/LTE Cellular Modem Kit
For NVIDIA Jetson Nano 4G/LTE Cellular Modem Kit UsersIf you are looking for the Getting Started Guide to set up your NVIDIA Jetson Nano 4G/LTE Cellular Modem Kit, please visit the dedicated page by clicking the link below:
➡️ Go to Getting Started with NVIDIA Jetson Nano 4G/LTE Cellular Modem Kit
This guide will walk you through the process of creating a reliable cellular connection with your Raspberry Pi using the Raspberry Pi 4G/LTE Cellular Modem Kit. By following the steps outlined below, you will be able to set up the hardware, establish a cellular connection using ECM mode, and explore remote terminal access via Raspberry Pi Connect.
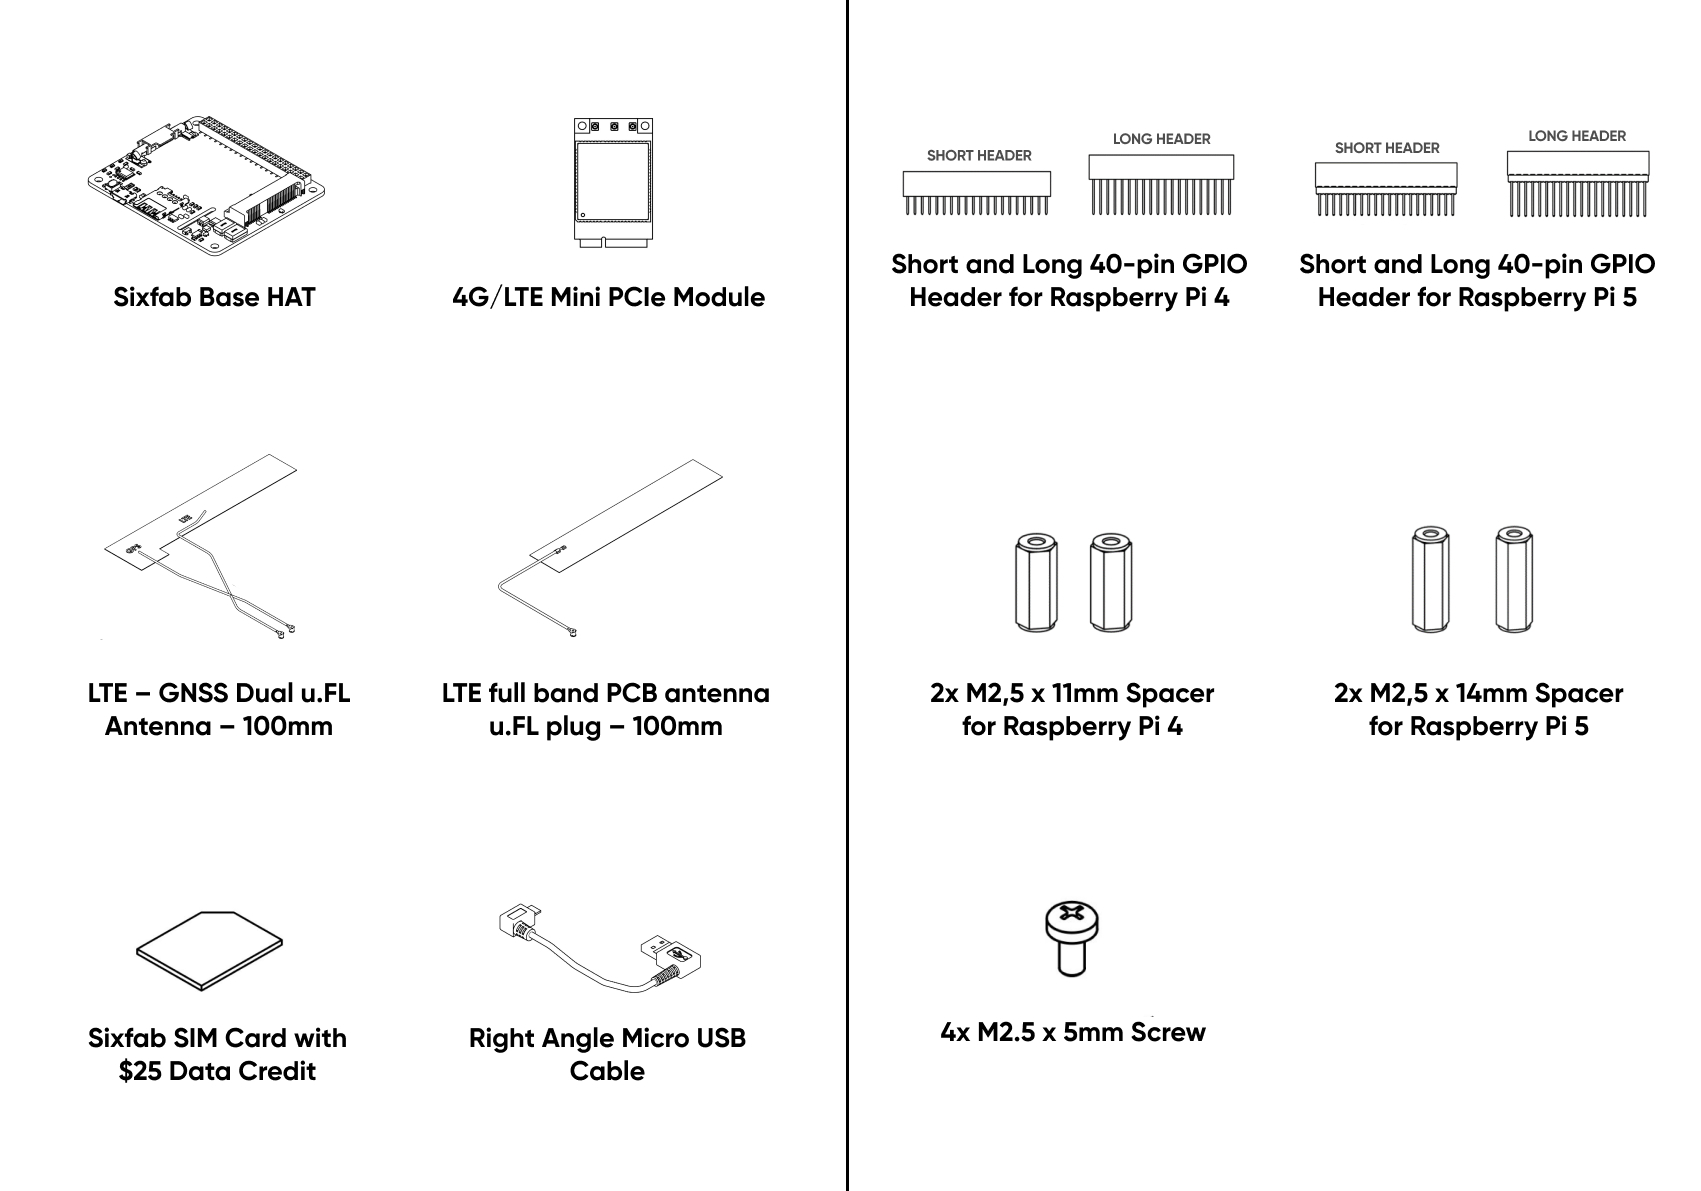
Box Contents
System Requirements
To getting started with the Raspberry Pi 4G/LTE Cellular Modem Kit, first check the following requirements.
| Hardware Requirements | Software Requirements |
|---|---|
| Raspberry Pi 3, 3B+, 4 or 5 | Raspberry Pi OS |
Header Options
All steps are shown with Raspberry Pi 4. The only assembly difference between Raspberry Pi 5 and Raspberry Pi 4 is the spacers and headers used.
Choose the Long or the Short 40-pin GPIO based on your project size and requirements.
| The Long Header | The Short Header |
|---|---|
| Allows stacking with full access to all GPIO pins on the Raspberry Pi. | More compact and space-saving for smaller projects. |
| Ideal for broad applications or prototyping purposes. | Ideal for embedded systems or productized projects where access to all GPIO pins may not be necessary. |
Step 1: Assembly
1. Attach the mini PCIe module to the HAT

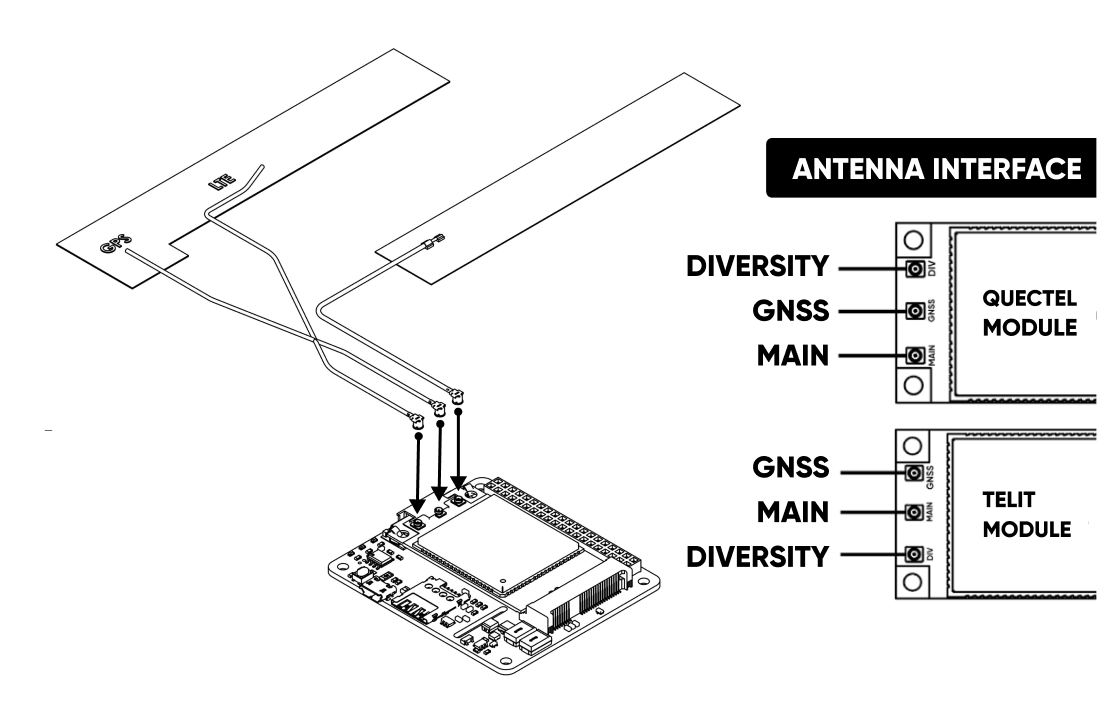
2. Attach the antenna to the mini PCIe module
Make sure the right antenna is connected to the right port. Attach LTE full band PCB antenna/LTE connector of the LTE-GNSS dual antenna to the main Antenna interface/diversity antenna interface & GPS Antenna portion goes to the GNSS antenna interface.
3. Attach the header under the board

4. Attach the micro SIM as shown

5. Attach the Base HAT to the Raspberry Pi and stack it with the plastic spacer kit

6. Plug the USB cable
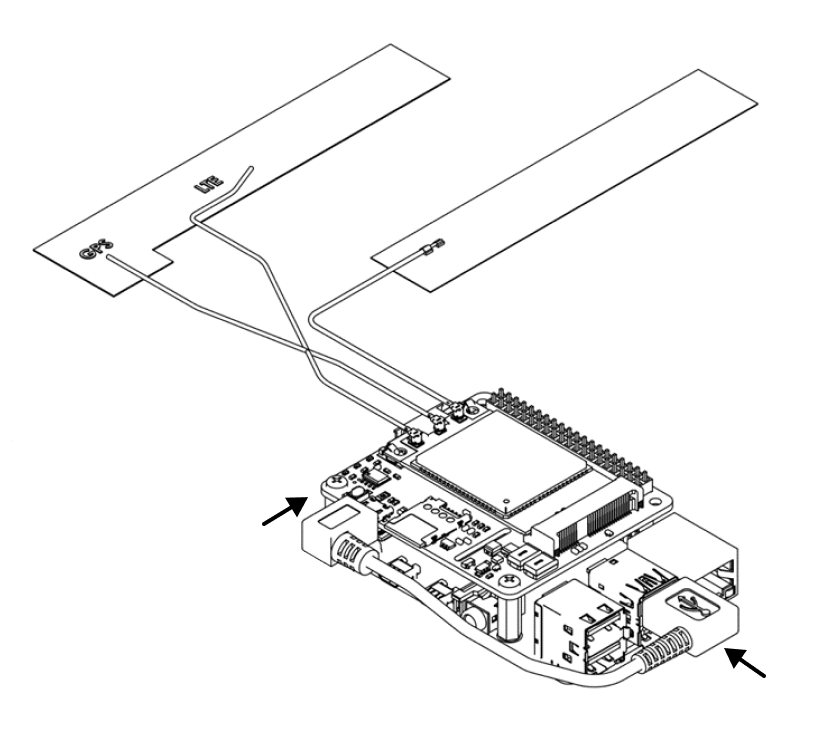
7. Connect the power supply to your Raspberry Pi

Updated 6 months ago