This post answers your questions about the UART of the Sixfab HATs. Following HATs has support for both UART and USB.
Below you will find the information on each of the products one by one.
Sixfab 3G/4G & LTE Base HAT
The UART is useful in communicating with the cellular modules without a USB cable attached. This interface can be used for AT based communication, such as sending AT commands & receiving responses and establishing PPP.
It should be noted that the performance of the internet in the case of PPP will be limited by the UART speed of the host device.
As mentioned in the documentation of the HAT technical details, the UART is supported by the HAT, but you should also have a suitable mini PCIe module.
First of all, check the compatibility of the UART of the Module. Here is how you can confirm;
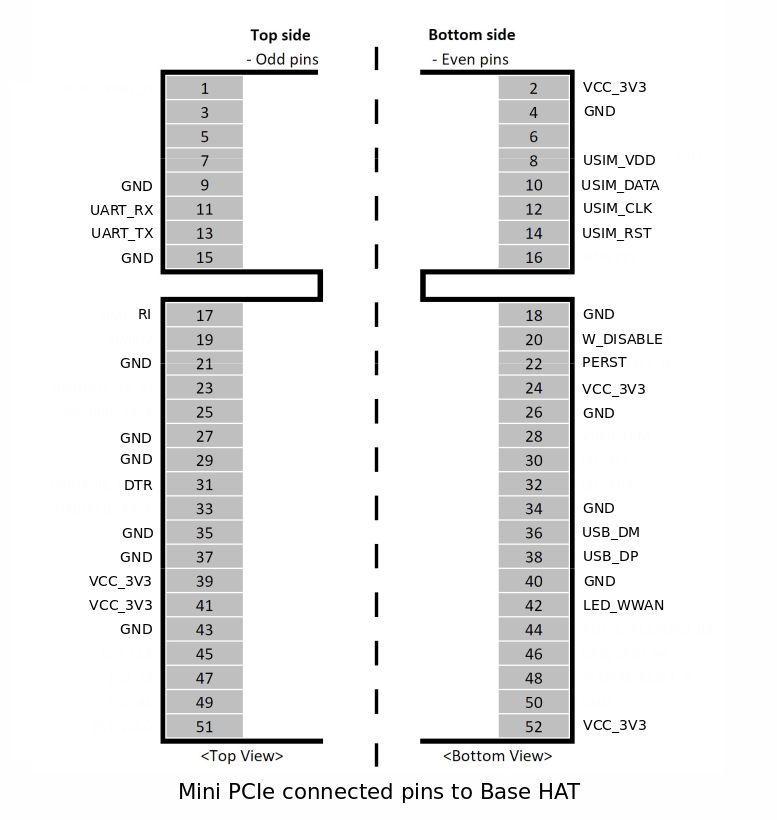
The UART pins on the mini PCIe module should be connected at pins 11(RX) & 13(TX) of the mini PCIe as shown in the figure below:

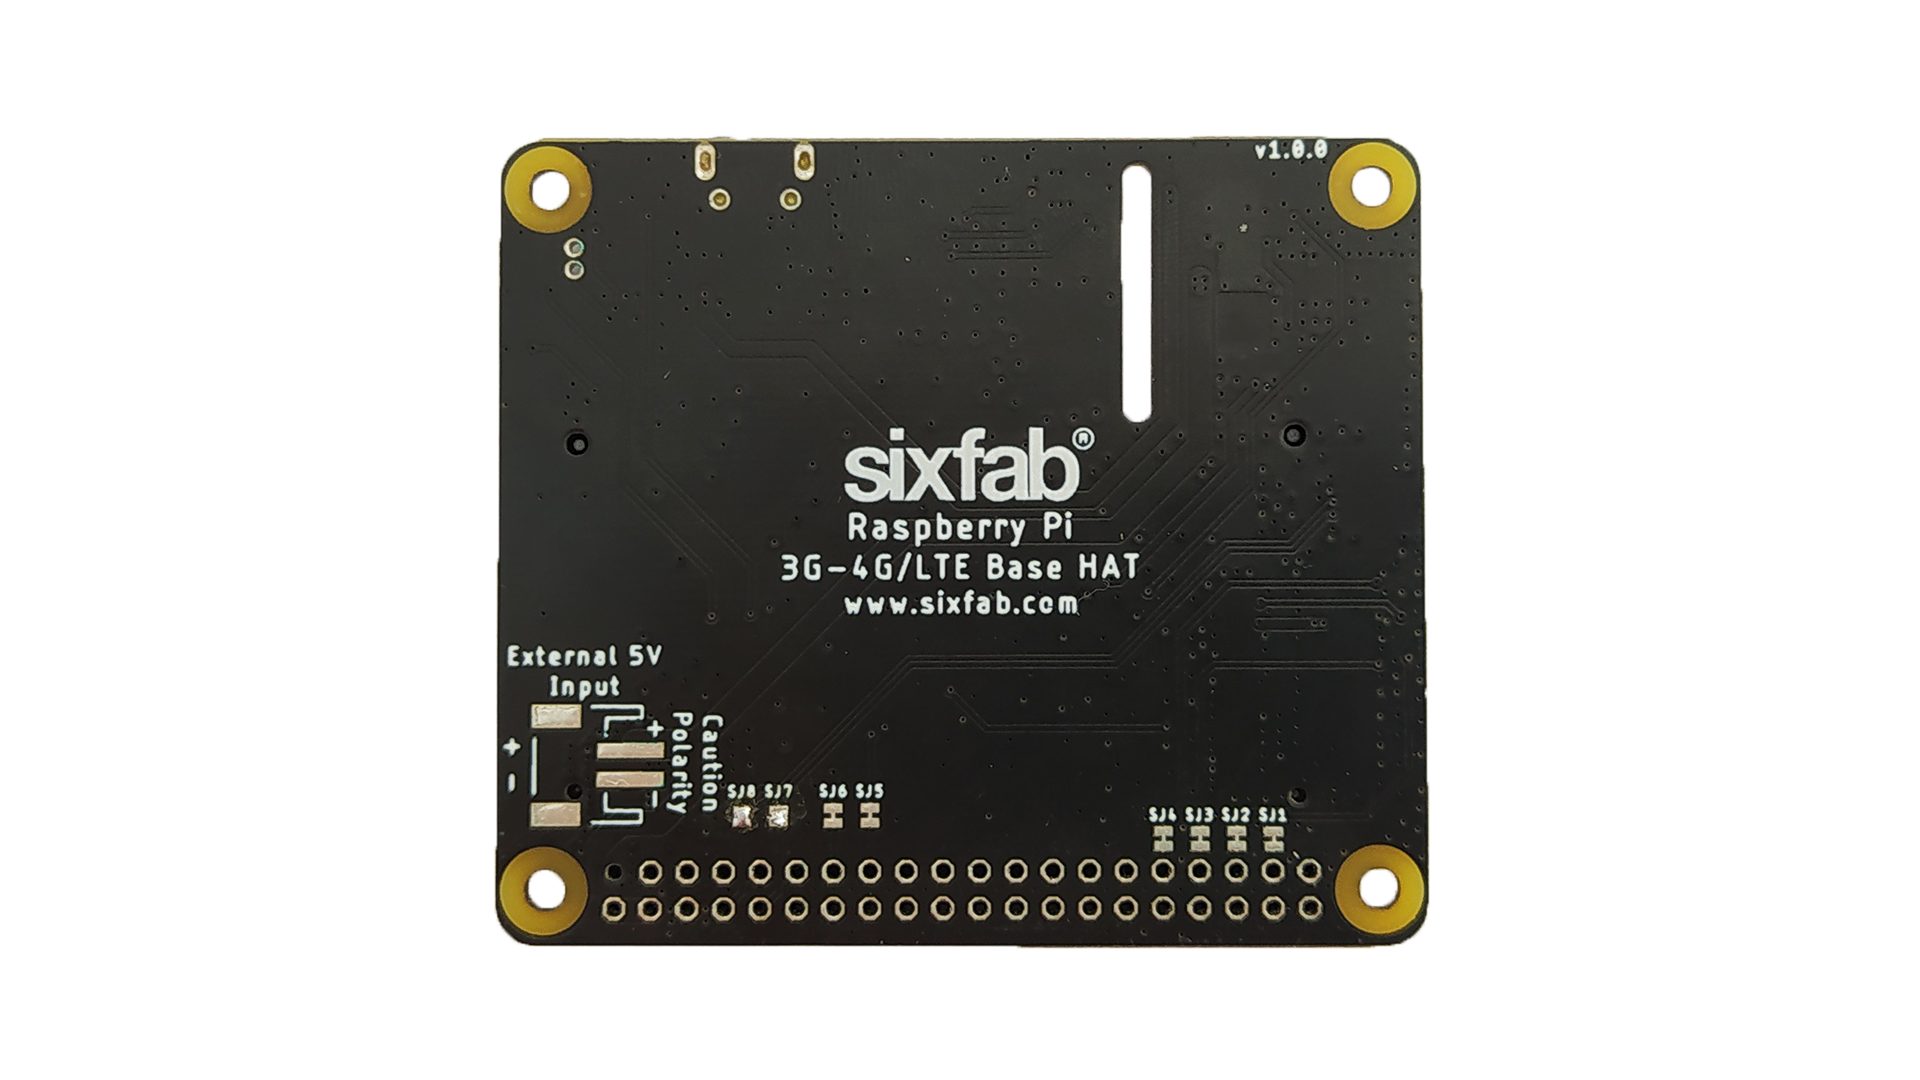
Then you may prepare the Base HAT for UART communication, Solder the SJ7 and SJ8 available under the HAT. By default, these jumpers are disconnected.

Next, we will need to enable the UART from the raspi-config. Please visit this link for further details about the UART configuration of Raspberry Pi.
- Start raspi-config: sudo raspi-config.
- Select option 3 - Interface Options.
- Select option P6 - Serial Port.
- At the prompt Would you like a login shell to be accessible over serial? answer 'No'.
- At the prompt Would you like the serial port hardware to be enabled? answer 'Yes'.
- Exit
raspi-configand reboot the Pi for changes to take effect.
Now we can test the connection by sending AT commands using minicom.
Use the following information for the connection:
Device NAME | Baudrate |
|---|---|
/dev/ttyS0 | 115200 |
The Sixfab 3G, 4G/LTE Base HAT has only one UART as a result, simultaneous usage of the internet, SMS, and GNSS/GPS is not possible. Only one function can be used once at a time. For GPS/GNSS use the USB.
Sixfab Cellular IoT HAT & Cellular IoT Application Shield
The Quectel BG96 module used in the Cellular IoT Application Shield and Cellular IoT HAT has 3 UARTs available;
But only one is used in Cellular IoT Application Shield and Cellular IoT HAT Worldwide Version(v1.1.0) while 2 UARTs are used in Cellular IoT HAT North American Version(v1.3.0) and these pins are connected as in the table.
Pin | Description |
|---|---|
8,10 | For AT commands |
33,32 | For GNSS |
The UART of the Cellular IoT HAT or Cellular IoT Application Shield is already connected.
In order to use it, your next step should be enabling the UART from the raspi-config. Please visit this link for further details about the UART configuration of Raspberry Pi.
- Start raspi-config: sudo raspi-config.
- Select option 3 - Interface Options.
- Select option P6 - Serial Port.
- At the prompt Would you like a login shell to be accessible over serial? answer 'No'.
- At the prompt Would you like the serial port hardware to be enabled? answer 'Yes'.
- Exit
raspi-configand reboot the Pi for changes to take effect.
Turn on the module by pressing the POWER button for about 2 seconds.
Now we can test the connection by sending AT commands using minicom.
Use the following information for the testing:
Device NAME | Baudrate |
|---|---|
/dev/ttyS0 | 115200 |
Cellular IoT Application Shield and Cellular IoT HAT Worldwide Version(v1.1.0) have only one UART. As a result, simultaneous usage of the internet, SMS, and GNSS/GPS is not possible. Only one function can be used once at a time.

