The following guide will detail the steps to bulk deployment of Sixfab CORE devices.
What Is Bulk Deployment?
Bulk deployment provides the option to provision a large number of devices with Sixfab CORE at once. It gives you speed and installation flexibility in device setup with the help of a single line of command. You can create a single OS image, copy and use it in numerous Raspberry Pi allow provisioning each of them on the CORE.
Why Do You Need It?
It's a great option if you're having trouble installing a large number of devices, to speed up the setup steps and avoid problems. You do not need to install CORE manually with a unique device token for each fresh OS image when the devices are identical.
For Whom Is It Suitable?
Suitable for those who have more than one hardware and Sixfab SIM and want to use and install Sixfab CORE. If you have them, this is the best solution for you.
Installation
SIM Card Registration
All SIM cards that you will use in devices must be registered to your account. First, register them.
Preparing the base OS image file for the deployment
The Raspberry Pi image with the user's application/project installed without the Sixfab CORE is referred to as the 'base image'.
sudo bash -c "$(curl -sN https://install.connect.sixfab.com)" -- --uninstallCreate new deployment
Now go to Sixfab Connect and log in then head to Assets → CORE Deployments and click on 'Create New Deployment'.
- Deployment Name: Specify the name of the deployment.
- Select End-of-Life Date: Specify until what date the deployment code enables the CORE provisioning.
- Device Quota: Enable device quota limit for deployment and specify the maximum number of devices.
- Deployment Prefix: The SIM/device name of the deployed device will start with the prefix. Prefix can't be longer than 12 letters and is not editable after deployment is created.
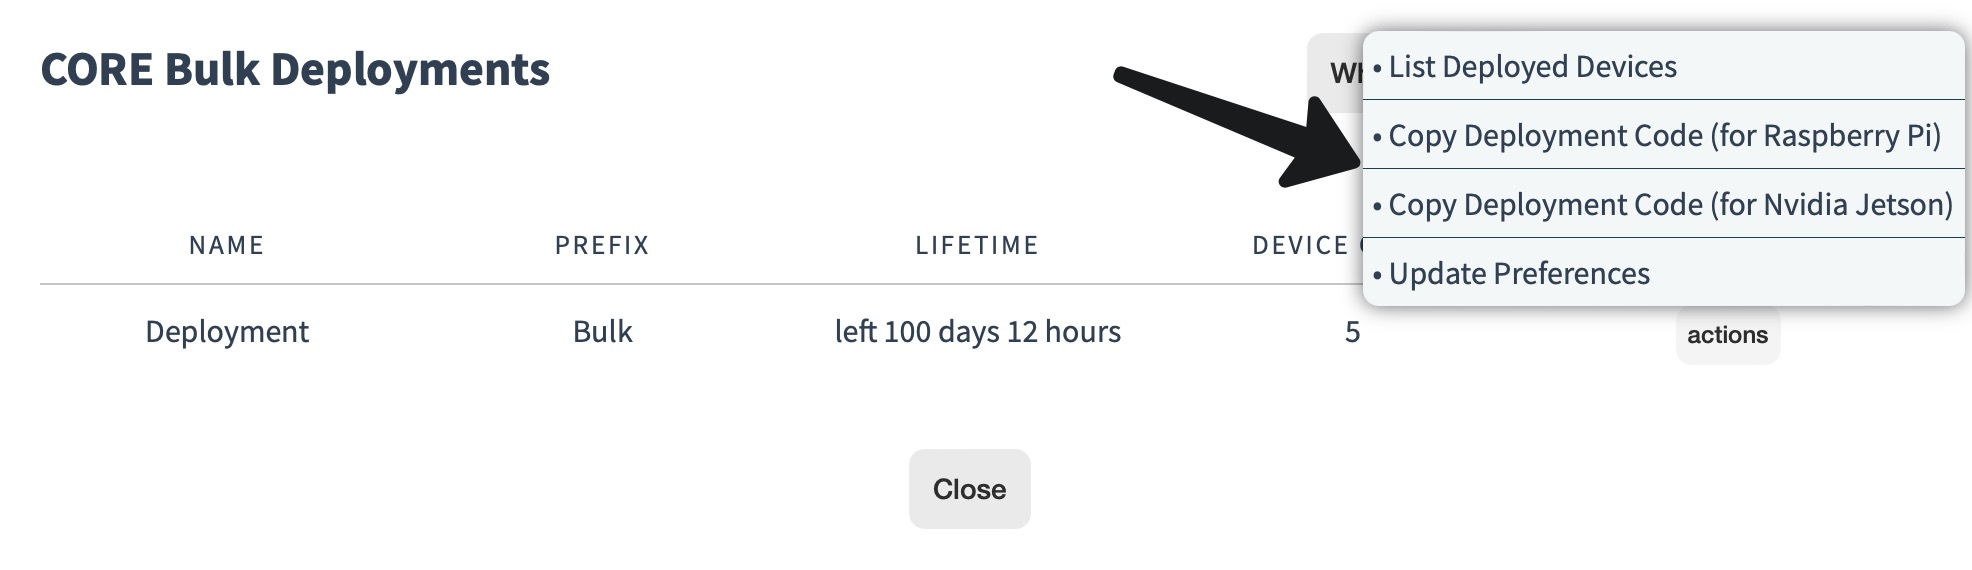
Get and run the installation code
Click the 'Copy Deployment Code' to copy the installation script for deployment you see there to your clipboard. Open a new terminal, paste and run the code. This can take up to a few minutes, depending on the device's internet speed.
Cloning the SD card
After the installation is complete, power off your device, remove the SD card and insert it into your Linux/Mac/Windows computer.
On Linux
Finding the SD card
Open a terminal and type lsblk. Look at the drives that show up. If your SD card is not showing up, unplug and replug the card. Once, it is detected enter lsblk again.
Commonly the image is /dev/sdX. Take note of how the SD card is identified.
Copying the Image
Before copying the image you should unmount the SD card (not eject). Type:
umount /dev/sdXOn Linux, use the following command to copy the SD card to your local drive:
sudo dd if=/dev/sdX of=bulk_deploy.img bs=4M status=progress && syncAfter the dd command finishes, you can eject the card.
On Mac OS
Finding the SD card
Open a terminal and type diskutil list at the command line. The name will be something like: /dev/diskX
Copying the Image
Before copying the image you should unmount the SD card (not eject). Type:
diskutil unmountDisk /dev/diskXType to make an image file:
sudo dd if=/dev/sdX of=bulk_deploy.img bs=64K conv=noerror,syncAfter the dd command finishes, you can eject the card.
On Windows
Download Win32DiskImager
Download Win32DiskImager from the Win32DiskImager SourceForge page. Launch Win32DiskImager.
Copying the Image

In the box marked Image File enter the path to, and a name, for the image file that you are about to create and select the drive letter for your SD card in the Device box.
Click the Read button.

Wait for the SD card to complete the imaging. After completion, you can eject the card.
Shrink your image
The dd command will be using the whole space of the SD card including the blank spaces, in other words, if the volume of the SD card is 32 GB, the image file will also be 32GB. Hence, we should shrink it to the volume of available data and get rid of the empty spaces.
PiShrink is a bash script that automatically shrink a pi image that will then resize to the max size of the SD card on boot. This will make putting the image back onto the SD card faster and the shrunk images will compress better.
Installation PiShrink
wget https://raw.githubusercontent.com/Drewsif/PiShrink/master/pishrink.sh
chmod +x pishrink.sh
sudo mv pishrink.sh /usr/local/bin
Usage
To shrink the image use:
sudo pishrink.sh bulk_deploy.imgProvision device
Now the image is ready. Flash the bulk_deploy.img image we have prepared to the SD card of a device you want to deploy with Balena Etcher.

Hardware setup
Insert the SD card you flashed and follow this guide to the hardware setup.
Go Deploy Now 🚀
Now your device is deployed. You can check the status of the device and see it's online. Prepare your other devices using the same image.